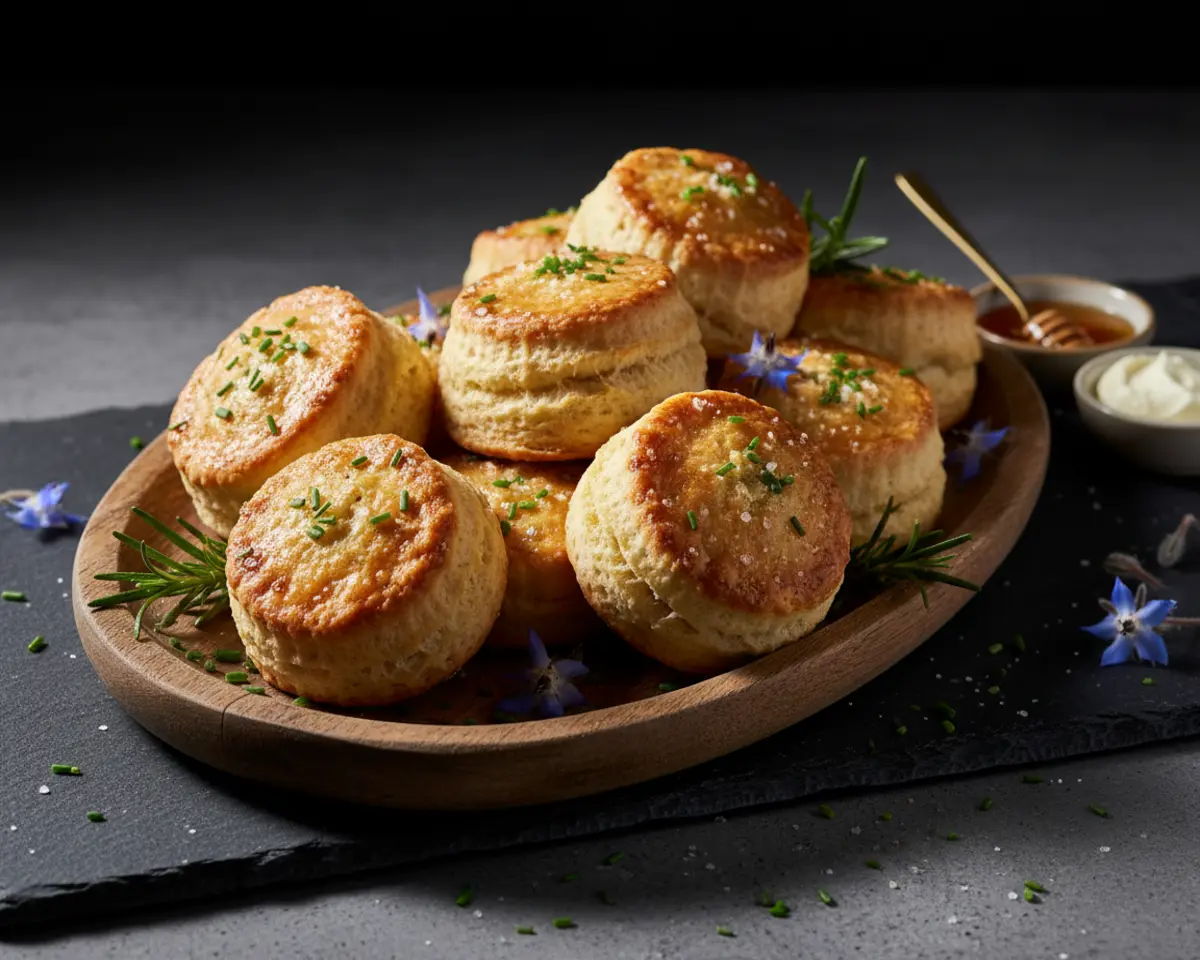
Fluffy Buttermilk Biscuits Recipe
These buttermilk biscuits are fluffy, tender, and ready in just 30 minutes — perfect for busy mornings or cozy dinners. With simple pantry ingredients and foolproof steps, this easy biscuit recipe delivers homemade southern biscuits that taste like a Charleston kitchen hug.
I’m Linda Sandra, and around my Charleston kitchen, buttermilk biscuits are as essential as sweet tea and porch sittin’. These fluffy biscuits have graced my breakfast table for years, whether I’m serving them alongside sausage gravy or slathering them with homemade strawberry jam.
That lesson stuck with me, and now these homemade biscuits come together so naturally that I can make them with my eyes half-closed on a sleepy Saturday morning.
Table of Contents
Quick Overview
Little Snapshot: What This Recipe Delivers
This buttermilk biscuits recipe yields 8-10 tender, flaky southern biscuits in under 30 minutes using just six pantry staples. Perfect for beginners and seasoned bakers alike, these fluffy biscuits deliver buttery layers without any special equipment or complicated techniques.
Why You’ll Love This Recipe 🌸
- This buttermilk biscuits recipe takes less time than scrolling through your morning social feed.
- You only need six simple ingredients — nothing fancy, nothing fussy, just cozy homemade goodness.
- These fluffy biscuits work beautifully for breakfast, dinner, or anytime you need a warm kitchen hug.
- According to NPR’s history of southern baking, biscuits have been a cornerstone of southern hospitality for generations — and this recipe proves exactly why.
Quick Facts ⚡
Here’s the quick scoop on this buttermilk biscuits recipe.
- CourseBread / Side Dish
- Prep Time15 minutes
- Cook Time12-15 minutes
- Total Time30 minutes
- Servings8-10 biscuits
- DifficultyEasy
Nutritional Peek
| Nutrient | Amount per Serving |
|---|---|
| Calories | 180 kcal |
| Protein | 4 g |
| Carbohydrates | 22 g |
| Fat | 8 g |
| Fiber | 1 g |
| Sugar | 1 g |
What You’ll Need
You don’t need a fancy kitchen to make these southern biscuits — just a few trusty tools and a little counter space.
- Large mixing bowl
- Whisk or fork
- Pastry blender, two knives, or clean fingertips
- 2-inch round biscuit cutter (or a drinking glass)
- Rolling pin or your hands for patting dough
- Baking sheet
- Parchment paper or light grease for the pan
- Measuring cups and spoons
Ingredients
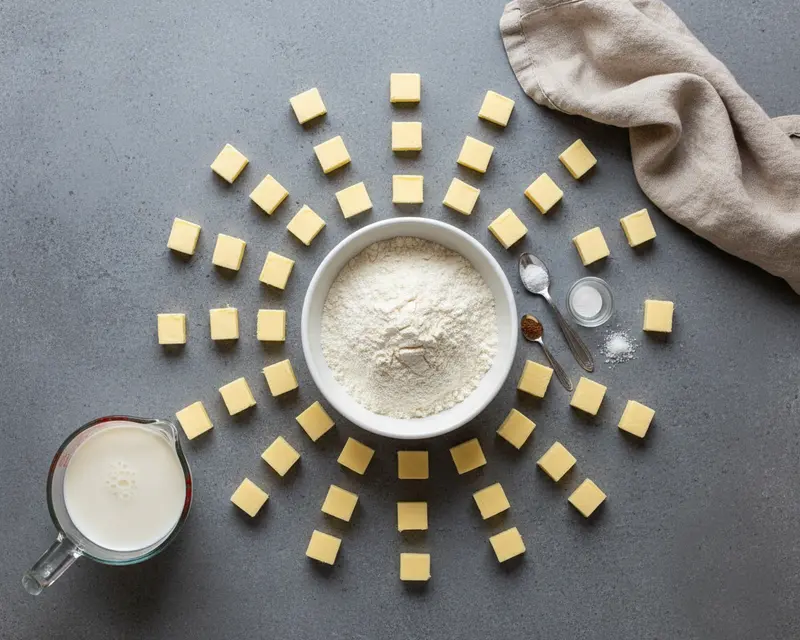
Fluffy biscuits start with quality ingredients kept cold until the very last moment. All-purpose flour provides structure, while baking soda and baking powder work together to create lift. Cold butter is the magic behind those flaky layers, and buttermilk adds tangy richness and activates the leavening for a tender crumb.
| Group | Ingredient | Amount | Notes |
|---|---|---|---|
| Dry Ingredients | All-purpose flour | 2 cups | Spoon and level for best results |
| Dry Ingredients | Baking soda | 1 teaspoon | Reacts with buttermilk for rise |
| Dry Ingredients | Salt | 1 teaspoon | Enhances flavor beautifully |
| Dry Ingredients | Baking powder | 1/2 teaspoon | Extra lift and fluffiness |
| Fat & Liquid | Unsalted butter, cold | 1/2 cup (1 stick), cubed | Keep it icy cold for flaky layers |
| Fat & Liquid | Cold buttermilk | 3/4 to 1 cup | Start with less, add as needed |
Step-by-Step Instructions
Let’s make this happen. You’re about to bake the most beautiful batch of buttermilk biscuits with just a few simple, cozy steps.
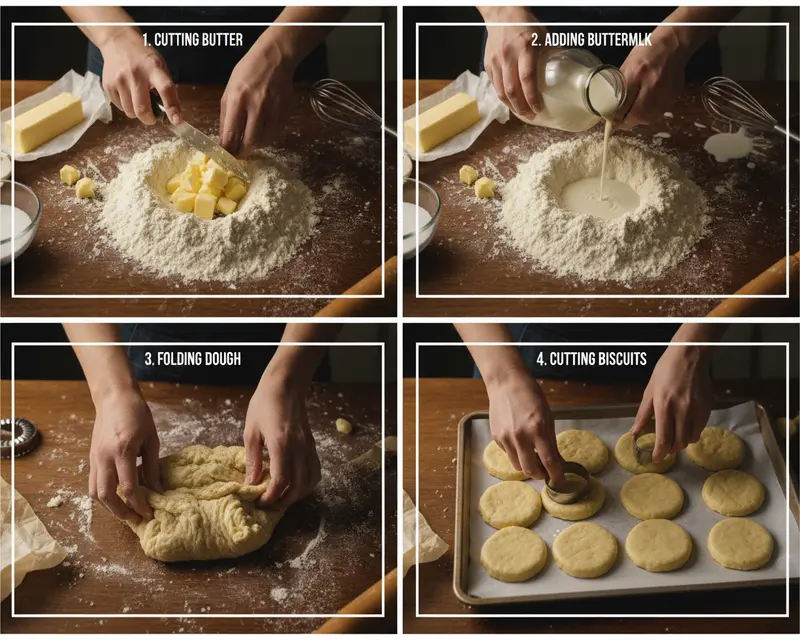
- Preheat and Prepare: Set your oven to 425°F (220°C) and lightly grease a baking sheet or line it with parchment paper. This high heat is essential for creating those golden, fluffy biscuits with crisp bottoms.
- Whisk the Dry Ingredients: In a large mixing bowl, whisk together 2 cups all-purpose flour, 1 teaspoon baking soda, 1 teaspoon salt, and 1/2 teaspoon baking powder until evenly combined. This ensures even distribution of leavening agents for consistent rise.
- Cut in the Cold Butter: Add the cold, cubed butter to the flour mixture. Use a pastry blender, two knives, or your fingertips to work the butter into the flour until the mixture looks like coarse crumbs with some pea-sized pieces of butter still visible. Those little butter bits create the flaky layers.
- Add the Buttermilk: Gradually pour in 3/4 cup of cold buttermilk, stirring gently with a fork until the dough is shaggy and just starting to come together. If it looks too dry and crumbly, add more buttermilk one tablespoon at a time until the dough holds together without being sticky.
- Knead Gently: Turn the dough out onto a lightly floured surface. Gently knead it 4-5 times, just until it barely comes together into a cohesive mass. Overworking the dough develops too much gluten, which leads to tough, dense biscuits instead of tender ones.
- Pat and Cut: Pat the dough into a circle or rectangle about 3/4-inch thick. Use a 2-inch biscuit cutter to cut out rounds, pressing straight down without twisting — twisting seals the edges and prevents rising. Gather scraps gently, pat them out again, and cut more biscuits.
- Arrange on Baking Sheet: Place the biscuits on your prepared baking sheet. If you want soft, pillowy sides, nestle them so they’re just touching. For crispier edges, space them about an inch apart.
- Bake Until Golden: Slide the baking sheet into your preheated oven and bake for 12-15 minutes, until the tops are golden brown and the biscuits have risen beautifully. Your kitchen will smell like a southern bakery.
- Serve Warm: Remove the biscuits from the oven and serve them warm, slathered with butter, drizzled with honey, or smothered in sausage gravy. These homemade biscuits are at their absolute best within the first hour.
Pro Tips & Gentle Guidance
Fluffy biscuits are all about technique, not fancy ingredients. Here are my tried-and-true tips for biscuit perfection every single time.
Keep Everything Cold: Cold butter and cold buttermilk are non-negotiable. I even pop my flour in the fridge for 15 minutes before starting. The colder your ingredients, the more steam you’ll create in the oven, and that steam is what makes your biscuits rise tall and flaky.
Don’t Twist the Cutter: When you cut out your biscuits, press straight down and lift straight up. Twisting the cutter seals the edges and prevents the layers from rising properly. It’s a small move that makes a huge difference.
Handle the Dough Minimally: The more you work the dough, the tougher your biscuits will be. Mix just until combined, knead just a few times, and resist the urge to overdo it. Think of it as a gentle hug, not a workout.
Use Full-Fat Buttermilk: Low-fat or nonfat buttermilk won’t give you the same rich flavor or tender crumb. If you don’t have buttermilk on hand, you can make a quick substitute by adding 1 tablespoon of lemon juice or white vinegar to 1 cup of whole milk and letting it sit for 5 minutes.
Brush with Butter Before Baking: For an extra golden, buttery crust, brush the tops of your biscuits with melted butter right before they go into the oven. It’s a restaurant trick that makes homemade biscuits look bakery-perfect.
Freeze for Later: You can freeze unbaked biscuits on a baking sheet, then transfer them to a freezer bag once solid. Bake them straight from frozen, adding 2-3 minutes to the baking time. According to Serious Eats’ science of biscuit making, freezing actually helps preserve those flaky layers beautifully.
Variations & Adaptations
These southern biscuits are endlessly adaptable — perfect for whatever mood or meal you’re craving.
Cheddar Herb Biscuits: Fold in 3/4 cup shredded sharp cheddar cheese and 2 tablespoons chopped fresh chives or parsley into the dough after cutting in the butter. These are amazing alongside soup or chili.
Sweet Cinnamon Sugar Biscuits: Brush the tops with melted butter and sprinkle with cinnamon sugar before baking. Serve them warm with honey butter for a simple, cozy breakfast treat.
Garlic Butter Biscuits: Mix 2 cloves of minced garlic into melted butter and brush it over the tops right before baking. These pair beautifully with garlic butter bread rolls for a carb-loaded dinner spread.
Whole Wheat Biscuits: Replace up to half of the all-purpose flour with whole wheat flour for a slightly nuttier flavor and extra fiber. You may need to add a tablespoon or two more buttermilk to keep the dough moist.
Gluten-Free Biscuits: Use a 1:1 gluten-free baking flour blend in place of all-purpose flour. The texture will be slightly different, but still delicious and tender.
Drop Biscuits: If you’re short on time or patience, skip the rolling and cutting. Just drop spoonfuls of slightly wetter dough onto the baking sheet for rustic, free-form biscuits that bake up just as fluffy.
Quick Fixes for Buttermilk Biscuits
Problem: Biscuits Are Dense and Heavy This usually means the dough was overworked or the butter wasn’t cold enough. Next time, handle the dough as little as possible and make sure your butter is straight from the fridge. Even warm hands can melt the butter prematurely, so work quickly and confidently.
Problem: Biscuits Didn’t Rise Check the freshness of your baking soda and baking powder — expired leavening agents won’t give you the lift you need. Also, make sure you’re pressing the cutter straight down without twisting, which can seal the edges and prevent rising.
Problem: Biscuits Are Too Dry You may need a bit more buttermilk. Flour absorbs moisture differently depending on humidity and how it’s measured, so start with 3/4 cup and add more until the dough is shaggy but moist. The dough should hold together without being sticky.
Problem: Biscuits Spread Instead of Rising This can happen if the dough is too wet or if the oven temperature is too low. Make sure your oven is fully preheated to 425°F before baking, and add flour a tablespoon at a time if your dough feels overly sticky.
Problem: Bottoms Are Burning Your oven might run hot, or the baking sheet might be too dark. Try using a light-colored baking sheet or placing a second sheet underneath to insulate the bottoms. You can also reduce the oven temperature to 400°F and bake a minute or two longer.
Storage & Reheating
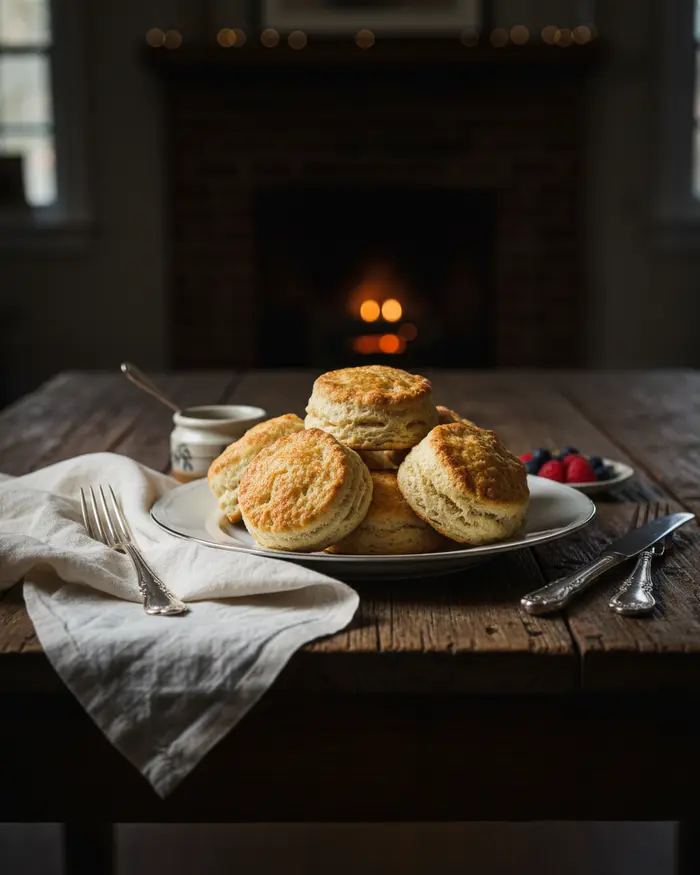
Fluffy biscuits are best enjoyed warm from the oven, but they’re still wonderful the next day with a little love. Serve them alongside scrambled eggs, sausage gravy, or a bowl of hearty soup. For breakfast, split them open and fill them with fried eggs and crispy bacon, or slather them with butter and jam for a simple, sweet treat.
Store leftover biscuits in an airtight container or resealable bag at room temperature for up to 2 days. If you want to keep them longer, refrigerate them for up to 5 days, though the texture may soften slightly. For the longest storage, freeze baked biscuits in a freezer-safe bag for up to 3 months.
To reheat, wrap biscuits in foil and warm them in a 350°F oven for 10 minutes, or microwave individual biscuits for 20-30 seconds. For a crispier exterior, split them in half and toast them in a skillet with a little butter until golden and heated through.
| Storage Method | Duration | Best Practice |
|---|---|---|
| Room Temperature | Up to 2 days | Store in airtight container |
| Refrigerator | Up to 5 days | Wrap tightly to prevent drying |
| Freezer (Baked) | Up to 3 months | Freeze individually, then bag |
| Freezer (Unbaked) | Up to 3 months | Bake from frozen, add 2-3 minutes |
No-Waste Kitchen Magic
Don’t toss those biscuit scraps or leftover biscuits — there’s so much you can do with them.
Biscuit Croutons: Cube day-old biscuits, toss them with olive oil and herbs, and bake at 375°F until crispy. They’re perfect for topping salads or soups.
Biscuit Bread Pudding: Tear up leftover biscuits and use them in place of bread in your favorite bread pudding recipe. The buttery richness makes for an extra-decadent dessert.
Strawberry Shortcake: Split biscuits in half and layer them with fresh strawberries and whipped cream for a quick, crowd-pleasing dessert.
Breakfast Casserole Base: Crumble leftover biscuits into a baking dish, top with scrambled eggs, cheese, and cooked sausage, and bake for an easy breakfast casserole.
Buttermilk Uses: If you have leftover buttermilk, use it in pancakes, waffles, or Irish soda bread. It adds tang and tenderness to just about any baked good.
Frequently Asked Questions
Here are the most common questions I get about making perfect buttermilk biscuits at home.
What makes buttermilk biscuits different from regular biscuits?
Buttermilk biscuits use buttermilk instead of regular milk, which reacts with baking soda to create a tender, flaky texture and adds a subtle tangy flavor. The acidity in buttermilk also helps activate leavening agents for a better rise.
Can I substitute regular milk for buttermilk in biscuit recipes?
Yes, you can make a buttermilk substitute by adding 1 tablespoon of lemon juice or white vinegar to 1 cup of regular milk. Let it sit for 5-10 minutes until it curdles slightly before using in your recipe.
Why are my buttermilk biscuits tough instead of flaky?
Tough biscuits usually result from overworking the dough, which develops too much gluten. Mix the dough just until ingredients come together, handle it gently, and avoid excessive kneading. Using cold butter and not overhandling the dough are key to flaky biscuits.
How do I store leftover buttermilk biscuits?
Store cooled biscuits in an airtight container at room temperature for up to 2 days, or refrigerate for up to 1 week. For longer storage, freeze biscuits in a freezer bag for up to 3 months. Reheat in the oven at 350 degrees Fahrenheit for best results.
What temperature should the butter be for making buttermilk biscuits?
Butter should be very cold, straight from the refrigerator or even frozen. Cold butter creates steam pockets as it melts during baking, which produces the flaky layers that make biscuits light and tender. Some bakers even freeze their butter and grate it into the flour.
Final Dish
These buttermilk biscuits are everything a homemade biscuit should be — fluffy, buttery, and ready to make any meal feel like a special occasion. Whether you’re serving them for Sunday breakfast or weeknight dinner, they bring that cozy Charleston comfort straight to your table.
I’d love to see how your biscuits turn out! Snap a photo, tag me on social media, or drop a comment below and let me know how they turned out. Did you try any of the variations? Did your family devour them before they even cooled? I’m here for all of it.
If you loved this recipe, you might also enjoy my sourdough discard cheddar biscuits or these cheesy garlic rolls for even more warm, carb-filled comfort.
I’m Linda Sandra — a Charleston home chef and comfort-food daydreamer. Around here, cooking’s not about perfection — it’s about cozy vibes, creative twists, and food that feels like love.
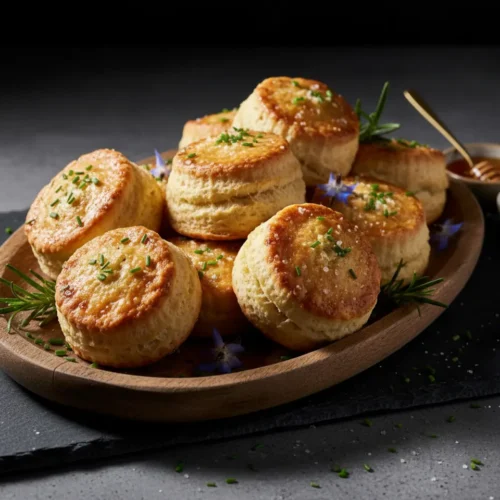
Buttermilk Biscuits
Ingredients
- 2 cups all-purpose flour
- 1 teaspoon baking soda
- 1 teaspoon salt
- ½ teaspoon baking powder
- ½ cup 1 stick cold unsalted butter, cubed
- ¾ to 1 cup cold buttermilk
Instructions
- Preheat your oven to 425°F (220°C). Lightly grease a baking sheet or line with parchment paper.
- In a large bowl, whisk together the flour, baking soda, salt, and baking powder.
- Add the cold, cubed butter to the flour mixture. Use a pastry blender, two knives, or your fingertips to cut the butter into the flour until the mixture resembles coarse crumbs with some pea-sized pieces of butter remaining.
- Gradually pour in 3/4 cup of cold buttermilk, mixing with a fork until just combined. The dough should be shaggy and moist. If it’s too dry, add more buttermilk, 1 tablespoon at a time, until it comes together.
- Turn the dough out onto a lightly floured surface. Gently knead the dough 4-5 times, just until it barely comes together. Avoid overworking the dough, as this can lead to tough biscuits.
- Pat the dough into a 3/4-inch thick circle or rectangle. Using a 2-inch biscuit cutter, cut out biscuits. Rework any scraps gently and cut out additional biscuits until all dough is used.
- Place the biscuits on the prepared baking sheet, ensuring they are touching if you prefer softer sides, or slightly separated for crispier sides.
- Bake for 12-15 minutes, or until the tops are golden brown and the biscuits are cooked through.
- Remove from the oven and serve warm, ideally with butter, jam, or gravy.