Korean Cabbage Recipe
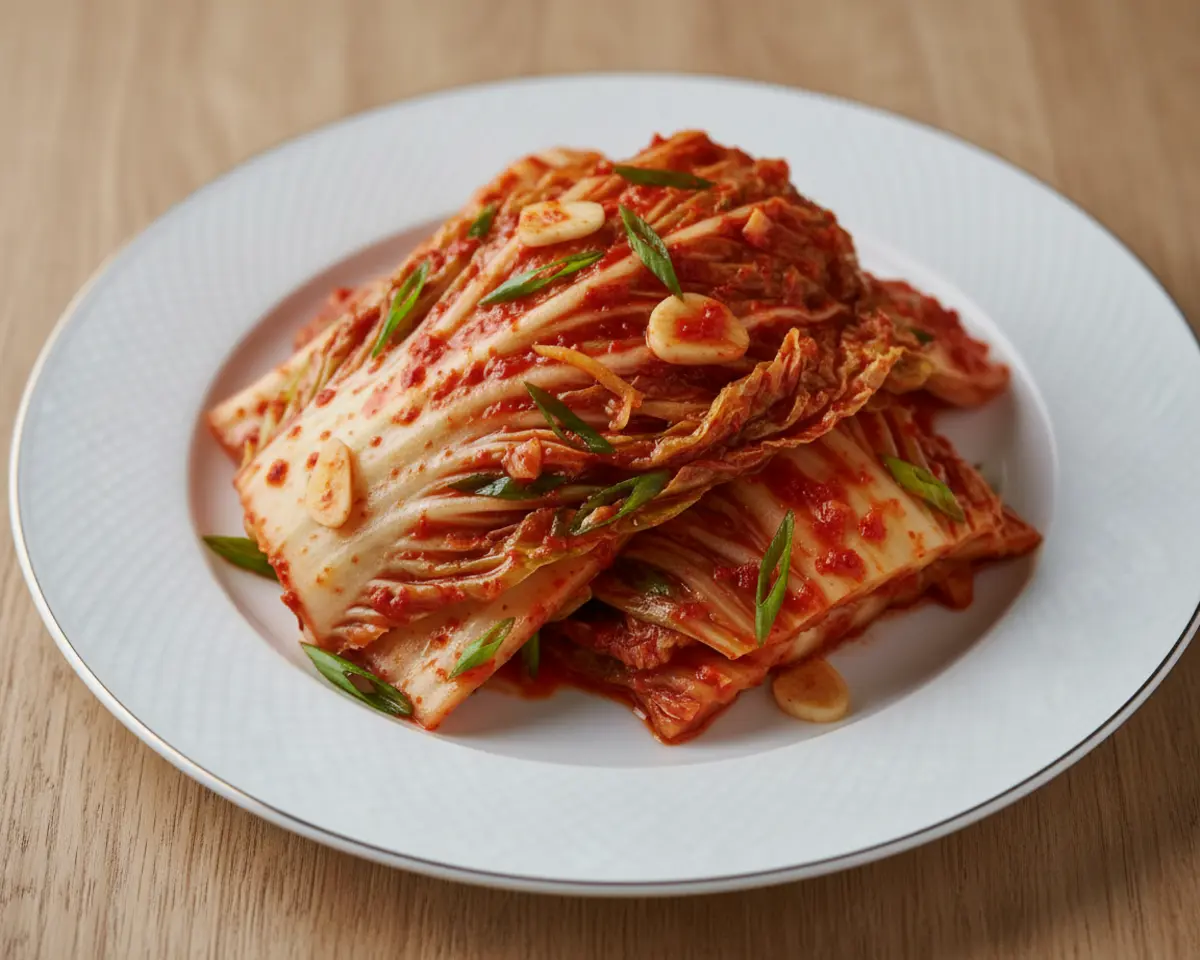
This Korean cabbage recipe is one of those kitchen adventures that feels a little magical—salty, spicy, tangy, and so alive with flavor. It’s a classic kimchi recipe that brings probiotic goodness and bold taste to your table, and it’s way easier than you think. Once you get the rhythm down, you’ll be making this korean pickled cabbage on repeat.
Think of it as your gateway to homemade fermented veggies and the ultimate korean side dish. Whether you’re pairing it with rice bowls, grilled meats, or just snacking straight from the jar, this spicy cabbage salad is about to become your new obsession. Let’s dive in and make some magic happen.
Table of Contents
Quick Overview
Little Snapshot: What This Recipe Delivers This Korean cabbage recipe transforms humble napa cabbage into tangy, probiotic-rich kimchi in just a few simple steps. You’ll salt, season, and ferment for bold, spicy flavor that only gets better with time.
Why You’ll Love This Recipe 🌸
- This korean cabbage recipe takes less active time than scrolling through your phone—just a little patience while it ferments.
- It’s packed with gut-friendly probiotics and gives you that restaurant-quality kick without leaving your kitchen.
- You control the heat, the tang, and the crunch—totally customizable to your taste buds.
- According to National Institutes of Health, fermented foods like kimchi support digestive health and immune function—and this recipe proves exactly why.
Quick Facts ⚡
Here’s the quick scoop on this korean cabbage recipe.
- CourseSide Dish / Condiment
- Prep Time20 minutes
- Cook Time0 minutes (fermentation: 1-2 days)
- Total Time1-2 days
- Servings8 servings
- DifficultyEasy
Nutritional Peek
| Nutrient | Amount per Serving |
|---|---|
| Calories | 45 kcal |
| Protein | 2g |
| Carbohydrates | 8g |
| Fat | 0.5g |
| Fiber | 2g |
| Sugar | 4g |
What You’ll Need
You don’t need fancy equipment for this korean side dish—just a few basics and a little counter space. Here’s what to grab before you get started.
- Large mixing bowl (or two)
- Clean glass jar or airtight container (at least 1 quart)
- Kitchen gloves (trust me, gochugaru stains!)
- Cutting board and sharp knife
- Colander for rinsing
Ingredients
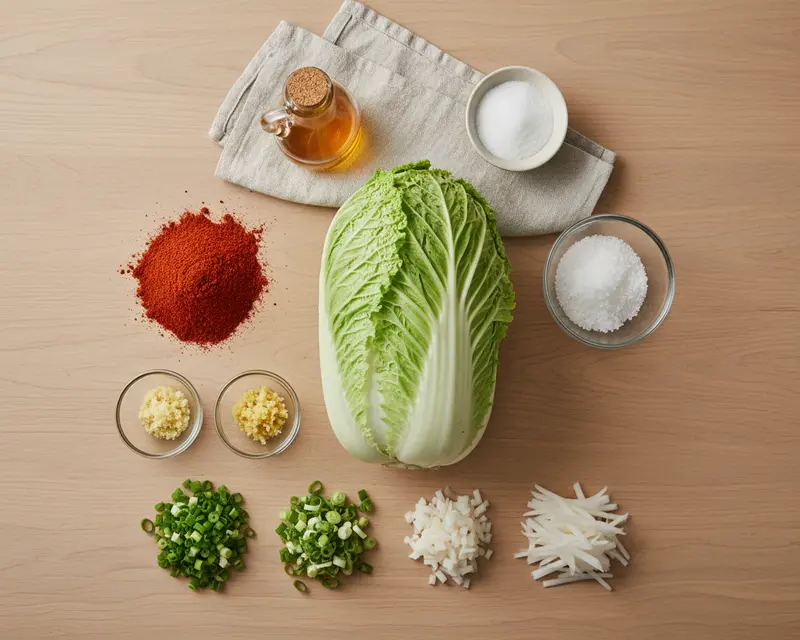
This kimchi recipe calls for fresh, bold ingredients that work together to create that signature fermented funk and fiery kick. Napa cabbage is the star, but the real magic happens when you toss it with gochugaru, garlic, and fish sauce. Each element brings depth, heat, and umami that only gets better as it ferments.
| Group | Ingredient | Amount | Notes |
|---|---|---|---|
| Cabbage Base | Napa cabbage | 1 large head | The foundation—crisp and mild |
| Cabbage Base | Coarse sea salt | 1/2 cup | Draws out water and softens the leaves |
| Seasoning Paste | Korean chili powder (gochugaru) | 1 cup | The soul of kimchi—smoky, spicy, essential |
| Seasoning Paste | Minced garlic | 1/4 cup | Bold and aromatic |
| Seasoning Paste | Minced ginger | 2 tablespoons | Adds warmth and zing |
| Seasoning Paste | Fish sauce | 1/4 cup | Umami bomb—use high quality if you can |
| Seasoning Paste | Sugar | 2 tablespoons | Balances the heat and feeds fermentation |
| Add-Ins | Finely chopped green onions | 1/4 cup | Fresh, bright, classic kimchi touch |
| Add-Ins | Korean radish or daikon (optional) | 1/4 cup | Adds crunch and texture |
Step-by-Step Instructions
Let’s make this happen. This korean cabbage recipe is all about layering flavor and giving time for the magic of fermentation to work its wonders.
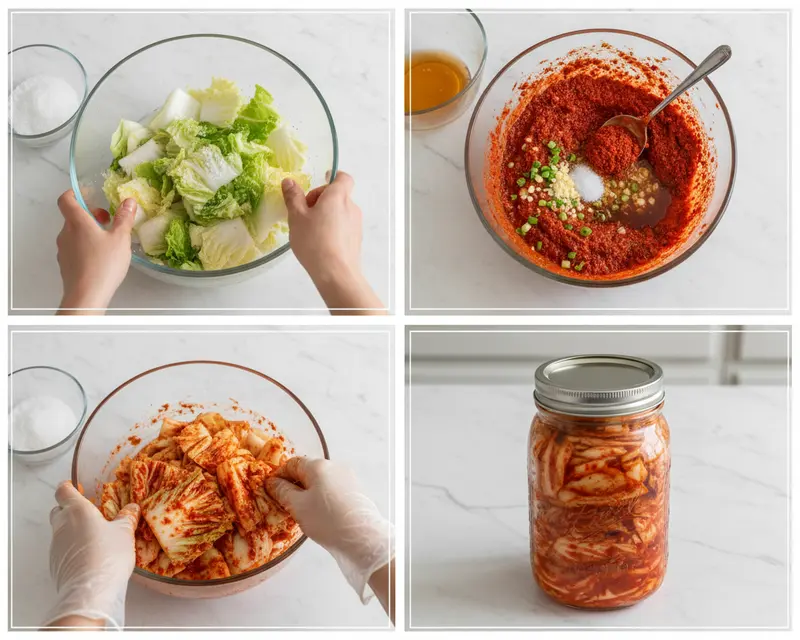
Step 1: Prepare the cabbage Quarter the napa cabbage lengthwise and chop into 2-inch pieces. Place the cabbage in a large bowl and sprinkle generously with coarse sea salt. Toss to coat evenly and let it sit for 1-2 hours, tossing occasionally, until the cabbage has softened and released water.
Rinse the cabbage thoroughly under cold water several times to remove excess salt, then drain well and squeeze out as much water as possible.
Step 2: Make the seasoning paste In a separate large bowl, combine the Korean chili powder, minced garlic, minced ginger, fish sauce, and sugar. Mix well to form a thick, vibrant red paste. If using, fold in the chopped green onions and Korean radish. The paste should smell pungent, spicy, and incredibly aromatic.
Step 3: Combine cabbage and seasoning Add the drained cabbage to the bowl with the seasoning paste. Using gloved hands, massage the paste into every nook and cranny of the cabbage, ensuring every piece is evenly coated. Taste a small piece (if you dare!) and adjust seasoning if needed—add more sugar for sweetness, fish sauce for umami, or chili powder for extra heat.
Step 4: Ferment Pack the seasoned cabbage tightly into a clean, airtight container or jar, pressing down firmly to remove air bubbles. Leave about an inch of headspace at the top. Close the lid tightly and let it sit at room temperature for 1-2 days, depending on your desired level of sourness. You may see bubbles forming, which means fermentation is happening—celebrate that funky goodness!
Step 5: Store Once fermented to your liking, transfer the kimchi to the refrigerator. It will continue to ferment slowly and develop more complex flavor over time. Serve as a classic korean side dish with rice, noodles, grilled meats, or straight from the jar when you need a tangy, spicy hit.
Pro Tips & Gentle Guidance
This kimchi recipe is forgiving, but a few pro moves will take your batch from good to unforgettable. Fresh gochugaru makes all the difference—look for Korean chili powder that’s vibrant red and slightly smoky. The fish sauce should be high quality, too, since it’s doing a lot of heavy lifting in the umami department.
Don’t skip the salting step. It draws out moisture, softens the cabbage, and creates the perfect texture for fermentation. If your cabbage tastes too salty after rinsing, rinse it one more time—it’s better to err on the side of less salt than to overpower the other flavors.
Fermentation time is flexible. In warmer kitchens, your kimchi may be ready in just one day. In cooler spaces, give it two full days. Taste as you go and stop when the tang hits your sweet spot.
Store your kimchi in a jar with a tight seal, but burp it daily during the first few days of refrigeration to release built-up gas. It’s a living food, and it likes a little breathing room.
For more inspiration on how to use cabbage creatively, check out this guide on beef and cabbage combinations that pair beautifully with fermented veggies.
Variations & Adaptations
This korean pickled cabbage is endlessly adaptable. Swap napa cabbage for regular green cabbage if that’s what you have—it’ll be crunchier and a bit more assertive, but still delicious.
Make it vegetarian by using soy sauce or tamari instead of fish sauce. You’ll lose a bit of that classic funky depth, but it’s still tasty and totally plant-based.
Add julienned carrots, thinly sliced cucumbers, or even apple matchsticks for extra crunch and sweetness. Each addition brings a new layer of texture and flavor.
Dial the heat up or down by adjusting the amount of gochugaru. Start with less if you’re sensitive to spice, or go wild if you love the burn.
Try a quick kimchi version by skipping the fermentation altogether—just toss the seasoned cabbage and eat it fresh as a spicy cabbage salad. It won’t have the probiotic benefits, but it’s still incredibly flavorful.
For a heartier meal, toss your kimchi into fried rice, stir it into sausage and cabbage stir fry, or layer it into grilled cheese sandwiches for a fusion twist.
Quick Fixes for Korean Cabbage Recipe
Problem: Cabbage is too salty after salting Rinse it under cold water one or two more times and taste as you go. Squeeze out as much water as possible after rinsing to keep the texture firm.
Problem: Kimchi isn’t fermenting (no bubbles) Your kitchen might be too cold. Move the jar to a warmer spot, like near a sunny window or on top of the fridge, and give it another day.
Problem: Kimchi tastes too bland Add a bit more fish sauce, a pinch of sugar, or an extra spoonful of gochugaru. Mix well and let it sit for a few more hours to meld.
Problem: It’s too spicy Serve it with plain rice or mix in a little extra chopped cabbage to dilute the heat. You can also rinse a portion lightly before eating.
Problem: Kimchi smells too strong That’s actually a sign of healthy fermentation! Store it in a sealed container in the back of the fridge and the smell will mellow over time.
Storage & Reheating

This korean side dish is all about serving it cold and crunchy, straight from the fridge. Pair it with grilled meats, rice bowls, noodles, or even eggs for a probiotic-packed punch of flavor.
Store your kimchi in an airtight glass jar or container in the refrigerator. It will keep for several weeks—even months—and the flavor will continue to develop and deepen. The tanginess will increase over time, so taste it periodically and enjoy it at whatever stage you love best.
Reheating isn’t typically necessary, but if you’re adding kimchi to soups, stews, or stir-fries, toss it in during the last few minutes of cooking to preserve some of the probiotic benefits and keep a bit of crunch.
| Storage Method | Duration | Best Practice |
|---|---|---|
| Refrigerator (sealed jar) | 2-3 months | Burp the jar daily for the first week, then weekly |
| Freezer (portioned) | Up to 6 months | Freeze in small batches; thaw in fridge before use |
| Room temperature (fermenting) | 1-2 days | Keep sealed and taste daily until desired tang |
No-Waste Kitchen Magic
The outer leaves of napa cabbage are perfect for wraps or adding to creamy cabbage soups. Don’t toss them—they’re tender and flavorful.
Leftover kimchi juice (the brine) is liquid gold. Use it as a salad dressing base, add it to marinades, or stir it into soups for instant umami depth.
If you have extra gochugaru, sprinkle it on popcorn, roasted vegetables, or scrambled eggs for a quick flavor boost. It’s not just for kimchi!
Wilted cabbage that didn’t make it into the jar can be sautéed with garlic and served as a quick side dish. Nothing goes to waste in a cozy kitchen.
Frequently Asked Questions
Got questions about making your own korean cabbage recipe? Here are the answers to the most common kimchi curiosities.
How do I select the best Korean cabbage for recipes?
Choose napa cabbage that feels heavy for its size with tightly packed, crisp leaves. The leaves should be pale green to white with no brown spots or wilting. A medium-sized cabbage weighing 2-3 pounds is ideal for most recipes. Fresh cabbage will have a sweet, mild aroma.
Do I need to salt Korean cabbage before cooking?
For kimchi and fermented dishes, salting is essential to draw out moisture and create the right texture. Use coarse sea salt and let it sit for 2-3 hours. For stir-fries and soups, salting is not necessary. Simply wash and cut the cabbage as directed in your recipe.
Can I substitute regular cabbage for Korean napa cabbage?
While napa cabbage is preferred for authentic Korean recipes due to its tender texture and mild flavor, you can substitute regular green cabbage in a pinch. Keep in mind that green cabbage is tougher and has a stronger flavor, so cooking times may need adjustment and the final taste will differ.
How long does cooked Korean cabbage last in the refrigerator?
Cooked Korean cabbage dishes will last 3-5 days when stored in an airtight container in the refrigerator. Kimchi and fermented cabbage can last several weeks to months due to the fermentation process. Always check for off odors or mold before consuming leftover cabbage dishes.
What are the most popular Korean cabbage recipes?
The most popular Korean cabbage recipes include kimchi, a spicy fermented dish; baechu-geotjeori, fresh kimchi salad; kimchi jjigae, kimchi stew; Korean cabbage stir-fry with garlic and sesame oil; and bossam, boiled pork wrapped in cabbage leaves. Each offers different flavors from spicy and tangy to mild and savory.
Final Dish
This korean cabbage recipe is more than just a side dish—it’s a little jar of tangy, spicy, probiotic magic that brings life to every meal. Whether you’re new to fermentation or a seasoned kimchi lover, this recipe is approachable, forgiving, and so rewarding. I’d love to see your batch—snap a pic, tag me, and let me know how yours turned out!
I’m Linda Sandra — a Charleston home chef and comfort-food daydreamer. Around here, cooking’s not about perfection — it’s about cozy vibes, creative twists, and food that feels like love.
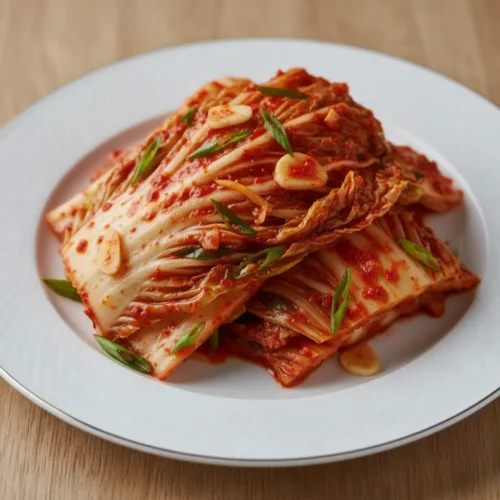
Korean Cabbage Kimchi
Ingredients
- 1 large head napa cabbage
- ½ cup coarse sea salt
- 1 cup Korean chili powder gochugaru
- ¼ cup minced garlic
- 2 tablespoons minced ginger
- ¼ cup fish sauce
- 2 tablespoons sugar
- ¼ cup finely chopped green onions
- ¼ cup finely chopped Korean radish or daikon radish optional
Instructions
- Prepare the cabbage: Quarter the napa cabbage lengthwise and chop into 2-inch pieces. Place the cabbage in a large bowl and sprinkle generously with coarse sea salt. Toss to coat evenly. Let it sit for 1-2 hours, tossing occasionally, until the cabbage has softened and released water. Rinse the cabbage thoroughly under cold water several times to remove excess salt, then drain well and squeeze out as much water as possible. Set aside.
- Make the seasoning paste: In a separate large bowl, combine the Korean chili powder, minced garlic, minced ginger, fish sauce, and sugar. Mix well to form a thick paste. If using, add the chopped green onions and Korean radish to the paste and mix.
- Combine cabbage and seasoning: Add the drained cabbage to the bowl with the seasoning paste. Using gloved hands, massage the paste into the cabbage, ensuring every piece is evenly coated. Taste and adjust seasoning if needed (add more sugar for sweetness, fish sauce for umami, or chili powder for spice).
- Ferment: Pack the seasoned cabbage tightly into a clean, airtight container or jar, pressing down to remove air bubbles. Leave about an inch of headspace. Close the lid tightly.
- Store: Let the kimchi ferment at room temperature for 1-2 days, depending on your desired level of sourness. You may see bubbles forming, which indicates fermentation is occurring. Once fermented to your liking, transfer the kimchi to the refrigerator. It will continue to ferment slowly and develop more flavor over time. Serve as a side dish with almost any Korean meal.