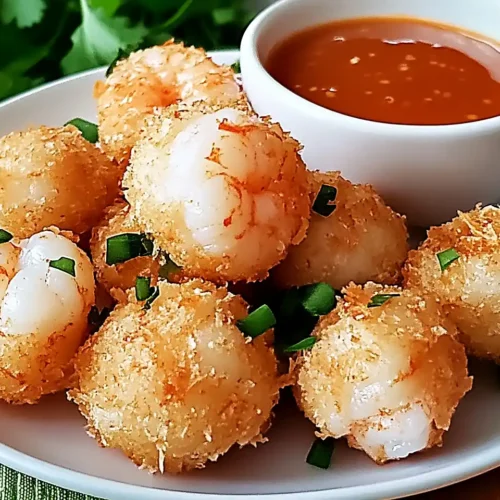
Crispy Shrimp Balls with Sweet Chili Sauce
I’m Linda Sandra — a Charleston home cook who believes every meal should feel like a hug, and this Crispy Shrimp Balls with Sweet Chili Sauce recipe is proof that seafood doesn’t have to be complicated to be absolutely delicious.
These golden, crispy bites are packed with tender shrimp, fresh ginger, and garlic — all held together with panko breadcrumbs and fried until perfectly crunchy. They’re like the sophisticated cousin of popcorn shrimp, but way more impressive at parties.
I first made these for a family gathering when I wanted something finger-food friendly but still special. They disappeared in about ten minutes, and I’ve been making them ever since.
Table of Contents
Little Snapshot: What This Recipe Delivers
These Crispy Shrimp Balls combine fresh shrimp with garlic, ginger, and green onions, then get pan-fried until golden and served with sweet chili sauce. They take about 30 minutes start to finish, yield 20-25 bite-sized pieces, and work perfectly as an appetizer or light seafood dinner.
Why You’ll Love This Recipe 🌸
- These Crispy Shrimp Balls look fancy but take less time than deciding what to watch on Netflix.
- They’re crispy on the outside, tender on the inside — like the seafood version of a perfect hug.
- You can make them ahead and fry them right before guests arrive, so you’re not stuck in the kitchen during the party.
- According to Serious Eats in their comprehensive shrimp ball guide, the key to perfect texture is not over-processing the shrimp — and this recipe gets it just right.
Quick Facts ⚡
Here’s the quick scoop on this Crispy Shrimp Balls with Sweet Chili Sauce.
- CourseAppetizer
- Prep Time15 minutes
- Cook Time15 minutes
- Total Time30 minutes
- Servings6 servings (20-25 balls)
- DifficultyEasy
Crispy Shrimp Balls with Sweet Chili Sauce
Equipment
- Large mixing bowl
- Food processor
- Large frying pan or skillet
- Paper towels
- slotted spoon or spider strainer
- Small bowl
Ingredients
Main Ingredients
- 1 lb raw shrimp peeled and deveined
- ½ cup breadcrumbs preferably panko
- 1 egg beaten
- ¼ cup green onions finely chopped
- 2 cloves garlic minced
- 1 tablespoon fresh ginger grated
- 1 tablespoon soy sauce
- 1 teaspoon sesame oil
- ½ teaspoon salt
- ½ teaspoon black pepper
- ¼ cup cilantro chopped, optional
- 1 tablespoon cornstarch optional, for binding
- vegetable oil for frying
Instructions
- Roughly chop the raw peeled and deveined shrimp into small pieces about the size of peas. If you’ve got a food processor, pulse the shrimp a few times until they’re finely chopped but still have some texture — you want some bite left, not shrimp paste. Stop before it turns into mush.
- In a large bowl, combine the chopped shrimp, panko breadcrumbs, beaten egg, finely chopped green onions, minced garlic, grated fresh ginger, soy sauce, sesame oil, salt, and black pepper. Add the chopped cilantro if you’re using it. Give everything a good stir until it’s well combined and holds together when you squeeze a bit in your palm. If the mixture feels too wet or won’t hold its shape, add a tablespoon of cornstarch to help bind it.
- Get a small bowl of water nearby and wet your hands slightly — this keeps the mixture from sticking to your palms. Roll the shrimp mixture into small balls about 1 to 1.5 inches in diameter, roughly the size of a walnut. You should get about 20-25 balls depending on how generous you are with the sizing. Place them on a plate as you go.
- In a large frying pan or skillet, heat enough vegetable oil over medium-high heat to cover the bottom of the pan by about 1/4 inch. You’ll know it’s ready when a tiny piece of the mixture sizzles immediately when you drop it in.
- Carefully place the shrimp balls into the hot oil, working in batches so you don’t overcrowd the pan — give them space or they’ll steam instead of crisp up. Fry for about 3-4 minutes on each side, turning them gently with a slotted spoon, until they’re golden brown all over and cooked through. The shrimp should be opaque and firm when you press gently.
- Once the Shrimp Balls are perfectly golden and crispy, remove them from the pan and place them on a paper towel-lined plate to drain any excess oil. If you want to get fancy, garnish with extra chopped cilantro or a sprinkle of sesame seeds. Serve immediately with sweet chili sauce, soy sauce, or a tangy lemon aioli for dipping.
Notes
Nutritional Peek
Here’s what you’re getting in each serving of these delicious Shrimp Balls — because sometimes it’s nice to know:
| Nutrient | Amount per Serving |
|---|---|
| Calories | 185 kcal |
| Protein | 16g |
| Carbohydrates | 12g |
| Total Fat | 8g |
| Saturated Fat | 1g |
| Fiber | 1g |
| Sugar | 1g |
| Sodium | 420mg |
Ingredients
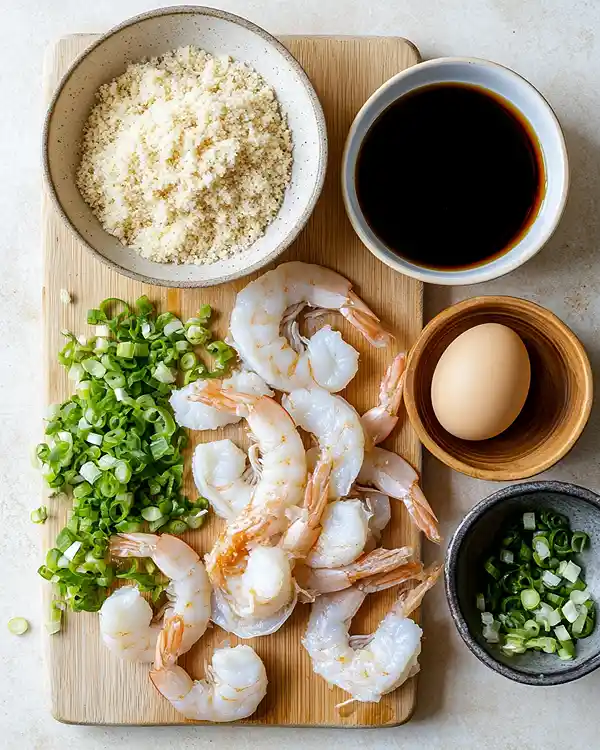
These Shrimp Balls come together with fresh, simple ingredients you probably already have on hand. For the shrimp mixture — you’ll want fresh raw shrimp, panko breadcrumbs, and an egg to bind everything together. For the aromatics — green onions, garlic, and fresh ginger bring all that bright, savory flavor that makes these so addictive.
| Amount | Ingredient |
|---|---|
| 1 lb | Raw shrimp, peeled and deveined |
| 1/2 cup | Breadcrumbs (preferably panko — they make it extra crispy) |
| 1 | Egg, beaten |
| 1/4 cup | Green onions, finely chopped |
| 2 cloves | Garlic, minced |
| 1 tablespoon | Fresh ginger, grated |
| 1 tablespoon | Soy sauce |
| 1 teaspoon | Sesame oil |
| 1/2 teaspoon | Salt |
| 1/2 teaspoon | Black pepper |
| 1/4 cup | Cilantro, chopped (optional but highly recommended) |
| 1 tablespoon | Cornstarch (optional, if your mixture needs help binding) |
| As needed | Vegetable oil, for frying |
Tools You’ll Actually Use
- Large mixing bowl
- Food processor (optional, but helpful for chopping shrimp)
- Large frying pan or skillet
- Paper towels for draining
- Slotted spoon or spider strainer
- Small bowl for wet hands
Step-by-Step Instructions
Let’s make these Crispy Shrimp Balls with Sweet Chili Sauce happen — it’s easier than you think!
Step 1: Prep Your Shrimp
Roughly chop the raw peeled and deveined shrimp into small pieces about the size of peas.
If you’ve got a food processor, pulse the shrimp a few times until they’re finely chopped but still have some texture — you want some bite left, not shrimp paste. Stop before it turns into mush.
Step 2: Mix It All Together
In a large bowl, combine the chopped shrimp, panko breadcrumbs, beaten egg, finely chopped green onions, minced garlic, grated fresh ginger, soy sauce, sesame oil, salt, and black pepper. Add the chopped cilantro if you’re using it.
Give everything a good stir until it’s well combined and holds together when you squeeze a bit in your palm. If the mixture feels too wet or won’t hold its shape, add a tablespoon of cornstarch to help bind it.
Step 3: Roll Into Balls
Get a small bowl of water nearby and wet your hands slightly — this keeps the mixture from sticking to your palms. Roll the shrimp mixture into small balls about 1 to 1.5 inches in diameter, roughly the size of a walnut. You should get about 20-25 balls depending on how generous you are with the sizing. Place them on a plate as you go.
Step 4: Heat Your Oil
In a large frying pan or skillet, heat enough vegetable oil over medium-high heat to cover the bottom of the pan by about 1/4 inch. You’ll know it’s ready when a tiny piece of the mixture sizzles immediately when you drop it in.
Step 5: Fry Until Golden and Gorgeous
Carefully place the shrimp balls into the hot oil, working in batches so you don’t overcrowd the pan — give them space or they’ll steam instead of crisp up.
Fry for about 3-4 minutes on each side, turning them gently with a slotted spoon, until they’re golden brown all over and cooked through. The shrimp should be opaque and firm when you press gently.
Step 6: Drain and Serve
Once the Shrimp Balls are perfectly golden and crispy, remove them from the pan and place them on a paper towel-lined plate to drain any excess oil. If you want to get fancy, garnish with extra chopped cilantro or a sprinkle of sesame seeds.
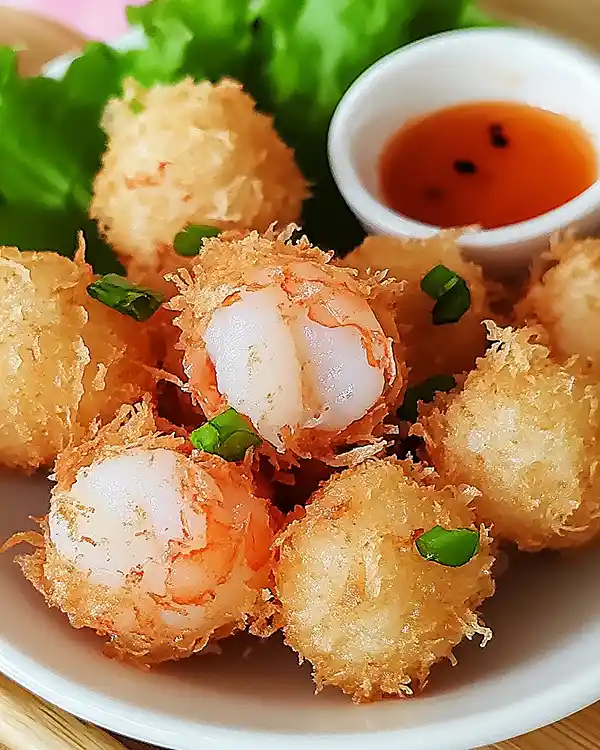
Serve immediately with sweet chili sauce, soy sauce, or a tangy lemon aioli for dipping — and watch them disappear.
Pro Tips & Gentle Guidance
Here’s how to make your Best Shrimp Recipes turn out absolutely perfect every time. These little tricks make all the difference.
Don’t over-process your shrimp in the food processor. You want a chunky texture, not baby food. Pulse just a few times and check — you can always chop more, but you can’t undo shrimp paste.
Keep your hands wet when rolling the balls. It sounds silly, but it really does prevent sticking and helps you shape them more smoothly. Just dip your fingers in a bowl of water between every few balls.
Fry in batches, not all at once. Overcrowding the pan drops the oil temperature, which means soggy instead of crispy. Patience here pays off in crunch factor.
If you’re new to working with fresh seafood, The Kitchn has an excellent detailed guide on buying and preparing shrimp that covers everything from deveining to storage. It’s my go-to reference.
Test one ball first before committing to the whole batch. Fry one up, taste it, and adjust your seasoning if needed. It’s way easier to add more salt to the remaining mixture than to wish you had.
Quick Fixes for Crispy Shrimp Balls
Problem: My shrimp mixture is too wet and won’t hold together.
Add a tablespoon of cornstarch or an extra tablespoon of panko breadcrumbs and mix well. Let it sit for 5 minutes — the breadcrumbs will absorb moisture and help bind everything.
Problem: The balls are falling apart in the oil.
Your oil might be too hot, or the mixture needs more binder. Lower the heat slightly and make sure you’ve got egg and breadcrumbs doing their job. You can also chill the formed balls in the fridge for 15 minutes before frying to help them hold their shape better.
Problem: They’re browning too fast but still raw inside.
Your oil temperature is too high. Lower the heat to medium and cook a bit longer — about 5-6 minutes per side. You want a gentle sizzle, not a violent bubble.
Problem: The shrimp balls are greasy.
Make sure your oil is hot enough before adding the balls — if it’s not hot enough, they’ll absorb oil instead of crisping up. Also, drain them on fresh paper towels and give them a minute to cool slightly before serving.
Variations & Adaptations
These Seafood Dish Recipes are so versatile — here are some fun ways to switch them up based on what you have or what you’re craving.
Gluten-Free Version: Swap the panko breadcrumbs for gluten-free breadcrumbs or crushed gluten-free crackers. You can also try almond flour or coconut flour, though they’ll give a slightly different texture.
Baked Instead of Fried: Place the formed balls on a greased baking sheet and bake at 400°F for 15-18 minutes, flipping halfway through. They won’t be quite as crispy, but they’re lighter and still delicious.
Spicy Kick: Add 1-2 teaspoons of sriracha or sambal oelek to the mixture for some heat. Or mix chili flakes right into your dipping sauce.
Thai-Style: Add a tablespoon of fish sauce and some chopped Thai basil to the mixture. Serve with a lime-based dipping sauce for a Southeast Asian vibe.
Air Fryer Method: Spray the balls lightly with oil and air fry at 380°F for 10-12 minutes, shaking the basket halfway through. Super crispy with almost no oil!
Serving, Storage & Reheating
Serve these Crispy Shrimp Balls immediately while they’re still hot and crispy, with small bowls of sweet chili sauce, soy sauce with ginger, or a creamy sriracha mayo for dipping. They’re perfect alongside Easy Coconut Spritz or Strawberry Lemonade Popsicles for a fun party spread.
If you somehow manage not to eat these all at once, store leftover Shrimp Balls in an airtight container in the refrigerator for up to 2 days. Just know they’ll lose some of their crunch in the fridge.
To reheat, skip the microwave (it makes them soggy) and use your oven instead. Place them on a baking sheet at 375°F for 8-10 minutes until heated through and crispy again. You can also pop them in an air fryer at 350°F for 5 minutes for the best texture.
No-Waste Kitchen Magic
Got leftover Shrimp Balls that have lost their crispiness? Chop them up and toss them into fried rice or a noodle stir-fry. They add amazing flavor and protein without needing to be crispy.
If you have extra raw shrimp mixture, roll it into balls and freeze them on a parchment-lined baking sheet until solid, then transfer to a freezer bag. Fry straight from frozen, adding an extra minute or two to the cooking time.
Save any leftover cilantro stems from this recipe — they’re packed with flavor. Freeze them in a small bag and toss them into soups, broths, or curry bases for extra aromatics.
The leftover panko breadcrumbs from the bag make an excellent crunchy topping for Blueberry Cream Cheese Bars or as a coating for baked chicken tenders later in the week.
Crispy Shrimp Balls with Sweet Chili Sauce FAQs
Can I freeze these Crispy Shrimp Balls?
Yep! Freeze the uncooked balls on a baking sheet until solid, then transfer to a freezer bag for up to 3 months. Fry them straight from frozen — just add 2 extra minutes to the cooking time and no one will ever know.
What’s the best way to store leftover Shrimp Balls?
Keep them in an airtight container in the fridge for up to 2 days. Reheat in the oven at 375°F for 8-10 minutes to bring back some of that crispy texture.
How do I know when Shrimp Balls are done cooking?
They should be golden brown all over and firm to the touch. If you cut one open, the shrimp inside should be opaque and white, not translucent. Internal temperature should hit 145°F if you want to be precise.
Why should I use panko breadcrumbs in Crispy Shrimp Balls?
Panko breadcrumbs are lighter and flakier than regular breadcrumbs, which creates a crispier coating that stays crunchy longer. They absorb less oil too, so your balls won’t be greasy.
Could I make these in advance for a party?
Absolutely! Form the balls and keep them covered in the fridge for up to 4 hours before frying. You can also fry them completely, let them cool, then reheat in the oven right before serving — they won’t be quite as crispy but they’ll still be delicious.
There’s a whole world of beef & pork stews waiting for you over at the Beef & Pork Stews collection. Each one is made with the same love and attention, and they’re all absolutely worth trying. Happy cooking!
Closing
So there you go — Crispy Shrimp Balls with Sweet Chili Sauce that look fancy but are secretly easy enough for a weeknight. They’re crispy, flavorful, and way more fun than regular shrimp.
I’d love to see your spin on this Crispy Shrimp Balls recipe! Drop a comment below with your photos or tell me what dipping sauce you paired them with — I’m always looking for new flavor combinations. These Shrimp Balls are so versatile; I bet you’ve got amazing variations already in mind!
Whether you’re serving them at a party or making them for dinner with Perfect Lemon Brownies for dessert, I hope they bring a little cozy magic to your kitchen.
I’m Linda Sandra — a Charleston home chef and comfort-food daydreamer. Around here, cooking’s not about perfection — it’s about cozy vibes, creative twists, and food that feels like love.