Brownie Pudding Recipe
This Brownie Pudding Recipe delivers rich, gooey chocolate heaven in 90 minutes. Perfect for busy moms craving an easy, crowd-pleasing dessert with minimal cleanup.
Hey there, I’m Claire Whitmore — a pastry whisperer in Asheville, NC, where butter totally counts as self-care. This Brownie Pudding Recipe is my secret weapon for when I need something ridiculously impressive but honestly can’t deal with complicated techniques right now.
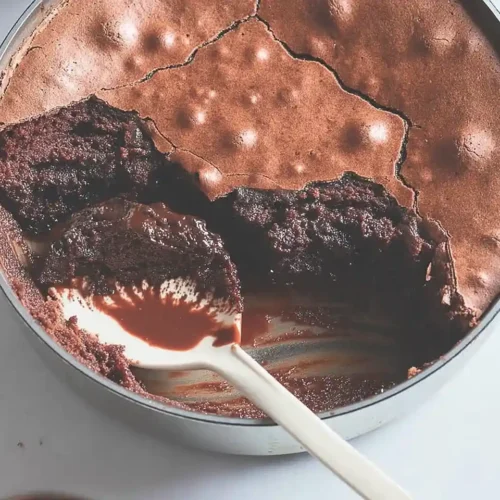
We’re talking fudgy brownie top, molten pudding bottom, and zero frosting stress — just pure chocolate bliss with pantry staples you probably already have.
This recipe combines the best of both worlds: rich cocoa powder for deep chocolate flavor, a simple one-bowl method that takes maybe 15 minutes of actual work, and a water bath technique that creates that signature gooey texture without any fancy equipment.
It’s the kind of dessert that makes people think you attended pastry school, when really you just melted some butter and whisked some eggs.
Table of Contents
Little Snapshot: What This Recipe Delivers
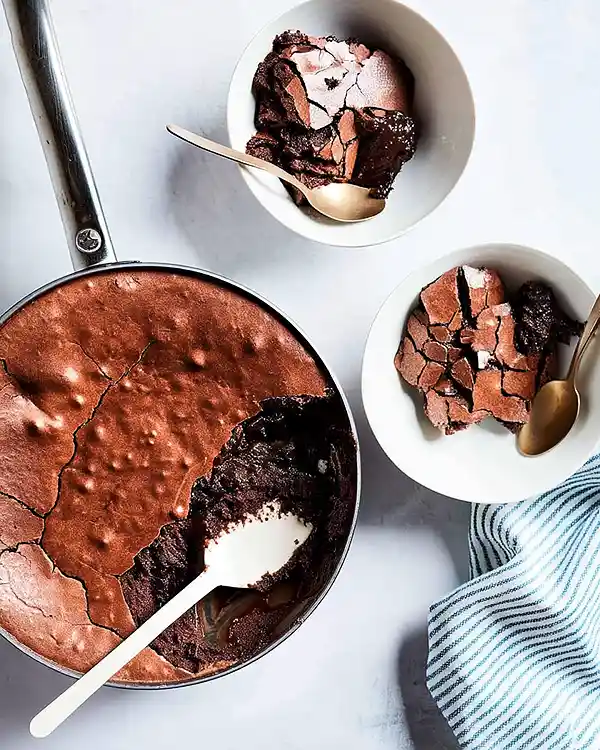
This Brownie Pudding Recipe creates a self-layering chocolate dessert with a crusty brownie top and silky pudding bottom in just 90 minutes total.
With only 7 ingredients and one bowl, you’ll get 6 generous servings of warm, gooey chocolate heaven that’s perfect with vanilla ice cream — no double boiler, no temperamental ganache, just foolproof chocolate comfort.
Why You’ll Love This Recipe 🌸
- This Brownie Pudding takes less time than folding laundry and tastes approximately 10,000 times better.
- It magically separates into two layers while baking — crusty brownie on top, silky pudding underneath — without any complicated technique or stress.
- Only one bowl gets dirty (seriously), and you probably have every ingredient already sitting in your pantry right now.
- According to King Arthur Baking’s guide to simple chocolate desserts, the best treats often require the fewest steps — and this recipe proves exactly why.
Quick Facts ⚡
Here’s the quick scoop on this Brownie Pudding Recipe.
- CourseDessert
- Prep Time15 minutes
- Cook Time60 minutes
- Total Time1 hour 30 minutes (including cooling)
- Servings6 servings
- DifficultyEasy
Brownie Pudding Recipe
Equipment
- 2-quart baking dish
- Large baking pan
- Small mixing bowl
- Large mixing bowl
- Electric hand mixer or stand mixer
- Whisk
- Measuring cups and spoons
Ingredients
- ¾ cup cocoa powder Dutch-process or regular; dark cocoa powder works great
- ½ cup all-purpose flour
- ¼ teaspoon salt
- 5 large eggs room temperature works best
- 1 ¾ cups granulated sugar
- 1 teaspoon vanilla extract
- 2 sticks salted butter melted
- ice cream for serving
Instructions
- Preheat your oven to 325°F. Lightly grease a 2-quart baking dish with nonstick cooking spray or butter, making sure to get the corners so nothing sticks later.
- In a small bowl, whisk together the 3/4 cup cocoa powder, 1/2 cup all-purpose flour, and 1/4 teaspoon salt until completely combined with no cocoa clumps hiding in there. Set this aside while you work on the fun part.
- In a large bowl using an electric hand mixer on medium speed (or in your stand mixer with the paddle attachment), beat the 5 eggs and 1 3/4 cups granulated sugar for 5-7 minutes until the mixture becomes very thick, pale, and light yellow — almost like a cloud. This step is absolutely essential for getting that perfect texture, so don’t short the time even if your arm gets tired. The mixture should fall in thick ribbons when you lift the beaters.
- Add the 1 teaspoon vanilla extract and your flour-cocoa mixture to the beaten eggs and mix on low speed until just combined with no dry streaks remaining. Don’t overmix here — we want tender pudding, not tough brownies.
- With your mixer still on low, carefully pour in the 2 sticks of melted salted butter and mix until just combined and smooth. The batter should look glossy and slightly loose — that’s exactly what you want.
- Spread the batter evenly in your prepared baking dish, then place it inside a larger baking pan. Transfer both to the oven, then carefully pour very hot water into the larger pan until it comes about halfway up the sides of your brownie pudding dish. This gentle water bath creates that signature pudding layer without drying out the top.
- Bake for 60 minutes. Don’t panic when you peek in — there will be a crusty layer on top and the middle will look seriously underbaked and jiggly. That’s completely normal and exactly what you want. Carefully remove the whole setup from the oven, then lift the brownie pudding pan out of the water bath using oven mitts or kitchen towels.
- Let it cool for 10-20 minutes before serving warm with a generous scoop of ice cream. The pudding layer will still be molten and gooey underneath that brownie crust — pure chocolate heaven.
Notes
Nutritional Peek
Here’s what you’re working with per serving of this chocolate lover’s dream — because sometimes knowing the numbers helps you decide if it’s a Tuesday treat or a weekend indulgence.
| Nutrient | Amount per Serving |
|---|---|
| Calories | 520 |
| Protein | 8g |
| Carbohydrates | 62g |
| Total Fat | 28g |
| Saturated Fat | 17g |
| Fiber | 3g |
| Sugar | 50g |
Note: This doesn’t include the ice cream, which let’s be honest, is absolutely non-negotiable.
Brownie Pudding Recipe Ingredients
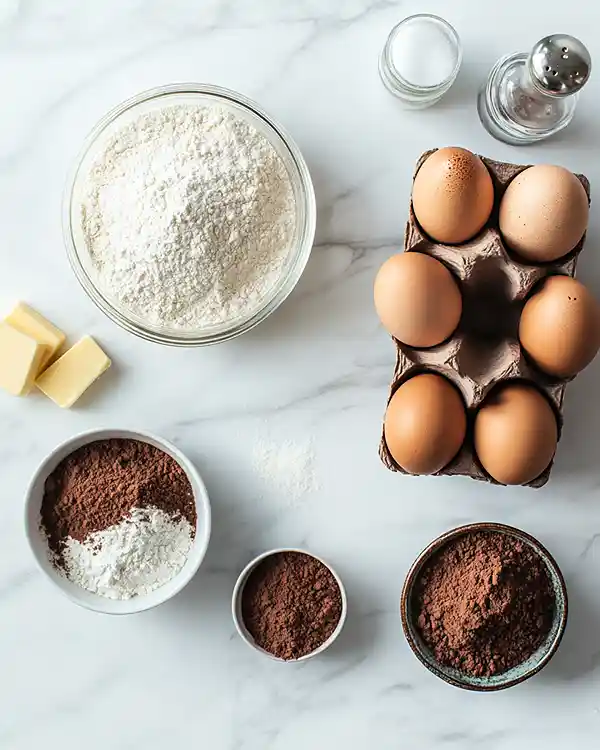
This chocolate pudding is built on seriously simple stuff — no weird specialty ingredients or last-minute grocery runs required. You’ll need basic pantry staples that come together to create something way fancier than the sum of their parts.
For the dry ingredients — cocoa powder, flour, and salt — you’ll want to whisk these together first to avoid cocoa clumps later. The melted butter and beaten eggs create the base that magically separates during baking, while the sugar dissolves into that signature shiny brownie crust.
| Amount | Ingredient |
|---|---|
| ¾ cup (64 g) | Cocoa powder (Dutch-process or regular; dark cocoa powder works great here — yes, the good stuff matters) |
| ½ cup (71 g) | All-purpose flour |
| ¼ teaspoon | Salt |
| 5 large | Eggs (room temperature works best, but don’t stress if you forget to take them out) |
| 1 ¾ cups (371 g) | Granulated sugar |
| 1 teaspoon | Vanilla extract (the real stuff, not imitation) |
| 2 sticks (227 g) | Salted butter, melted (yes, real butter — margarine just doesn’t cut it here) |
| As needed | Ice cream for serving (vanilla is classic, but salted caramel is chef’s kiss) |
Tools You’ll Actually Use
- 2-quart baking dish (an 8×8 or 9×9 works perfectly)
- Large baking pan (for the water bath — any roasting pan will do)
- Small mixing bowl
- Large mixing bowl
- Electric hand mixer or stand mixer with paddle attachment
- Whisk
- Measuring cups and spoons
- Nonstick cooking spray or butter for greasing
Step-by-Step Instructions
Making this Brownie Pudding Recipe is honestly easier than convincing a toddler to wear matching socks. The key is beating those eggs properly — that’s what creates the magical texture everyone freaks out about.
Step 1: Prep your oven and pan Preheat your oven to 325°F (yes, lower than you’d think for brownies — this is the secret to that pudding layer). Lightly grease a 2-quart baking dish with nonstick cooking spray or butter, making sure to get the corners so nothing sticks later.
Step 2: Mix your dry ingredients In a small bowl, whisk together the ¾ cup cocoa powder, ½ cup all-purpose flour, and ¼ teaspoon salt until completely combined with no cocoa clumps hiding in there. Set this aside while you work on the fun part.
Step 3: Beat the eggs and sugar (don’t skip this!) In a large bowl using an electric hand mixer on medium speed (or in your stand mixer with the paddle attachment), beat the 5 eggs and 1 ¾ cups granulated sugar for 5-7 minutes until the mixture becomes very thick, pale, and light yellow — almost like a cloud.
This step is absolutely essential for getting that perfect texture, so don’t short the time even if your arm gets tired. The mixture should fall in thick ribbons when you lift the beaters.
Step 4: Add the dry ingredients Add the 1 teaspoon vanilla extract and your flour-cocoa mixture to the beaten eggs and mix on low speed until just combined with no dry streaks remaining. Don’t overmix here — we want tender pudding, not tough brownies.
Step 5: Incorporate the melted butter With your mixer still on low, carefully pour in the 2 sticks of melted salted butter and mix until just combined and smooth. The batter should look glossy and slightly loose — that’s exactly what you want.
Step 6: Set up the water bath Spread the batter evenly in your prepared baking dish, then place it inside a larger baking pan.
Transfer both to the oven, then carefully pour very hot water into the larger pan until it comes about halfway up the sides of your brownie pudding dish. This gentle water bath creates that signature pudding layer without drying out the top.
Step 7: Bake until magical Bake for 60 minutes. Don’t panic when you peek in — there will be a crusty layer on top and the middle will look seriously underbaked and jiggly. That’s completely normal and exactly what you want.
Carefully remove the whole setup from the oven, then lift the brownie pudding pan out of the water bath using oven mitts or kitchen towels.
Step 8: Cool and serve Let it cool for 10-20 minutes before serving warm with a generous scoop of ice cream. The pudding layer will still be molten and gooey underneath that brownie crust — pure chocolate heaven.
Claire’s Pro Tips & Gentle Guidance
This chocolate lover’s dream is pretty foolproof, but I’ve learned a few tricks that’ll make yours even better.
Use Dutch-process cocoa if you can find it. It has a smoother, less acidic flavor than regular cocoa powder, which makes the chocolate taste richer and more sophisticated. That said, regular cocoa works totally fine — I’ve made this both ways dozens of times.
Don’t skimp on beating the eggs. I know 5-7 minutes feels like forever, but this is what creates that amazing texture where the pudding separates from the brownie layer. Set a timer and let your mixer do its thing while you scroll Instagram or whatever.
According to Serious Eats‘ comprehensive chocolate brownie guide , properly aerated eggs are the foundation of great chocolate desserts — and honestly, they’re not wrong.
Room temperature eggs beat better. They incorporate more air and create a fluffier texture. If you forgot to take them out (hi, that’s me every time), just place them in a bowl of warm water for 5-10 minutes before using.
The water bath isn’t optional. I tried skipping it once thinking I could save time, and ended up with basically just a flat brownie instead of that gorgeous pudding layer. The gentle steam keeps everything moist and helps create that signature gooey bottom.
Can’t get enough of these flavors? You’re going to love what’s waiting in the Cookies & Brownies lineup. Every single recipe is made to impress without the stress. Happy cooking, friend!
Quick Fixes for Brownie Pudding
Problem: The top cracked like a desert Your oven was probably too hot or you overbaked it slightly.
Next time, double-check your oven temperature with an oven thermometer (mine runs 25 degrees hot, which I only discovered after years of mysterious baking fails). The cracks won’t affect the taste though — just cover them with ice cream and call it rustic.
Problem: It’s more brownie than pudding You likely overbaked it or didn’t use enough water in the water bath. The middle should still look seriously underdone when you pull it out — that jiggly center firms up to pudding texture as it cools. If it’s fully set in the oven, you’ve gone too far.
Problem: The pudding layer is too thin Make sure you’re beating those eggs for the full 5-7 minutes until thick and pale. Underbeaten eggs don’t create enough lift for proper separation. Also, using a shallower, wider pan instead of a deeper 2-quart dish will give you less dramatic layers.
Problem: It tastes good but looks weird and separated wrong Check that your baking dish is actually 2 quarts — using something too large spreads the batter too thin and messes with the magic. An 8×8 or 9×9 inch square pan works perfectly for this recipe.
Variations & Fun Twists
This Brownie Pudding is crazy versatile once you nail the basic version — and trust me, you will.
For mint chocolate lovers: Add ½ teaspoon peppermint extract along with the vanilla, and serve with chocolate chip mint ice cream. My sister requests this version for every family gathering.
Make it extra decadent: Fold in ½ cup chocolate chips to the batter before baking. They’ll melt into little pockets of extra gooey chocolate throughout the pudding layer.
Salted caramel version: Drizzle salted caramel sauce over each serving and finish with a sprinkle of flaky sea salt. The sweet-salty combo is absolutely ridiculous in the best way.
Coffee chocolate: Add 1 tablespoon instant espresso powder to the dry ingredients to intensify the chocolate flavor without making it taste like coffee. This is my personal go-to version.
Individual servings: Divide the batter among 6 ramekins, place them in the water bath, and bake for 35-40 minutes. Perfect for dinner parties where you want to look extra fancy with zero extra effort.
Serving, Storage & Reheating
Serve this chocolate pudding warm — like, right out of the oven after a short cooling period — with a big scoop of vanilla ice cream melting into that gooey pudding layer. It’s also fantastic with whipped cream, fresh berries, or if you’re feeling wild, both at the same time.
Store any leftovers (if you actually have leftovers, which I seriously doubt) covered in the fridge for up to 3 days. The texture changes slightly as it cools completely, becoming more fudgy and less pudding-like, but still absolutely delicious.
Reheat individual portions in the microwave for 30-45 seconds to bring back that warm, gooey texture. Or reheat the whole dish covered with foil in a 300°F oven for about 15-20 minutes until warmed through.
No-Waste Kitchen Magic
Day-old brownie pudding: If it firms up too much in the fridge, crumble it over vanilla ice cream for an instant chocolate-brownie sundae. My kids actually prefer it this way.
Turn it into truffles: Roll chilled brownie pudding into small balls, then coat in cocoa powder, crushed cookies, or melted chocolate. Boom — fancy truffles that took you 10 minutes.
Make a trifle: Layer chunks of leftover brownie pudding with whipped cream and fresh berries in a glass for an impressive-looking dessert that uses every last bite.
Freeze for emergencies: This freezes surprisingly well for up to 2 months. Wrap individual portions in plastic wrap, then store in a freezer bag. Microwave from frozen for 1-2 minutes when you need an emergency chocolate fix.
Brownie Pudding Recipe FAQs
Can I freeze this Brownie Pudding Recipe?
Yes! Let it cool completely, then wrap tightly in plastic wrap and aluminum foil before freezing for up to 2 months. Thaw overnight in the fridge, then reheat in the microwave or a low oven until warm and gooey again.
What’s the best way to store Brownie Pudding?
Cover it tightly and refrigerate for up to 3 days. The texture becomes more fudgy and less pudding-like when cold, but it’s still absolutely delicious — just reheat before serving if you want that original gooey texture back.
Why should I use salted butter in this Brownie Pudding Recipe?
Salted butter adds a subtle flavor complexity that balances all that sweetness and makes the chocolate taste even richer. If you only have unsalted, just add an extra ¼ teaspoon of salt to the recipe.
Can I make this Brownie Pudding without a water bath?
Honestly, no — the water bath is what creates that signature pudding layer underneath the brownie crust. Without it, you’ll basically end up with a flat, dense brownie instead of the magical two-layer texture that makes this dessert special.
Will this work with gluten-free flour?
I haven’t tested it personally, but readers have had success using a 1:1 gluten-free baking flour blend like Bob’s Red Mill. The texture might be slightly different, but it should still work since there’s so little flour in the recipe anyway.
Cozy Closing
This Brownie Pudding Recipe has honestly saved me more times than I can count — from forgotten book club meetings to last-minute dinner parties to Tuesday nights when I just need chocolate immediately. The fact that it looks and tastes this impressive while being stupid-easy to make? That’s the kind of kitchen magic I’m absolutely here for.
I’d love to see your spin on this Brownie Pudding Recipe! Drop a comment below with your photos or tell me which variation you tried — I always get the best ideas from you all. And if you’re on a dessert kick, you might also love these Ricotta Dip with Hot Honey or these Spicy Mexican Corn Bites for your next gathering.
I’m Claire Whitmore — a dessert daydreamer from Asheville, NC. For me, baking isn’t about perfect pastries — it’s about the joy of sharing something sweet (and maybe sneaking an extra bite of that gooey pudding layer when no one’s looking).