Easy No-Bake Lemon Icebox Pie Recipe
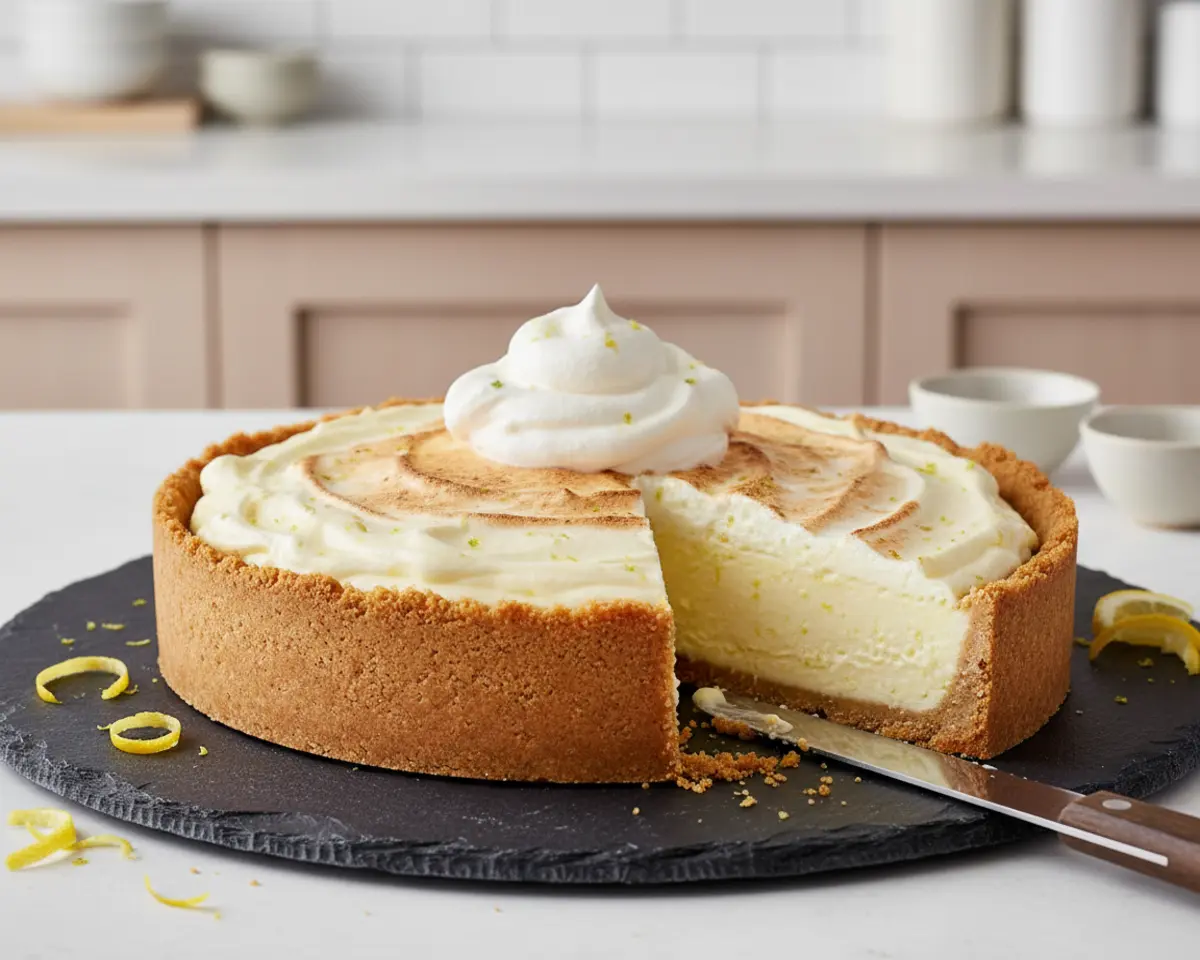
This tangy, creamy Lemon Icebox Pie is a refreshing no-bake dessert that takes just minutes to prepare and delivers the perfect balance of sweet and tart citrus flavor. With only four simple ingredients and no oven required, this easy summer pie is about to become your new warm-weather favorite.
I’m Claire Whitmore, and if you’ve been searching for a bright, breezy Lemon Icebox Pie that doesn’t ask much of you, friend, you’ve found it. This is the dessert I make when Asheville’s summer heat makes turning on the oven feel like a personal betrayal.
Last June, I brought this pie to a neighbor’s backyard cookout, and it disappeared faster than the ice in everyone’s sweet tea. One friend actually texted me at midnight asking for the recipe because her kids wouldn’t stop talking about it. That’s the kind of delicious chaos this Lemon Icebox Pie creates.
Table of Contents
Quick Overview
This is just one of the many gems in our Delicious Desserts series. Every recipe there has been tested and loved in real kitchens, and I promise there’s something for every craving. Go see for yourself.
Little Snapshot: What This Recipe Delivers
This no-bake Lemon Icebox Pie combines sweetened condensed milk, fresh lemon juice, and zest in a graham cracker crust for a tangy, creamy dessert that sets in the fridge with zero baking. It’s a refreshing citrus dessert perfect for summer gatherings, picnics, and anyone who wants impressive results without heating up the kitchen.
Why You’ll Love This Recipe 🌸
- This Lemon Icebox Pie takes less time to make than folding a load of laundry — seriously, about 10 minutes of hands-on work.
- It’s a forgiving, beginner-friendly easy no-bake dessert that feels fancy but won’t stress you out on a busy weeknight.
- The bright lemon flavor tastes like sunshine in pie form, and everyone always asks for seconds.
- According to Smithsonian Magazine, icebox desserts became popular in the 1930s when home refrigerators revolutionized American kitchens — and this recipe proves exactly why.
Quick Facts ⚡
Here’s the quick scoop on this Lemon Icebox Pie.
- CourseDessert
- Prep Time10 minutes
- Chill Time4 hours
- Total Time4 hours 10 minutes
- Servings8 slices
- DifficultyEasy
Nutritional Peek
| Nutrient | Amount per Serving |
|---|---|
| Calories | 310 |
| Protein | 5g |
| Carbohydrates | 45g |
| Fat | 12g |
| Fiber | 1g |
| Sugar | 35g |
What You’ll Need
You don’t need fancy pastry tools or complicated equipment for this summer pie recipe. Just a few basic kitchen items and you’re golden.
- Medium mixing bowl
- Whisk or fork
- Citrus zester or fine grater
- Citrus juicer (or just your hands and a fork)
- Rubber spatula
- Plastic wrap or pie cover
- Measuring cups and spoons
Ingredients
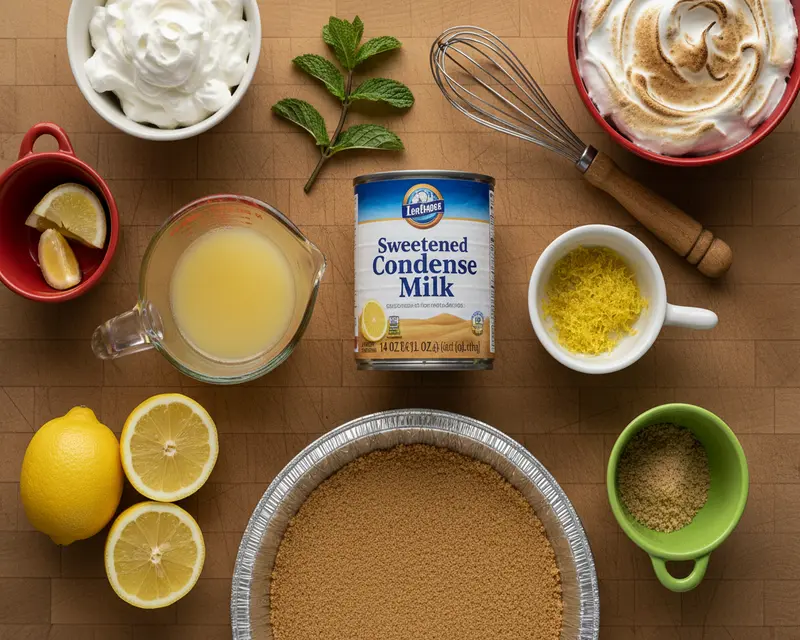
This easy no-bake dessert starts with just a handful of simple ingredients you can grab at any grocery store. The magic is in how the lemon juice’s acidity transforms the sweetened condensed milk into a thick, creamy custard that sets perfectly without any heat. Fresh lemon juice makes all the difference here — bottled just won’t give you that bright, sunny flavor we’re after.
| Group | Ingredient | Amount | Notes |
|---|---|---|---|
| Filling Base | Sweetened condensed milk | 1 (14 ounce) can | The sweet, creamy foundation |
| Filling Base | Fresh lemon juice | 1/2 cup | About 3-4 lemons; freshly squeezed is non-negotiable |
| Filling Base | Lemon zest | 1 tablespoon | Adds aromatic oils and extra lemony punch |
| Crust | Graham cracker pie crust | 1 (9 inch) | Store-bought works beautifully, or make your own |
| Topping (Optional) | Whipped cream or meringue | To taste | Fluffy clouds of deliciousness on top |
Step-by-Step Instructions
Let’s make this happen. The Lemon Icebox Pie comes together so quickly, you’ll wonder why you ever waited so long to try it.
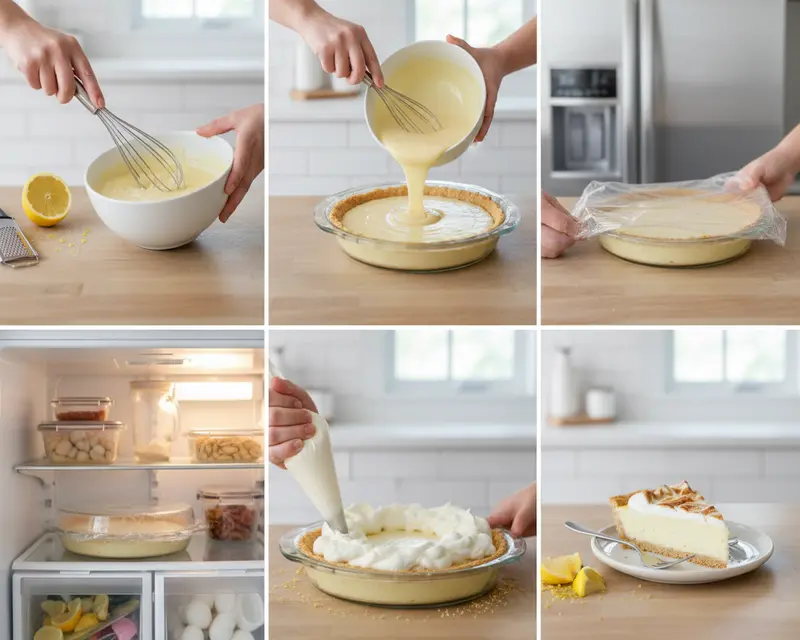
Step 1: Combine the Filling Ingredients
In your medium mixing bowl, pour in the entire can of sweetened condensed milk. Add the fresh lemon juice and lemon zest. Use your whisk to blend everything together until the mixture is smooth and starts to thicken slightly — this usually takes about 2 minutes of steady whisking. You’ll notice the filling getting creamier as the acid in the lemon juice reacts with the milk proteins.
Step 2: Pour Into the Crust
Grab your graham cracker pie crust and pour the lemon filling right into it. Use your rubber spatula to spread the filling evenly across the entire crust, making sure it reaches all the edges. Smooth the top gently so it looks nice and even — this is going to be a beautiful pie.
Step 3: Chill Until Firm
Cover your pie completely with plastic wrap, making sure the wrap touches the surface of the filling to prevent a skin from forming. Pop it into the refrigerator for at least 4 hours, though overnight is even better if you have the time. The pie needs this chilling period to set properly and develop its signature sliceable texture.
Step 4: Add Topping and Serve
Once your pie is fully chilled and firm to the touch, remove the plastic wrap. If you’re using whipped cream or meringue, now’s the time to add it. Pile it on generously, spreading it to the edges, or pipe it fancy if you’re feeling decorative. Slice with a sharp knife wiped clean between cuts for the prettiest slices.
Expert Tips
This key lime pie alternative is already super simple, but a few little tricks will take your citrus dessert from great to absolutely incredible. I’ve made this pie more times than I can count, and these tips come straight from my own kitchen adventures.
Use Room Temperature Ingredients
Let your sweetened condensed milk sit out for about 30 minutes before mixing. Room temperature ingredients blend more smoothly and create a silkier filling texture. Cold condensed milk can be harder to whisk and may result in a slightly grainy texture.
Zest Before You Juice
Always zest your lemons before you cut and juice them — it’s so much easier to work with whole fruit. Use a microplane or fine grater and only take the bright yellow outer layer, avoiding the bitter white pith underneath. This little habit saves so much frustration.
Strain Your Lemon Juice
After juicing, pour your lemon juice through a fine-mesh strainer to catch seeds and pulp. This gives you a super smooth filling without any surprise chewy bits. It takes 10 seconds and makes a noticeable difference in the final texture.
Chill Completely Before Slicing
I know it’s tempting to cut into this beauty early, but patience pays off here. A fully chilled pie slices cleanly and holds its shape beautifully on the plate. According to Serious Eats’ comprehensive guide to citrus pies, proper chilling time allows the proteins to fully set and creates that perfect custard-like consistency. Under-chilled pies tend to be runny and messy.
Make Your Own Crust for Extra Wow
Store-bought crusts are perfectly fine, but if you have 10 extra minutes, mix 1½ cups graham cracker crumbs with 6 tablespoons melted butter and 3 tablespoons sugar. Press into your pie pan and bake at 350°F for 8 minutes, then cool completely before filling. The homemade version tastes noticeably better and impresses everyone.
Variations
Once you’ve mastered the classic Lemon Icebox Pie, the citrus world is your oyster. These fun twists keep things interesting without complicating the basic formula.
Lemon-Lime Combo
Use ¼ cup lemon juice and ¼ cup lime juice for a tropical twist that bridges the gap between lemon and key lime pie. Add half a tablespoon of each zest for balanced citrus flavor. This version tastes like summer vacation in a slice.
Meyer Lemon Luxury
If you can find Meyer lemons, swap them in for regular lemons. They’re sweeter and more floral, creating a more delicate, perfumed filling. You might want to add an extra tablespoon of juice since Meyers are less tart than standard lemons.
Berry Lemon Swirl
Before chilling, drop spoonfuls of raspberry or strawberry jam over the filling and gently swirl with a knife for a marbled effect. The berry flavor complements the lemon beautifully and adds gorgeous visual appeal. Try this with your favorite raspberry cream pie techniques too.
Toasted Coconut Crown
Toast ½ cup sweetened shredded coconut in a dry skillet until golden, then sprinkle it over your whipped cream topping. The nutty coconut adds texture and a tropical vibe that pairs perfectly with the bright lemon. It’s like a beach vacation for your taste buds.
Gingersnap Crust Swap
Replace the graham cracker crust with a gingersnap cookie crust for a spicy-sweet contrast. The warm ginger spice plays beautifully against the tangy lemon filling. This variation feels a bit more sophisticated and works wonderfully for holiday desserts.
Troubleshooting
Even the simplest recipes can throw us a curveball now and then. Here are the most common issues with summer pie recipes and exactly how to fix them.
Problem: Filling Won’t Thicken
If your filling stays soupy even after whisking, you likely need more lemon juice or didn’t whisk long enough. Add another tablespoon of fresh lemon juice and whisk vigorously for 2-3 more minutes. The acid is what triggers the thickening reaction, so more acid equals thicker filling. If it’s still thin after adding juice, chill it anyway — it will firm up significantly in the fridge.
Problem: Filling Is Too Tart
Lemons vary in tartness, and sometimes you get a batch that’s super acidic. If your filling makes you pucker, whisk in 2-3 tablespoons of additional sweetened condensed milk to balance the flavor. You can also top with sweetened whipped cream, which mellows the tartness beautifully when eaten together.
Problem: Filling Has Lumps
Lumps usually mean the condensed milk was too cold or you added the lemon juice too quickly. Whisk more vigorously to break up the lumps, or pour the filling through a fine-mesh strainer into the crust to remove them. Next time, let your condensed milk come to room temperature first.
Problem: Crust Is Soggy
If your crust absorbed too much moisture from the filling, it might be because you didn’t chill the pie long enough or the crust wasn’t fully cooled before filling. For future pies, brush the inside of the crust with a thin layer of melted white chocolate and let it set before adding filling — this creates a moisture barrier.
Also make sure you’re using a proper graham cracker crust and not a pastry crust, which doesn’t hold up as well to no-bake fillings.
Problem: Pie Won’t Slice Cleanly
Messy slices usually mean the pie hasn’t chilled long enough or your knife isn’t clean between cuts. Chill for the full 4 hours minimum, and use a sharp knife dipped in hot water and wiped dry before each cut. This warm knife glides through the cold filling like butter and gives you those Instagram-worthy slices.
Storage & Reheating
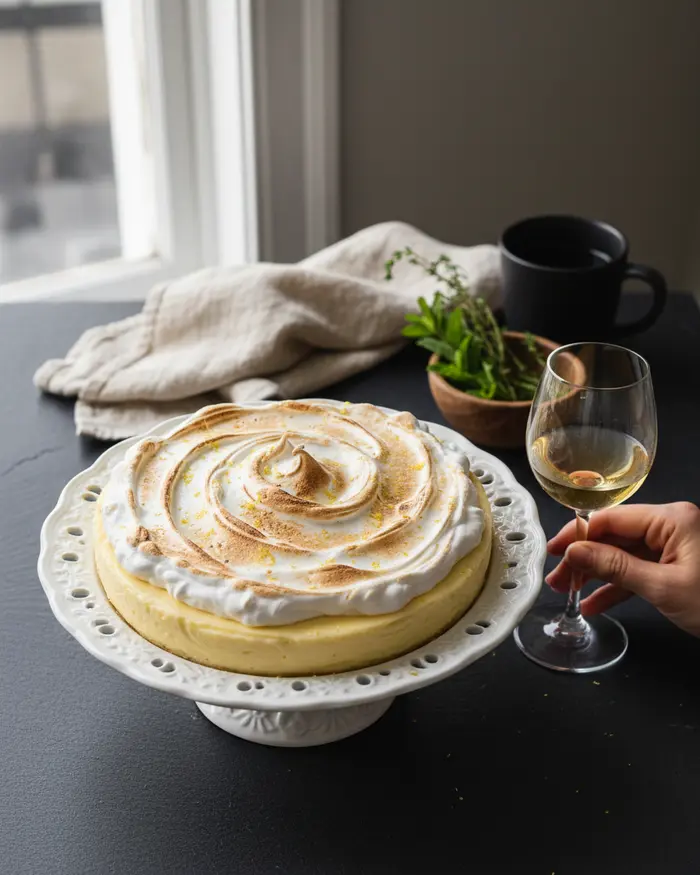
This key lime pie alternative stores beautifully, making it perfect for make-ahead entertaining or meal prep desserts. The flavors actually improve slightly after a day in the fridge as they meld together.
Serving Suggestions
Serve slices chilled, topped with a generous dollop of whipped cream and a sprinkle of fresh lemon zest. This pie pairs wonderfully with hot coffee or iced tea on warm afternoons. For an extra-fancy presentation, add fresh berries or thin lemon slices as garnish.
Storage Instructions
Cover your Lemon Icebox Pie tightly with plastic wrap or transfer to an airtight pie keeper. Store in the refrigerator for up to 5 days. The filling stays perfectly creamy and the crust maintains its texture beautifully throughout that time. This is one of those rare desserts that doesn’t suffer at all from being made ahead.
Freezing and Reheating
You can freeze this pie for up to 2 months, though the crust texture may soften slightly upon thawing. Wrap it tightly in plastic wrap, then again in aluminum foil. Thaw overnight in the refrigerator before serving — never at room temperature, which can make the filling weep. If you’re topping with whipped cream, add that fresh after thawing rather than before freezing.
| Storage Method | Duration | Best For |
|---|---|---|
| Refrigerator (covered) | Up to 5 days | Best texture and flavor |
| Freezer (wrapped tightly) | Up to 2 months | Long-term storage |
| Room temperature | Not recommended | Filling will soften and separate |
No-Waste Kitchen Ideas
Let’s make sure every bit of those beautiful lemons gets put to good use. Waste not, want not — especially when citrus is involved.
Save Those Lemon Halves
After juicing, toss your lemon halves down the garbage disposal with cold running water to freshen and deodorize it naturally. Or rub the cut side over cutting boards, countertops, and stainless steel sinks to remove stains and smells. They’re nature’s best cleaning tool.
Make Lemon Simple Syrup
If you have extra lemon juice left over, combine equal parts lemon juice, water, and sugar in a saucepan. Simmer until the sugar dissolves, then cool and store in the fridge for up to two weeks. Use it to sweeten iced tea, cocktails, or drizzle over pound cake.
Dry Your Zest
Got more zest than you need? Spread it on a plate and let it air-dry for a day or two, then store in an airtight container. Dried lemon zest lasts for months and adds bright flavor to baked goods, salad dressings, and marinades. It’s like sunshine in a jar.
Candy Those Peels
Cut your leftover lemon peels into thin strips, simmer in simple syrup for about 30 minutes, then toss in sugar and let dry. Candied lemon peel makes a gorgeous garnish for desserts and a lovely homemade gift. It’s also delicious dipped in dark chocolate.
Freeze Juice in Ice Cube Trays
Pour any extra lemon juice into ice cube trays and freeze. Pop the frozen cubes into a freezer bag for up to 6 months. Each cube equals about 2 tablespoons of juice, perfect for adding to recipes, drinks, or this no-bake lemonade pie next time.
Frequently Asked Questions
Here are the questions I hear most often about making this tangy, dreamy citrus dessert.
What is Lemon Icebox Pie?
Lemon Icebox Pie is a no-bake dessert made with a graham cracker crust filled with a creamy, tangy lemon filling. It gets its name from being chilled in the refrigerator or icebox until firm and is known for its refreshing citrus flavor and smooth texture.
Do I need to bake Lemon Icebox Pie?
No, Lemon Icebox Pie is a no-bake dessert. While the graham cracker crust is typically baked for about 10 minutes to set it, the lemon filling itself does not require baking. The pie simply needs to be refrigerated for several hours until it sets properly.
How long does Lemon Icebox Pie need to chill?
Lemon Icebox Pie typically needs to chill in the refrigerator for at least 4 hours, though overnight is ideal for the best texture. This chilling time allows the filling to set properly and develop its characteristic firm yet creamy consistency.
How long will Lemon Icebox Pie keep in the refrigerator?
Lemon Icebox Pie will keep well in the refrigerator for up to 3 to 4 days when properly covered. Store it in an airtight container or cover the pie dish tightly with plastic wrap to maintain freshness and prevent it from absorbing other refrigerator odors.
Can I use bottled lemon juice instead of fresh lemons?
While you can use bottled lemon juice, fresh lemon juice is highly recommended for the best flavor. Fresh lemons provide a brighter, more authentic citrus taste and better aroma. If using bottled juice, make sure it is 100 percent lemon juice without added preservatives for optimal results.
Final Dish
This Lemon Icebox Pie is proof that the best desserts don’t have to be complicated. With just a handful of ingredients and a few minutes of effort, you’ve created something bright, beautiful, and absolutely delicious. The creamy, tangy filling against that sweet graham cracker crust is pure summer magic, whether you’re serving it at a backyard barbecue or just treating yourself on a Tuesday night.
I hope this recipe becomes a staple in your dessert rotation like it has in mine. Make it your own with different toppings, try the variations, and don’t stress about perfection — this pie is forgiving and wants you to succeed. If you make this Lemon Icebox Pie, I’d absolutely love to see your creation! Share your photos in the comments below or tag me on social media.
Did you add meringue or keep it simple with whipped cream? Did the kids devour it or did you hide a slice for yourself? Tell me everything.
For more easy citrus desserts that celebrate sunny flavors without heating up your kitchen, check out this frozen strawberry lemonade pie or this dreamy banana split icebox cake. Both are just as simple and just as delicious.
I’m Claire Whitmore — a dessert daydreamer from Asheville, NC. For me, baking isn’t about perfect pastries — it’s about the joy of sharing something sweet (and maybe sneaking an extra scoop of icing).
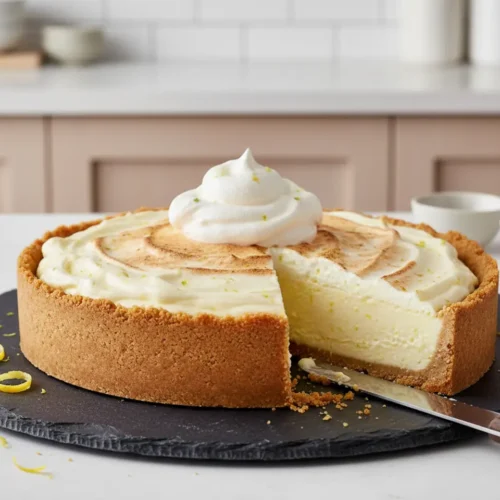
Lemon Icebox Pie
Ingredients
- 1 14 ounce can sweetened condensed milk
- ½ cup fresh lemon juice
- 1 tablespoon lemon zest
- 1 9 inch graham cracker pie crust
- Optional: whipped cream or meringue for topping
Instructions
- In a medium bowl, combine the sweetened condensed milk, lemon juice, and lemon zest. Whisk until well combined and the mixture thickens slightly.
- Pour the lemon mixture into the graham cracker pie crust, spreading evenly.
- Cover the pie with plastic wrap and refrigerate for at least 4 hours, or until firm.
- If desired, top with whipped cream or meringue before serving.