Protein Copycat Reese’s Cups
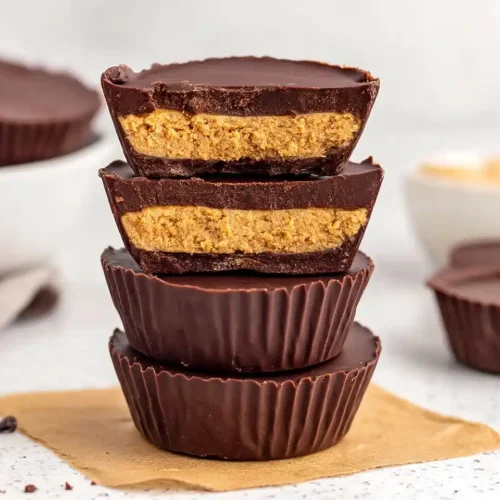
Protein Copycat Reese’s Cups pack 8g of protein per serving with creamy peanut butter filling and rich chocolate coating. Ready in 20 minutes, these healthier homemade treats satisfy cravings guilt-free!
Hey there, I’m Claire Whitmore — a dessert daydreamer from Asheville, NC, where chocolate and peanut butter is basically a love language. This Protein Copycat Reese’s Cups recipe is my answer to every late-night candy craving that doesn’t leave you feeling guilty afterward.
We’re talking rich semi-sweet chocolate, creamy natural peanut butter, and a sneaky boost of vanilla protein powder that makes these little cups as wholesome as they are delicious. With just 15 minutes of hands-on time and simple ingredients you probably already have, you’ll be making healthier homemade Reese’s that actually taste indulgent.
Table of Contents
Little Snapshot: What This Recipe Delivers
These Protein Copycat Reese’s Cups give you all the creamy, chocolatey satisfaction of store-bought candy with 8g of protein per serving and zero artificial ingredients.
Using natural peanut butter, vanilla protein powder, and quality chocolate chips, you’ll create 12 perfectly portioned cups in about 20 minutes of active time — plus an hour to set in the fridge. They’re easier than you think, way healthier than the originals, and genuinely taste like the real deal.
Why You’ll Love This Recipe 🌸
- These Protein Copycat Reese’s Cups taste just like the real thing but without the ingredient list that reads like a chemistry experiment.
- Each cup packs 8g of protein, making them perfect for post-workout snacks or guilt-free dessert that actually fuels your body.
- You only need 7 ingredients and about 15 minutes of hands-on time — seriously less effort than running to the store.
- According to EatingWell’s guide to healthier homemade candy, controlling your ingredients means controlling the quality — and these protein-packed peanut butter cups prove exactly why.
Quick Facts ⚡
Here’s the quick scoop on this Protein Copycat Reese’s Cups recipe.
- CourseDessert/Snack
- Prep Time15 minutes
- Chill Time1 hour
- Total Time1 hour 15 minutes
- Servings12 cups
- DifficultyEasy
Nutritional Peek
Here’s what you’re getting in each protein-packed cup — because knowing the numbers helps you enjoy them even more!
| Nutrient | Amount per Serving |
|---|---|
| Calories | 165 |
| Protein | 8g |
| Carbohydrates | 16g |
| Fat | 9g |
| Fiber | 2g |
| Sugar | 11g |
If this recipe made your day, you’re in for a treat. The full Classic Comfort Foods guide is filled with tried-and-true favorites that real home cooks swear by. Trust me, you won’t be able to pick just one.
Ingredients
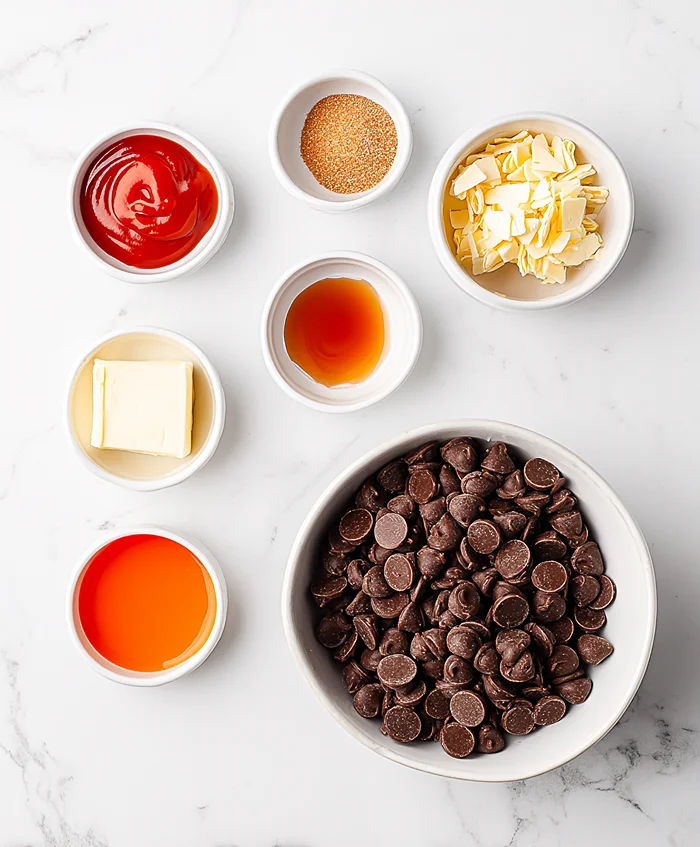
If you’ve been wondering how to make protein cups at home, you’re about to discover it’s way simpler than you thought. For the chocolate coating — semi-sweet chocolate chips, coconut oil, and vanilla extract — you’ll want quality ingredients since they make up half the flavor experience.
For the creamy peanut butter filling — natural peanut butter, pure maple syrup, vanilla protein powder, and salt — stick with simple, clean ingredients that blend smoothly and taste genuinely delicious.
| Amount | Ingredient |
|---|---|
| For the Chocolate | |
| 12 oz | semi-sweet chocolate chips |
| 1 teaspoon | coconut oil, measured solid |
| 1/4 teaspoon | vanilla extract |
| For the Peanut Butter Filling | |
| 1/4 cup | natural creamy peanut butter (only ingredients should be peanuts + salt) |
| 2 tablespoons | pure maple syrup |
| 1/3 cup | vanilla protein powder |
| 1/4 teaspoon | salt |
Tools You’ll Actually Use
- 12-cup muffin tin
- Parchment paper muffin liners
- 2 microwave-safe bowls
- Measuring cups and spoons
- Spoon or small offset spatula for spreading
- Airtight container for storage
Step-by-Step Instructions
Making these High Protein Reeses at home is honestly therapeutic — there’s something so satisfying about layering chocolate and peanut butter into perfect little cups. Let me walk you through it.
Step 1: Line your 12-cup muffin tin with parchment paper muffin liners. Trust me, these work way better than regular paper liners because the cups pop right out without sticking.
Step 2: Add the 12 oz semi-sweet chocolate chips and 1 teaspoon solid coconut oil to a microwave-safe bowl. Microwave in 30-second intervals, stirring thoroughly each time, until the chocolate is completely melted and smooth — this usually takes 90 seconds to 2 minutes total.
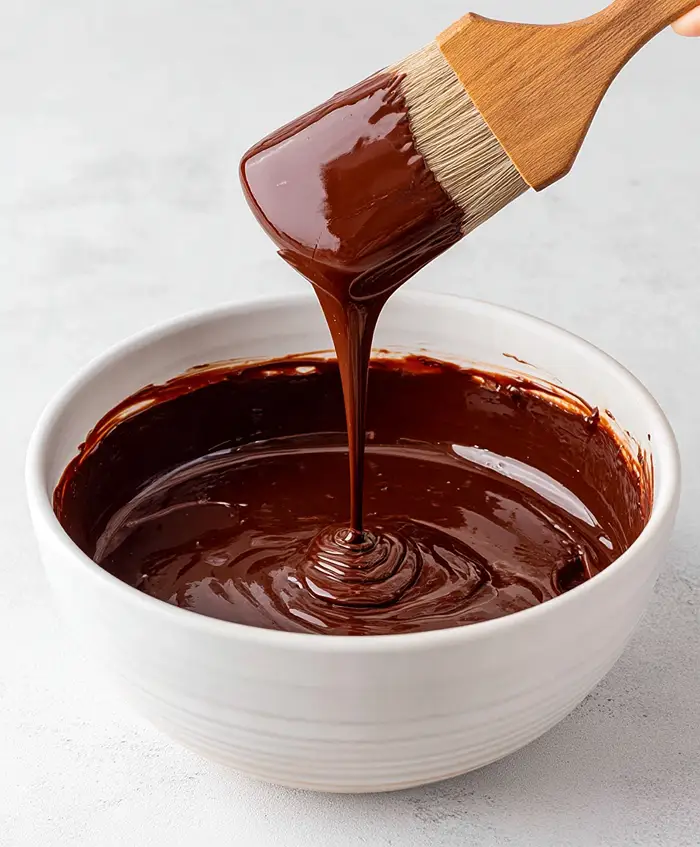
The coconut oil helps create that signature glossy finish and makes the chocolate easier to work with.
Step 3: Once your chocolate is silky smooth, stir in the 1/4 teaspoon vanilla extract. This little addition makes such a difference in flavor — you’ll taste it.
Step 4: Pour 1 heaping teaspoon of melted chocolate into the bottom of each muffin liner, then use the back of your spoon to spread it out to the edges in a flat, even layer. You want it thin enough to leave room for filling but thick enough to hold its shape — about 1/8 inch works perfectly. Repeat for all 12 cups.
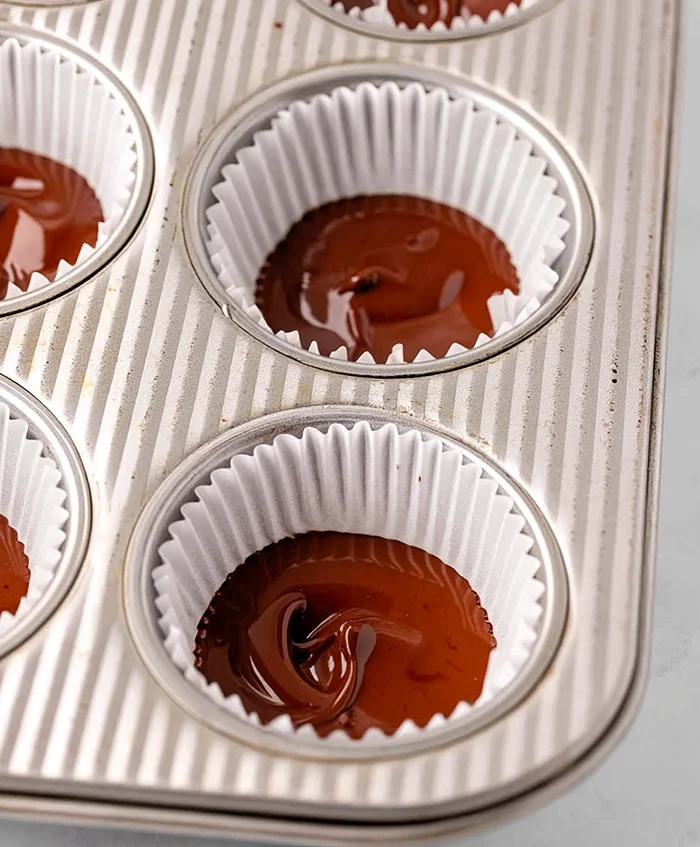
Step 5: Pop the muffin tin in the refrigerator for about 10 minutes while you make the peanut butter filling. This firms up the chocolate base so the filling doesn’t sink through.
Step 6: Place the 1/4 cup natural creamy peanut butter in a microwave-safe bowl and microwave for 15-20 seconds until it’s runny and easy to stir. Room-temperature peanut butter won’t blend as smoothly with the protein powder, so this step matters.
Step 7: Stir in the 1/3 cup vanilla protein powder, 1/4 teaspoon salt, and 2 tablespoons pure maple syrup until completely combined. The mixture should be thick but pliable — kind of like cookie dough. If it’s too dry, add another teaspoon of maple syrup; if it’s too wet, add a little more protein powder.
Step 8: Divide the peanut butter filling into 12 equal portions and gently shape each one into a disc that’s slightly smaller than the width of your muffin liner — about the size of a quarter in thickness. I find it easiest to roll them between my palms first, then flatten gently.
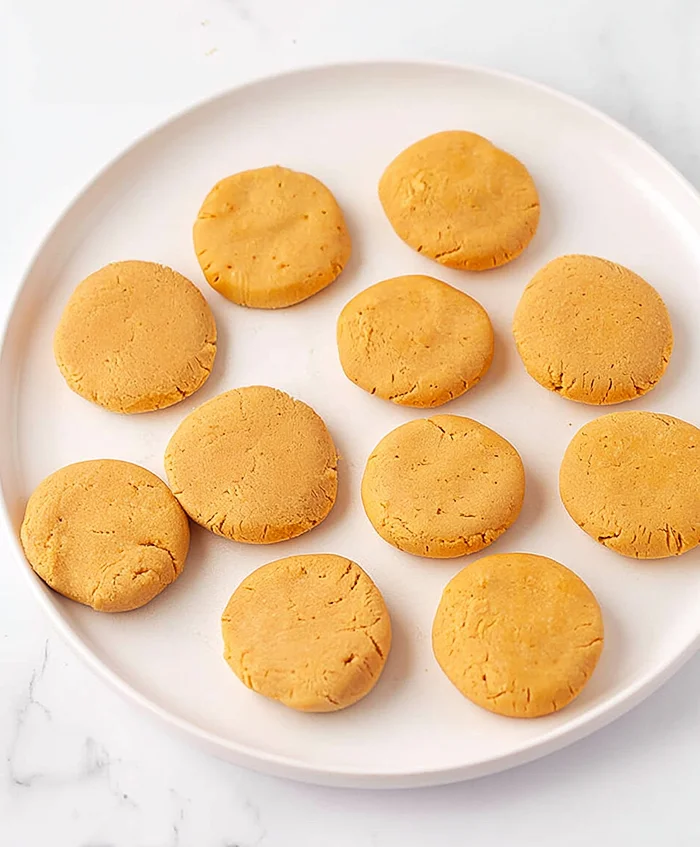
Step 9: Remove the muffin tin from the refrigerator and place one peanut butter disc onto the center of each chilled chocolate cup. Press down very gently — you just want them to settle in place, not squish out to the edges.
Step 10: If your leftover melted chocolate has hardened while you worked on the filling, microwave it for another 15-20 seconds to loosen it back up. You want it pourable but not hot.
Step 11: Drizzle the remaining chocolate over the tops of each peanut butter disc, using the back of your spoon to smooth it out in an even layer that reaches the edges and completely seals in the filling. Make sure there are no peanut butter gaps showing — this gives you that perfect Reese’s look.
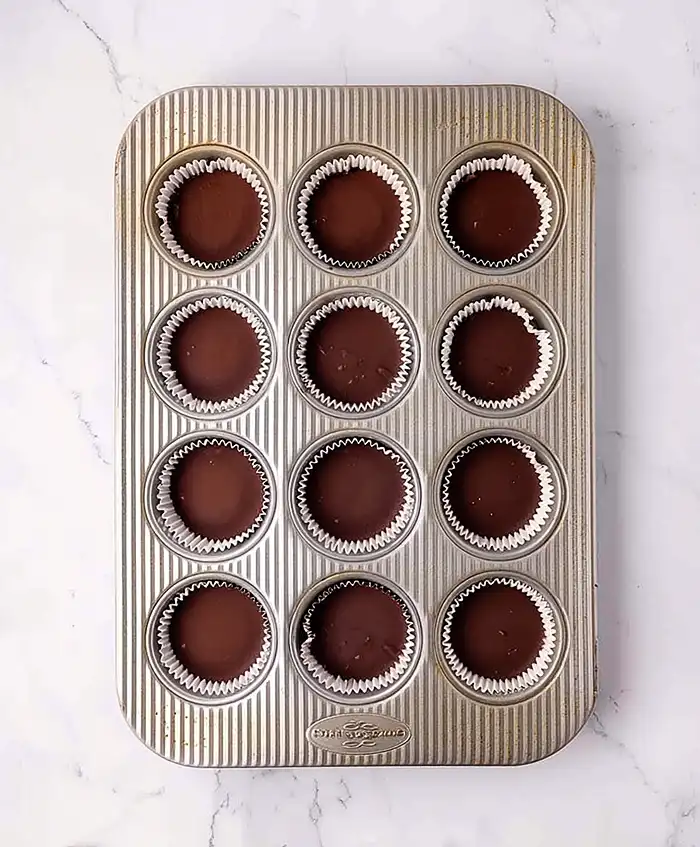
Step 12: Place the peanut butter cups back in the refrigerator for at least 1 hour, or until completely set. They’ll firm up beautifully and taste absolutely incredible. Once set, store them in an airtight container in the refrigerator or freezer — though I’m betting they won’t last long enough to worry about storage.
Claire’s Pro Tips & Gentle Guidance
Here’s what I’ve learned from making batch after batch of these Protein Reeses — these little tricks make all the difference between good cups and absolutely perfect ones.
Use natural peanut butter where the only ingredients are peanuts and salt. Regular peanut butter with added oils and sugars won’t give you the same clean flavor or texture. I love brands like Teddie or Smucker’s Natural — they blend perfectly with the protein powder.
Don’t skip the coconut oil in the chocolate layer. It creates that signature glossy finish and helps the chocolate set with a satisfying snap when you bite into it. Butter won’t work the same way here.
Make sure your peanut butter discs are smaller than the muffin liner width. If they touch the edges, you won’t get that clean chocolate seal around the sides, and they’ll look homemade in the wrong way. Leave about a quarter-inch border all around.
Freeze them for 20 minutes if you’re impatient like me. They’ll set faster in the freezer, and honestly, I think they taste even better super cold — like biting into a frozen candy bar on a summer day.
For more detailed insights on working with protein powder in desserts, check out Precision Nutrition‘s expert baking guidance — they break down which types work best for different treats.
Quick Fixes for Protein Copycat Reese’s Cups
Problem: The peanut butter filling is too dry and crumbly. Add an extra teaspoon of maple syrup or a tiny bit of melted coconut oil to the mixture. Different protein powder brands absorb liquid differently, so you might need to adjust slightly.
Problem: The chocolate layer is too thick and there’s not enough for the top. You used too much chocolate on the bottom layer. Aim for about 1 teaspoon per cup — it should just barely cover the bottom in a thin layer. If this happens, melt another 4 oz of chocolate chips to finish the tops.
Problem: The peanut butter filling is showing through the top chocolate layer. Your top chocolate layer was too thin or not spread all the way to the edges. Melt a little extra chocolate and add another thin layer over any spots where the filling peeks through.
Problem: The cups are sticking to the muffin liners. You didn’t use parchment paper liners. Regular paper liners stick like crazy to homemade chocolate. Parchment liners are a total game-changer — the cups pop right out cleanly every time.
Variations & Fun Twists
These Protein Copycat Reese’s Cups are incredibly versatile — here’s how to make them your own.
Go dark chocolate: Swap the semi-sweet chocolate chips for dark chocolate (70% cacao or higher) if you want a richer, less-sweet version. The peanut butter filling is sweet enough to balance it beautifully.
Try almond butter or cashew butter: If peanut allergies are a concern or you just want a different flavor, almond butter works perfectly. Cashew butter creates an even creamier, milder filling that’s totally swoon-worthy.
Make them mini: Use a mini muffin tin instead and divide the recipe into 24 bite-sized cups. They’re perfect for portion control or when you want just a little something sweet.
Add a sprinkle of sea salt: Before the top chocolate layer sets completely, sprinkle a few flakes of flaky sea salt on top. The sweet-salty combo is ridiculously good — kind of like those fancy salted caramels but in peanut butter cup form.
Create a white chocolate version: Use white chocolate chips instead of semi-sweet for the coating. It’s sweeter and creates a totally different (but equally delicious) flavor profile that looks gorgeous too.
Serving, Storage & Reheating
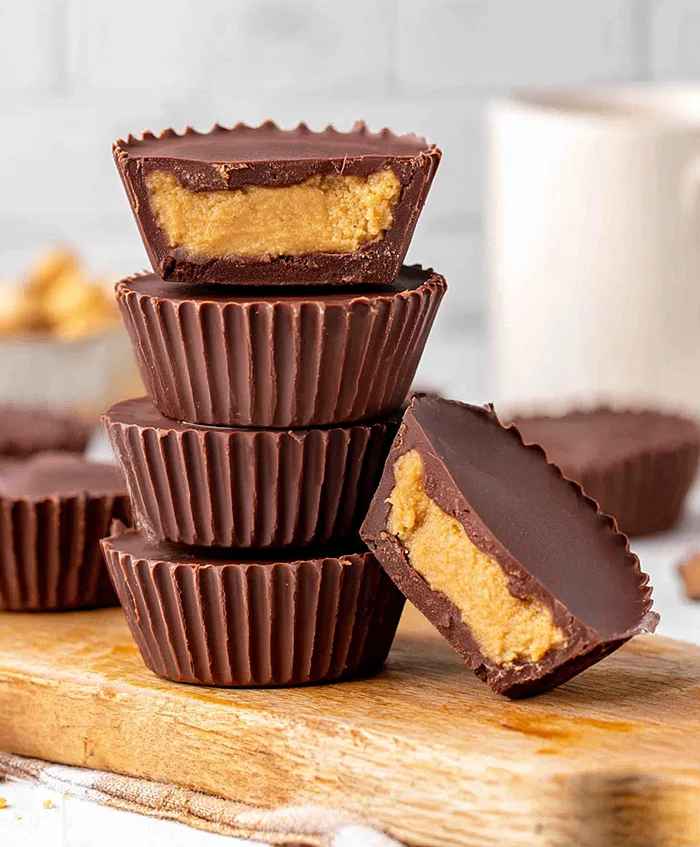
Serve these High Protein Reeses straight from the fridge or freezer for the best texture — they’re meant to be enjoyed cold, just like the store-bought version. I love keeping a stash in the freezer for grab-and-go snacks, post-workout fuel, or when I need something sweet after dinner that won’t derail my day.
Store your protein peanut butter cups in an airtight container in the refrigerator for up to 2 weeks, or in the freezer for up to 3 months. Layer them between pieces of parchment paper so they don’t stick together.
No reheating needed here — these are designed to be enjoyed cold! If you freeze them, you can eat them straight from the freezer (they’re amazing frozen) or let them sit at room temperature for about 5 minutes to soften slightly.
No-Waste Kitchen Magic
Save those chocolate drippings: Any leftover melted chocolate in your bowl? Drizzle it over fresh strawberries, like in my Strawberry Cream Cheese Heart Danishes, or spread it on apple slices for a quick snack. Waste not, want not!
Repurpose day-old cups: If any cups somehow survive long enough to get a little less fresh (unlikely, but still), crumble them over yogurt parfaits or vanilla ice cream for a protein-packed topping that tastes like candy bar pieces.
Double the filling for energy balls: Make a double batch of the peanut butter filling, roll it into balls, and skip the chocolate coating for quick no-bake protein bites. They’re perfect for tossing in lunchboxes or gym bags.
FAQs
Can I freeze these Protein Copycat Reese’s Cups?
Absolutely! They freeze beautifully for up to 3 months in an airtight container. I actually think they taste even better frozen — the texture is firmer and more like a frozen candy bar.
What’s the best way to store Protein Copycat Reese’s Cups?
Keep them in an airtight container in the refrigerator for up to 2 weeks, or in the freezer for longer storage. Layer them between parchment paper to prevent sticking.
How do I know when the chocolate is melted enough?
The chocolate should be completely smooth with no lumps remaining when you stir it. It should drizzle off your spoon in a steady stream, not clump or fall in chunks.
Will these protein cups melt at room temperature?
If left out for more than 30 minutes in a warm room, they’ll start to soften. That’s why I always recommend storing them in the fridge or freezer and enjoying them cold.
How can I make these Protein Copycat Reese’s Cups dairy-free?
Use dairy-free chocolate chips (like Enjoy Life brand) and make sure your protein powder is plant-based. Everything else in the recipe is already dairy-free!
Cozy Closing
I’d love to see your spin on these Protein Copycat Reese’s Cups! Drop a comment below with your photos — I’m obsessed with seeing how everyone makes them their own. Whether you go mini, try almond butter, or add that flaky sea salt on top, these protein-packed cups are so versatile that I bet you’ve already got amazing variations in mind.
And if you’re looking for more fun snack ideas, check out my Taco Ranch Bites for something savory, or my Dominican Flag Recipe for a stunning dessert that’ll wow your guests. Happy baking, friends!
I’m Claire Whitmore — a dessert daydreamer from Asheville, NC. For me, baking isn’t about perfect pastries — it’s about the joy of sharing something sweet (and maybe sneaking an extra scoop of icing). Or in this case, an extra protein cup or three.
Protein Copycat Reese’s Cups
Equipment
- 12-cup muffin tin
- Parchment paper muffin liners
- 2 microwave-safe bowls
- Measuring cups and spoons
- Spoon or small offset spatula
- Airtight container
Ingredients
For the Chocolate
- 12 oz semi-sweet chocolate chips
- 1 teaspoon coconut oil measured solid
- ¼ teaspoon vanilla extract
For the Peanut Butter Filling
- ¼ cup natural creamy peanut butter only ingredients should be peanuts and salt
- 2 tablespoons pure maple syrup
- ⅓ cup vanilla protein powder
- ¼ teaspoon salt
Instructions
- Line your 12-cup muffin tin with parchment paper muffin liners.
- Add the 12 oz semi-sweet chocolate chips and 1 teaspoon solid coconut oil to a microwave-safe bowl. Microwave in 30-second intervals, stirring thoroughly each time, until the chocolate is completely melted and smooth — this usually takes 90 seconds to 2 minutes total.
- Once your chocolate is silky smooth, stir in the 1/4 teaspoon vanilla extract.
- Pour 1 heaping teaspoon of melted chocolate into the bottom of each muffin liner, then use the back of your spoon to spread it out to the edges in a flat, even layer. Repeat for all 12 cups.
- Pop the muffin tin in the refrigerator for about 10 minutes while you make the peanut butter filling.
- Place the 1/4 cup natural creamy peanut butter in a microwave-safe bowl and microwave for 15-20 seconds until it’s runny and easy to stir.
- Stir in the 1/3 cup vanilla protein powder, 1/4 teaspoon salt, and 2 tablespoons pure maple syrup until completely combined. The mixture should be thick but pliable.
- Divide the peanut butter filling into 12 equal portions and gently shape each one into a disc that’s slightly smaller than the width of your muffin liner.
- Remove the muffin tin from the refrigerator and place one peanut butter disc onto the center of each chilled chocolate cup. Press down very gently.
- If your leftover melted chocolate has hardened while you worked on the filling, microwave it for another 15-20 seconds to loosen it back up.
- Drizzle the remaining chocolate over the tops of each peanut butter disc, using the back of your spoon to smooth it out in an even layer that reaches the edges and completely seals in the filling.
- Place the peanut butter cups back in the refrigerator for at least 1 hour, or until completely set. Store in an airtight container in the refrigerator or freezer.