Friendsgiving Stuffing Muffins
Hey there, I’m Claire Whitmore — a pastry whisperer in Asheville, NC, where butter totally counts as self-care. These friendsgiving stuffing muffins are about to become your favorite way to serve holiday side dishes without the stress of a giant casserole dish or awkward scooping at the table.
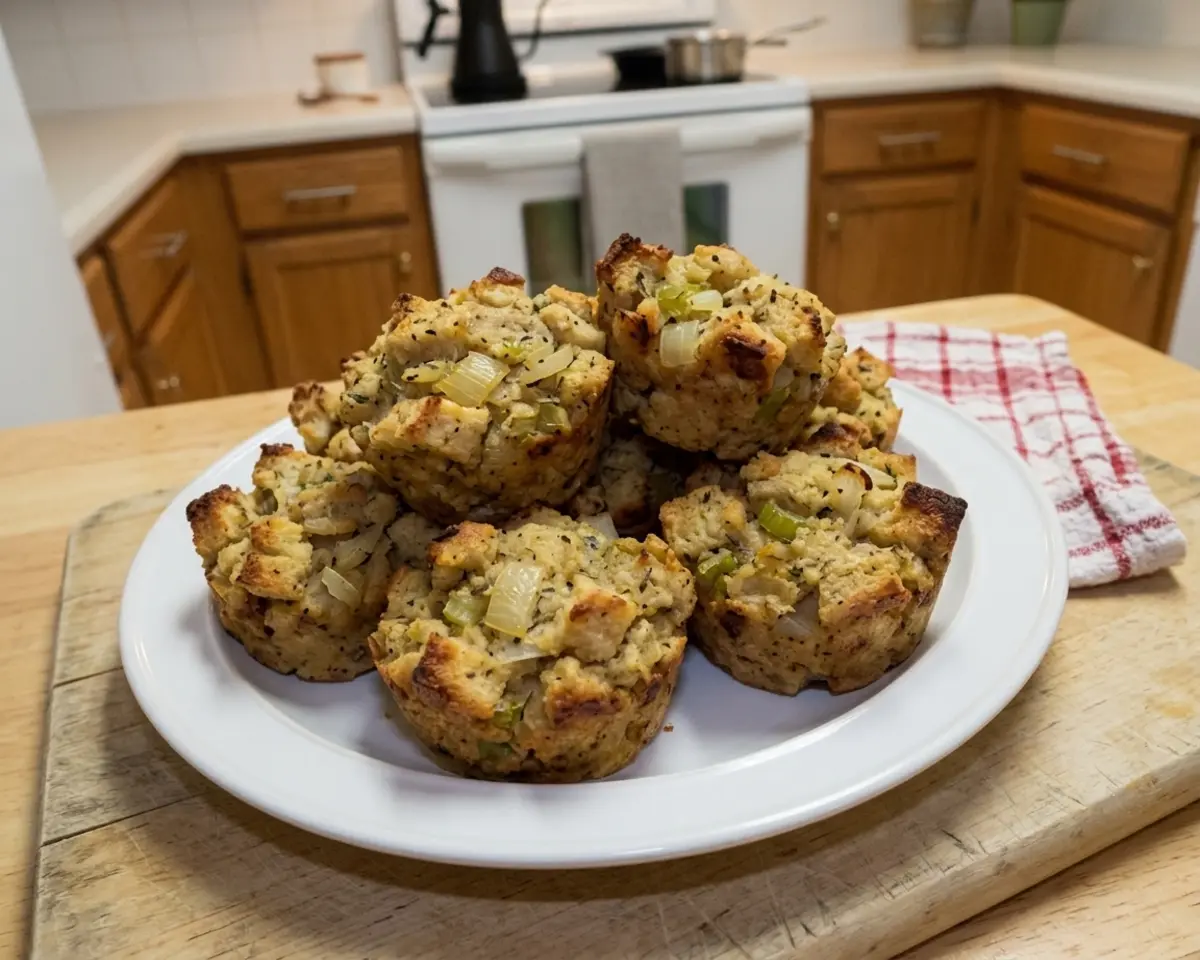
They’re packed with savory bread cubes, aromatic sage and thyme, tender sautéed onions and celery, plus fresh parsley for a pop of color — and they bake up in perfectly portioned individual cups that make serving a breeze.
I stumbled onto this idea last November when I was hosting a cozy Friendsgiving for eight and realized my oven real estate was maxed out. Instead of fighting for space with the turkey and sweet potatoes, I baked the stuffing in muffin tins and everyone went wild. They’re crispy on top, tender inside, and honestly so cute you’ll want to make them year-round.
Plus, they reheat beautifully, freeze like a dream, and you can grab one (or three) without anyone judging your portion size. That’s the kind of holiday magic we all need.
Table of Contents
Little Snapshot: What This Recipe Delivers
These friendsgiving stuffing muffins give you all the flavor of traditional Thanksgiving stuffing baked into twelve individual portions with golden, crispy tops and tender, herb-scented centers. They take about 35 minutes start to finish, use simple pantry ingredients, and free up oven space while making serving (and seconds) a total breeze.
Why You’ll Love This Recipe 🌸
- These friendsgiving stuffing muffins take less time than arguing over who gets the corner piece of casserole stuffing.
- They’re perfect for meal prep — bake a batch on Sunday and reheat them all week for savory breakfast muffins or quick lunch sides.
- No more soggy middles or unevenly baked stuffing — every muffin gets a crispy golden top and a moist, flavorful center.
- According to Serious Eats’ comprehensive stuffing science guide, maximizing surface area creates the best crispy-to-tender ratio — and this recipe proves exactly why.
Quick Facts ⚡
Here’s the quick scoop on this friendsgiving stuffing muffins recipe.
- CourseSide Dish
- Prep Time10 minutes
- Cook Time25 minutes
- Total Time35 minutes
- Servings12 muffins
- DifficultyEasy
Nutritional Peek
| Nutrient | Amount per Muffin |
|---|---|
| Calories | 95 |
| Protein | 3g |
| Carbohydrates | 13g |
| Fat | 3g |
| Fiber | 1g |
| Sodium | 280mg |
Ingredients
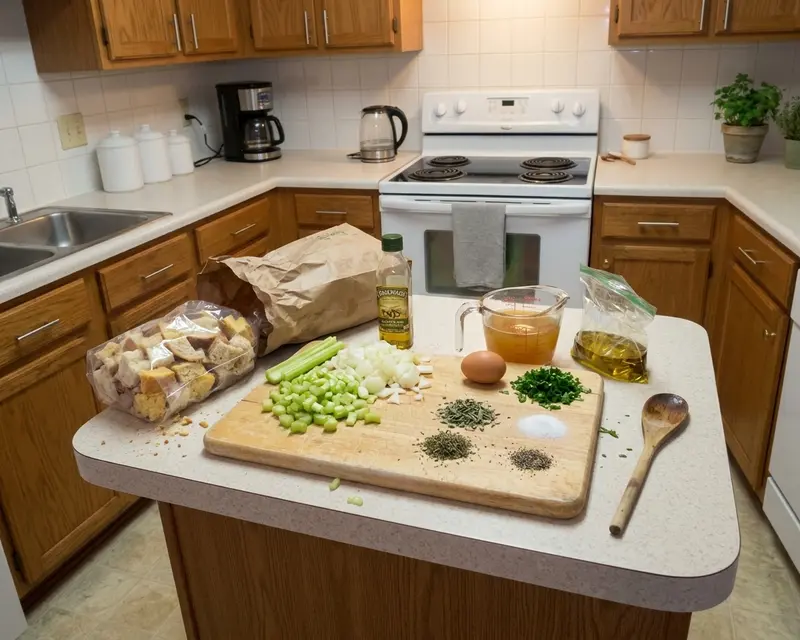
These thanksgiving stuffing cups start with a classic aromatic base — olive oil, yellow onion, and celery — that gets sautéed until tender and fragrant. For the seasoning blend, you’ll use dried sage, thyme, black pepper, and salt to give every bite that cozy holiday flavor.
The bread cubes (choose stale white bread, sourdough, or cornbread) soak up a savory custard made from chicken or vegetable broth whisked with a lightly beaten egg, then fresh parsley adds a bright, herbaceous finish.
| Amount | Ingredient |
|---|---|
| 1 tablespoon | olive oil |
| 1 cup | chopped yellow onion (about 1 small) |
| 1 cup | chopped celery (about 2 stalks) |
| 1 teaspoon | dried sage |
| 1/2 teaspoon | dried thyme |
| 1/4 teaspoon | black pepper |
| 1/2 teaspoon | salt |
| 4 cups | dried bread cubes (from stale white bread, sourdough, or cornbread) — yes, stale is key here for the best texture |
| 1 3/4 cups | chicken or vegetable broth (go veggie if you’re keeping it plant-based) |
| 1 large | egg, lightly beaten |
| 1/4 cup | chopped fresh parsley |
Tools You’ll Actually Use
- 12-cup muffin tin
- Large skillet
- Large mixing bowl
- Small mixing bowl
- Whisk
- Wooden spoon or spatula
- Measuring cups and spoons
- Paper muffin liners (optional, but they make cleanup easier)
Step-by-Step Instructions
Let’s turn those simple ingredients into golden, savory individual stuffing portions that’ll have everyone asking for seconds. Each step is designed to build flavor and texture, so your friendsgiving stuffing muffins come out crispy on top and tender inside every single time.
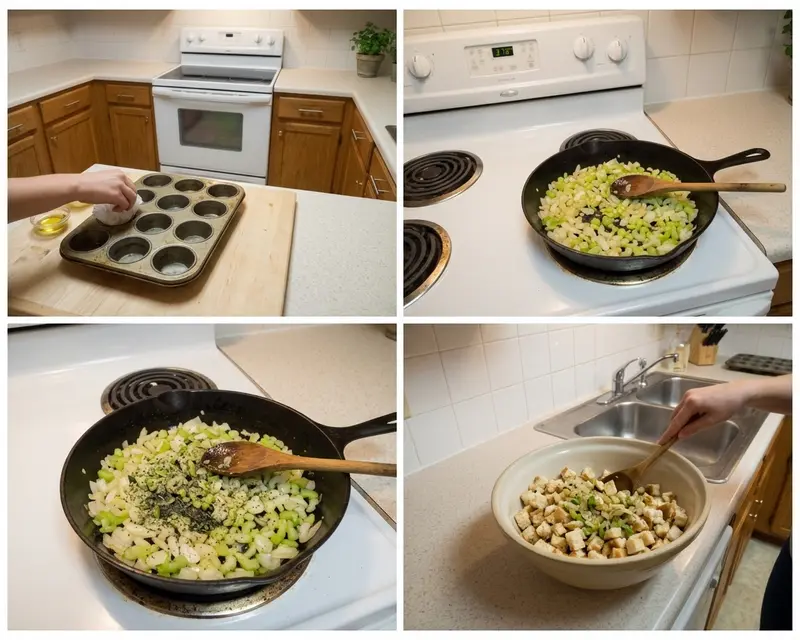
- Preheat and prep your muffin tin. Set your oven to 375°F (190°C) and either grease a 12-cup muffin tin generously with butter or nonstick spray, or line each cup with a paper liner. This prevents sticking and makes serving a breeze.
- Sauté the aromatic vegetables. In a large skillet over medium heat, warm the 1 tablespoon of olive oil. Add the 1 cup of chopped yellow onion and 1 cup of chopped celery, then cook for 5-7 minutes, stirring occasionally, until both are softened and the onion turns translucent. You’ll know they’re ready when your kitchen smells amazing and the veggies are tender but not browned.
- Add the herbs and seasonings. Stir in the 1 teaspoon of dried sage, 1/2 teaspoon of dried thyme, 1/4 teaspoon of black pepper, and 1/2 teaspoon of salt. Cook for another minute, stirring constantly, until the herbs are fragrant and toasted. This quick bloom intensifies their flavor.
- Combine the bread cubes with the veggie mixture. In a large bowl, add the 4 cups of dried bread cubes. Pour the cooked onion, celery, and herb mixture over the bread and toss gently to distribute the vegetables and seasonings evenly throughout the cubes.
- Make the savory custard. In a separate small bowl, whisk together the 1 3/4 cups of chicken or vegetable broth and the 1 lightly beaten large egg until smooth. This mixture will bind the bread cubes and keep your muffins moist and flavorful.
- Moisten the bread mixture. Pour the broth-egg mixture over the bread cubes and stir gently with a wooden spoon or your hands until all the bread is evenly moistened. Don’t overmix — you want the cubes to hold their shape, not turn into mush.
- Fold in the fresh parsley. Add the 1/4 cup of chopped fresh parsley to the stuffing mixture and fold it in gently. The parsley adds a pop of color and a fresh, herbaceous note that balances the savory richness.
- Fill the muffin cups. Divide the stuffing mixture evenly among the 12 muffin cups, using a spoon or your hands to press down lightly so each portion holds together. You want them packed just enough to stay cohesive, but not so tight that they turn dense.
- Bake until golden and crispy. Place the muffin tin in your preheated 375°F oven and bake for 20-25 minutes, or until the tops are golden brown and the muffins are heated through. If you love an extra-crispy top, crank the oven up to 400°F for the last 5 minutes — your kitchen will smell like a cozy Thanksgiving feast.
- Cool and serve. Let the friendsgiving stuffing muffins cool in the tin for about 5 minutes to set up, then gently remove them with a fork or your fingers. Serve warm alongside your favorite holiday mains, or sneak one (or two) as a savory snack.
Claire’s Pro Tips & Gentle Guidance
These individual stuffing portions are pretty forgiving, but a few little tricks will take them from good to “please-make-these-every-week” amazing. I’ve learned most of these the hard way, so you don’t have to!
Use day-old or slightly stale bread cubes for the best texture. Fresh bread turns soggy and dense when it soaks up the broth, but stale cubes hold their shape and develop those crispy edges we all crave.
Don’t skip the egg in the broth mixture. It acts as a binder and gives your muffins structure so they don’t fall apart when you pop them out of the tin.
Press the stuffing mixture gently but firmly into each muffin cup. You want them compact enough to hold together, but not so tight that they bake up dry or dense.
For extra flavor and richness, swap half the broth for melted butter. I learned this trick from my friend who swears by it for holiday side dish muffins, and honestly, she’s not wrong.
If you’re making these ahead, bake them fully, let them cool, then store in an airtight container in the fridge for up to three days. Reheat in a 350°F oven for about 10 minutes to bring back that crispy top.
According to King Arthur Baking’s make-ahead holiday strategies, freezing baked stuffing portions locks in freshness without sacrificing texture. Wrap each muffin individually in plastic wrap, freeze for up to two months, then thaw overnight in the fridge and reheat before serving.
Quick Fixes for Friendsgiving Stuffing Muffins
Muffins are too dry: You probably didn’t use enough broth, or your bread cubes were extra absorbent. Next time, add an extra 1/4 cup of broth to the mixture, and make sure every cube is moistened before baking.
Muffins are falling apart: This usually means the egg didn’t get mixed in well, or you didn’t press the mixture firmly enough into the cups. Whisk that egg thoroughly into the broth, and give each muffin a gentle but firm press before baking.
Tops aren’t browning: Your oven might be running cool, or the muffins need a little extra time. Bump the temperature to 400°F for the last 5 minutes, or switch on the broiler for 1-2 minutes (but watch them like a hawk so they don’t burn).
Muffins are sticking to the tin: You need more grease, friend. Use butter or nonstick spray generously, or line the cups with paper liners. If they’re already baked and stuck, run a butter knife gently around the edges to loosen them.
Texture is mushy instead of tender: Fresh bread is the usual culprit. Always use stale or toasted bread cubes, and make sure they’re fully dried out before you add the broth mixture.
Variations & Fun Twists
Once you nail the basic friendsgiving stuffing muffins recipe, the fun really begins. These savory breakfast muffins are crazy versatile, so feel free to riff on flavors, ingredients, and mix-ins based on what you have or what you’re craving.
Sausage and sage: Brown 1/2 pound of crumbled breakfast sausage in the skillet before adding the onion and celery, then proceed with the recipe. The savory, slightly spicy sausage makes these hearty enough to serve as a main dish.
Cranberry and pecan: Fold in 1/2 cup of dried cranberries and 1/3 cup of toasted chopped pecans along with the parsley. The sweet-tart cranberries and crunchy pecans add a festive, holiday vibe.
Gluten-free version: Swap the regular bread cubes for your favorite gluten-free bread (make sure it’s stale or toasted), and double-check that your broth is certified gluten-free. Everything else stays the same.
Vegan thanksgiving stuffing cups: Use vegetable broth and replace the egg with 2 tablespoons of ground flaxseed mixed with 5 tablespoons of water (let it sit for 5 minutes to thicken). Brush the tops with a little olive oil before baking for extra crispiness.
Herb lover’s twist: Add 1/2 teaspoon of dried rosemary and a pinch of ground fennel seed to the herb mix. Fresh herbs like chopped rosemary or thyme also work beautifully if you have them on hand.
Cornbread style: Use all cornbread cubes instead of white bread or sourdough for a Southern-inspired spin. The slightly sweet, crumbly texture is amazing with the savory seasonings.
Pair these muffins with Grandma’s classic Thanksgiving stuffing for a side-by-side comparison, or serve them alongside sweet potato casserole with marshmallows and creamy mashed potatoes for a full holiday spread.
Serving, Storage & Reheating
Serve these friendsgiving stuffing muffins warm, straight from the oven, as a side dish for Thanksgiving, Friendsgiving, or any cozy fall dinner. They’re perfect alongside roasted turkey, glazed ham, or even a simple rotisserie chicken. If you’re hosting a smaller gathering, check out my Thanksgiving dinner for two guide for more scaled-down holiday ideas.
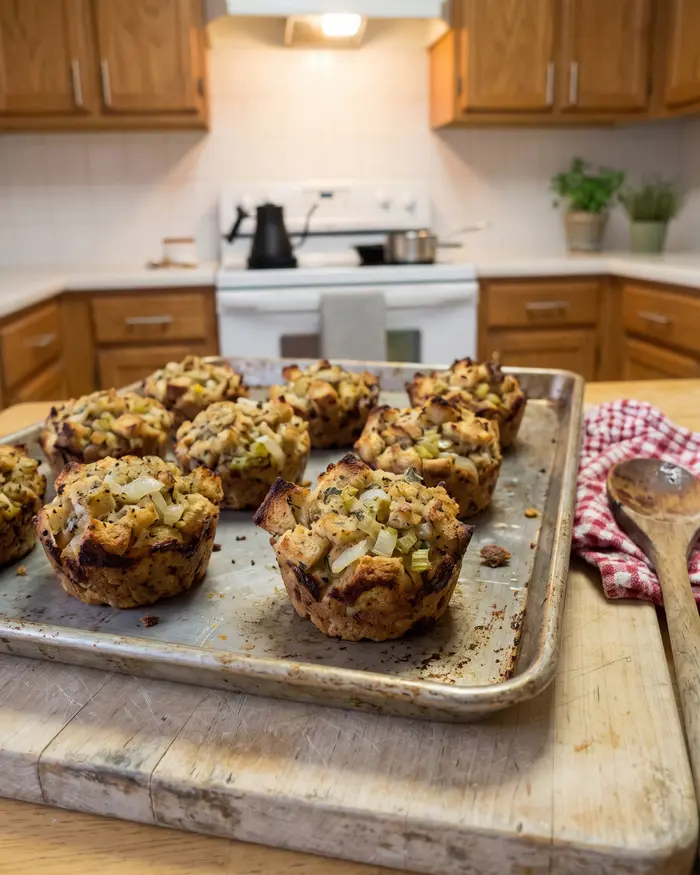
To store, let the muffins cool completely, then transfer them to an airtight container and refrigerate for up to four days. They also freeze beautifully — wrap each muffin individually in plastic wrap, then place them all in a freezer-safe bag or container for up to two months.
To reheat from the fridge, place the muffins on a baking sheet and warm them in a 350°F oven for about 10 minutes, or until heated through and the tops are crispy again. If reheating from frozen, thaw them overnight in the fridge first, then follow the same oven method. You can also microwave them for 30-45 seconds, but they won’t be as crispy (still delicious, though).
No-Waste Kitchen Magic
Got leftover friendsgiving stuffing muffins? (Honestly, if you do, I’m impressed.) Crumble them up and use them as a crunchy topping for casseroles or baked mac and cheese. The crispy edges add amazing texture.
Turn day-old muffins into savory stuffing croutons by cutting them into cubes and toasting them in a 350°F oven for 10-15 minutes. Toss them on salads or soups for a holiday-flavored crunch.
If your muffins didn’t brown as much as you’d like, slice them in half and pan-fry the cut sides in a little butter until golden and crispy. It’s like a savory stuffing “toast” and it’s ridiculously good with a fried egg on top.
Use any leftover broth mixture to make a quick gravy. Just whisk it into a small saucepan with a tablespoon of butter and a teaspoon of flour, then simmer until thickened. Drizzle it over the muffins for extra richness.
Freeze any extra muffins individually so you can pull out just one or two for quick breakfasts or lunches. They reheat in minutes and make meal prep so much easier during the busy holiday season.
FAQs
Here are the most common questions I get about making these individual stuffing portions, plus the answers that’ll help you nail them every time.
What are Friendsgiving stuffing muffins?
Friendsgiving stuffing muffins are individual portions of traditional stuffing baked in a muffin tin. They combine classic stuffing ingredients like bread cubes, vegetables, herbs, and broth, but are portioned into convenient, crispy-edged servings perfect for a Friendsgiving celebration.
How far in advance can I make stuffing muffins?
You can prepare stuffing muffins up to 2 days in advance. Once baked and cooled completely, store them in an airtight container in the refrigerator. Reheat them in a 350-degree oven for about 10-15 minutes before serving to restore their crispy exterior.
Can I freeze Friendsgiving stuffing muffins?
Yes, stuffing muffins freeze very well. After baking and cooling completely, wrap them individually in plastic wrap or aluminum foil, then place in a freezer-safe bag or container. They can be frozen for up to 3 months. Thaw overnight in the refrigerator and reheat in the oven before serving.
What type of bread works best for stuffing muffins?
Day-old or slightly stale bread works best for stuffing muffins. Good options include white bread, sourdough, French bread, or cornbread. The bread should be cut into cubes and allowed to dry out slightly, which helps it absorb the broth and seasonings without becoming too soggy.
How do I prevent stuffing muffins from sticking to the pan?
To prevent sticking, generously grease each muffin cup with butter or cooking spray. You can also use paper or silicone muffin liners for easy removal. Another option is to use a non-stick muffin tin and make sure to let the muffins cool for about 5 minutes before attempting to remove them from the pan.
Cozy Closing
I’d love to see your spin on these friendsgiving stuffing muffins! Drop a comment below with your photos or tell me what mix-ins you tried — I bet you’ve got some amazing variations already in mind. These thanksgiving stuffing cups are so versatile and forgiving, and they make any holiday meal feel a little more special without any extra stress.
If you’re planning a smaller gathering, don’t miss my collection of 20 easy, budget-friendly Thanksgiving sides that pair perfectly with these muffins. Happy baking, and happy Friendsgiving!
I’m Claire Whitmore — a dessert daydreamer from Asheville, NC. For me, baking isn’t about perfect pastries — it’s about the joy of sharing something sweet (and maybe sneaking an extra scoop of icing).
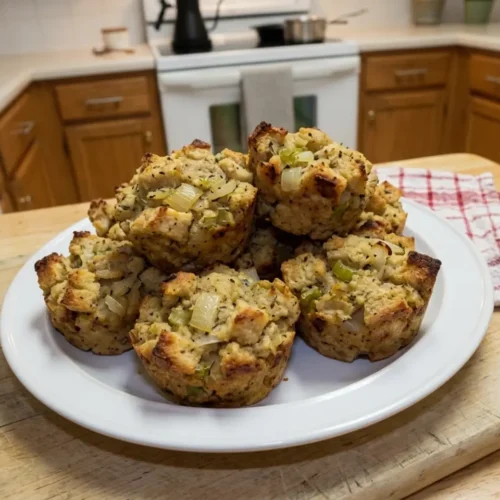
Friendsgiving Stuffing Muffins
Ingredients
- 1 tablespoon olive oil
- 1 cup chopped yellow onion about 1 small
- 1 cup chopped celery about 2 stalks
- 1 teaspoon dried sage
- ½ teaspoon dried thyme
- ¼ teaspoon black pepper
- ½ teaspoon salt
- 4 cups dried bread cubes from stale white bread, sourdough, or cornbread
- 1 ¾ cups chicken or vegetable broth
- 1 large egg lightly beaten
- ¼ cup chopped fresh parsley
Instructions
- Preheat your oven to 375°F (190°C). Grease a 12-cup muffin tin or line with paper liners.
- In a large skillet, heat the olive oil over medium heat. Add the chopped onion and celery and cook until softened, about 5-7 minutes.
- Stir in the dried sage, thyme, black pepper, and salt. Cook for another minute until fragrant.
- In a large bowl, combine the dried bread cubes with the cooked onion and celery mixture.
- In a separate small bowl, whisk together the chicken or vegetable broth and the lightly beaten egg. Pour this mixture over the bread cubes and stir gently until all the bread is moistened.
- Fold in the fresh parsley.
- Divide the stuffing mixture evenly among the 12 muffin cups, pressing down lightly.
- Bake for 20-25 minutes, or until the tops are golden brown and the muffins are heated through. If you like a crispier top, you can increase the oven temperature to 400°F (200°C) for the last 5 minutes.
- Let cool in the muffin tin for a few minutes before removing and serving.