Cured Egg Yolk Recipe Soy Sauce
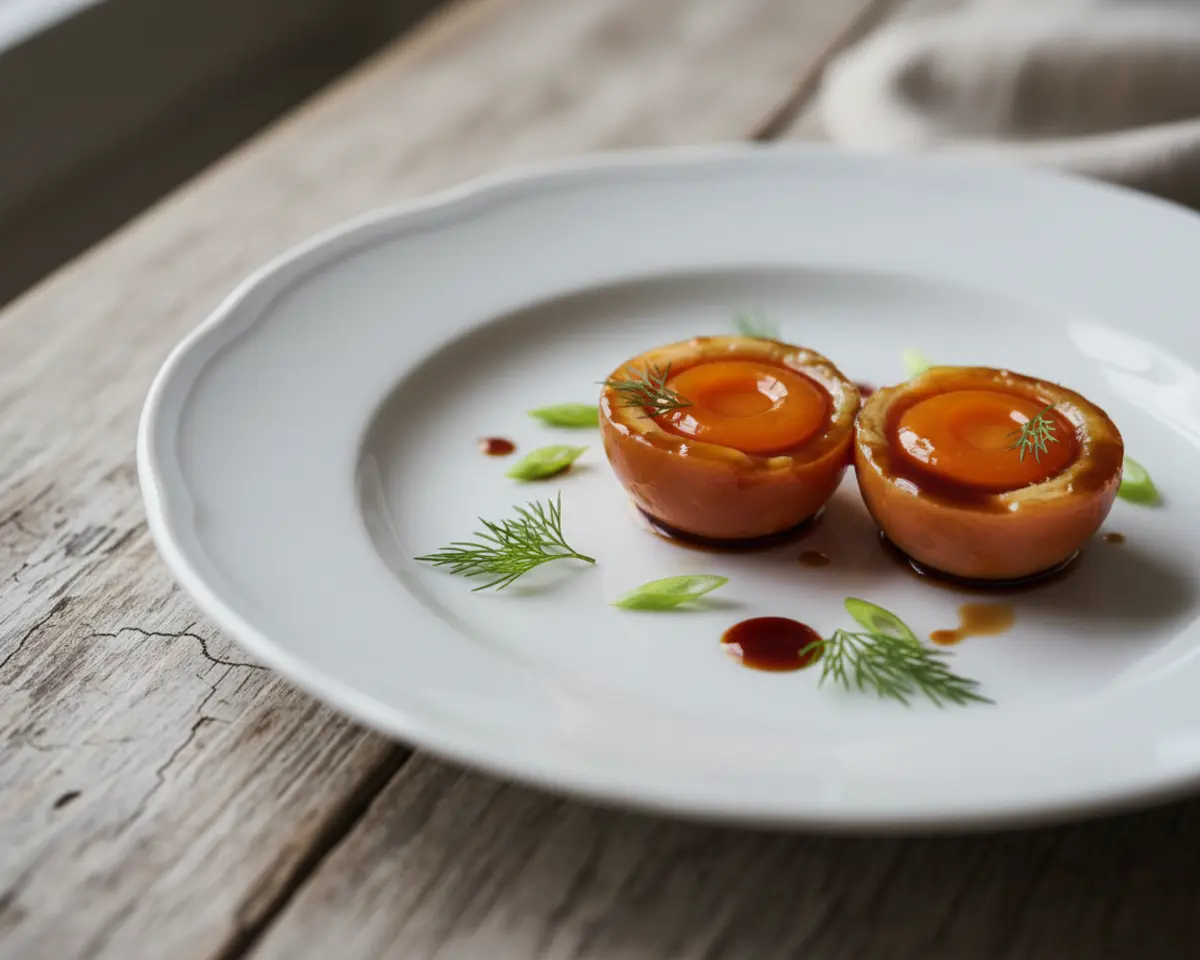
This cured egg yolk recipe soy sauce technique transforms simple egg yolks into luxurious, umami-rich jewels with just two ingredients and minimal effort. The soy sauce cures the yolks into firm, slightly translucent beauties that add instant sophistication to rice bowls, noodles, and toast.
I’m Linda Sandra, your Charleston kitchen friend who’s always hunting for those magical little techniques that make everyday meals feel special. This cured egg yolk recipe is one of those secrets that sounds fancy but is honestly easier than making scrambled eggs.
The Japanese have been perfecting egg yolk curing for generations, and the soy sauce method delivers concentrated umami flavor with a silky, slightly jammy texture. It’s the kind of thing you see at upscale ramen shops, but you can make it in your own fridge with zero fancy equipment.
Table of Contents
Quick Overview
Loved creating these umami-packed cured egg yolks? If you’re as egg-cited as we are about the incredible versatility of this kitchen staple, you’ll definitely want to explore our wider collection of delicious egg and omelette recipes for even more inspiration!
Little Snapshot: What This Recipe Delivers
This cured egg yolk recipe soy sauce method takes just 6-12 hours of passive curing time to create firm, intensely savory egg yolks perfect for grating over pasta, slicing onto rice bowls, or elevating avocado toast. You’ll get restaurant-quality umami egg yolks with only two ingredients and zero cooking required.
Why You’ll Love This Recipe 🌸
- This cured egg yolk recipe soy sauce takes less active time than brewing your morning coffee.
- You only need two ingredients you probably already have, making it perfect for busy weeknights when you want something special without the fuss.
- These umami egg yolks keep for days and instantly upgrade leftovers into restaurant-worthy meals.
- According to Serious Eats, salt-cured and soy-cured egg yolks concentrate flavor while creating a unique firm texture — and this recipe proves exactly why.
Quick Facts ⚡
Here’s the quick scoop on this cured egg yolk recipe soy sauce.
- CourseCondiment/Topping
- Prep Time5 minutes
- Cure Time6-12 hours
- Total Time6-12 hours
- Servings6 cured yolks
- DifficultyEasy
Nutritional Peek
| Nutrient | Amount per serving |
|---|---|
| Calories | 65 |
| Protein | 3g |
| Carbohydrates | 1g |
| Fat | 5g |
| Fiber | 0g |
| Sugar | 0g |
What You’ll Need
This is one of those wonderfully minimal recipes where the equipment list is shorter than your grocery receipt. You likely have everything sitting in your kitchen right now.
- Shallow dish or small container (something that holds the yolks snugly without needing too much soy sauce)
- Plastic wrap or lid for covering
- Slotted spoon (for carefully lifting out the delicate cured yolks)
- Paper towels (for patting dry)
- Small bowl (for egg whites if you’re saving them)
Ingredients
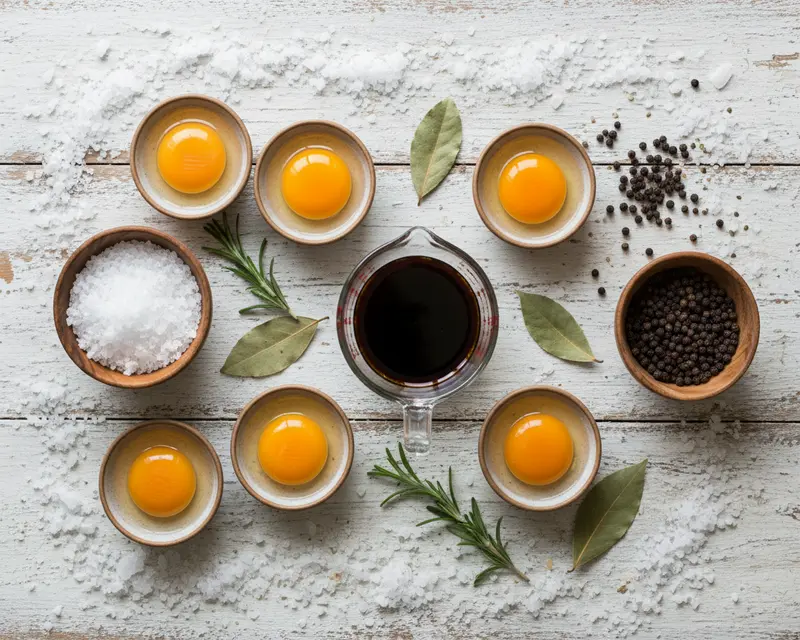
Soy sauce egg yolks require just two ingredients, but the quality really matters here since there’s nowhere to hide. Use the freshest eggs you can find, and choose a soy sauce you actually enjoy the taste of since that flavor will concentrate beautifully into every bite of these savory egg yolks.
| Group | Ingredient | Amount | Notes |
|---|---|---|---|
| Main | Large egg yolks | 6 | Room temperature eggs separate more easily, but cold yolks hold their shape better |
| Curing liquid | Soy sauce | 1/2 cup | Regular or low-sodium both work; I prefer regular for deeper umami flavor |
Step-by-Step Instructions
Let’s make this happen. This cured egg yolk recipe soy sauce method is surprisingly forgiving, so don’t stress if your yolks aren’t perfectly round or if a tiny bit of white clings to them.
Step 1: Separate the egg yolks
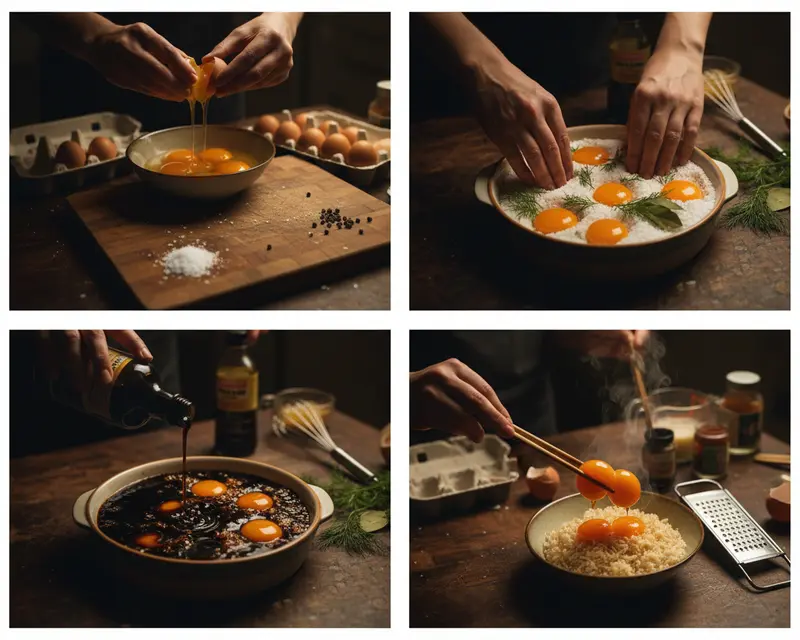
Crack each egg carefully and use your cleanest hand-to-hand method or an egg separator to divide yolks from whites. The key is keeping those yolks intact and unbroken, like precious little golden orbs. Save the whites in a covered container for scrambled eggs, meringues, or homemade mayonnaise projects later this week.
Step 2: Pour the soy sauce into your dish
Choose a shallow container just wide enough to hold your six yolks without crowding. Pour in enough soy sauce to create a depth of about half an inch, which should fully submerge the yolks once they settle in. The soy sauce will work its magic by drawing out moisture and infusing deep umami flavor simultaneously.
Step 3: Nestle the yolks into the soy sauce
Gently lower each yolk into the soy sauce bath using a spoon or by rolling it carefully off your palm. Space them out so they’re not touching, which prevents them from sticking together during the curing process. They’ll sink slightly and the soy sauce should come up and over each one completely.
Step 4: Cover and refrigerate for 6-12 hours
Seal your dish with plastic wrap or a tight lid and slide it into the fridge on a flat, stable shelf. For softer, jammy umami egg yolks, check them at the 6-hour mark. For firmer yolks that you can grate like Parmesan, let them cure the full 12 hours or even up to 18 if you’re feeling adventurous.
Step 5: Remove the cured yolks
Use a slotted spoon to carefully lift each yolk from the soy sauce bath. They’ll feel noticeably firmer than raw yolks, almost like soft cheese, and they’ll have a beautiful amber-brown color. Handle them gently but confidently—they’re sturdier than they look.
Step 6: Rinse and dry
Run each cured egg yolk under cold water for just a few seconds to remove excess surface soy sauce and prevent them from being overly salty. Pat them dry with paper towels using gentle pressure. Now they’re ready to slice, grate, or plop whole onto whatever dish needs a luxurious umami boost.
Pro Tips & Gentle Guidance
Soy sauce egg yolks are incredibly forgiving, but these little tricks help you get that perfect firm texture and concentrated flavor every single time. I’ve learned most of these through happy accidents and a few less-happy ones.
Use the freshest eggs you can find, preferably from a local farm or dated within the last week. Fresher yolks have tighter membranes that hold their shape better during the curing process and separate more cleanly from the whites.
If you’re nervous about breaking yolks during separation, crack each egg into a small bowl first, then use a clean plastic water bottle to “vacuum” up just the yolk. Squeeze the bottle, place the opening over the yolk, then release to suck it up gently.
Don’t toss that used soy sauce after you remove the yolks. It’s now enriched with eggy richness and makes an incredible base for stir-fry sauces, marinades, and salad dressings with extra depth and body.
For ultra-firm yolks that you can grate like hard cheese, extend the curing time to 18-24 hours. The longer they sit, the more moisture evaporates and the firmer the texture becomes, similar to aged cheese or bottarga.
Store your finished cured egg yolks in a small covered container lined with paper towels to absorb any residual moisture. They’ll keep for up to five days in the fridge, though mine rarely last that long once my family discovers them.
Variations & Adaptations
Once you’ve mastered the basic egg yolk curing technique with soy sauce, you can play with different flavor profiles and curing liquids. The principles stay the same, but the results open up a whole world of umami possibilities.
Miso-soy hybrid cure
Mix equal parts soy sauce and white miso paste thinned with a tablespoon of mirin for a sweeter, more complex cure. This creates umami egg yolks with deeper fermented notes that pair beautifully with Japanese-inspired rice bowls and ramen.
Tamari or coconut aminos version
Swap regular soy sauce for tamari if you need gluten-free savory egg yolks, or use coconut aminos for a soy-free option with slightly sweeter undertones. Both create similarly firm textures with their own unique flavor signatures.
Spiced soy cure
Add aromatics like smashed garlic, ginger slices, star anise, or dried chilies to your soy sauce bath before adding the yolks. The curing liquid infuses those flavors directly into the yolks for a more complex, layered taste.
Shorter cure for soft-jammy yolks
If you prefer a softer, more jammy center similar to ramen eggs, cure for only 4-6 hours. These won’t slice or grate cleanly, but they’re perfect for nestling into rice bowls where they can break and ooze beautifully.
Quick Fixes for Cured Egg Yolk Recipe Soy Sauce
Problem: My yolk broke during separation
Don’t panic—you can still cure it! Just pour the broken yolk and any clinging whites into the soy sauce and cure it the same way. The texture won’t be as pretty for slicing, but it’ll still taste incredible crumbled over noodles or rice.
Problem: The yolks are too salty
Next time, use low-sodium soy sauce or cure for a shorter duration. For yolks that are already too salty, rinse them more thoroughly under cold water and soak briefly in plain water for 5-10 minutes before patting dry.
Problem: My yolks didn’t firm up enough
They need more time or less liquid volume. Make sure the yolks are fully submerged and extend the curing time to 12-18 hours. Firmer results also come from using a shallower dish where less soy sauce touches each yolk.
Problem: The yolks stuck to the bottom of the dish
Use a silicone mat or parchment paper on the bottom of your curing dish next time to prevent sticking. If they’re already stuck, slide a thin offset spatula or butter knife gently underneath to release them without breaking.
Storage & Reheating
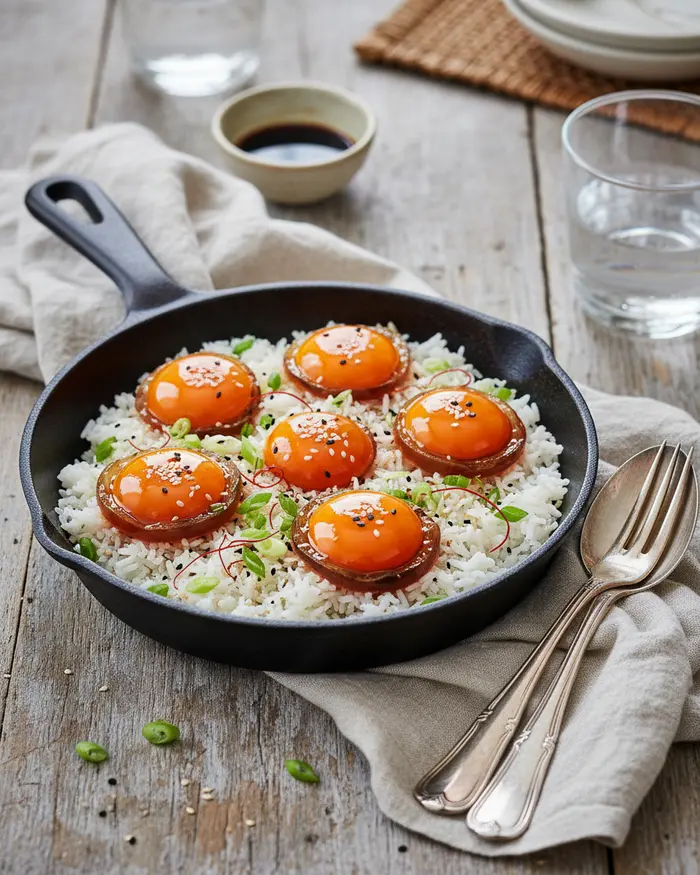
Soy sauce egg yolks keep beautifully in the refrigerator and actually taste better after a day or two as the flavors continue to develop and mellow. They’re best served at cool room temperature rather than ice-cold, which brings out their silky texture and complex umami depth.
Serve these savory egg yolks sliced thin over steaming rice bowls, grated over pasta like you would Parmesan, or perched whole on avocado toast with everything bagel seasoning. They also make stunning additions to sushi bowls, grain salads, and ramen for instant restaurant-level presentation.
Store finished cured egg yolks in an airtight container lined with paper towels to absorb any moisture. Keep them refrigerated and use within 4-5 days for best flavor and texture, though they’re technically safe for up to a week if handled with clean utensils.
| Storage Method | Duration | Best Practices |
|---|---|---|
| Refrigerator (airtight container) | 4-5 days | Line container with paper towels; keep yolks separated |
| Refrigerator (in curing liquid) | Up to 7 days | Leave yolks in soy sauce for extended storage; rinse before using |
| Room temperature serving | 30 minutes before serving | Remove from fridge to enhance flavor and texture |
These umami egg yolks don’t require reheating and taste best served chilled or at room temperature. If you do want to warm them slightly, place them on hot rice or noodles and let residual heat gently warm them through without cooking further.
No-Waste Kitchen Magic
This cured egg yolk recipe soy sauce is already pretty waste-conscious, but there are clever ways to use every bit of what you’ve created. Nothing needs to hit the trash or compost here.
Save those leftover egg whites in an airtight container for up to four days and use them for fluffy scrambled eggs, protein-packed smoothies, or homemade meringue cookies. You can also freeze them in ice cube trays for future baking projects.
The used soy sauce is now infused with rich egg flavor and makes an incredible marinade for chicken thighs, pork chops, or tofu. Use it as the base for fried rice seasoning or stir it into soup broths for extra depth and body.
If you cure more yolks than you can use within five days, grate the extras and freeze the gratings in a small container. Frozen grated cured yolk works beautifully sprinkled over hot dishes straight from the freezer without needing to thaw.
Any yolks that break during separation can still be cured successfully. Just cure them in a separate small container and use them crumbled over salads, mixed into grain bowls, or stirred into creamy pasta sauces for umami richness.
Frequently Asked Questions
Here are the most common questions home cooks ask about making soy sauce egg yolks and egg yolk curing techniques.
How long does it take to cure egg yolks in soy sauce?
Curing egg yolks in soy sauce typically takes 3 to 7 days. For a firmer, more concentrated flavor, cure them for the full week. The yolks will become darker and develop a richer umami taste as they cure longer in the refrigerator.
What is the ratio of soy sauce to other ingredients for curing egg yolks?
A common ratio is equal parts soy sauce and mirin, typically half a cup of each. Some recipes add sake or sugar for additional flavor. The liquid should be enough to completely submerge the egg yolks in an airtight container.
How should I store cured egg yolks and how long do they last?
Store cured egg yolks in an airtight container in the refrigerator, either in the curing liquid or wrapped in plastic wrap once removed. They will last up to 2 weeks when properly refrigerated. The yolks will continue to firm up over time.
What can I use cured soy sauce egg yolks for?
Cured egg yolks can be grated or sliced over pasta, rice, salads, ramen, or toast. They add a rich, savory umami flavor similar to cheese. You can also use them as a topping for vegetables, seafood, or incorporate them into sauces and dressings.
Do I need to use fresh eggs for curing in soy sauce?
Yes, you should use the freshest eggs possible for curing. Fresh eggs have firmer yolks that hold their shape better during the curing process. Separate the yolks carefully to keep them intact, as broken yolks will not cure properly in the soy sauce mixture.
Final Dish
This cured egg yolk recipe soy sauce has become one of my favorite little kitchen secrets for transforming simple weeknight meals into something that feels special and cared-for. It’s the kind of technique that makes you feel like a culinary genius even though it requires almost zero effort or skill.
Once you’ve made your first batch of these umami-rich beauties, you’ll find yourself looking for excuses to make them again. They turn leftover rice into a restaurant-worthy bowl, elevate simple salads into Instagram-worthy creations, and make avocado toast taste like it came from a trendy brunch spot.
I’d love to see how your cured egg yolks turn out! Share your photos in the comments below and tell me what you served them on. Did you slice them, grate them, or just plop one whole onto a steaming bowl of noodles? Every version is perfect.
I’m Linda Sandra — a Charleston home chef and comfort-food daydreamer. Around here, cooking’s not about perfection — it’s about cozy vibes, creative twists, and food that feels like love.
Soy Sauce Cured Egg Yolks
Ingredients
- 6 large egg yolks
- ½ cup soy sauce
Instructions
- Separate egg yolks from whites, being careful not to break the yolks. You can save the whites for another recipe.
- In a shallow dish, pour enough soy sauce to completely submerge the egg yolks. Carefully place the yolks into the soy sauce, ensuring they are fully covered.
- Cover the dish and refrigerate for 6-12 hours. For a firmer, more intensely flavored yolk, cure for the longer duration.
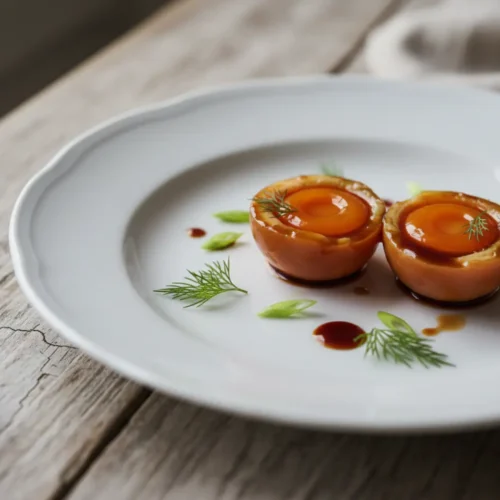
- Carefully remove the cured egg yolks from the soy sauce. They will be firm and slightly translucent.
- Gently rinse the cured egg yolks under cold water to remove excess soy sauce. Pat them dry with a paper towel.
- Serve immediately as a topping for rice, noodles, salads, or avocado toast. They can also be thinly sliced or grated.