Easy Sushi Balls Recipe
This Easy Sushi Balls Recipe is about to become your new favorite thing to make on a Friday night — or honestly, any night you want something that feels special without the stress.
I’m Linda Sandra — a Charleston home cook who believes every meal should feel like a little celebration. And these sushi balls? They deliver every single time.
Sushi rice rolled into little handheld bites with smoked salmon, cream cheese, and cucumber — it’s elegant enough for guests but simple enough for a Tuesday. These are the kind of homemade sushi recipes that make you look like you really have it together.
Table of Contents
Little Snapshot: What This Recipe Delivers
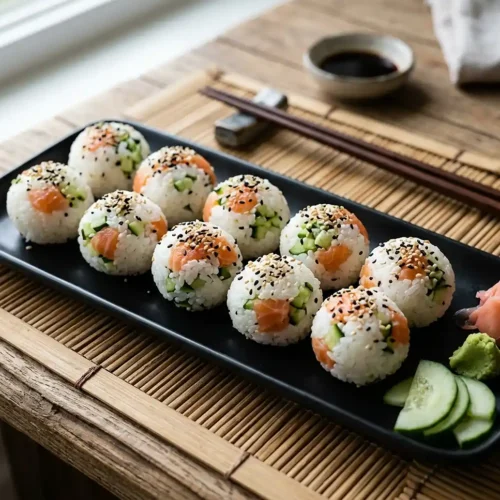
This Easy Sushi Balls Recipe makes 15 bite-sized sushi balls filled with smoked salmon, cucumber, and cream cheese, all wrapped in seasoned sushi rice and finished with sesame seeds.
It takes about 30 minutes total, works great for beginners, and is one of those crowd-pleasing sushi recipes homemade that feels way fancier than the effort required.
Why You’ll Love This Recipe
- This Easy Sushi Balls Recipe takes less time than folding laundry — and it’s infinitely more rewarding.
- No bamboo mat, no rolling, no stress. Just scoop, fill, shape, done. Even the kids can help with this one.
- The smoked salmon and cream cheese combo is ridiculously creamy and satisfying — like a fancy bagel but make it sushi.
- According to Just One Cookbook’s complete guide to making sushi rice at home, the key to beautiful sushi is perfectly seasoned rice — and this recipe nails it every time.
Quick Facts
Here’s the quick scoop on this Easy Sushi Balls Recipe.
- CourseAppetizer / Snack
- Prep Time20 minutes
- Cook Time10 minutes
- Total Time30 minutes
- Servings15 sushi balls
- DifficultyEasy
Nutritional Peek
Here’s a rough nutritional breakdown per sushi ball so you can snack with confidence.
| Nutrient | Amount Per Serving (1 ball) |
|---|---|
| Calories | ~85 kcal |
| Protein | 4g |
| Carbohydrates | 11g |
| Fat | 3g |
| Fiber | 0.3g |
| Sugar | 0.5g |
Ingredients
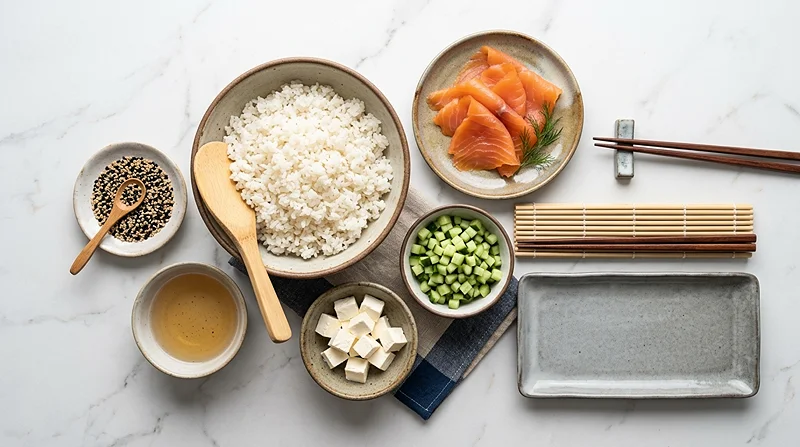
These sushi recipes homemade use just a handful of simple ingredients that work beautifully together.
For the base, you’ll need cooked and seasoned sushi rice — short-grain is key here for that sticky, glossy texture. For the filling, you’ve got smoked salmon and finely diced cucumber for freshness, plus cream cheese cubed up for that dreamy creamy center. Sesame seeds go on the outside for a little crunch and visual charm.
| Amount | Ingredient |
|---|---|
| 2 cups | Sushi rice, cooked and seasoned |
| 100g (½ cup) | Smoked salmon, chopped |
| ½ cup | Cucumber, deseeded and finely diced |
| 100g | Cream cheese, cubed (1cm cubes) |
| To taste | Sesame seeds, for rolling |
Tools You’ll Actually Use
Nothing fancy required — just your everyday kitchen basics.
- Large mixing bowl
- Rice cooker or medium saucepan (for the sushi rice)
- Sharp knife and cutting board
- Spoon or small cookie scoop
- Small bowl of water (to keep hands from sticking)
- Baking sheet or serving plate for chilling
Step-by-Step Instructions for This Easy Sushi Balls Recipe
Let’s walk through it — it’s simpler than you think, I promise.
Step 1: Cook and Season Your Sushi Rice
Prepare 2 cups of sushi rice using your preferred method. You can use a stovetop sushi rice recipe or make it in the Instant Pot. The rice needs to be fully cooled before shaping — warm rice is too sticky and hard to handle.
Step 2: Prep the Cream Cheese
Take your 100g of cream cheese straight from the fridge and cut it into small 1cm cubes. Cold cream cheese holds its shape better inside the ball, so don’t skip this step. Set the cubes aside on a plate while you prep the other fillings.
Step 3: Prep the Cucumber
Slice the cucumber in half lengthwise and use a spoon to scrape out the watery seeds from the center — this keeps your rice from getting soggy. Then slice each half into long batons and dice those into small, even pieces about the size of a pea.
Step 4: Prep the Smoked Salmon
Chop your 100g of smoked salmon into small bite-sized pieces. You want them small enough to blend into the rice mixture without being chunky. The salmon adds a silky, savory depth to every bite.
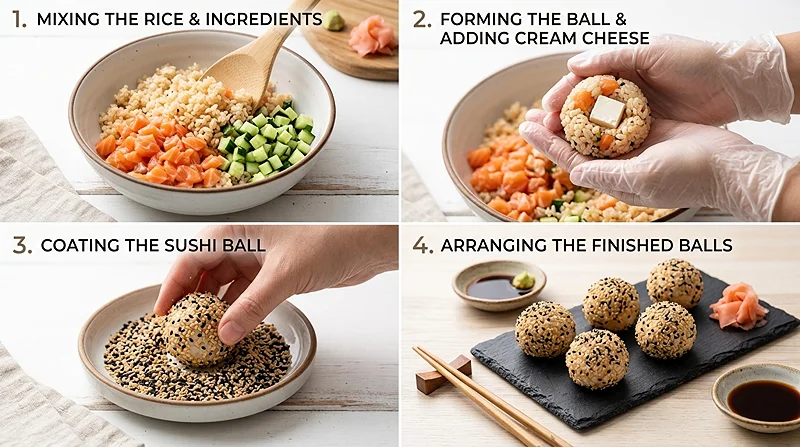
Step 5: Mix the Rice Filling
Add your cooled, seasoned sushi rice to a large mixing bowl. Toss in the diced cucumber and chopped smoked salmon. Gently fold everything together with a rice paddle or large spoon until the fillings are evenly distributed. Be gentle — you don’t want to mash the rice.
Step 6: Shape the Sushi Balls
Wet your hands slightly to prevent sticking. Take a spoonful of the rice mixture and flatten it slightly in your palm. Place one cube of cream cheese in the center, then top with another spoonful of the rice mixture. Cup your hands and gently roll into a compact, round ball. Repeat with remaining mixture — you should get about 15 balls.
Step 7: Add Sesame Seeds and Chill
Sprinkle sesame seeds generously over the sushi balls, pressing them gently so they stick. Arrange the balls on a plate or baking sheet, then refrigerate until you’re ready to serve. Chilling helps them firm up and hold their shape beautifully.
Pro Tips for Perfect Sushi Recipes Homemade
A few little tricks that make a big difference when you’re making these at home.
Cool your rice completely. Warm rice will stick to your hands and lose its shape. Spread it out on a baking sheet and fan it to cool faster — it makes shaping so much easier and gives the rice that gorgeous shine.
Wet your hands between each ball. Keep a small bowl of water nearby and re-wet your hands every couple of balls. This is the single biggest trick for smooth, non-sticky shaping.
Use cold cream cheese. Room-temperature cream cheese will get too soft and mushy inside the ball. Keep it refrigerated until you’re ready to cube and use it.
Don’t overstuff. It’s tempting to add extra filling, but too much makes the balls hard to close and shape. One cream cheese cube per ball is the sweet spot.
Also, if you love creamy, satisfying bites like these, you might enjoy my pea salad with cheese — it has that same cozy, crowd-pleasing energy.
Quick Fixes for Your Easy Sushi Balls Recipe
Problem: The balls won’t hold their shape. This usually means the rice is too warm or too dry. Make sure it’s fully cooled and properly seasoned with rice vinegar — that stickiness is what holds everything together. Try wetting your hands again and pressing a little more firmly.
Problem: Sesame seeds won’t stick. Press them on while the outside of the rice ball is still slightly tacky, right before chilling. If the surface has dried out, lightly dampen your fingers and press the seeds on by hand.
Problem: The inside is too wet or mushy. This usually comes from cucumber that wasn’t properly deseeded. Always scrape out those watery seeds — they’re the sneaky culprit behind soggy sushi balls.
Problem: Cream cheese is leaking out. Cut the cream cheese into smaller cubes and make sure you’re sealing the rice tightly around it before rolling. Cold cream cheese also holds its shape much better, so keep it refrigerated until the last second.
Variations and Adaptations
These sushi recipes homemade are wonderfully flexible — make them your own!
Dairy-free version: Swap the cream cheese for avocado chunks. It’s creamy, rich, and complements the smoked salmon just as beautifully.
Vegetarian version: Skip the salmon and use diced avocado, shredded carrots, or edamame as your filling. These are fresh, colorful, and just as satisfying.
Spicy twist: Mix a little sriracha into the cream cheese before cubing for a surprise kick in every bite.
Crab version: Swap smoked salmon for imitation crab or real crab meat for a California roll-inspired bite.
Black sesame upgrade: Use black sesame seeds instead of (or mixed with) white sesame for a dramatic, elegant look that’s perfect for entertaining.
Serving, Storage, and Reheating
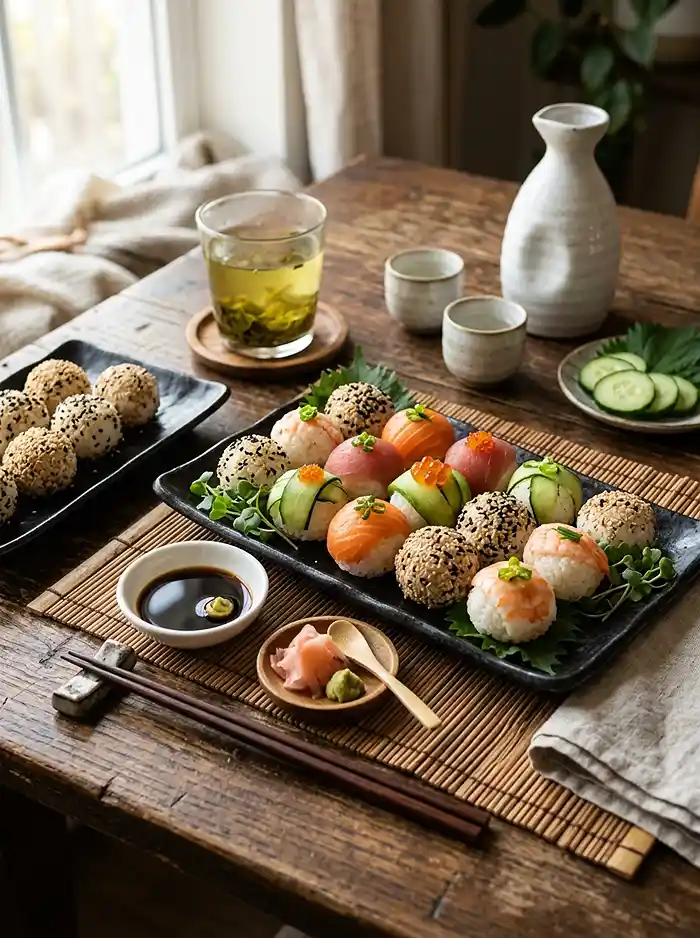
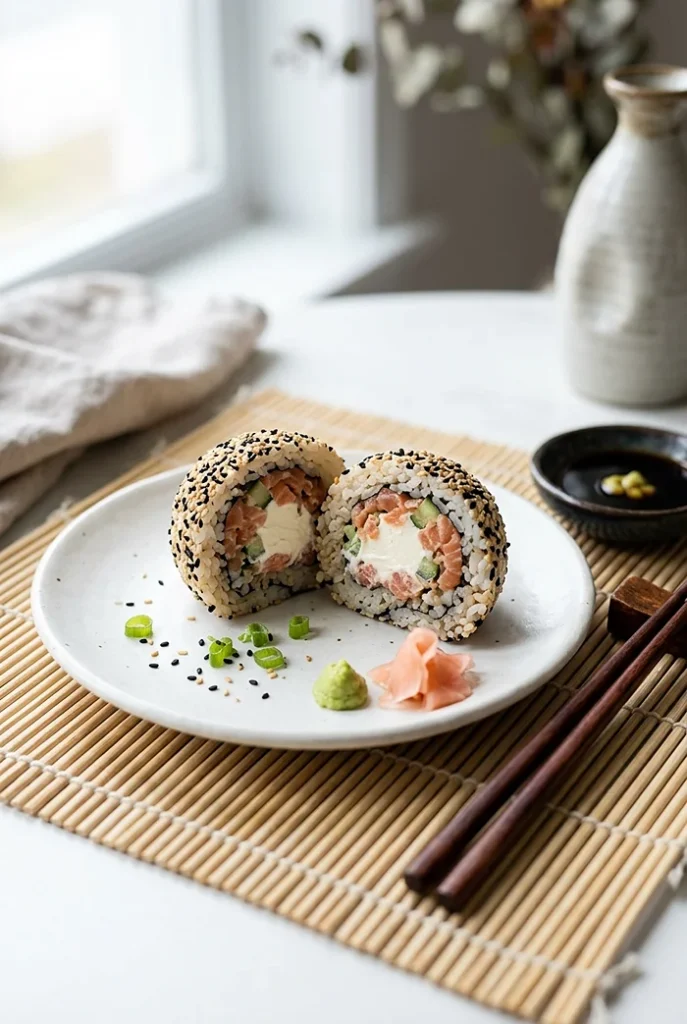
These sushi balls are best served cold, straight from the fridge. Arrange them on a platter with a side of soy sauce for dipping, a dab of wasabi, and some pickled ginger. They make a gorgeous appetizer or a fun party snack that disappears fast.
If you somehow manage not to eat them all at once, store leftovers in an airtight container in the refrigerator for up to 24 hours. Cover them with a slightly damp paper towel inside the container to prevent the rice from drying out and hardening.
These sushi balls are best enjoyed cold and are not suitable for reheating — the rice texture changes when warmed. If you want to prep ahead, make the rice and fillings in advance and shape the balls an hour or two before serving for the freshest results.
Pair them with my grilled cheese burrito copycat for a totally unexpected but genuinely delicious fusion spread.
No-Waste Kitchen Magic
Got leftover seasoned sushi rice? Don’t toss it — press it into a bowl and top it with anything you have on hand for a quick rice bowl lunch the next day.
Any leftover smoked salmon works beautifully on scrambled eggs, avocado toast, or stirred into cream cheese for an instant bagel spread. Nothing goes to waste around here.
Leftover cucumber can go straight into a simple salad or a quick cucumber and vinegar pickle. Just a little rice vinegar, salt, and sugar and you’ve got a lovely little side in minutes.
FAQs About This Easy Sushi Balls Recipe
Can I make this Easy Sushi Balls Recipe ahead of time?
Yes! You can prep the sushi rice and fillings up to a day ahead and store them separately in the fridge. Shape and assemble the sushi balls a couple of hours before serving for the best texture and freshness.
What is the best way to store sushi balls?
Store them in an airtight container in the refrigerator for up to 24 hours. Tuck a slightly damp paper towel inside the container to keep the rice from drying out and becoming hard.
Can I freeze sushi balls?
Freezing is not recommended for these sushi balls — the rice and cream cheese both change texture when frozen and thawed. For the best results, make them fresh and enjoy within 24 hours.
How do I know when my sushi rice is ready to use?
Your sushi rice is ready when it has cooled to room temperature, looks glossy, and feels slightly sticky — not mushy. It should hold together when pressed but not clump in a wet, gummy way. If it’s too warm, give it more time to cool.
Why should I deseed the cucumber in this sushi balls recipe?
The seeds and watery core of a cucumber release a lot of moisture, which can make your sushi rice soggy and your balls hard to shape. Scooping them out takes 10 seconds and makes a huge difference in the final texture.
Can’t get enough of these flavors? You’re going to love what’s waiting in the Finger Foods & Bites lineup. Every single recipe is made to impress without the stress. Happy cooking, friend!
Let’s Wrap It Up
So there you go — an Easy Sushi Balls Recipe that feels fancy but is secretly one of the most beginner-friendly things you can make at home. No rolling mats, no culinary school required.
I’d love to see your spin on this Easy Sushi Balls Recipe! Drop a comment below with your photos or tag me — I’d love to see how you made it your own. Whether you went spicy, kept it classic, or swapped in avocado, I bet your version is amazing.
These sushi balls are so versatile, so fun, and honestly just the kind of recipe that makes weeknight cooking feel like a little adventure. Happy rolling, friend.
I’m Linda Sandra — a Charleston home chef and comfort-food daydreamer. Around here, cooking’s not about perfection — it’s about cozy vibes, creative twists, and food that feels like love.
Easy Sushi Balls Recipe
Equipment
- Large mixing bowl
- Rice cooker or saucepan
- Knife
- Cutting board
- Spoon or cookie scoop
- Small bowl
- Baking sheet or plate
Ingredients
Main Ingredients
- 2 cups sushi rice cooked and seasoned
- 100 g smoked salmon chopped
- ½ cup cucumber deseeded and finely diced
- 100 g cream cheese cubed
- sesame seeds to taste
Instructions
- Cook and season sushi rice, then allow it to cool completely before use.
- Cut cold cream cheese into small cubes and set aside.
- Deseed and finely dice the cucumber into small pieces.
- Chop smoked salmon into small bite-sized pieces.
- In a large bowl, gently mix cooled sushi rice with cucumber and smoked salmon.
- Wet hands, flatten a portion of rice, place a cube of cream cheese in the center, top with more rice, and shape into a ball.
- Roll or sprinkle sesame seeds over the sushi balls, press gently, and refrigerate until ready to serve.