Easy Charcuterie Cups Recipe
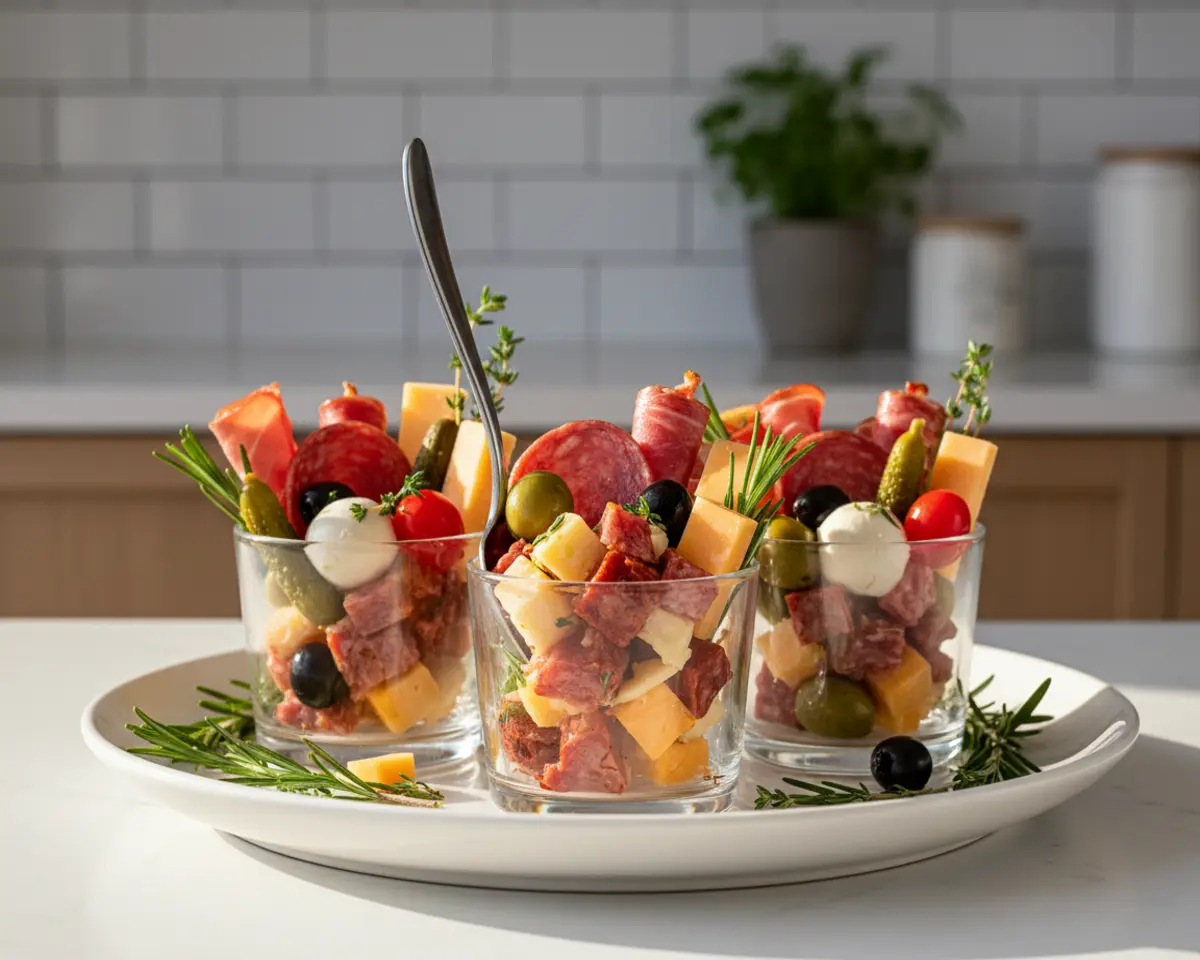
Charcuterie cups are the ultimate party appetizers—a beautiful, individual charcuterie solution that turns a traditional board into handheld, shareable bites. Each mini charcuterie creation brings bold flavors, crunchy textures, and visual charm, making them perfect for any gathering or celebration.
I’m Linda Sandra, a Charleston home chef who believes every meal should feel like a hug. These charcuterie in a cup creations have saved me more times than I can count—from neighborhood potlucks to impromptu porch parties when friends show up with wine and zero notice.
I’ll never forget the first time I served these at my book club meeting. Everyone grabbed a cup, clinked them together like champagne flutes, and declared them genius—no double-dipping, no awkward hovering, just pure snacking joy that felt both fancy and fuss-free.
Table of Contents
Quick Overview
This is just one of the many gems in our Classic Comfort Foods series. Every recipe there has been tested and loved in real kitchens, and I promise there’s something for every craving. Go see for yourself.
Little Snapshot: What This Recipe Delivers
Charcuterie cups deliver individual charcuterie servings packed with cheese, meat, olives, grapes, and crackers in a portable, no-mess format. They’re perfect party appetizers that combine bold flavors, stunning presentation, and zero stress for the host.
Why You’ll Love This Recipe 🌸
- These mini charcuterie cups take less time than folding laundry and look like you hired a caterer.
- No board battles—everyone gets their own gorgeous little serving, and cleanup is a breeze.
- Customizable for picky eaters, dietary needs, or whatever you’ve got hiding in the fridge.
- According to Healthline, protein-packed snacks help stabilize energy—and these cups deliver exactly that with every bite.
Quick Facts ⚡
Here’s the quick scoop on this charcuterie cups recipe.
- CourseAppetizer
- Prep Time20 minutes
- Cook Time0 minutes
- Total Time20 minutes
- Servings8 cups
- DifficultyEasy
Nutritional Peek
| Nutrient | Amount per serving |
|---|---|
| Calories | 220 |
| Protein | 12g |
| Carbohydrates | 8g |
| Fat | 16g |
| Fiber | 1g |
| Sugar | 4g |
What You’ll Need
You don’t need fancy equipment to make these charcuterie cups come together beautifully. Just a few simple tools and you’re ready to build your portable snack magic.
- Clear plastic cups or small glass tumblers (8-10 oz)
- Sharp knife for cubing cheese and slicing meats
- Cutting board
- Small serving tray or platter
- Kitchen scissors (optional, for herbs)
Ingredients
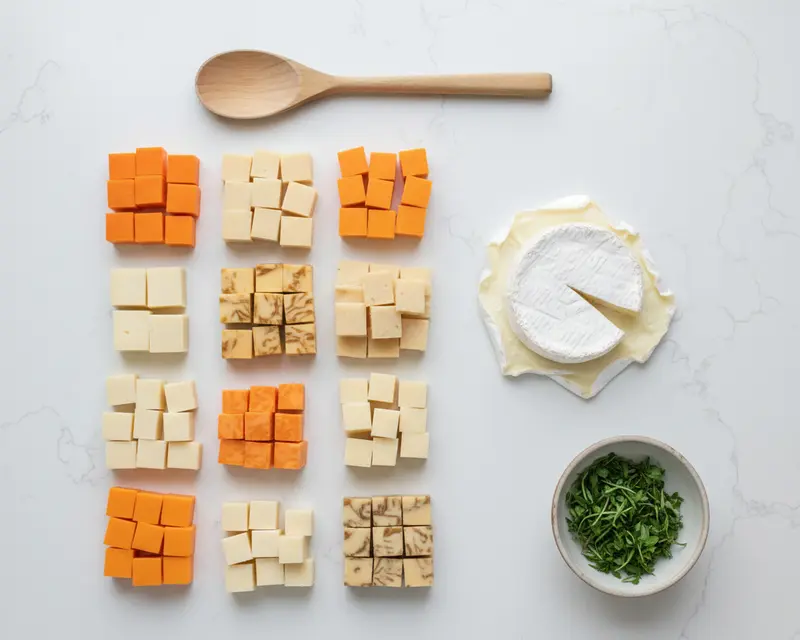
Individual charcuterie is all about layering flavors and textures in a way that feels both artful and effortless. I organize my ingredients into cheese, meat, fresh bites, and crunchy accents—it makes assembly so much smoother and keeps things visually stunning from every angle.
| Group | Ingredient | Amount | Notes |
|---|---|---|---|
| Hard Cheeses | Cheddar, Colby Jack, Provolone | 1 cup, cubed | Cut into bite-sized cubes for easy layering |
| Soft Cheeses | Brie, fresh mozzarella balls | 1 cup, small pieces | Use mini mozzarella balls or cube brie for elegance |
| Cured Meats | Salami, prosciutto, pepperoni | 1 cup, folded or rolled | Roll or fold into cute little bundles |
| Fresh Fruits | Red and green grapes | 1/2 cup, washed | Sweet and juicy, adds color contrast |
| Fresh Veggies | Cherry tomatoes | 1/4 cup, washed | Bright pops of freshness |
| Briny Bites | Green and black olives, pitted | 1/4 cup | Always check they’re pitted! |
| Pickled | Small pickles or cornichons | 1/4 cup | Tangy crunch that balances richness |
| Crunchy Accents | Small crackers or breadsticks | 1/4 cup | Choose sturdy crackers that won’t crumble |
| Nuts | Mixed nuts | 1/4 cup | Adds protein and satisfying crunch |
| Garnish | Fresh rosemary, thyme, basil | As needed | A sprig makes everything look chef-kissed |
Step-by-Step Instructions
Let’s make this happen. Building charcuterie cups is as easy as layering pretty flavors into clear cups—no culinary degree required, just a little creativity and a love for delicious, shareable bites.
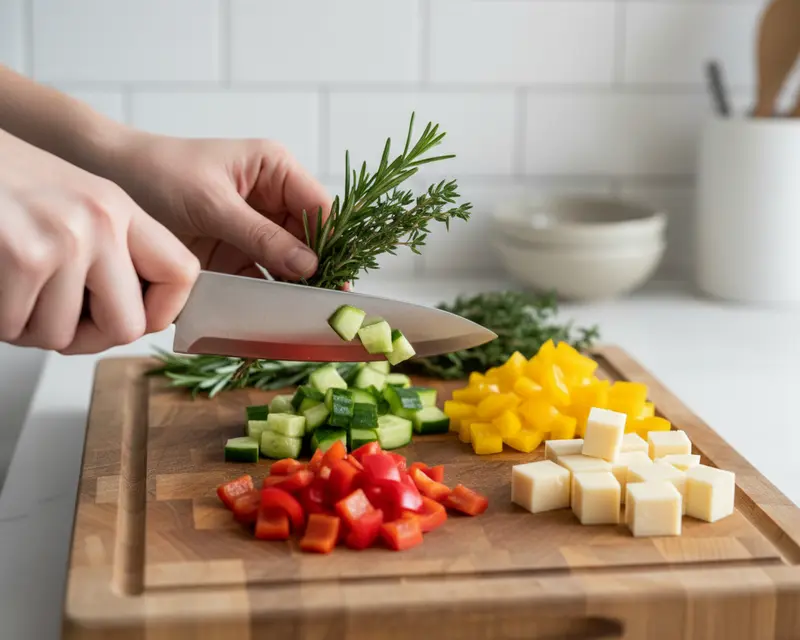
Prepare your ingredients. Cube cheddar, colby jack, and provolone into bite-sized pieces. Cut soft brie into small wedges and keep fresh mozzarella balls whole if they’re mini. Fold or roll salami, prosciutto, and pepperoni into cute little bundles. Wash grapes and cherry tomatoes, then pat them dry. Double-check that olives are pitted and pickles are small enough to fit neatly in your cups.
Choose your cups. Select clear plastic cups or small glass tumblers that show off your colorful layers. I love 8- to 10-ounce cups because they’re sturdy, easy to hold, and give you enough room to create visual drama without overflowing.
Build the base. Drop a few cubes of hard cheese and some rolled meats at the bottom of each cup. This creates a stable, flavorful foundation and prevents softer ingredients from getting squished later.
Add fresh elements. Layer in a few grapes, a cherry tomato, and a couple of olives. Alternate red and green grapes for visual pop, and tuck the tomato where it’ll catch the light—you’re building art you can eat.
Introduce more cheese and meat. Add another round of soft cheese pieces and a few more folded or rolled meats. Try to position them at different angles so every layer looks intentional and beautiful from the outside of the cup.
Include crunch and tang. Slide a few small crackers or a breadstick vertically along the inside edge of each cup so they’re easy to grab. Tuck in a few cornichons or small pickles for that briny contrast that makes your taste buds dance.
Finish with nuts and garnish. Sprinkle a small handful of mixed nuts over the top of each cup for satisfying crunch and a protein boost. Finish with a fresh sprig of rosemary, thyme, or a tiny basil leaf—it’s the final touch that says you care about presentation.
Arrange and serve. Set your completed charcuterie cups on a large tray or platter so guests can grab and go. They’re perfect for mingling, outdoor gatherings, or any time you want to serve something stunning without the stress of a communal board.
Pro Tips & Gentle Guidance
Mini charcuterie cups are forgiving and fun, but a few little tricks can take them from “nice” to “wow.” These tips help you build cups that look gorgeous, taste balanced, and make entertaining feel like a breeze instead of a chore.
Layer with intention. Start with heavier items like cheese and meat at the bottom, then build up to lighter, colorful elements like grapes and herbs. This creates visual balance and prevents delicate ingredients from getting crushed under the weight of everything else.
Cut everything small. Bite-sized pieces are essential for easy snacking—you want guests to eat straight from the cup with a toothpick or their fingers, not wrestle with oversized chunks. Small cubes, rolled meats, and petite pickles make every bite effortless and elegant.
Balance salty and sweet. Every cup should have a mix of salty cured meats, creamy cheese, sweet grapes, tangy pickles, and crunchy nuts. This creates a full flavor experience in every serving and keeps guests coming back for more.
Prep ahead for stress-free hosting. You can assemble these cups up to 4 hours in advance and keep them covered in the fridge. Just wait to add crackers and fresh herbs until right before serving so they stay crisp and vibrant.
Mix textures thoughtfully. Soft cheese, crunchy nuts, chewy meats, and juicy grapes all play different roles. According to Food Network, texture variety is what makes charcuterie boards (and cups!) so satisfying and memorable.
Use toothpicks or mini forks. Set out a little bowl of toothpicks or small appetizer forks next to your tray. Some guests love eating with their hands, but others appreciate a utensil—and it keeps things tidy and comfortable for everyone.
Variations & Adaptations
Charcuterie cups are endlessly adaptable. You can swap ingredients based on what’s in your fridge, dietary needs, or the vibe of your gathering—these little beauties are built for creativity and flexibility.
Mediterranean Style: Swap in feta cheese, hummus, cucumber slices, cherry tomatoes, kalamata olives, and whole wheat crackers. Add a drizzle of olive oil and a sprinkle of za’atar for a fresh, sunny flavor profile that feels like a vacation in a cup.
Italian Twist: Use fresh mozzarella, prosciutto, salami, marinated artichokes, sun-dried tomatoes, and basil. Serve with crunchy breadsticks and a balsamic glaze drizzle for an Italian-inspired appetizer that’s pure elegance.
Kid-Friendly Cups: Fill cups with cubed mild cheddar, turkey slices, baby carrots, grapes, pretzels, and a few M&Ms or chocolate chips. Kids love having their own special snack cup, and you can sneak in veggies without a fight.
Vegan or Dairy-Free: Use dairy-free cheese, roasted chickpeas, mixed nuts, olives, cherry tomatoes, cucumber slices, and crackers. Add avocado slices or hummus for creaminess and protein without any animal products.
Holiday or Themed Cups: Match your ingredients to the season—red and green grapes for Christmas, orange cheddar and blackberries for Halloween, or red, white, and blue elements for a patriotic Fourth of July spread.
Quick Fixes for Charcuterie Cups
Cups look messy or ingredients are falling over? Start with a stable base of heavier items like cheese cubes and rolled meats at the bottom. Layer lighter ingredients like grapes and herbs on top so everything stays balanced and visually appealing.
Crackers getting soggy? Add crackers and breadsticks right before serving, and position them vertically along the inside edge of the cup so they don’t sit in any moisture. This keeps them crispy and ready to crunch.
Cups looking bland or boring? Add pops of color with red and green grapes, cherry tomatoes, fresh herbs, and a variety of cheese and meat colors. Visual contrast makes each cup feel special and photo-worthy.
Not enough flavor variety? Make sure every cup has a balance of salty, sweet, tangy, and creamy elements. Include cured meats, cheese, pickles, grapes, olives, and nuts so each bite offers a new taste experience.
Guests can’t grab ingredients easily? Set out toothpicks or small appetizer forks so everyone can spear their favorite bites. This makes eating easier and keeps hands cleaner, especially at fancy events or outdoor gatherings.
Storage & Reheating
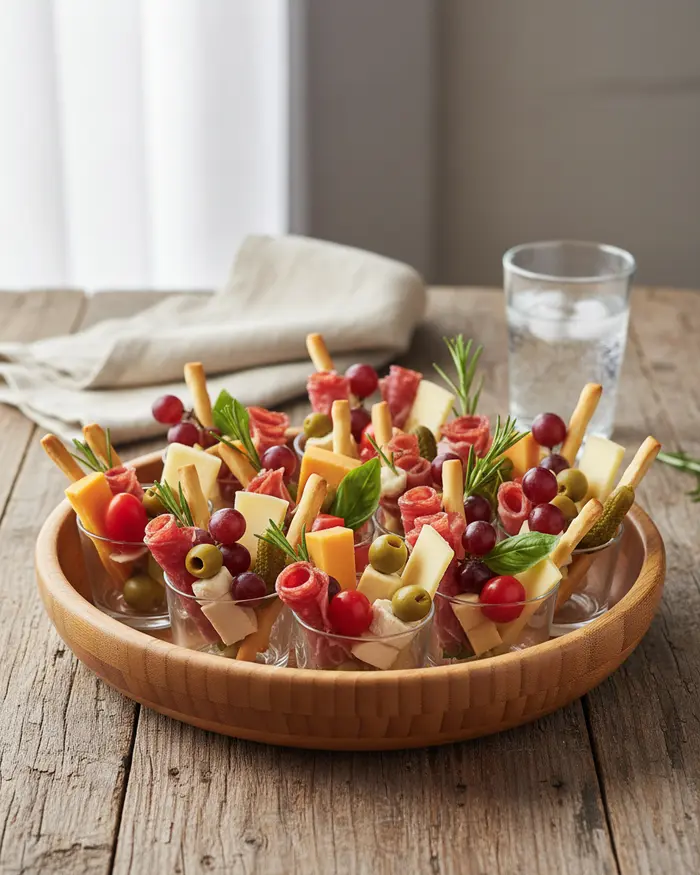
Charcuterie in a cup is best enjoyed fresh, but you can prep and store these beauties with a little planning. Proper storage keeps everything crisp, flavorful, and safe for your guests to enjoy without worry.
Serving Suggestions: Arrange your cups on a large serving tray or platter and set them out just before guests arrive. They’re perfect for cocktail parties, baby showers, picnics, or any gathering where mingling and snacking go hand in hand.
Storage: If you need to prep ahead, assemble the cups up to 4 hours in advance and cover each one tightly with plastic wrap. Store them in the refrigerator until you’re ready to serve. Wait to add crackers, fresh herbs, and any delicate garnishes until the last minute to keep them looking and tasting fresh.
Reheating: These cups are meant to be served cold or at room temperature—no reheating needed. If they’ve been chilled, let them sit out for about 10 minutes before serving so the cheese softens slightly and flavors come alive.
| Storage Method | Duration | Best For |
|---|---|---|
| Refrigerator (covered) | Up to 4 hours | Prepped cups before serving |
| Room temperature | Up to 2 hours | Active party or event |
| Leftover ingredients | 3–5 days (separate containers) | Cheese, meats, and pickled items stored separately |
No-Waste Kitchen Magic
Leftover ingredients from your charcuterie cups don’t have to go to waste. With a little creativity, you can turn extra cheese, meats, and veggies into brand-new meals and snacks that feel just as special.
Leftover cheese and meats: Chop them up and toss into a frittata, omelet, or scrambled eggs for a protein-packed breakfast. You can also add them to a green salad, grain bowl, or pasta for a quick lunch that tastes gourmet.
Extra grapes and tomatoes: Slice and add to a fresh green salad, or roast cherry tomatoes with olive oil and garlic for a simple pasta topping. Grapes can be frozen and used later in smoothies or as a refreshing frozen snack on hot days.
Leftover olives and pickles: Chop them finely and stir into tuna or chicken salad for a briny flavor boost. You can also add them to a layered dip or homemade pizza for extra tang and texture.
Stale crackers or breadsticks: Crush them into coarse crumbs and use as a topping for baked mac and cheese, casseroles, or salads. They add a satisfying crunch and help you avoid tossing perfectly good food.
Fresh herb sprigs: Chop leftover rosemary, thyme, or basil and freeze in ice cube trays with olive oil or butter. Pop out a cube whenever you need fresh herb flavor for roasted veggies, pasta, or a grilling board spread.
Frequently Asked Questions
Here are some of the most common questions I get about making and serving charcuterie cups, answered with love and a little Charleston charm.
What are charcuterie cups?
Charcuterie cups are individual servings of charcuterie ingredients arranged in small cups or containers. They typically include a variety of cured meats, cheeses, crackers, fruits, nuts, and other accompaniments traditionally found on a charcuterie board, but portioned into single-serve cups for convenience and easy serving.
How long can charcuterie cups stay out at room temperature?
Charcuterie cups should not be left at room temperature for more than 2 hours. If the temperature is above 90 degrees Fahrenheit, they should not sit out for more than 1 hour. After this time, bacteria can grow rapidly on perishable items like meats and cheeses, making them unsafe to eat.
What ingredients should I include in charcuterie cups?
A well-balanced charcuterie cup should include a variety of textures and flavors. Common ingredients include cured meats like salami or prosciutto, different types of cheese such as cheddar or brie, crackers or breadsticks, fresh or dried fruits like grapes or apricots, nuts such as almonds or walnuts, and optional additions like olives, pickles, or honey.
How far in advance can I prepare charcuterie cups?
Charcuterie cups can be prepared up to 24 hours in advance. Assemble the cups with all ingredients, cover them tightly with plastic wrap or lids, and store them in the refrigerator until ready to serve. This makes them an excellent option for parties and events where advance preparation is needed.
What size cups work best for charcuterie cups?
Clear plastic cups or containers ranging from 8 to 12 ounces work best for charcuterie cups. This size provides enough room to include a good variety of ingredients while remaining easy for guests to hold and eat from. Clear containers are preferred as they allow the colorful arrangement of ingredients to be visible and appetizing.
Final Dish
These little beauties bring all the joy of a classic charcuterie board into a portable, personal format that guests absolutely love. They’re perfect for parties, picnics, showers, or any time you want to serve something gorgeous without the stress of a communal platter.
I hope you have as much fun making these charcuterie cups as I do. Snap a photo of your creations and share them in the comments—I love seeing your twists, color combos, and the creative ways you make these cups your own.
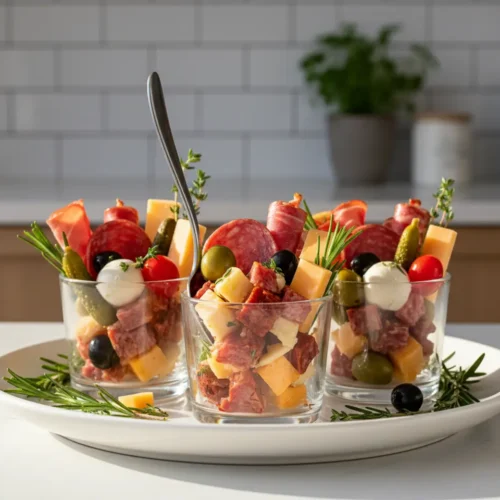
Charcuterie Cups
Ingredients
- 1 cup assorted hard cheeses cheddar, colby jack, provolone, cubed
- 1 cup assorted soft cheeses brie, fresh mozzarella balls, small pieces
- 1 cup assorted cured meats salami, prosciutto, pepperoni, folded or rolled
- ½ cup grapes red and green, washed
- ¼ cup cherry tomatoes washed
- ¼ cup olives green and black, pitted
- ¼ cup small pickles or cornichons
- ¼ cup small crackers or breadsticks
- ¼ cup mixed nuts
- Fresh herbs for garnish rosemary, thyme, basil
Instructions
- Prepare your ingredients: Cube hard cheeses, cut soft cheeses into small pieces, and fold or roll cured meats. Wash grapes and cherry tomatoes. Ensure olives are pitted and pickles are small.
- Choose your cups: Select clear plastic or glass cups that are sturdy enough to hold the ingredients and show off the layers.
- Build the base: Start by placing a few pieces of hard cheese and some rolled meats at the bottom of each cup. This helps create a stable foundation.
- Add fresh elements: Next, add a layer of grapes, cherry tomatoes, and olives. You can alternate colors for visual appeal.
- Introduce more cheese and meat: Add more of the remaining cheeses and cured meats, arranging them artfully.
- Include crunch and tang: Tuck in the crackers or breadsticks, and a few small pickles or cornichons.
- Finish with nuts and garnish: Sprinkle a small handful of mixed nuts on top. Garnish with a sprig of fresh rosemary, thyme, or a basil leaf for a touch of freshness and color.
- Arrange and serve: Arrange the completed charcuterie cups on a tray for guests to easily grab and enjoy.