Easy Cherry Pie Bites Recipe
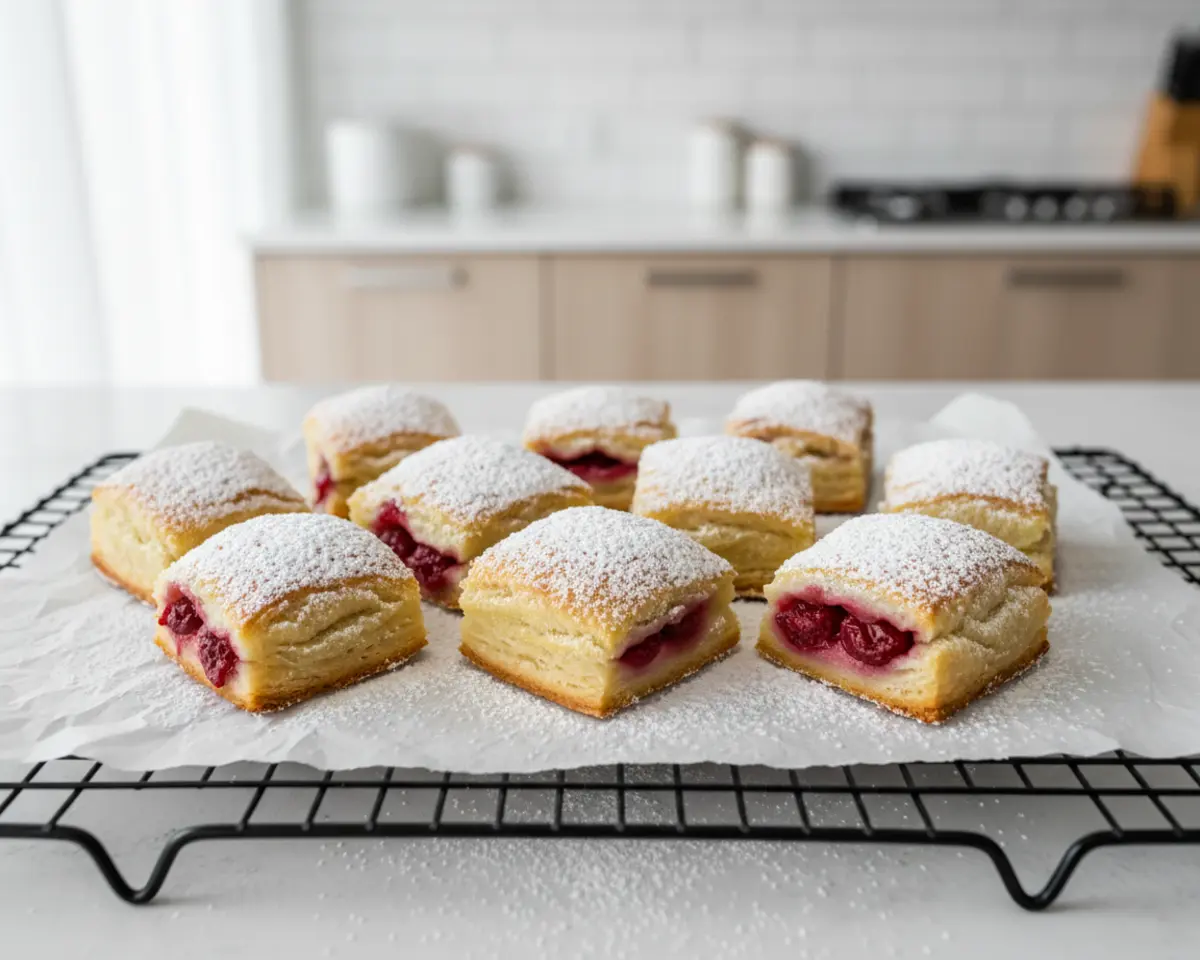
Cherry pie bites are adorable mini cherry pies that transform a classic dessert into bite-sized bliss. These easy pie bites take just 15 minutes to bake and use store-bought pie crust to keep prep simple. Perfect for potlucks, lunchboxes, or your next cozy afternoon craving, these kid-friendly cherry pie treats are a hands-down winner.
I’m Claire, a dessert daydreamer from Asheville, NC, and cherry pie bites hold a special place in my heart. These tiny tarts combine buttery golden crust, glossy cherry pie filling, and a crisp sugary edge that makes every bite feel like a mini celebration. They’re my go-to when I want all the flavor of a traditional cherry pie without the fuss of crimping a full-sized lattice.
These little beauties are endlessly forgiving, wonderfully portable, and ridiculously cute. Whether you top them with lattice strips, cut-out stars, or leave them open-faced, cherry pie bites deliver all the nostalgic charm of homemade pie in a fraction of the time. Let’s dive into how you can make these sweet little wonders in your own kitchen.
Table of Contents
Quick Overview
I have a feeling you’ll love what’s next. The Pies & Tarts favorites are packed with recipes that disappear fast at every gathering. Go check them out before someone else snags them!
Little Snapshot: What This Recipe Delivers
Cherry pie bites are buttery, flaky mini pies filled with sweet cherry pie filling and baked to golden perfection in a muffin tin. Ready in under 30 minutes, they’re an easy, kid-friendly dessert that requires just five ingredients and zero pie-making experience.
Why You’ll Love This Recipe 🌸
- These cherry pie bites take less time than folding laundry and taste like a hug from your grandma’s kitchen.
- They’re mess-free, portable, and perfect for busy moms who want homemade dessert without the stress.
- You can make them with your kids, and they’ll actually enjoy helping (and eating the results).
- According to The Spruce Eats, cherry pie is one of America’s most beloved desserts — and these mini cherry pies prove exactly why.
Quick Facts ⚡
Here’s the quick scoop on this cherry pie bites recipe.
- CourseDessert
- Prep Time10 minutes
- Cook Time15 minutes
- Total Time25 minutes
- Servings24-30 mini pies
- DifficultyEasy
Nutritional Peek
| Nutrient | Amount per Serving |
|---|---|
| Calories | 78 |
| Protein | 1g |
| Carbohydrates | 11g |
| Fat | 4g |
| Fiber | 0g |
| Sugar | 5g |
What You’ll Need
You don’t need fancy pastry tools to make these easy pie bites. A mini muffin tin and a simple cookie cutter are your best friends here. Everything else is probably already sitting in your kitchen.
- Mini muffin tin (24-cup capacity)
- 2-inch round cookie cutter or small drinking glass
- Rolling pin (optional, for smoothing dough)
- Pastry brush for egg wash
- Small spoon for filling
- Wire cooling rack
- Small shape cutters for decorative tops (optional)
Ingredients
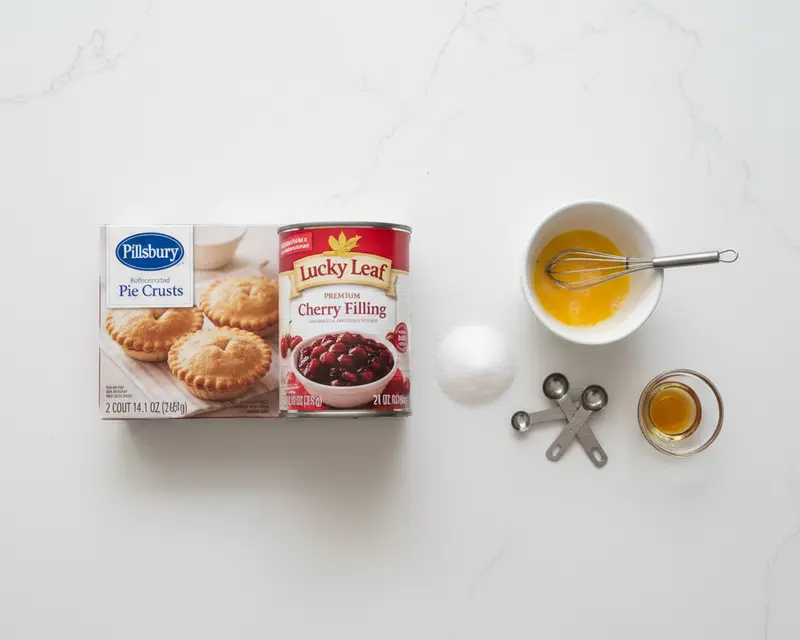
Mini cherry pies start with just a handful of pantry staples. Refrigerated pie crust is your secret weapon for flaky, buttery layers without the rolling pin marathon. Cherry pie filling brings deep, fruity sweetness, while a simple egg wash and sugar sprinkle give you that bakery-style golden finish.
| Group | Ingredient | Amount | Notes |
|---|---|---|---|
| Crust | Refrigerated pie crusts | 1 box (14.1 oz, 2 count) | Let them sit at room temp for easier cutting |
| Filling | Cherry pie filling | 1 can (21 oz) | Use your favorite brand or homemade |
| Finish | Egg | 1, beaten | Creates that gorgeous golden shine |
| Finish | Granulated sugar | 1 tablespoon | For a sweet, sparkly crust |
Step-by-Step Instructions
Let’s make this happen. Preheat your oven to 375°F and lightly grease your mini muffin tin so these little beauties pop right out when they’re done.
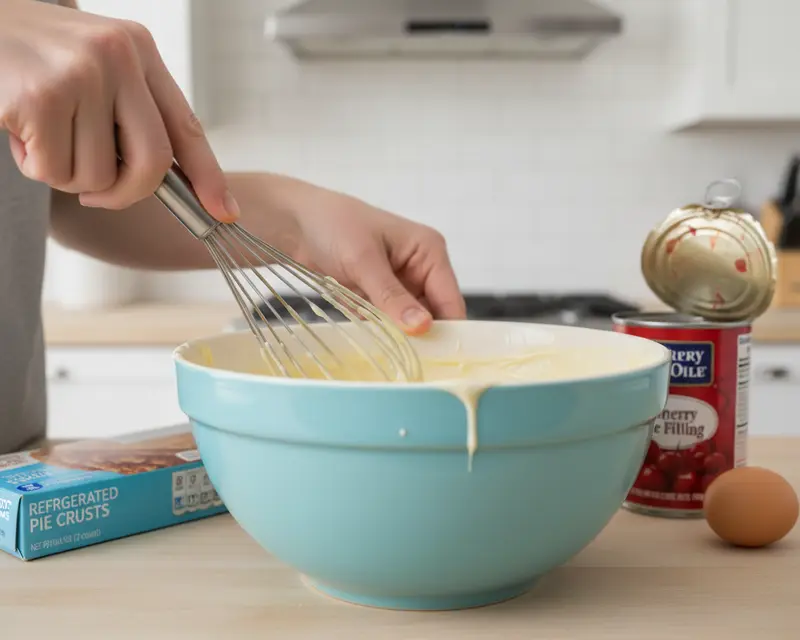
Unroll one pie crust onto a lightly floured surface and use a 2-inch cookie cutter or the rim of a small glass to cut out circles. Press gently but firmly to get clean edges. You’ll get about 12-15 circles per crust, so repeat with the second pie crust until you have 24-30 rounds total.
Gently press each pie crust circle into a mini muffin cup, making sure the dough reaches the bottom and sides. Don’t worry if the edges look a little uneven—that’s part of their homemade charm. If the dough tears, just patch it with a scrap and press to seal.
Spoon about 1 tablespoon of cherry pie filling into each crust-lined cup, being careful not to overfill. The filling will bubble up as it bakes, and you want to leave a tiny bit of room at the top so it doesn’t spill over.
If you want to get fancy, use leftover pie crust scraps to cut out small stars, hearts, or other shapes and place them on top of the filling. You can also create a mini lattice by cutting thin strips and crisscrossing them over the cherries. Both options look adorable and add extra flaky crust to every bite.
Brush the edges of each pie crust and any top decorations with beaten egg using a pastry brush. This egg wash is what gives your mini cherry pies that beautiful golden-brown finish. Sprinkle lightly with granulated sugar for a sweet, sparkly crust.
Bake for 12-15 minutes, or until the crust turns golden brown and the cherry filling is bubbling. Keep an eye on them after the 10-minute mark—ovens vary, and you want them perfectly crisp, not burnt.
Let the cherry pie bites cool in the muffin tin for about 5 minutes before carefully removing them. Use a small offset spatula or butter knife to gently lift each one out and transfer to a wire rack to cool completely. They’ll firm up as they cool and become easier to handle.
Expert Tips
Easy pie bites are forgiving, but a few small tweaks can take them from good to absolutely irresistible. Let your pie crust sit at room temperature for about 10 minutes before cutting—it’ll be more pliable and less likely to crack. If you’re working in a warm kitchen, pop the dough back in the fridge for a few minutes if it gets too soft.
Use a spoon to scoop just the cherries and a little bit of the gel from the pie filling, leaving behind excess liquid. This keeps your crust crisp instead of soggy. You want juicy filling, not a puddle in the bottom of your muffin tin.
If you’re making these for a party, bake them the day before and store them in an airtight container at room temperature. They actually taste even better the next day when the flavors have melded. Just warm them gently in the oven before serving.
For extra flavor, add a tiny pinch of almond extract to your cherry pie filling before spooning it into the crusts. It deepens the cherry flavor and adds a subtle bakery-style twist that people will ask you about.
Don’t toss those pie dough scraps! Roll them out, sprinkle with cinnamon sugar, and bake them alongside your cherry pie bites for a quick baker’s snack. My kids fight over these little cinnamon crisps every single time.
According to King Arthur Baking, keeping your dough cold is key to a flaky crust, so work quickly and don’t overhandle the dough. Cold butter creates steam pockets that make your mini pies light and crisp.
Variations
Cherry pie bites are deliciously versatile. Swap cherry pie filling for strawberry hand pies-style filling, blueberry, or apple for a flavor twist. You can even use lemon curd or Nutella for a totally different dessert vibe.
Make them dairy-free by using a vegan pie crust and brushing with almond milk instead of egg wash. They’ll still bake up golden and flaky, just without the shiny gloss.
Add a cream cheese layer by spreading a thin smear of sweetened cream cheese in the bottom of each crust before adding the cherry filling. It’s like a mini cherry cheesecake pie, and it’s ridiculously good.
Turn them into cherry hand pies by cutting larger circles, folding them in half over the filling, and crimping the edges with a fork. Bake on a parchment-lined sheet instead of a muffin tin for portable, pocket-sized treats.
For a holiday spin, add a drop of red food coloring to the egg wash for a festive Valentine’s Day or Fourth of July look. You can also dust them with powdered sugar after they cool for a snowy, elegant finish.
Troubleshooting
Problem: My crust is soggy on the bottom.
Solution: Use less liquid from the pie filling and make sure your oven is fully preheated. You can also blind-bake the crusts for 3-4 minutes before adding the filling to create a moisture barrier.
Problem: The filling bubbled over and made a mess.
Solution: Don’t overfill the cups—1 tablespoon is plenty. If you’re using a super-liquidy pie filling, drain off some of the gel before spooning it in. A little overflow is normal, but too much means you’ve added too much filling.
Problem: The pie bites stuck to the pan.
Solution: Make sure you grease the muffin tin well, and let the bites cool for a few minutes before removing them. Use a small offset spatula or butter knife to gently loosen the edges before lifting them out.
Problem: My crust is too thick and doughy.
Solution: Roll out your pie crust a little thinner before cutting circles, or press the dough circles thinner in the muffin cups. You want a delicate, flaky crust, not a bread-like texture.
Problem: The tops are browning too fast.
Solution: Tent the muffin tin loosely with foil for the last few minutes of baking. Your crust will finish cooking without getting too dark.
Storage & Reheating

Kid-friendly cherry pie bites taste incredible warm from the oven, but they’re also delicious at room temperature. Serve them on a platter with a dusting of powdered sugar, a scoop of vanilla ice cream, or a dollop of whipped cream. They’re perfect for lunchboxes, picnics, and potlucks because they travel beautifully and don’t need utensils.
Store leftover cherry pie bites in an airtight container at room temperature for up to 3 days. If your kitchen is warm or humid, pop them in the fridge to keep the crust from getting soft. They’ll last up to 5 days chilled, though they’re usually gone long before that in my house.
Reheat individual bites in the microwave for 10-15 seconds, or warm them in a 300°F oven for 5-7 minutes to crisp up the crust again. You can also freeze them in a single layer on a baking sheet, then transfer to a freezer bag for up to 3 months. Thaw at room temperature and warm before serving.
| Storage Method | Duration | Best For |
|---|---|---|
| Room temperature (airtight container) | Up to 3 days | Quick snacking and serving at parties |
| Refrigerator (airtight container) | Up to 5 days | Keeping crust fresh in warm weather |
| Freezer (freezer bag) | Up to 3 months | Make-ahead batches and emergency dessert stash |
No-Waste Kitchen Ideas
Don’t toss those pie crust scraps—roll them out, brush with melted butter, sprinkle with cinnamon sugar, and bake at 375°F for 8-10 minutes. You’ll have crispy cinnamon twists that are perfect for snacking or crumbling over ice cream.
If you have leftover cherry pie filling, swirl it into yogurt for breakfast, spoon it over pancakes or waffles, or layer it in a parfait with granola and whipped cream. You can also freeze it in an ice cube tray and use the cubes to flavor smoothies or oatmeal.
Use the leftover egg white from your egg wash to make a simple glaze by whisking it with powdered sugar and a splash of vanilla. Drizzle it over the cooled cherry pie bites for an extra-sweet finish.
Save any broken or misshapen bites and crumble them over a bowl of vanilla ice cream for an instant cherry pie sundae. It’s a delicious way to use up the “ugly” ones that didn’t quite make it to the serving platter.
Frequently Asked Questions
Got questions about making cherry pie bites? I’ve answered the most common ones below to help you bake with confidence.
What are Cherry Pie Bites?
Cherry Pie Bites are small, bite-sized desserts that feature a flaky pastry crust filled with sweet cherry pie filling. They offer all the flavor of traditional cherry pie in a convenient, portable form perfect for parties, snacking, or dessert.
How do you store Cherry Pie Bites?
Cherry Pie Bites should be stored in an airtight container at room temperature for up to 2 days, or refrigerated for up to 5 days. For longer storage, they can be frozen for up to 3 months. Reheat in the oven at 350 degrees Fahrenheit for best results.
Can I make Cherry Pie Bites ahead of time?
Yes, Cherry Pie Bites can be made ahead of time. You can prepare them completely and store them, or assemble them unbaked and refrigerate for up to 24 hours before baking. Unbaked bites can also be frozen and baked directly from frozen, adding a few extra minutes to the baking time.
What ingredients do I need to make Cherry Pie Bites?
The basic ingredients for Cherry Pie Bites include pie crust or puff pastry, cherry pie filling, and optionally an egg wash for brushing. You can use store-bought or homemade pie crust and filling. Some recipes also include a simple glaze made from powdered sugar and milk.
How long does it take to bake Cherry Pie Bites?
Cherry Pie Bites typically bake at 375-400 degrees Fahrenheit for 15-20 minutes, or until the pastry is golden brown and flaky. Baking time may vary depending on the size of your bites and your oven, so watch them closely near the end of baking.
Final Dish
Cherry pie bites are the kind of dessert that makes everyone smile—kids, adults, and especially the person who gets to skip rolling out a full pie crust. They’re buttery, flaky, and bursting with sweet cherry filling, and they come together so quickly that you’ll wonder why you ever bothered with full-sized pies.
Whether you’re packing them in lunchboxes, serving them at a party, or sneaking one (or three) for yourself, these mini cherry pies deliver big flavor in the cutest possible package.
I’d love to see your cherry pie bites creations! Snap a photo and tag me, or drop a comment below to let me know how yours turned out. Did you add a lattice top? Try a fun flavor twist? Or maybe you just ate them all straight from the pan? No judgment here—that’s exactly what these little beauties are for.
I’m Claire Whitmore — a dessert daydreamer from Asheville, NC. For me, baking isn’t about perfect pastries — it’s about the joy of sharing something sweet (and maybe sneaking an extra scoop of icing).
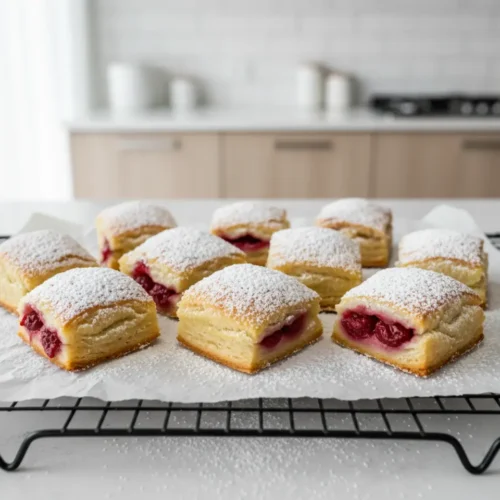
Cherry Pie Bites
Ingredients
- 1 box 14.1 ounces refrigerated pie crusts (2 count)
- 1 can 21 ounces cherry pie filling
- 1 egg beaten
- 1 tablespoon granulated sugar
Instructions
- Preheat oven to 375°F (190°C). Lightly grease a mini muffin tin.
- Unroll one pie crust on a lightly floured surface. Using a 2-inch cookie cutter or the rim of a small glass, cut out circles. Repeat with the second pie crust. You should get about 24-30 circles total.
- Press each pie crust circle gently into the prepared mini muffin cups.
- Spoon about 1 tablespoon of cherry pie filling into each crust-lined cup.
- If desired, cut small shapes (stars, hearts, etc.) from leftover pie crust dough to place on top of the filling, or create a lattice top.
- Brush the edges of the pie crust and any top pieces with the beaten egg.
- Sprinkle lightly with granulated sugar.
- Bake for 12-15 minutes, or until the crust is golden brown and the filling is bubbly.
- Let cool in the muffin tin for a few minutes before carefully removing and transferring to a wire rack to cool completely.