3-Ingredient Cherry Dump Cake
Hey there, I’m Claire Whitmore — a pastry whisperer in Asheville, NC, where butter totally counts as self-care. This 3-ingredient cherry dump cake is ridiculously easy, takes just 5 minutes of prep, and bakes into a warm, gooey dessert that’ll have everyone asking for seconds.
With just cherry pie filling, yellow cake mix, and melted butter, you get a bubbling, golden masterpiece that tastes like you spent all day in the kitchen — but honestly, you’ll spend more time preheating your oven than actually assembling this.
This recipe is perfect for busy weeknights, last-minute potlucks, or those moments when you need something sweet without the stress.
The cherry filling provides juicy tartness, the cake mix creates a tender, buttery crust, and the melted butter? Well, that’s where all the magic happens. It’s basically a cobbler’s laid-back cousin — less fuss, same cozy vibes.
Table of Contents
Little Snapshot: What This Recipe Delivers
This 3-ingredient cherry dump cake combines canned cherry pie filling, yellow cake mix, and melted butter to create an effortless, crowd-pleasing dessert in under an hour.
It requires zero mixing — just layer, drizzle, and bake — making it perfect for beginner bakers or anyone craving a warm, comforting treat without complicated techniques or specialty ingredients.
Why You’ll Love This Recipe 🌸
- This cherry dump cake takes less time than scrolling through your social media feed — seriously, it’s a 5-minute assembly job.
- You don’t need fancy baking skills or a mile-long ingredient list; if you can open a can and melt butter, you’re basically a dessert genius.
- It feeds a crowd without breaking the bank, and leftovers (if there are any) taste even better the next day.
- According to Southern Living’s comprehensive dump cake guide, the beauty of dump cakes lies in their simplicity and ability to deliver bakery-quality results with minimal effort — and this recipe proves exactly why.
Quick Facts ⚡
Here’s the quick scoop on this 3-ingredient cherry dump cake.
- CourseDessert
- Prep Time5 minutes
- Cook Time45 minutes
- Total Time50 minutes
- Servings8 servings
- DifficultyEasy
Nutritional Peek
Here’s a quick peek at what you’re getting in each delicious serving of this easy cherry dump cake.
| Nutrient | Amount per Serving |
|---|---|
| Calories | 320 kcal |
| Protein | 2g |
| Carbohydrates | 48g |
| Fat | 14g |
| Fiber | 1g |
| Sugar | 32g |
Ingredients
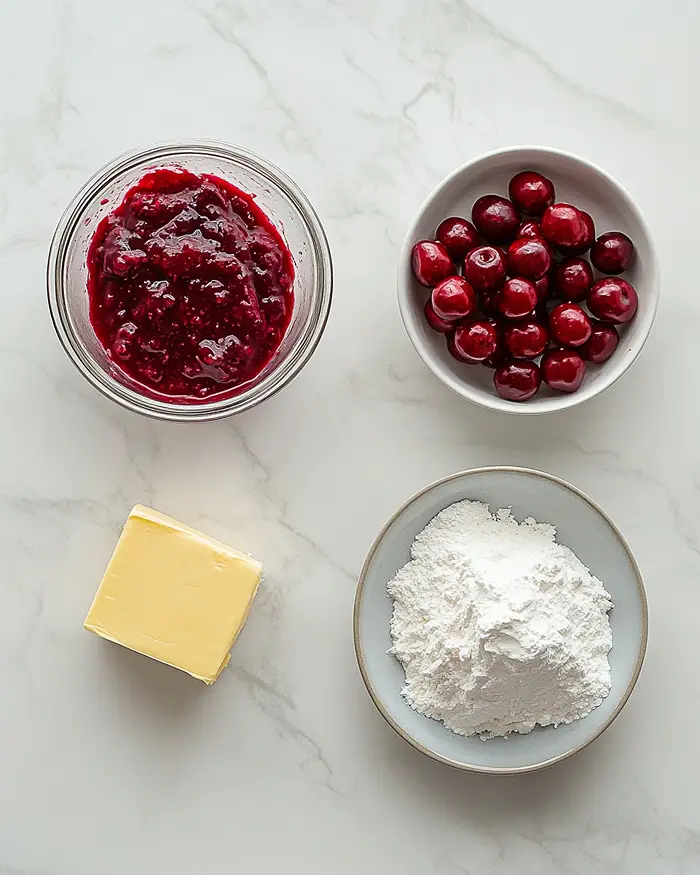
This cherry cake mix dump cake comes together with just three pantry-friendly ingredients — no fancy shopping trips required.
For this recipe, you’ll need a can of cherry pie filling for the fruity base, a box of yellow cake mix for that golden, crumbly topping, and melted unsalted butter to bring everything together with rich, buttery goodness. These three simple components create layers of flavor and texture without any complicated mixing or measuring.
| Amount | Ingredient |
|---|---|
| 1 (21 oz) can | Cherry pie filling (the base of all that gooey, fruity magic) |
| 1 (15.25 oz) box | Yellow cake mix (yep, straight from the box — no mixing required) |
| ½ cup (1 stick) | Unsalted butter, melted (yes, real butter — margarine just doesn’t deliver the same rich flavor here) |
This recipe is just the beginning. Over in the Cakes & Cupcakes collection, you’ll find even more dishes that are just as easy and packed with flavor. Go take a peek — your next favorite is waiting.
Tools You’ll Actually Use
You probably have everything you need already sitting in your kitchen:
- 9×9-inch or 9×13-inch baking dish (greased)
- Small saucepan or microwave-safe bowl (for melting butter)
- Can opener
- Measuring cup
- Spoon or spatula (for spreading)
Step-by-Step Instructions
Making this 3-ingredient cherry dump cake is seriously foolproof — just follow these simple steps and you’ll have a warm, bubbly dessert ready in under an hour.
Step 1: Preheat your oven Preheat your oven to 350°F (175°C) and grease a 9×9-inch square baking dish or 9×13-inch baking dish with butter or non-stick spray. The size you choose will affect the thickness — a 9×9 gives you deeper, gooier layers while a 9×13 spreads things out for more crispy edges.

Step 2: Dump the cherry pie filling Pour the entire 21-ounce can of cherry pie filling into the prepared baking dish and spread it evenly across the bottom using a spoon or spatula. Make sure the cherries are distributed nicely so every bite gets that sweet, fruity goodness.
Step 3: Add the cake mix layer Sprinkle the dry yellow cake mix evenly over the cherry pie filling, creating a uniform layer that covers all the cherries. Do NOT stir or mix — just spread it in an even layer like you’re tucking the cherries under a cozy blanket. This is key to getting that perfect cobbler-like texture on top.
Step 4: Drizzle with melted butter Pour the melted unsalted butter evenly over the top of the dry cake mix, drizzling it back and forth in a zigzag pattern to cover as much surface area as possible. The butter will seep into the cake mix during baking, creating those irresistible golden, crispy patches we’re all here for.
Step 5: Bake until golden and bubbly Bake for 40-50 minutes, or until the top is golden brown and the cherry filling is bubbling around the edges. Your kitchen should smell like a warm, fruity bakery by now — if it does, you’re doing everything right.
Step 6: Cool and serve Let the cherry dump cake cool for 5-10 minutes before serving (this helps it set up just a bit). Dust with powdered sugar for a pretty finish, then scoop into bowls and serve warm with vanilla ice cream or whipped cream if you’re feeling extra indulgent.
Claire’s Pro Tips & Gentle Guidance
This easy cherry dump cake is pretty forgiving, but these little tricks will take it from good to absolutely crave-worthy.
Don’t skip the butter drizzle. I know it seems like a lot of butter, but that’s what transforms the dry cake mix into a golden, crispy topping. If you skimp on it, you’ll end up with powdery patches instead of that gorgeous, bakery-style crust.
Use cold butter if you want extra crunch. Instead of melting the butter, you can slice it into thin pats and lay them across the top of the cake mix. As it bakes, the butter melts and creates even more crispy, caramelized spots — it’s a game-changer if you love texture.
Try different pie fillings. Cherry is classic, but apple, blueberry, or peach pie filling work beautifully too. You can even mix two flavors for a fun twist — cherry-blueberry is one of my favorites for summer gatherings, especially when I’m also making crowd-pleasing appetizers like these crispy baked broccoli cheese balls.
Add a little spice. A sprinkle of cinnamon or a pinch of almond extract over the cherry filling adds warmth and depth. According to King Arthur Baking‘s detailed guide to flavor extracts, almond extract pairs especially well with cherries, amplifying the fruity notes without overpowering them.
Quick Fixes for 3-Ingredient Cherry Dump Cake
Problem: The top is browning too fast but the filling isn’t bubbly yet. Cover the dish loosely with aluminum foil for the last 15-20 minutes of baking. This shields the top from direct heat while allowing the filling underneath to finish cooking and bubbling around the edges.
Problem: The cake mix is still powdery in spots after baking. This usually means the butter didn’t reach every area. Next time, drizzle the melted butter more thoroughly, or use a spoon to gently spread it across any dry patches before baking.
Problem: The dessert is too runny even after cooling. The filling needs a bit of time to thicken as it cools. Let it sit for at least 10-15 minutes after baking — it’ll firm up nicely and be much easier to serve without turning into a soupy mess.
Problem: It’s sticking to the pan. Always grease your baking dish well before adding the filling. If you forgot, run a thin spatula around the edges while it’s still warm to loosen it up before serving.
Variations & Fun Twists
This cherry dump cake is endlessly adaptable — here are a few ways to make it your own.
Seasonal swaps: Use pumpkin pie filling in the fall with a spice cake mix, or try cranberry sauce during the holidays for a festive twist. In summer, fresh or frozen peaches with a sprinkle of brown sugar on top are absolutely divine.
Gluten-free version: Simply swap the regular yellow cake mix for a gluten-free version — the rest of the recipe stays exactly the same, and honestly, no one will even notice the difference.
Fancy it up: Top each serving with a dollop of whipped cream, a scoop of vanilla ice cream, or even a drizzle of caramel sauce. For gatherings, I love adding a handful of sliced almonds or chopped pecans on top before baking for extra crunch.
Chocolate lover’s twist: Use chocolate cake mix instead of yellow and add a handful of chocolate chips over the cherry filling before sprinkling on the mix. It’s like a warm, gooey cherry-chocolate lava situation that’ll blow your mind.
Serving, Storage & Reheating
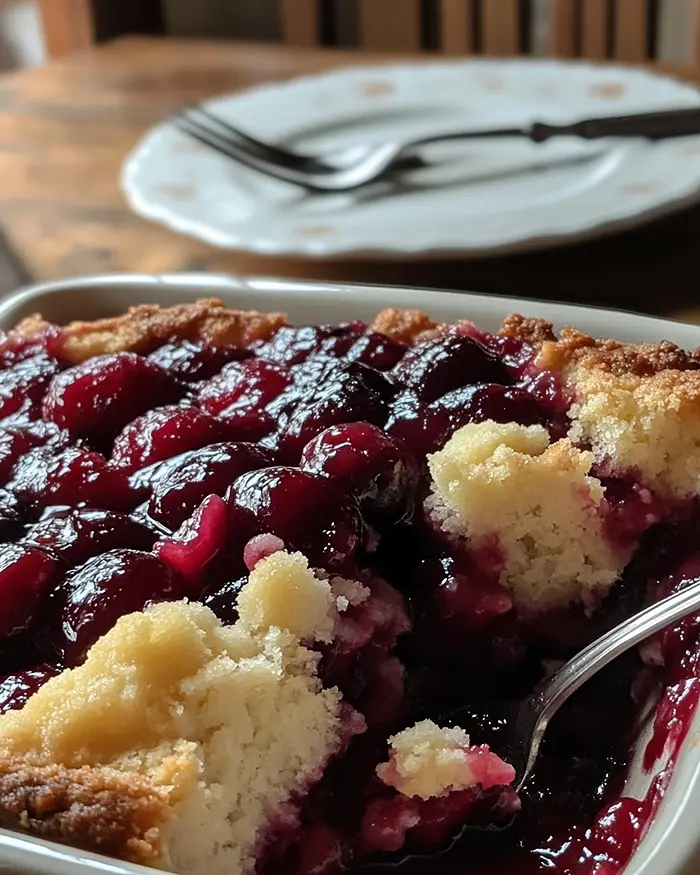
This cherry cake mix dump cake is best enjoyed warm, straight from the oven with a scoop of vanilla ice cream melting on top. If you’re serving it at a potluck or party, keep it in the baking dish and let people help themselves — it’s casual, cozy, and always a hit.
Store any leftovers (if you actually have leftovers, which I doubt) in an airtight container in the fridge for up to 3 days. The flavors meld together even more as it sits, so day-two slices are legitimately amazing.
To reheat, scoop individual portions into microwave-safe bowls and warm for 30-45 seconds, or cover the whole dish with foil and reheat in a 300°F oven for about 15 minutes. You want it warm and gooey again, not dried out, so keep an eye on it.
No-Waste Kitchen Magic
Got leftover cherry dump cake? Crumble it up and layer it in parfait glasses with Greek yogurt and granola for a decadent breakfast treat. It’s like having dessert for breakfast, but we’ll call it a “fruit parfait” and feel virtuous about it.
Extra cake mix from another project? Use it in place of the yellow cake mix here — chocolate, white, or even funfetti cake mix work beautifully with cherry filling. Just adjust the butter slightly if the box size is different.
Leftover pie filling? Swirl it into pancake batter, spoon it over waffles, or use it as a topping for cheesecake or pound cake. Cherry pie filling is basically a secret weapon for instant dessert upgrades.
FAQs
Can I freeze this 3-ingredient cherry dump cake?
Absolutely! Once it’s completely cooled, cover the dish tightly with plastic wrap and then foil, and freeze for up to 2 months. Thaw overnight in the fridge and reheat in the oven until warmed through.
What’s the best way to store cherry dump cake?
Store it covered in the fridge for up to 3 days. The cake topping stays surprisingly crisp even after refrigeration, especially if you reheat it before serving.
How do I know when the cherry dump cake is done?
Look for a golden-brown top and bubbling cherry filling around the edges. If you insert a toothpick into the cake portion, it should come out mostly clean with just a few moist crumbs.
Why should I use unsalted butter in cherry dump cake?
Unsalted butter gives you control over the sweetness and prevents the dessert from tasting too salty. Cake mixes already contain some salt, so adding salted butter can throw off the balance.
Cozy Closing
I’d love to see your spin on this 3-ingredient cherry dump cake! Drop a comment below or tag me with your photos — whether you went classic or added your own fun twist, I’m always inspired by how you make these recipes your own. This cherry dump cake is so versatile and forgiving; I bet you’ve already got amazing variations in mind!
I’m Claire Whitmore — a dessert daydreamer from Asheville, NC. For me, baking isn’t about perfect pastries — it’s about the joy of sharing something sweet (and maybe sneaking an extra warm spoonful straight from the pan). Happy baking!

3-Ingredient Cherry Dump Cake
Equipment
- 9×9-inch or 9×13-inch baking dish
- Small saucepan or microwave-safe bowl
- Can opener
- Measuring cup
- Spoon or spatula
Ingredients
- 1 21 oz can cherry pie filling the base of all that gooey, fruity magic
- 1 15.25 oz box yellow cake mix yep, straight from the box — no mixing required
- ½ cup unsalted butter, melted yes, real butter — margarine just doesn’t deliver the same rich flavor here
Instructions
- Preheat your oven to 350°F (175°C) and grease a 9×9-inch square baking dish or 9×13-inch baking dish with butter or non-stick spray. The size you choose will affect the thickness — a 9×9 gives you deeper, gooier layers while a 9×13 spreads things out for more crispy edges.
- Pour the entire 21-ounce can of cherry pie filling into the prepared baking dish and spread it evenly across the bottom using a spoon or spatula. Make sure the cherries are distributed nicely so every bite gets that sweet, fruity goodness.
- Sprinkle the dry yellow cake mix evenly over the cherry pie filling, creating a uniform layer that covers all the cherries. Do NOT stir or mix — just spread it in an even layer like you’re tucking the cherries under a cozy blanket. This is key to getting that perfect cobbler-like texture on top.
- Pour the melted unsalted butter evenly over the top of the dry cake mix, drizzling it back and forth in a zigzag pattern to cover as much surface area as possible. The butter will seep into the cake mix during baking, creating those irresistible golden, crispy patches we’re all here for.
- Bake for 40-50 minutes, or until the top is golden brown and the cherry filling is bubbling around the edges. Your kitchen should smell like a warm, fruity bakery by now — if it does, you’re doing everything right.
- Let the cherry dump cake cool for 5-10 minutes before serving (this helps it set up just a bit). Dust with powdered sugar for a pretty finish, then scoop into bowls and serve warm with vanilla ice cream or whipped cream if you’re feeling extra indulgent.