Easy No Bake Cheesecake Cups
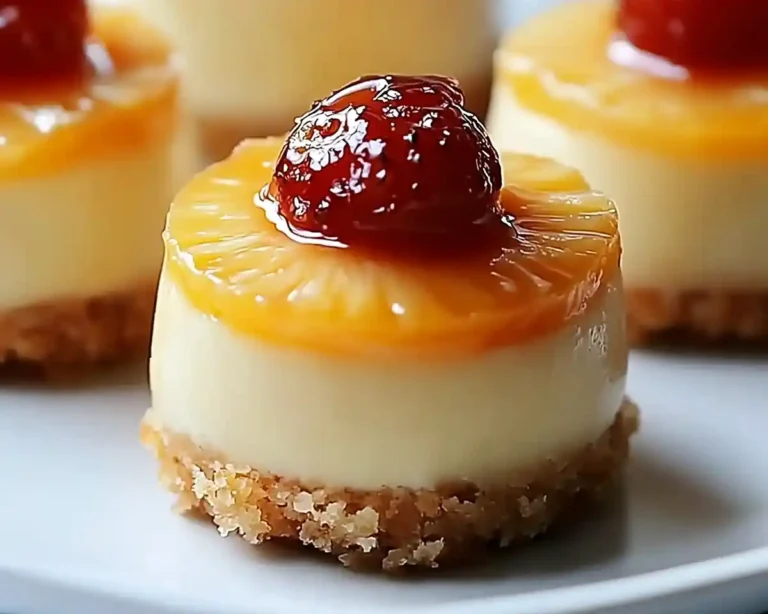
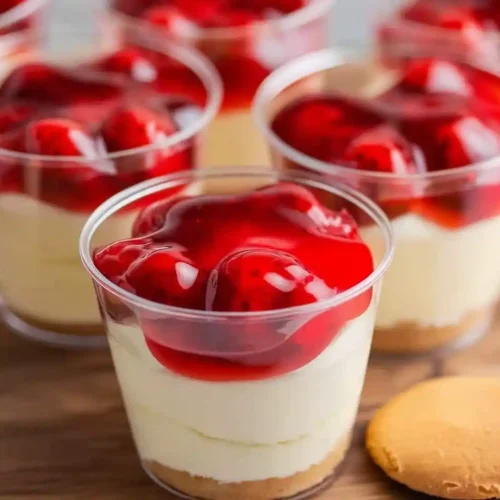
No Bake Cheesecake Cups are creamy, dreamy individual desserts with a cookie base, fluffy cheesecake filling, and fruit topping—no oven needed, ready in minutes!
Hey there, I’m Claire Whitmore — a pastry whisperer in Asheville, NC, where butter totally counts as self-care. This No Bake Cheesecake Cups recipe is my secret weapon for stress-free entertaining and last-minute dessert emergencies.
These little beauties combine a vanilla wafer base, silky cream cheese filling, whipped cream clouds, and a gorgeous fruit topping—all without turning on your oven. They’re make-ahead friendly, endlessly customizable, and perfectly portioned for parties, potlucks, or Tuesday evenings when you just need something sweet.
I stumbled onto this recipe during a particularly chaotic summer when my oven decided to quit right before a backyard barbecue. Turns out, some of the best desserts don’t need heat at all—just a little creativity and a good whisk.
What This Recipe Delivers
No Bake Cheesecake Cups deliver all the creamy, tangy richness of classic cheesecake in cute individual portions—no baking, no water bath, no stress. With just 10 minutes of prep and simple ingredients like cream cheese, whipped cream, and vanilla wafers, you’ll have elegant dessert cups ready to chill and serve in about an hour.
Why You’ll Love This Recipe 🌸
- This No Bake Cheesecake Cups recipe takes less time than deciding what to watch on Netflix—seriously, 10 minutes of active work.
- They look bakery-fancy but require zero baking skills, making them perfect for busy moms who want impressive desserts without the stress.
- Make them ahead and stash them in the fridge—they actually get better as they chill, so you can prep the night before and look like a dessert genius the next day.
- According to Food Network’s guide to no-bake desserts, the best warm-weather treats skip the oven entirely — and this recipe proves exactly why.
Quick Facts ⚡
Here’s the quick scoop on this No Bake Cheesecake Cups.
- CourseDessert
- Prep Time10 minutes
- Cook Time0 minutes
- Total Time1 hour 10 minutes (includes chilling)
- Servings16 cups
- DifficultyEasy
Table of Contents
No Bake Cheesecake Cups
Equipment
- Electric mixer
- Mixing bowls
- Rubber spatula
- Small cups or dessert glasses
- Measuring cups and spoons
- Spoon
Ingredients
Ingredients
- 16 Vanilla wafer cookies
- 16 ounces Cream cheese, softened
- 1 cup Powdered sugar
- 1 teaspoon Vanilla extract
- 1 cup Heavy whipping cream
- ½ teaspoon Cornstarch
- 1 can Prepared fruit pie filling Cherry, strawberry, or blueberry
Instructions
- Beat softened cream cheese until smooth, then add powdered sugar and vanilla and mix until fluffy.
- Whip cold heavy cream with cornstarch until stiff peaks form.
- Fold whipped cream gently into the cream cheese mixture.
- Place one vanilla wafer cookie at the bottom of each cup and fill with cheesecake mixture.
- Top each cup with fruit pie filling and chill for at least 1 hour before serving.
Notes
Nutritional Peek
Here’s a peek at what you’re getting per serving (nutrition will vary based on your cup size and toppings):
| Nutrient | Amount per Serving |
|---|---|
| Calories | 180 kcal |
| Protein | 3g |
| Carbohydrates | 16g |
| Fat | 12g |
| Fiber | 0g |
| Sugar | 13g |
Ingredients
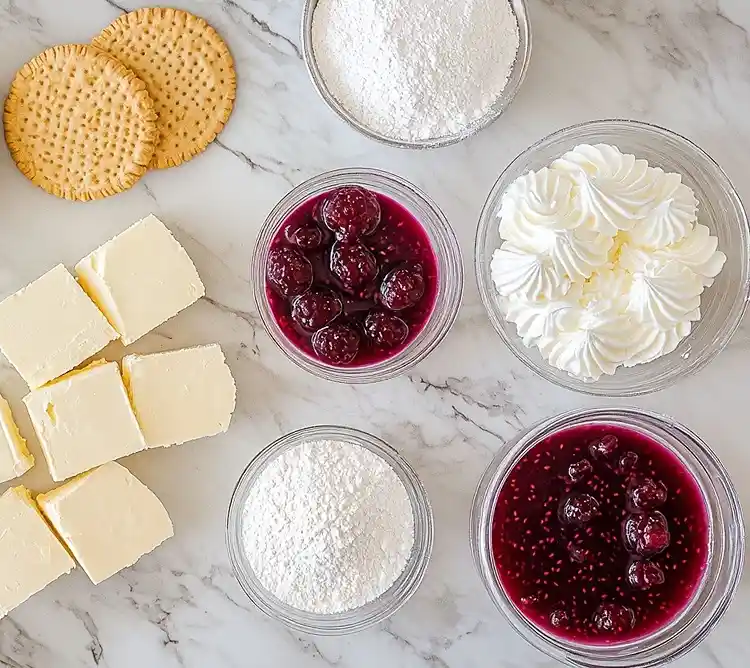
These Easy Dessert Recipes In A Cup start with ingredients you probably already have hanging out in your fridge. For the creamy base—cream cheese, powdered sugar, and vanilla extract—make sure everything’s at room temperature so it blends into silky perfection without lumps.
For the whipped topping—heavy cream and a touch of cornstarch—you’ll beat it until it’s cloud-like and stable enough to hold its shape beautifully.
| Amount | Ingredient |
|---|---|
| 16 (or more as needed) | Vanilla wafer cookies (Yes, the classic Nilla Wafers work perfectly—no substitutions needed here.) |
| 16 ounces | Cream cheese, softened (Let it sit on the counter for 30 minutes so it’s actually soft—cold cream cheese = lumpy filling.) |
| 1 cup | Powdered sugar (Also called confectioners’ sugar—it dissolves way better than granulated.) |
| 1 teaspoon | Vanilla extract (Pure vanilla tastes so much better than imitation, trust me.) |
| 1 cup | Heavy whipping cream (The real stuff—not half-and-half or “whipping cream” in a tub.) |
| ½ teaspoon | Cornstarch (This little trick keeps your whipped cream stable and fluffy for days.) |
| 1 can | Prepared fruit pie filling (Cherry, strawberry, or blueberry—pick your favorite or mix it up!) |
Tools You’ll Actually Use
- Electric mixer (hand or stand—either works great)
- 2 medium mixing bowls
- Rubber spatula
- 16 small cups or dessert glasses (I love clear plastic cups so you can see those pretty layers)
- Measuring cups and spoons
- Spoon for topping
How To Make Mini Dessert Cups
Making No Bake Cheesecake Cups is ridiculously easy—like, “I can’t believe this counts as homemade” easy.
Step 1: Beat the softened 16-ounce block of cream cheese with an electric mixer on medium speed until it’s completely smooth and creamy with no lumps—this takes about 2 minutes. Add 1 cup of powdered sugar and 1 teaspoon of vanilla extract, then beat until everything’s fully combined and fluffy. Set this gorgeous cream cheese mixture aside while you make the whipped cream.
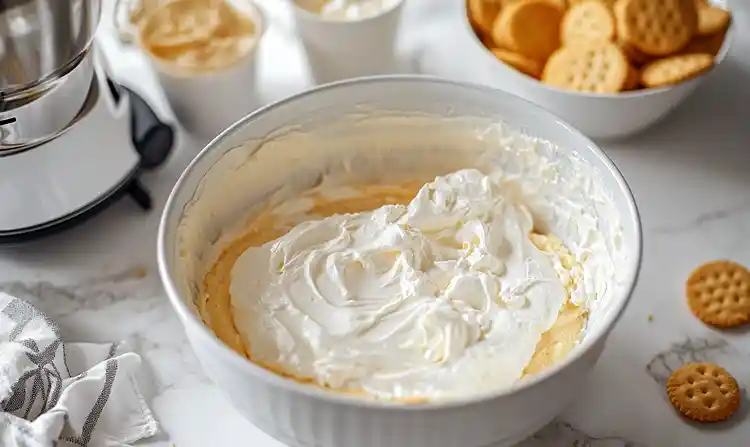
Step 2: In a separate medium bowl, pour in 1 cup of cold heavy whipping cream and beat on low speed for about 1 minute to start thickening it up. Sprinkle in ½ teaspoon of cornstarch (this keeps it stable and prevents weeping), then crank the mixer to high and beat for 3-4 minutes until you see stiff peaks form—when you lift the beaters, the cream should stand up proud and not flop over.
Step 3: Gently fold the whipped cream into the cream cheese mixture using a rubber spatula, using broad strokes from the bottom up until everything’s combined and dreamy. Don’t overmix or you’ll deflate all that beautiful fluff you just created.
Step 4: Place one vanilla wafer cookie flat on the bottom of each cup, then spoon or pipe the cheesecake filling on top until it reaches about 1 inch from the rim. You want to leave room for that gorgeous fruit topping.
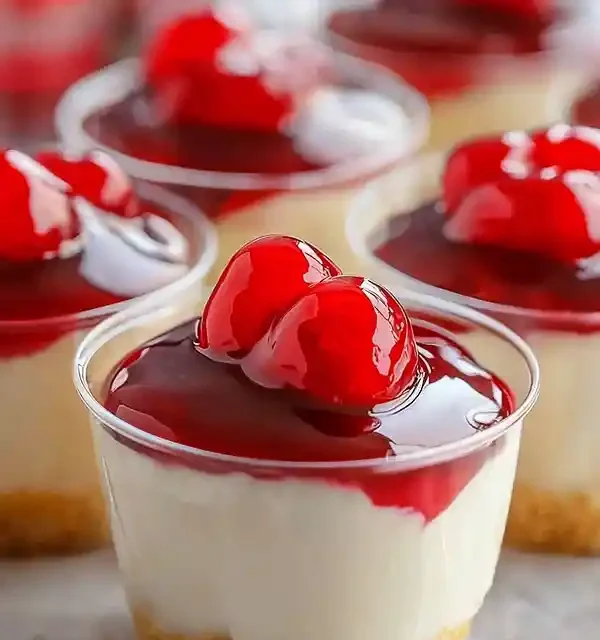
Step 5: Spoon your chosen fruit pie filling—cherry, strawberry, or blueberry—generously on top of each cup. Pop them in the fridge for at least 1 hour to set (overnight is even better if you’ve got the time), and watch them disappear the moment you serve them.
This is just one of the many gems in our Delicious Desserts series. Every recipe there has been tested and loved in real kitchens, and I promise there’s something for every craving. Go see for yourself.
Claire’s Pro Tips & Gentle Guidance
Let me share some little secrets I’ve picked up while making these Cheesecake In Cups about a million times.
For ultra-smooth filling, make absolutely sure your cream cheese is truly softened—not just “kinda soft” but “I can press my finger into it easily” soft. Cold cream cheese will give you lumps no matter how long you beat it, and nobody wants chunky cheesecake.
The cornstarch in the whipped cream is a total game-changer. It stabilizes the cream so your cups stay fluffy and beautiful for days instead of getting weepy and sad-looking after a few hours.
If you’re short on time, crush the vanilla wafer before adding it to the cups. The cheesecake will set up faster, and you won’t have to wait as long for that perfect creamy texture.
Want to get fancy? Pipe the cheesecake filling into the cups using a piping bag or a zip-top bag with the corner snipped off. It looks way more professional and makes portion control super easy.
For even more inspiration on perfecting expert no-bake cheesecake techniques, Sally’s Baking Addiction has fantastic tips on achieving that signature creamy texture without an oven.
Quick Fixes for No Bake Cheesecake Cups
Problem: My filling turned out runny. Your whipped cream probably wasn’t beaten to stiff peaks, or your cream cheese was too soft and warm. Make sure the heavy cream is cold from the fridge before whipping, and beat it until the peaks stand straight up without drooping.
Problem: The filling has lumps in it. Your cream cheese wasn’t softened enough before mixing. Next time, let it sit at room temperature for at least 30 minutes, and beat it alone first until completely smooth before adding anything else.
Problem: The whipped cream deflated when I folded it in. You might’ve stirred too vigorously or for too long. Use gentle folding motions with a rubber spatula—think of it like tucking a baby into bed, not stirring pancake batter.
Problem: My cups look watery after a day in the fridge. This happens when the whipped cream wasn’t stabilized properly. The cornstarch is crucial—don’t skip it, and make sure you beat the cream to stiff peaks before folding.
Variations & Fun Twists
These Easy Dessert Recipes In A Cup are endlessly adaptable to your mood and pantry.
Switch up the base: Try graham cracker crumbs, chocolate cookies, gingersnaps, or even crushed pretzels for a sweet-salty vibe. Just press about a tablespoon into the bottom of each cup.
Go chocolate crazy: Fold in ¼ cup of cocoa powder with the powdered sugar for chocolate cheesecake cups, or drizzle melted chocolate over the top before adding fruit.
Make them seasonal: Top with pumpkin pie filling and a sprinkle of cinnamon in fall, or use lemon curd and fresh berries in spring. For the holidays, try my Christmas Fruit Wreath Appetizer for more festive inspiration.
Keep it fresh: Skip the canned pie filling and top with fresh berries, sliced peaches, caramel sauce, or a dollop of berry compote. Check out my Blueberry Cinnamon Rolls for ideas on working with fresh berries.
Serving, Storage & Reheating
Serve these No Bake Cheesecake Cups straight from the fridge when they’re beautifully chilled and set. They’re perfect for parties, picnics, or weeknight treats—plus, the individual portions mean no slicing and everyone gets their own adorable dessert.
Store your cheesecake cups covered in the refrigerator for up to 5 days (though honestly, they rarely last that long at my house). The cookie base will soften as it sits, which actually makes it even better—think of it as getting all those flavors married together.
If you want to freeze them, go for it—they freeze beautifully for up to 2 months even with the fruit topping. Just thaw them in the fridge overnight before serving, and they’ll taste freshly made. For more make-ahead dessert ideas, my Gingerbread House Icing is another stress-free option.
No-Waste Kitchen Magic
Got leftover cheesecake filling? Spread it on toast, bagels, or graham crackers for an indulgent breakfast treat. It’s like cream cheese frosting but somehow feels more acceptable at 7 a.m.
If your vanilla wafers are getting stale, crush them up and use them as an ice cream topping or mix them into yogurt parfaits. They add the perfect sweet crunch.
Extra fruit pie filling works beautifully swirled into oatmeal, spooned over pancakes, or mixed into plain yogurt for a quick fruit-on-the-bottom situation. Waste not, want not!
No Bake Cheesecake Cups FAQs
How to make cheesecake cup?
Making a cheesecake cup is super simple—just beat softened cream cheese with powdered sugar and vanilla until smooth, fold in freshly whipped cream stabilized with cornstarch, then layer it over a vanilla wafer in individual cups and top with fruit filling. Chill for at least an hour, and you’ve got perfect no-bake cheesecake cups ready to devour.
Are cheese cupcakes easy to make?
Yes, cheesecake cups are incredibly easy—probably one of the easiest desserts you’ll ever make! There’s no baking involved, no crust to press into a pan, and no water bath to worry about. You just whip, fold, layer, and chill—even beginner bakers nail these every time.
What are some common cheesecake cup mistakes?
The biggest mistakes are using cold cream cheese (which creates lumps), under-beating the whipped cream (leading to runny filling), and skipping the cornstarch (which makes the cream weep). Also, not chilling long enough means the cheesecake won’t set properly—give it at least an hour, but overnight is ideal for the best texture.
Can I freeze No Bake Cheesecake Cups?
Absolutely—these freeze like a dream for up to 2 months! Just cover them tightly with plastic wrap or store in an airtight container, then thaw in the fridge overnight before serving. The texture stays creamy and delicious.
What’s the best way to store No Bake Cheesecake Cups?
Keep them covered in the refrigerator for up to 5 days. I like to place plastic wrap directly on top of each cup or store them in a container with a lid to prevent them from absorbing fridge odors.
Cozy Closing
I’d love to see your spin on this No Bake Cheesecake Cups recipe! Drop a comment below with your No Bake Cheesecake Cups photos—I’d love to see how you made it your own. This No Bake Cheesecake Cups dessert is so versatile; I bet you’ve got amazing variations already in mind! Whether you’re topping them with fresh fruit, going full chocolate mode, or serving them at your next gathering, these little cups of joy are guaranteed crowd-pleasers.
For more easy entertaining ideas, don’t miss my Pesto Puff Pastry Christmas Trees—another stress-free showstopper!
I’m Claire Whitmore — a dessert daydreamer from Asheville, NC. For me, baking isn’t about perfect pastries — it’s about the joy of sharing something sweet (and maybe sneaking an extra scoop of cheesecake filling straight from the bowl).