Gingerbread House Icing
Gingerbread House Icing is a super-simple 2-ingredient recipe that creates the perfect thick, sturdy frosting to hold your festive gingerbread house together. Quick, easy, and foolproof for holiday decorating fun!
Hey there, I’m Claire Whitmore — a dessert daydreamer in Asheville, NC, where sprinkles are basically a food group and butter totally counts as self-care.
This Gingerbread House Icing recipe is my secret weapon for stress-free holiday building projects. With just two ingredients and five minutes, you’ll have the perfect thick, sturdy frosting that actually holds your gingerbread walls together instead of sliding off into a sugary puddle.
Whether you’re crafting an easy gingerbread house with the kids or going full architectural mode with a gingerbread mansion, this simple icing delivers.
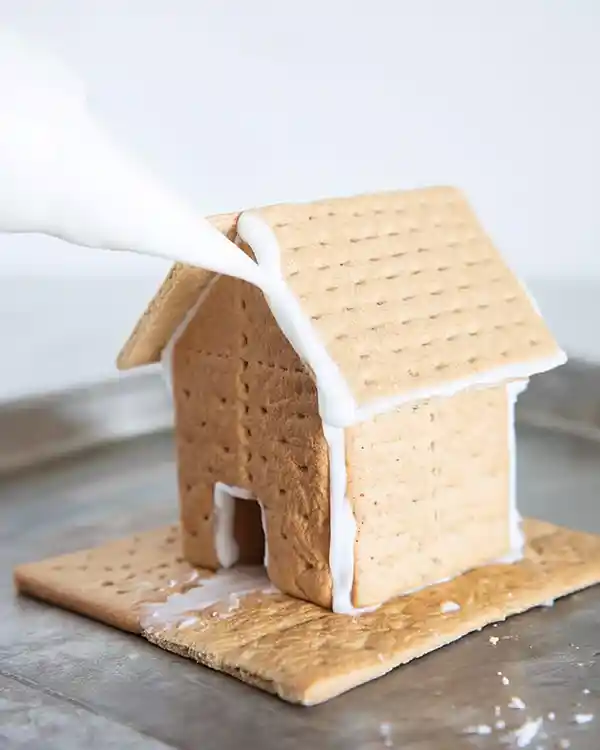
It’s thick enough to glue walls, pipe decorations, and stick candy on every possible surface without dripping. Plus, there’s zero fancy equipment needed — just a bowl, a spoon, and your holiday spirit.
Last December, I made three gingerbread houses in one weekend for my nieces. By house number three, I’d perfected this foolproof ratio, and let me tell you, even when little hands got creative with the candy placement, those walls stayed standing.
Little Snapshot: What This Recipe Delivers
This Gingerbread House Icing is a quick 2-ingredient royal icing-style frosting that dries hard and holds strong. Made with just powdered sugar and water, it’s ready in minutes, pipes beautifully from a zip-top bag, and creates the perfect “glue” for assembling and decorating gingerbread houses without any fuss.
Why You’ll Love This Recipe 🌸
- This Gingerbread House Icing takes literally five minutes to make — faster than finding your piping tips in that kitchen drawer you never organize.
- It dries rock-hard so your gingerbread house actually stays standing instead of slowly collapsing like a sugar-coated disaster movie.
- You only need two ingredients you probably already have in your pantry, which means no last-minute grocery store panic.
- According to King Arthur Baking in their comprehensive gingerbread house guide, the right icing consistency is everything for sturdy construction — and this recipe nails that perfect thick, pipeable texture every single time.
Quick Facts ⚡
Here’s the quick scoop on this Gingerbread House Icing.
- CourseDessert Topping/Construction Icing
- Prep Time5 minutes
- Cook Time0 minutes
- Total Time5 minutes
- ServingsEnough for 1 medium gingerbread house
- DifficultyEasy
Gingerbread House Icing
Equipment
-
Medium mixing bowl
-
Spoon or small whisk
-
Zip-top plastic bag
-
Scissors
-
Spatula
Ingredients
- 2 cups Powdered sugar sifted if lumpy
- 2 Tablespoons Water plus more as needed
Instructions
-
In a medium bowl, combine the powdered sugar and 1 tablespoon of water. Stir until the mixture looks dry and crumbly. Don’t panic — this is exactly what you want at first.
-
Add the second tablespoon of water and keep stirring. It’ll look clumpy and weird for a minute, but just keep going. Stir until the icing becomes smooth and thick. This takes about 2-3 minutes of steady stirring, and your arm might get a little tired, but you’ve got this.
-
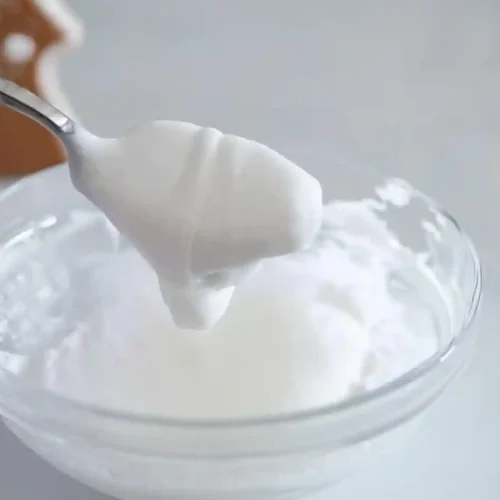
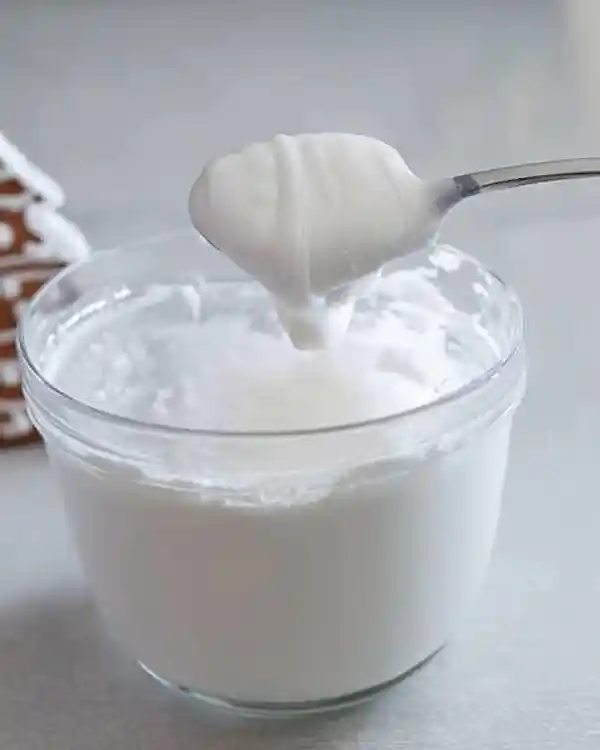
Check the consistency by doing the “spoon test.” Lift your spoon above the bowl and flip it over. The icing should stay on the spoon when turned upside down without dripping off. If it drizzles or runs off immediately, it’s too thin.
-
If your icing is too thin (dripping off the spoon), add 1 to 2 tablespoons of powdered sugar and stir until thick again. If it’s too thick and won’t pipe easily, add water 1 teaspoon at a time until you reach that perfect balance.
-
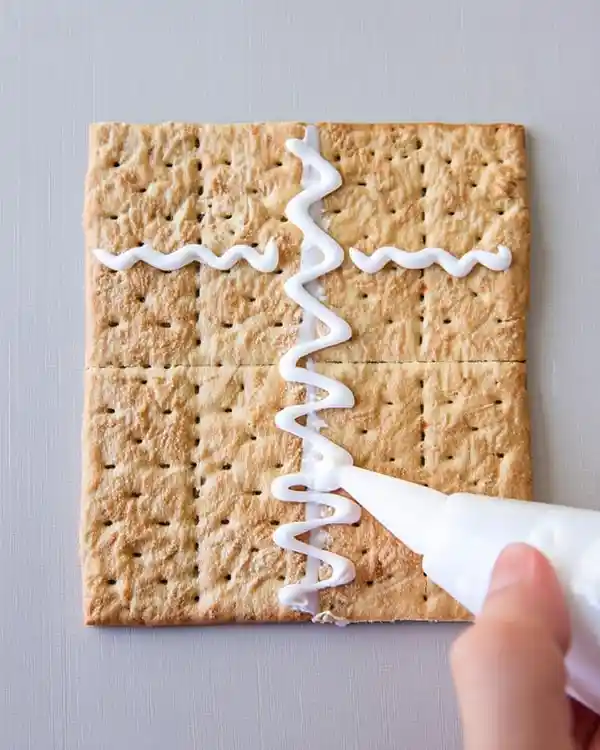
Once you’ve nailed the consistency, transfer the icing into a zip-top plastic bag. Seal it tightly, then snip off one corner — start with a tiny cut, you can always make it bigger. Now you’re ready to build and decorate your gingerbread masterpiece!
Notes
Test your icing before you commit to decorating. Pipe a small line on a piece of parchment paper and let it sit for 5 minutes. If it holds its shape without spreading, you’re golden.
If your icing starts drying out in the bag while you’re decorating, just snip off the tip a bit more or add a tiny bit of water to the remaining icing in your bowl. Keep extra icing covered with a damp towel so it doesn’t crust over.
Make your icing fresh when you’re ready to use it. This recipe doesn’t store well because it starts hardening in just 30 minutes. If you need to pause mid-project, transfer unused icing back to your bowl and cover it tightly with plastic wrap pressed directly against the surface.
Want to add color? Gel food coloring works best since it won’t thin out your icing. Liquid food coloring can make your frosting too runny, and then you’re stuck adding more powdered sugar to fix it.
Variations:
For colored icing, divide your batch into small bowls before adding gel food coloring. Red and green are classic Christmas colors, but pastel icings make adorable springtime gingerbread houses.
Add flavor extracts for a special touch — vanilla, almond, or peppermint extract work beautifully. Add just 1/4 teaspoon at a time since too much liquid can thin out your icing.
For sparkly houses, dust your freshly piped icing with sanding sugar or edible glitter while it’s still wet.
Nutritional Peek
Here’s a quick nutritional snapshot per 2-tablespoon serving. Keep in mind, most of this icing is used for decorating rather than eating, so a little goes a long way!
| Nutrient | Amount per Serving (2 Tbsp) |
|---|---|
| Calories | 120 |
| Carbohydrates | 30g |
| Sugars | 29g |
| Protein | 0g |
| Fat | 0g |
| Fiber | 0g |
Gingerbread House Icing Ingredients
This Easy Gingerbread House icing couldn’t be simpler — seriously, two ingredients and you’re good to go. The magic is all in the consistency, which we’ll dial in perfectly together.
For the base, you’ll need powdered sugar (also called confectioners’ sugar), which creates that smooth, pipeable texture. Then there’s water to bring everything together — we add it gradually so you can control the thickness. This combo creates a simple royal icing-style frosting that dries hard and holds strong.
| Amount | Ingredient |
|---|---|
| 2 cups | Powdered sugar (sifted if lumpy) |
| 2 Tablespoons | Water (plus more as needed) |
Tools You’ll Actually Use
- Medium mixing bowl
- Spoon or small whisk
- Zip-top plastic bag (for piping)
- Scissors (to snip the bag tip)
- Spatula (optional, for stirring)
Step-by-Step Instructions
Making this Gingerbread House Icing is genuinely foolproof. The key is adding water slowly and testing as you go — you want it thick enough to hold walls together but smooth enough to pipe easily.
Step 1: In a medium bowl, combine the powdered sugar and 1 tablespoon of water. Stir until the mixture looks dry and crumbly. Don’t panic — this is exactly what you want at first.
Step 2: Add the second tablespoon of water and keep stirring. It’ll look clumpy and weird for a minute, but just keep going. Stir until the icing becomes smooth and thick. This takes about 2-3 minutes of steady stirring, and your arm might get a little tired, but you’ve got this.
Step 3: Check the consistency by doing the “spoon test.” Lift your spoon above the bowl and flip it over. The icing should stay on the spoon when turned upside down without dripping off. If it drizzles or runs off immediately, it’s too thin.
Step 4: If your icing is too thin (dripping off the spoon), add 1 to 2 tablespoons of powdered sugar and stir until thick again. If it’s too thick and won’t pipe easily, add water 1 teaspoon at a time until you reach that perfect balance.
Step 5: Once you’ve nailed the consistency, transfer the icing into a zip-top plastic bag. Seal it tightly, then snip off one corner — start with a tiny cut, you can always make it bigger. Now you’re ready to build and decorate your gingerbread masterpiece!
Claire’s Pro Tips & Gentle Guidance
After years of making Gingerbread Frosting for holiday projects, I’ve learned a few tricks that make everything easier. These little tips will save you from common frustrations and help you nail the perfect consistency every time.
Test your icing before you commit to decorating. Pipe a small line on a piece of parchment paper and let it sit for 5 minutes. If it holds its shape without spreading, you’re golden.
If your icing starts drying out in the bag while you’re decorating, just snip off the tip a bit more or add a tiny bit of water to the remaining icing in your bowl. Keep extra icing covered with a damp towel so it doesn’t crust over.
Make your icing fresh when you’re ready to use it. This recipe doesn’t store well because it starts hardening in just 30 minutes. If you need to pause mid-project, transfer unused icing back to your bowl and cover it tightly with plastic wrap pressed directly against the surface.
Want to add color? Gel food coloring works best since it won’t thin out your icing. Liquid food coloring can make your frosting too runny, and then you’re stuck adding more powdered sugar to fix it.
According to Wilton’s detailed royal icing techniques , keeping your tools grease-free is crucial for proper consistency. Even a tiny bit of butter or oil residue can prevent your icing from setting correctly, so wash everything thoroughly before you start.
Quick Fixes for Gingerbread House Icing
Problem: Icing is too runny and won’t hold walls together Add powdered sugar 1 tablespoon at a time and stir well after each addition. Keep testing with the spoon-flip method until it stays put without dripping. Sometimes you’ll need up to 3-4 extra tablespoons depending on humidity.
Problem: Icing is too thick and won’t pipe from the bag Add water just 1/2 teaspoon at a time — seriously, tiny amounts make a huge difference. Stir thoroughly between additions. If you add too much water at once, you’ll overshoot and end up too thin.
Problem: Icing is drying out too fast while I’m working Cover your icing bowl with a damp paper towel between uses. For the piping bag, you can place a damp cloth over the snipped tip when you take breaks. This keeps everything workable longer.
Problem: My decorated house walls are sliding apart Your icing might be too thin, or you’re not giving it enough time to set. Hold pieces in place for 2-3 minutes before letting go, and let the “glue” seams dry for at least 30 minutes before adding roof pieces or decorations.
Variations & Fun Twists
While this classic Gingerbread House Frosting is perfect as-is, there are fun ways to customize it for different looks and occasions.
For colored icing, divide your batch into small bowls before adding gel food coloring. Red and green are classic Christmas colors, but pastel icings make adorable springtime gingerbread houses, and black icing is perfect for Halloween haunted houses.
Add flavor extracts for a special touch — vanilla, almond, or peppermint extract work beautifully. Add just 1/4 teaspoon at a time since too much liquid can thin out your icing. The flavor is subtle but makes everything smell amazing while you’re decorating.
For sparkly houses, dust your freshly piped icing with sanding sugar or edible glitter while it’s still wet. Once the icing dries, the sparkle is locked in place. My nieces go absolutely wild for this part.
Make a thinner version for “snow” effects by adding extra water until your icing drizzles slowly off a spoon (not too fast though). You can pour this over your finished house roof for that fresh snowfall look, or use it to create icicles along the edges.
One recipe down, and so many more to explore! Head over to our complete Christmas & Winter lineup for more delicious ideas that’ll keep your kitchen buzzing. Bookmark this one — you’ll thank yourself later.
Serving, Storage & Reheating
Your Gingerbread House Icing is meant to be used fresh, so plan to mix it right when you’re ready to build and decorate. The icing starts setting up within 30 minutes, which is perfect for construction but not great for storage.
If you absolutely need to store leftover icing, transfer it to an airtight container and press plastic wrap directly onto the surface to prevent crusting.
It’ll keep at room temperature for 2-3 days max. When you’re ready to use it again, stir vigorously and add a few drops of water to restore the consistency.
The decorated gingerbread house itself can be displayed at room temperature for weeks — the icing acts as both glue and preservative. Just keep it in a cool, dry spot away from humidity. Humid environments can make the icing sticky and cause candy decorations to slide off.
There’s no reheating needed here since you’re working with room-temperature ingredients from the start. If your icing gets too stiff while working, just add water drops as needed to loosen it back up.
No-Waste Kitchen Magic
Got leftover icing that’s starting to harden? Don’t toss it! Here’s how to use every last bit creatively.
Pipe it onto parchment paper in fun shapes like snowflakes, stars, or simple flowers. Let them dry completely (24 hours), then peel them off and use as edible decorations for your Christmas Tree Shaped Charcuterie or Festive Christmas Veggie Platter. They’re like homemade candy toppers that add a special touch to any holiday spread.
Use extra icing to “glue” together your Christmas Fruit Wreath Appetizer display pieces or secure candy decorations on your Easy Sugar Cookie Christmas Fudge. The icing dries clear and holds everything in place beautifully.
If your icing is too far gone and rock-hard, crush it into a fine powder and mix it with regular powdered sugar for next time. It’s already sweetened and ready to go, so you’re just extending your baking supplies.
Day-old gingerbread house pieces that didn’t make the cut? Crumble them up with any hardened icing scraps and use as a crunchy topping for ice cream or yogurt. It tastes like gingerbread granola and nothing goes to waste.
Gingerbread House Icing FAQs
Can I make this Gingerbread House Icing ahead of time?
Not really — this icing works best when made fresh and used immediately. It starts hardening within 30 minutes, which is great for construction but makes it tough to store.
What’s the best way to store leftover icing?
Transfer any unused icing to an airtight container immediately and press plastic wrap directly onto the surface to prevent crusting. It’ll keep for 2-3 days at room temperature.
How do I know when my Gingerbread House Icing is the right consistency?
Do the spoon test: lift your spoon above the bowl and flip it upside down.
Why is my icing too runny even after following the recipe?
Humidity plays a huge role in icing consistency — on humid days, you’ll need more powdered sugar to reach the right thickness. Add it gradually, 1 tablespoon at a time, until you nail that perfect non-drip consistency. Sometimes you’ll need an extra 2-4 tablespoons depending on your environment.
Cozy Closing
There you have it — the simplest, most foolproof Gingerbread House Icing that actually holds your festive creations together! Whether you’re building a cozy cottage or an elaborate gingerbread mansion, this 2-ingredient wonder has your back.
I’d love to see your spin on this Gingerbread House Icing! Drop a comment below with photos of your gingerbread creations — I’m always amazed by the creative designs people come up with.
Did you make a classic house, or did you get adventurous with a gingerbread castle or winter village? This Gingerbread House Icing is so versatile, and I bet you’ve already got amazing ideas in mind!
I’m Claire Whitmore — a dessert daydreamer from Asheville, NC, where holiday baking season starts way too early and somehow never lasts long enough.
For me, making gingerbread houses isn’t about perfection — it’s about the laughter when walls collapse, the candy “taste-testing” that happens before decorating, and creating sweet memories that last way longer than the cookies do. Happy building!