Chocolate Green Cookie Recipe
This Chocolate Green Cookie Recipe combines festive green hues with chocolate chips, white chocolate, and crushed Oreos—perfect St. Patrick’s Day treats ready in just 23 minutes!
Hey there, I’m Claire Whitmore — a pastry whisperer in Asheville, NC, where butter totally counts as self-care. This Chocolate Green Cookie Recipe is my go-to when you want something fun, festive, and seriously delicious without spending your entire afternoon in the kitchen.
We’re talking soft, chewy cookies loaded with semi-sweet chocolate chips, white chocolate chips, and crushed Oreos, all wrapped up in that gorgeous green hue that screams St. Patrick’s Day.
These cookies are easy enough for busy weeknights but special enough to wow at any party, making them ideal St Patrick Day snack ideas that both kids and adults will devour.
Table of Contents
Little Snapshot: What This Recipe Delivers
This Chocolate Green Cookie Recipe delivers soft, bakery-style cookies with a festive green twist, packed with three types of mix-ins (chocolate chips, white chocolate chips, and crushed Oreos) in just 23 minutes total time.
Perfect for St. Patrick’s Day celebrations or anytime you want St Pattys treat ideas that are fun, easy, and guaranteed crowd-pleasers.
Why You’ll Love This Recipe 🌸
- This Chocolate Green Cookie Recipe takes less time than deciding what to watch on Netflix — just 15 minutes of prep and 8 minutes in the oven.
- It’s basically foolproof, which means even if your toddler “helps,” you’ll still end up with gorgeous cookies that look like you spent hours on them.
- The triple chocolate-Oreo combo creates this ridiculously addictive flavor that’ll have everyone asking for the recipe (and secretly wondering if you have a culinary degree).
- According to King Arthur Baking’s guide to perfect cookie texture, mixing in multiple add-ins creates incredible textural contrast — and this recipe proves exactly why.
Quick Facts ⚡
Here’s the quick scoop on this Chocolate Green Cookie Recipe.
- CourseDessert
- Prep Time15 minutes
- Cook Time8 minutes
- Total Time23 minutes
- Servings24 cookies
- DifficultyEasy
Nutritional Peek
Here’s what you’re working with per cookie — because knowledge is power, and also because sometimes you just need to know if you can justify eating three in one sitting (spoiler: you can).
| Nutrient | Amount per Serving |
|---|---|
| Calories | 195 kcal |
| Protein | 2.5g |
| Carbohydrates | 26g |
| Total Fat | 9g |
| Saturated Fat | 5.5g |
| Fiber | 1g |
| Sugar | 16g |
| Sodium | 120mg |
Chocolate Green Cookie Recipe Ingredients
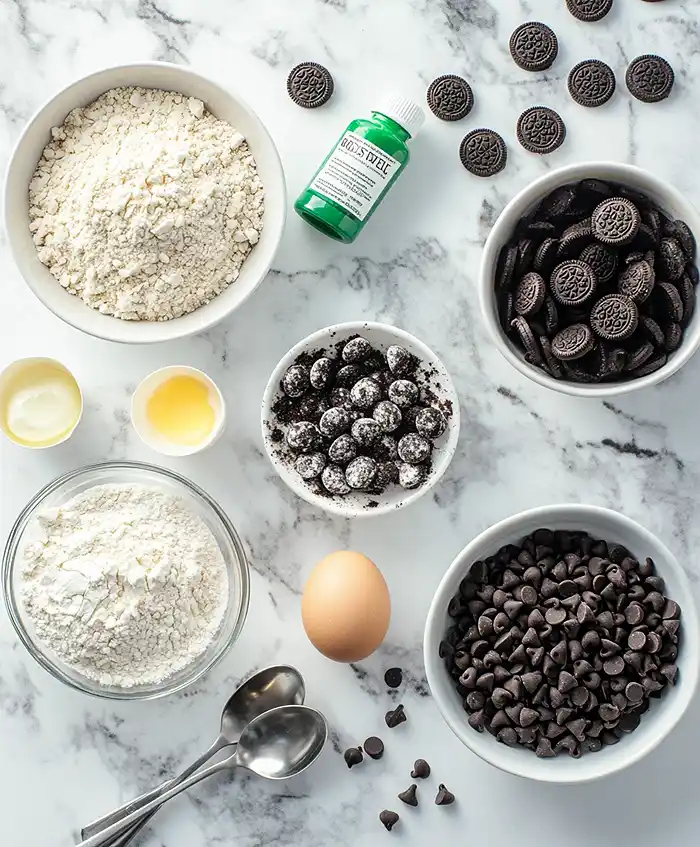
When it comes to the best St Patrick Day snack ideas, you need ingredients that are easy to find and even easier to work with. For the wet ingredients — softened butter, eggs, vanilla extract, and green food coloring — you’ll want everything at room temperature so it blends into a smooth, dreamy base.
For the dry mix — flour, baking powder, and baking soda — sift them together to avoid any stubborn lumps. And for the fun stuff — chocolate chips, white chocolate chips, and crushed Oreos — just make sure you’ve got enough, because some will mysteriously disappear during the mixing process (no judgment).
| Amount | Ingredient |
|---|---|
| 1 cup | Light brown sugar, packed |
| ½ cup | Granulated sugar |
| 1 cup | Salted butter, softened (yes, real butter — margarine just doesn’t cut it here) |
| 2 large | Eggs, room temperature |
| 1 teaspoon | Vanilla extract (the good stuff if you’ve got it) |
| ½ teaspoon | Green food coloring (gel works best for vibrant color) |
| ½ teaspoon | Baking powder |
| 1 teaspoon | Baking soda |
| 3 cups | All-purpose flour |
| 1 cup | Semi-sweet chocolate chips |
| 1 cup | White chocolate chips |
| 1 cup | Crushed Oreo cookies (about 10-12 cookies) |
Tools You’ll Actually Use
You probably have most of these already hanging out in your kitchen:
- Large mixing bowl
- Electric mixer (hand or stand mixer works great)
- Measuring cups and spoons
- Whisk
- Cookie scoop or tablespoon
- Baking sheet
- Parchment paper or silicone baking mat
- Cooling rack
Step-by-Step Instructions
Let’s make this Chocolate Green Cookie Recipe happen — grab your apron (or don’t, we’re all friends here) and let’s get baking.
Step 1: Get out and measure all your ingredients so everything’s ready to go. Trust me, there’s nothing worse than realizing you’re out of flour when you’re elbow-deep in cookie dough.
Step 2: Preheat your oven to 375 degrees Fahrenheit and line your baking sheet with parchment paper or a silicone mat. This prevents sticking and makes cleanup so much easier.
Step 3: In your large mixing bowl, cream together the packed light brown sugar, granulated sugar, and softened salted butter using your electric mixer on medium speed until the mixture is smooth, fluffy, and almost pale in color — this usually takes about 2-3 minutes and creates that perfect cookie base.
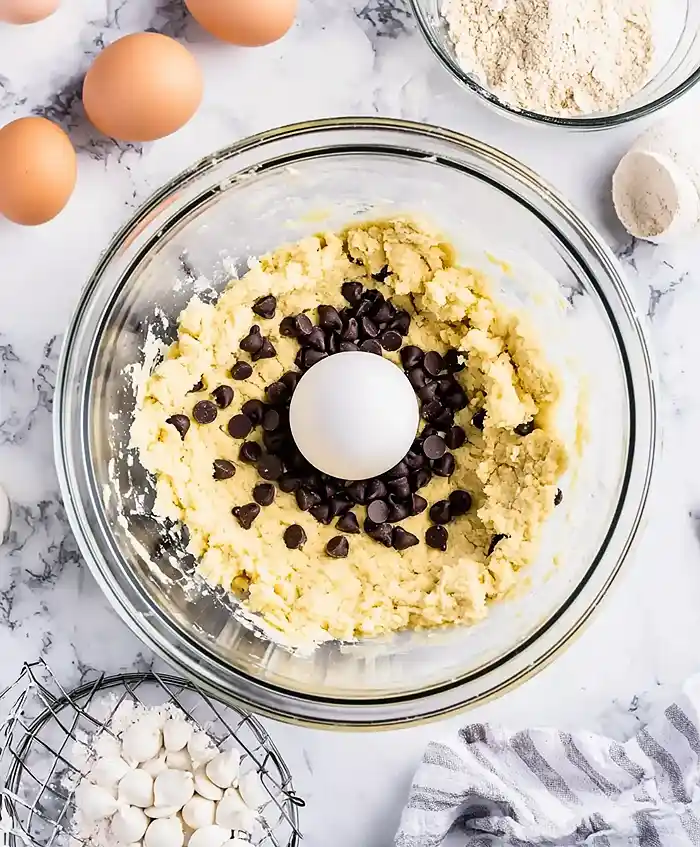
Step 4: Whisk in the room-temperature eggs, vanilla extract, and green food coloring slowly, mixing on low speed until everything is fully incorporated into the creamed sugar-butter mixture and you’ve got that gorgeous festive green color throughout.
Step 5: Gently whisk in the all-purpose flour, baking powder, and baking soda on low speed, mixing just until no clumps of dry ingredients remain in the cookie dough — don’t overmix here or you’ll end up with tough cookies instead of soft, chewy ones.
Step 6: Gently fold in the semi-sweet chocolate chips, white chocolate chips, and crushed Oreo cookies using a spatula or wooden spoon, stirring until all three mix-ins are evenly distributed throughout the vibrant green cookie dough.
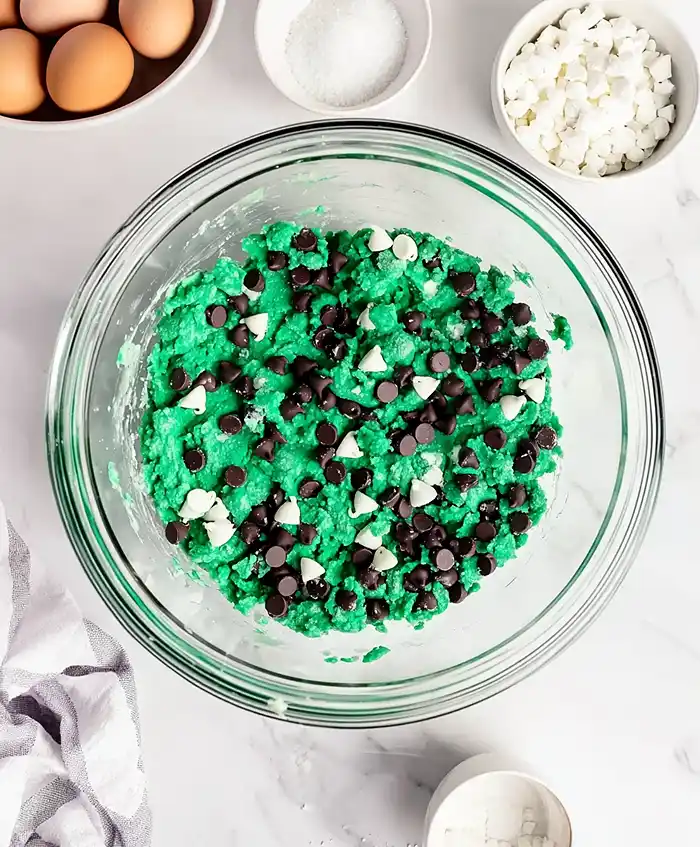
Step 7: Using a cookie scoop or two tablespoons, scoop balls of cookie dough (about 2 tablespoons each) onto your prepared baking sheet, leaving about 2 inches between each one since they’ll spread a bit while baking.
Step 8: Bake the cookies for 8 minutes until the edges are just set but the centers still look slightly underdone — they’ll continue cooking on the hot pan after you remove them, giving you that perfect soft, chewy texture.
Step 9: Allow the cookies to cool on the baking sheet for about 5 minutes before transferring them to a cooling rack. This cooling time lets them firm up enough to move without falling apart.
Step 10: Serve these gorgeous green beauties while they’re still slightly warm, or let them cool completely if you prefer — either way, they’re absolutely irresistible.
Claire’s Pro Tips & Gentle Guidance
Want your St Patricks Day foods for kids to turn out bakery-perfect every single time? Let me share a few secrets I’ve learned through years of cookie experimentation (and a few hilarious fails).
First up, room temperature ingredients are your best friend. When your butter and eggs are at room temperature, they blend together so much smoother, creating a better texture in your final cookies. Just leave them on the counter for about 30-60 minutes before you start baking.
Don’t skip the cooling time on the baking sheet. I know it’s tempting to transfer those cookies immediately, but trust me — I’ve learned the hard way that moving them too soon means they’ll break apart and you’ll be left with delicious crumbs instead of beautiful cookies.
For the most vibrant green color, use gel food coloring instead of liquid. Gel is more concentrated, so you get better color without adding extra liquid that could throw off your cookie dough consistency. Start with ½ teaspoon and add more if you want a deeper shamrock green.
If you want extra-thick cookies, chill your dough for 30 minutes before scooping. This prevents excessive spreading and gives you those gorgeous bakery-style thick cookies that everyone loves. According to Serious Eats‘ comprehensive cookie science guide, chilled dough creates cookies with better structure and chewier centers.
Quick Fixes for Chocolate Green Cookie Recipe
Cookies spreading too much? Your butter was probably too soft or melted. Next time, make sure your butter is just softened (it should hold its shape but have a slight give when pressed), and try chilling your dough for 20-30 minutes before baking.
Cookies turning out too dry or crumbly? You likely overbaked them or overmixed the dough once you added the flour. Remember, these cookies continue cooking on the hot pan after you remove them from the oven, so pull them out when the centers still look slightly underdone.
Green color looking pale or washed out? Switch to gel food coloring for more vibrant results, or simply add another ¼ teaspoon to your dough. Liquid food coloring just doesn’t pack the same color punch, especially in baked goods.
Oreo pieces sinking to the bottom? Toss your crushed Oreos in a tiny bit of flour (about a tablespoon) before folding them into the dough. This helps them stay suspended throughout the cookie instead of settling at the bottom.
Variations & Fun Twists
This Chocolate Green Cookie Recipe is crazy versatile, so feel free to make it your own with these fun swaps and additions.
Seasonal Swap: Not celebrating St. Patrick’s Day? Skip the green food coloring entirely and you’ve got an amazing chocolate-Oreo cookie that’s perfect for any occasion. Or try different colors for various holidays — red for Valentine’s Day, orange for Halloween, or pastel colors for Easter.
Gluten-Free Version: Swap the all-purpose flour for a 1-to-1 gluten-free baking flour blend. I’ve tested this with Bob’s Red Mill and King Arthur’s gluten-free blends, and both worked beautifully with no other adjustments needed.
Mint Chocolate Twist: Add ½ teaspoon of peppermint extract along with the vanilla for minty chocolate cookies that taste like Girl Scout Thin Mints had a baby with an Oreo. Replace the regular Oreos with mint Oreos for an even stronger mint flavor.
Fancy Plating: Serve these on a rustic wooden board with fresh mint sprigs scattered around for a gorgeous presentation that looks straight out of a food magazine. Or stack them in clear glass jars tied with green ribbon for adorable party favors or gifts.
Serving, Storage & Reheating

These St Pattys treat ideas are best enjoyed fresh from the oven when the chocolate is still slightly melty and the cookies are at peak softness. Serve them with a cold glass of milk, a cup of coffee, or even vanilla ice cream for an over-the-top dessert experience.
For storage, keep your cookies in an airtight container at room temperature for up to 5 days — though honestly, if they last that long in your house, you have more willpower than I do. Place a piece of bread in the container to keep them extra soft (the cookies absorb moisture from the bread).
To reheat, pop a cookie in the microwave for 10-15 seconds for that just-baked warmth and melty chocolate experience all over again. Or warm them in a 300°F oven for 3-4 minutes if you’re reheating a whole batch.
No-Waste Kitchen Magic
Got leftover cookies (if that’s even possible)? Crumble them over vanilla ice cream for the most decadent sundae topping imaginable. Or chop them up and fold them into vanilla buttercream frosting for cookies-and-cream frosting that’s absolutely next-level on cupcakes or layer cakes.
Day-old cookies that have lost some of their softness make incredible cookie crumb crusts. Just pulse them in a food processor with a little melted butter and press into a pie pan for an amazing base for cheesecake or ice cream pies.
You can also freeze unbaked cookie dough balls for up to 3 months. Scoop the dough onto a baking sheet, freeze until solid, then transfer to a freezer bag. Bake straight from frozen, adding just 1-2 extra minutes to the baking time for fresh cookies anytime the craving hits.
One recipe down, and so many more to explore! Head over to our complete Cookies & Brownies lineup for more delicious ideas that’ll keep your kitchen buzzing. Bookmark this one — you’ll thank yourself later.
Chocolate Green Cookie Recipe FAQs
Can I freeze this Chocolate Green Cookie Recipe?
Absolutely! These cookies freeze beautifully either baked or as dough. For baked cookies, let them cool completely, then freeze in an airtight container for up to 3 months. Thaw at room temperature for about 30 minutes before serving.
What’s the best way to store Chocolate Green Cookies?
Keep them in an airtight container at room temperature with a piece of bread to maintain softness. They’ll stay fresh for up to 5 days, though mine never last that long!
How do I know when Chocolate Green Cookies are done baking?
Pull them out when the edges are set but the centers still look slightly underdone and soft. They’ll continue cooking on the hot baking sheet and firm up perfectly as they cool.
Why should I use salted butter in this Chocolate Green Cookie Recipe?
Salted butter adds amazing depth of flavor and balances out all that sweetness from the chocolate and sugar. It creates a more complex, less one-dimensional cookie that people always rave about.
Can I make these cookies without food coloring?
Of course! Just skip the green food coloring and you’ll have delicious chocolate-Oreo cookies that are perfect for any time of year. They’ll taste exactly the same, just without the festive green hue.
Cozy Closing
There you have it — the easiest, most festive Chocolate Green Cookie Recipe that’ll make you the hero of any St. Patrick’s Day celebration (or really any day you’re craving something special). These cookies are proof that you don’t need fancy ingredients or complicated techniques to create something absolutely magical in your kitchen.
I’d love to see your spin on this Chocolate Green Cookie Recipe! Drop a comment below with your photos — I’d love to see how you made it your own. This recipe is so versatile; I bet you’ve got amazing variations already in mind!
And hey, if you’re looking for more fun St. Patrick’s Day inspiration, check out these St. Patrick’s Day cookies or treat yourself to something sweet any morning with these easy strawberry cinnamon rolls.
I’m Claire Whitmore — a dessert daydreamer from Asheville, NC. For me, baking isn’t about perfect pastries — it’s about the joy of sharing something sweet (and maybe sneaking an extra cookie when no one’s looking).

Chocolate Green Cookie Recipe
Equipment
- Large mixing bowl
- Electric mixer
- Measuring cups and spoons
- Whisk
- Cookie scoop or tablespoon
- Baking sheet
- Parchment paper or silicone baking mat
- cooling rack
Ingredients
- 1 cup light brown sugar packed
- ½ cup granulated sugar
- 1 cup salted butter softened
- 2 large eggs room temperature
- 1 teaspoon vanilla extract
- ½ teaspoon green food coloring gel works best for vibrant color
- ½ teaspoon baking powder
- 1 teaspoon baking soda
- 3 cups all-purpose flour
- 1 cup semi-sweet chocolate chips
- 1 cup white chocolate chips
- 1 cup crushed Oreo cookies about 10-12 cookies
Instructions
- Get out and measure all your ingredients so everything’s ready to go. Trust me, there’s nothing worse than realizing you’re out of flour when you’re elbow-deep in cookie dough.
- Preheat your oven to 375 degrees Fahrenheit and line your baking sheet with parchment paper or a silicone mat. This prevents sticking and makes cleanup so much easier.
- In your large mixing bowl, cream together the packed light brown sugar, granulated sugar, and softened salted butter using your electric mixer on medium speed until the mixture is smooth, fluffy, and almost pale in color — this usually takes about 2-3 minutes and creates that perfect cookie base.
- Whisk in the room-temperature eggs, vanilla extract, and green food coloring slowly, mixing on low speed until everything is fully incorporated into the creamed sugar-butter mixture and you’ve got that gorgeous festive green color throughout.
- Gently whisk in the all-purpose flour, baking powder, and baking soda on low speed, mixing just until no clumps of dry ingredients remain in the cookie dough — don’t overmix here or you’ll end up with tough cookies instead of soft, chewy ones.
- Gently fold in the semi-sweet chocolate chips, white chocolate chips, and crushed Oreo cookies using a spatula or wooden spoon, stirring until all three mix-ins are evenly distributed throughout the vibrant green cookie dough.
- Using a cookie scoop or two tablespoons, scoop balls of cookie dough (about 2 tablespoons each) onto your prepared baking sheet, leaving about 2 inches between each one since they’ll spread a bit while baking.
- Bake the cookies for 8 minutes until the edges are just set but the centers still look slightly underdone — they’ll continue cooking on the hot pan after you remove them, giving you that perfect soft, chewy texture.
- Allow the cookies to cool on the baking sheet for about 5 minutes before transferring them to a cooling rack. This cooling time lets them firm up enough to move without falling apart.
- Serve these gorgeous green beauties while they’re still slightly warm, or let them cool completely if you prefer — either way, they’re absolutely irresistible.