St. Patrick’s Day Cookies
Hey there, I’m Claire Whitmore — a pastry whisperer in Asheville, NC, where butter totally counts as self-care. These St. Patrick’s Day Cookies are about to become your new favorite way to celebrate the holiday.
They’re soft, chewy, festive green treats made with just a few simple ingredients — cake mix, eggs, oil, and vibrant green food coloring — that come together in under an hour from start to finish.
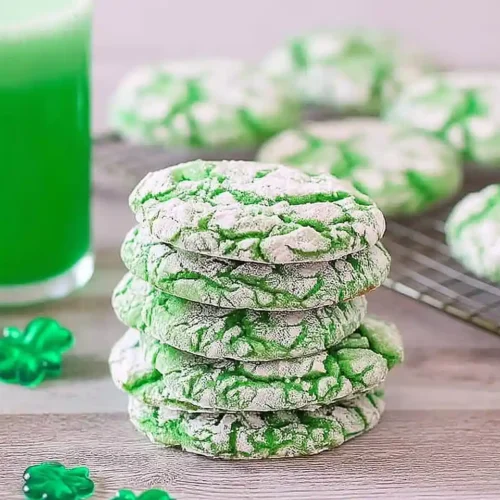
With their signature crackled powdered sugar coating and bright emerald hue, these cookies deliver all the charm of bakery-style sweets without any fuss or fancy techniques.
I’ll be honest — I used to think holiday baking had to be complicated to be impressive. Then I discovered the magic of cake mix cookies on a particularly chaotic St. Patrick’s Day morning when I needed treats for my daughter’s class party. These beauties saved me, and now they’re my go-to whenever I want maximum impact with minimal stress.
Table of Contents
Little Snapshot: What This Recipe Delivers
These St. Patrick’s Day Cookies are soft, festive cake mix cookies with a stunning crackled coating — ready in under an hour with just five ingredients. They’re perfect for parties, classroom treats, or satisfying your sweet tooth with minimal effort and maximum charm.
Why You’ll Love This Recipe 🌸
- These St. Patrick’s Day Cookies take less time than scrolling through your phone — seriously, they’re that quick.
- They look like you spent hours in the kitchen, but the secret’s safe with us (cake mix for the win!).
- Perfect for busy moms who want festive treats without the stress — no rolling pins, no cutters, just scoop and bake.
- According to King Arthur Baking’s guide to cake mix cookie techniques, starting with quality cake mix creates bakery-style texture — and these cookies prove exactly why.
Quick Facts ⚡
Here’s the quick scoop on this St. Patrick’s Day Cookies recipe.
- CourseDessert
- Prep Time15 minutes
- Cook Time12 minutes
- Total Time57 minutes (includes 30 min chill time)
- Servings18 cookies
- DifficultyEasy
Nutritional Peek
Here’s what you’re working with per cookie — because knowing never hurts, right?
| Nutrient | Amount per Serving |
|---|---|
| Calories | 145 kcal |
| Protein | 1g |
| Carbohydrates | 24g |
| Total Fat | 5g |
| Fiber | 0g |
| Sugar | 18g |
Can’t get enough of these flavors? You’re going to love what’s waiting in the Seasonal Celebrations lineup. Every single recipe is made to impress without the stress. Happy cooking, friend!
Ingredients
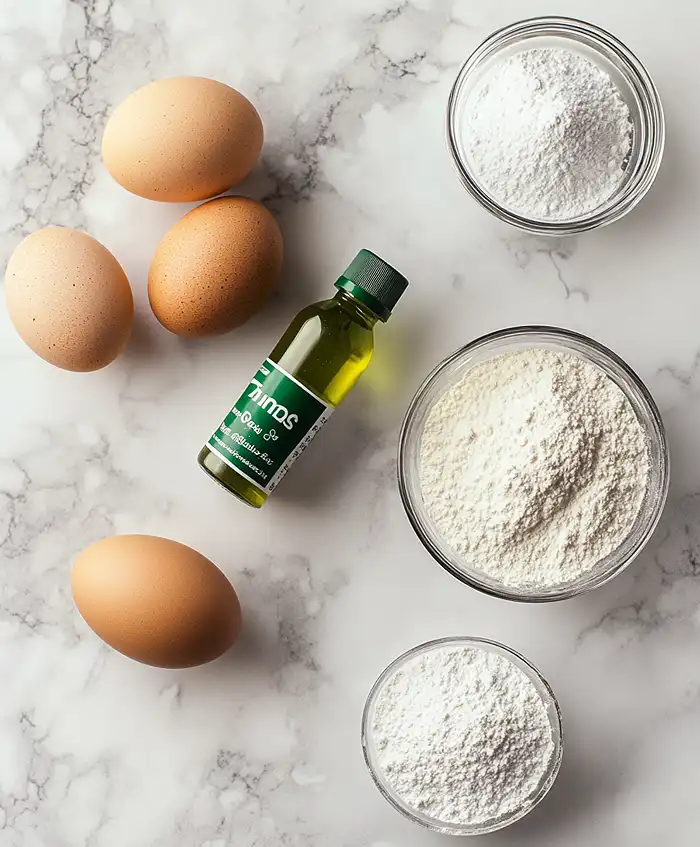
These cookies for St. Patrick’s Day start with pantry staples you probably already have on hand. For the base — vanilla or white cake mix, vegetable oil, and eggs — you’ll want everything at room temperature so it blends into a smooth, sticky dough.
For the coating — granulated sugar and powdered sugar — these create that iconic crackled finish that makes these cookies look bakery-fancy. Don’t skip the green food coloring; it’s what transforms ordinary cookies into festive showstoppers.
| Amount | Ingredient |
|---|---|
| 1 box (15.25 oz) | Vanilla or white cake mix |
| ⅓ cup | Vegetable oil |
| 2 large | Eggs, room temperature |
| Green | Food coloring (gel or liquid) |
| ½ cup | Granulated sugar, for coating |
| ½ cup | Powdered sugar, for coating |
Tools You’ll Actually Use
- Large mixing bowl
- Spatula or wooden spoon
- Plastic wrap
- Cookie sheet
- Parchment paper
- 1 tablespoon cookie scoop
- Two small bowls (for sugar coatings)
- Wire rack or paper towels for cooling
Step-by-Step Instructions
Let’s make these St. Patrick’s Day Cookies happen — trust me, you’ve totally got this.
Step 1: Add the vanilla cake mix, vegetable oil, and room-temperature eggs to a large bowl. Stir everything together with a sturdy spatula until the mixture comes together into a sticky, cohesive dough — it should pull away from the sides of the bowl but still feel tacky to the touch.
Step 2: Add green food coloring to the dough. Start with a small amount (about 5-7 drops of gel or 10-15 drops of liquid), then mix thoroughly until the food coloring is evenly distributed throughout and you’ve reached your desired shade of festive green. Don’t be shy — St. Patrick’s Day is all about that vibrant emerald!
Step 3: Cover the bowl tightly with plastic wrap and chill the dough in the refrigerator for 30 minutes. This step isn’t optional — it firms up the dough so your cookies hold their shape and develop those gorgeous cracks instead of spreading into flat puddles.
Step 4: While the dough chills, preheat your oven to 350°F and line a cookie sheet with parchment paper. Set up your coating station by adding the granulated sugar to one small bowl and the powdered sugar to a separate small bowl.
Step 5: Using a 1 tablespoon cookie scoop, portion the chilled dough and roll each scoop between your palms into smooth, round balls. Working with one dough ball at a time keeps everything cold and makes the coating process so much easier.
Step 6: Roll each cookie dough ball first in the granulated sugar, coating it completely — this creates the inner layer that helps the powdered sugar adhere. Next, roll the same ball in the powdered sugar until it’s completely covered in a thick, snowy coating.
Step 7: Place the coated cookies on your lined baking sheet about 2 inches apart from each other — they’ll spread slightly but not too much thanks to that chill time. Bake for 9 to 12 minutes, until the cookies have puffed up, developed beautiful cracks, and the edges just barely start to set.
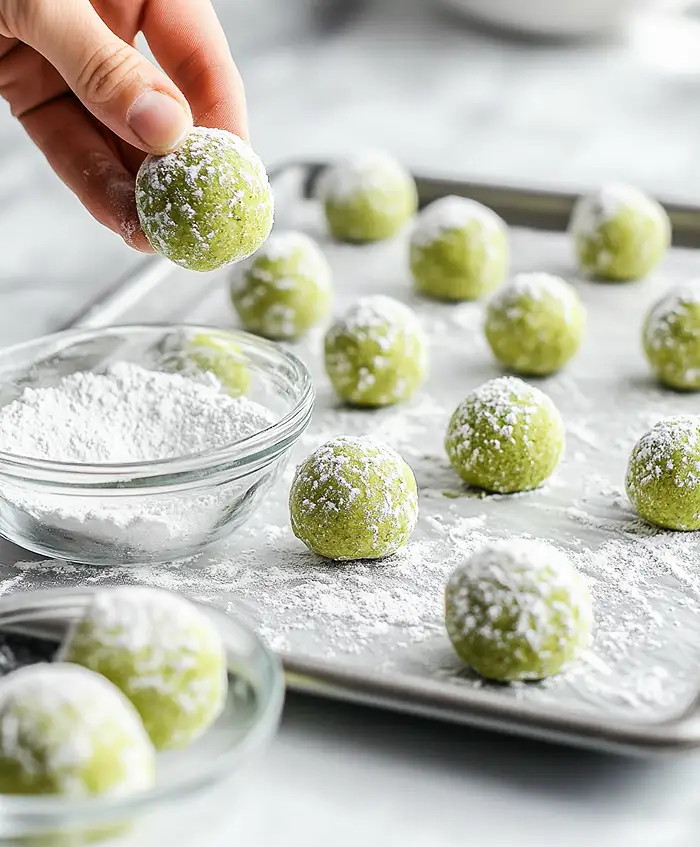
Step 8: Let the cookies cool on the baking sheet for 5 minutes (they’ll firm up during this time), then carefully transfer them to a wire rack or paper towels to cool completely. The crackled coating will set as they cool, creating that signature two-toned look.
Claire’s Pro Tips & Gentle Guidance
These St. Patrick’s Day cookies easy tricks will take your batch from good to absolutely gorgeous.
Don’t skip the chill time. I know it’s tempting when you’re in a hurry, but that 30-minute rest in the fridge is what prevents flat, greasy cookies. If you’re really pressed for time, pop the dough in the freezer for 15 minutes instead — it works in a pinch.
Use gel food coloring for the most vibrant green. Liquid works too, but gel gives you that bold, shamrock-worthy color without adding extra moisture to the dough. I learned this the hard way after making pale, wimpy-looking cookies my first time around — not exactly festive.
Roll the cookies while the dough is cold. If your hands warm up the dough too much, pop the bowl back in the fridge for 10 minutes. Cold dough = better shape retention and more dramatic cracks.
For even more trustworthy baking insights, check out Sally’s Baking Addiction’s comprehensive cake mix cookie tutorial — it’s packed with expert tips for perfecting this style of cookie.
Watch your baking time closely. These cookies are done when they look slightly underbaked in the center — they’ll continue cooking on the hot pan during that 5-minute rest. Overbaked cookies lose their signature chewiness and can turn dry.
Quick Fixes for St. Patrick’s Day Cookies
Problem: Cookies spread too much and lose their shape. Your dough was probably too warm. Always chill the dough for the full 30 minutes, and if your kitchen is hot, consider chilling the shaped balls for an additional 10 minutes before baking.
Problem: The powdered sugar coating disappeared during baking. You didn’t use enough powdered sugar, or the coating was too thin. Make sure each cookie is heavily coated — it should look almost white before it goes in the oven. The coating will crack and reveal the green underneath, but you need a generous layer to start.
Problem: Cookies turned out flat and crispy instead of soft and chewy. You either overbaked them or didn’t measure the oil correctly. Pull them from the oven when they still look slightly soft in the center, and double-check that you’re using exactly ⅓ cup of oil — too much makes them spread and crisp up.
Problem: The green color looks uneven or streaky. Mix the food coloring more thoroughly into the dough. It takes a good 30-45 seconds of vigorous stirring to fully distribute the color, so don’t rush this step.
Variations & Fun Twists
Want to switch up these green food for St. Patrick’s Day dinners (dessert edition, of course)?
Chocolate Chip Shamrock Cookies: Fold ½ cup of mini chocolate chips into the dough after adding the food coloring. The chocolate adds richness and makes these even more irresistible — plus, chocolate and mint-green just look gorgeous together.
Gluten-Free Version: Swap the regular cake mix for a gluten-free vanilla cake mix (I love Bob’s Red Mill or Pillsbury’s gluten-free options). Everything else stays exactly the same, and honestly, no one will even notice the difference.
Lucky Charms Topping: Press a few Lucky Charms marshmallows onto the top of each cookie right when they come out of the oven. They’ll stick as the cookies cool and add a fun, whimsical touch that kids absolutely love.
Lemon-Green Twist: Use a lemon cake mix instead of vanilla and add a tiny bit of lemon zest to the dough. The bright citrus flavor pairs beautifully with the festive color and feels a little more grown-up.
Serving, Storage & Reheating
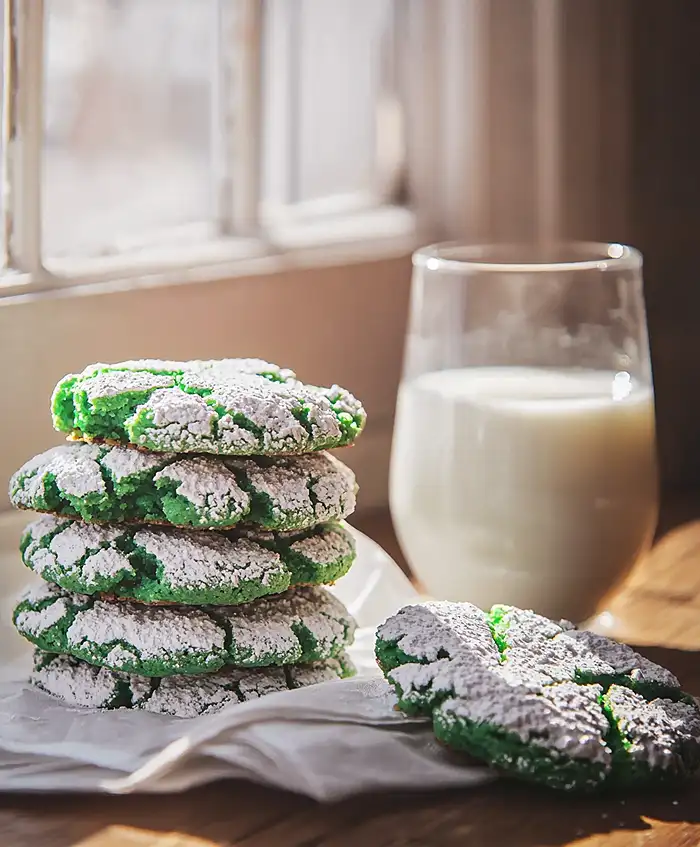
These cookies for St. Patrick’s Day are best enjoyed slightly warm with a cold glass of milk — but let’s be real, they’re delicious at any temperature. Serve them on a green platter for extra festive points, or pack them in clear cellophane bags tied with gold ribbon for party favors that’ll make you the favorite guest.
Store your cookies in an airtight container at room temperature for up to 5 days. Layer them between sheets of parchment paper to prevent the powdered sugar coating from smudging. If you actually have leftovers (which I doubt), they hold up beautifully — the texture stays soft and chewy.
To freeze, arrange cooled cookies in a single layer in a freezer-safe container with parchment between layers, then freeze for up to 3 months. Thaw at room temperature for about an hour before serving — they’ll taste freshly baked.
You can also freeze the formed, uncoated dough balls and bake them straight from frozen, just add 2-3 extra minutes to the bake time.
No-Waste Kitchen Magic
Got a few cookies that went a little too crispy or broke during transfer? Crumble them over vanilla ice cream for an instant St. Patrick’s Day sundae. The sweet, crackly pieces add amazing texture and turn a simple scoop into something special.
If you’ve got extra cake mix taking up space in your pantry, these cookies are the perfect way to use it up. Experiment with different flavors throughout the year — chocolate cake mix with red food coloring for Valentine’s Day, or orange for Halloween.
Leftover powdered sugar from the coating? Save it in a jar and use it to dust pancakes, waffles, or French toast. That little bit of sweetness makes weekend breakfast feel extra cozy.
St. Patrick’s Day Cookies FAQs
Can I freeze St. Patrick’s Day Cookies?
Absolutely! These cookies freeze beautifully for up to 3 months. Just make sure they’re completely cooled, then layer them with parchment paper in an airtight container to prevent sticking. Thaw at room temperature for about an hour before serving.
What’s the best way to store St. Patrick’s Day Cookies?
Keep them in an airtight container at room temperature for up to 5 days. The key is making sure the container seals well — any air exposure will dry out that soft, chewy texture we’re after.
How do I know when St. Patrick’s Day Cookies are done baking?
They’re ready when the edges just barely start to set and the cookies have puffed up with visible cracks across the surface. They’ll look slightly underbaked in the center — that’s perfect! They firm up as they cool on the baking sheet.
Why should I use cake mix in St. Patrick’s Day Cookies?
Cake mix gives you that incredible soft, tender texture without any fuss or complicated mixing methods. It’s pre-measured, perfectly balanced, and creates consistent results every single time — basically foolproof baking magic for busy days.
Cozy Closing
I’d love to see your spin on these St. Patrick’s Day Cookies! Drop a comment below with your cookie photos — I’d love to see how you made them your own. These St. Patrick’s Day Cookies are so versatile; I bet you’ve got amazing variations already in mind!
Whether you’re baking for a classroom party, a family gathering, or just because Tuesday needs a little green magic, these cookies deliver every single time. They’re proof that the best recipes don’t have to be complicated — sometimes the simplest treats bring the most joy.
If you loved these festive cookies, you’ll absolutely adore my Valentine’s Day Oreo Pops for another holiday treat, my Valentine’s Day Waffle Board for celebration breakfast inspiration.
I’m Claire Whitmore — a dessert daydreamer from Asheville, NC. For me, baking isn’t about perfect pastries — it’s about the joy of sharing something sweet (and maybe sneaking an extra cookie when no one’s looking).
St. Patrick’s Day Cookies
Equipment
- Large mixing bowl
- Spatula or wooden spoon
- Plastic wrap
- Cookie sheet
- Parchment paper
- 1-tablespoon cookie scoop
- Two small bowls
- Wire rack or paper towels
Ingredients
- 1 box (15.25 oz) Vanilla or white cake mix
- ⅓ cup Vegetable oil
- 2 large Eggs room temperature
- Green food coloring gel or liquid
- ½ cup Granulated sugar for coating
- ½ cup Powdered sugar for coating
Instructions
- Add the vanilla cake mix, vegetable oil, and room-temperature eggs to a large bowl. Stir everything together with a sturdy spatula until the mixture comes together into a sticky, cohesive dough — it should pull away from the sides of the bowl but still feel tacky to the touch.
- Add green food coloring to the dough. Start with a small amount (about 5-7 drops of gel or 10-15 drops of liquid), then mix thoroughly until the food coloring is evenly distributed throughout and you’ve reached your desired shade of festive green.
- Cover the bowl tightly with plastic wrap and chill the dough in the refrigerator for 30 minutes. This step firms up the dough so your cookies hold their shape and develop those gorgeous cracks instead of spreading into flat puddles.
- While the dough chills, preheat your oven to 350°F and line a cookie sheet with parchment paper. Set up your coating station by adding the granulated sugar to one small bowl and the powdered sugar to a separate small bowl.
- Using a 1 tablespoon cookie scoop, portion the chilled dough and roll each scoop between your palms into smooth, round balls. Working with one dough ball at a time keeps everything cold and makes the coating process easier.
- Roll each cookie dough ball first in the granulated sugar, coating it completely — this creates the inner layer that helps the powdered sugar adhere. Next, roll the same ball in the powdered sugar until it’s completely covered in a thick, snowy coating.
- Place the coated cookies on your lined baking sheet about 2 inches apart from each other. Bake for 9 to 12 minutes, until the cookies have puffed up, developed beautiful cracks, and the edges just barely start to set.
- Let the cookies cool on the baking sheet for 5 minutes (they’ll firm up during this time), then carefully transfer them to a wire rack or paper towels to cool completely. The crackled coating will set as they cool, creating that signature two-toned look.