Peppermint Red Velvet Blossoms with Candy Cane Kisses
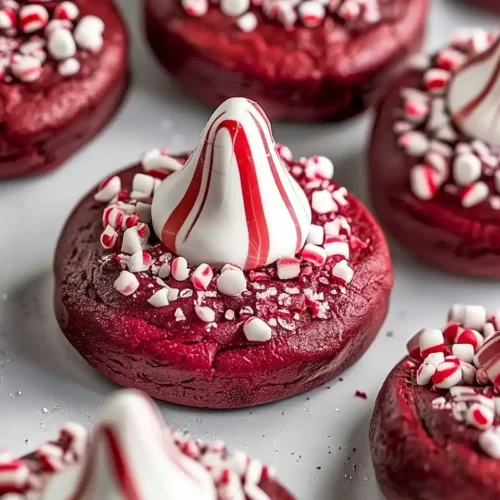
Peppermint Red Velvet Blossoms with Candy Cane Kisses combine festive red velvet cookies with creamy peppermint candy for the perfect holiday treat that’s ready in under an hour.
Hey there, I’m Claire Whitmore — a pastry whisperer in Asheville, NC, where butter totally counts as self-care. This Peppermint Red Velvet Blossoms with Candy Cane Kisses recipe is my go-to when I want something that screams “holiday magic” without actually screaming at my mixer for three hours. These cookies bring together the subtle cocoa richness of red velvet with cool, refreshing peppermint candy kisses — it’s like Christmas decided to show up in cookie form.
Picture this: soft, pillowy red velvet cookies topped with a melty peppermint kiss and a sparkle of crushed candy canes. They’ve got that gorgeous ruby color, a hint of cocoa that’s not too intense, and just enough peppermint to make your taste buds do a little happy dance. Plus, they’re seriously easy to make — no fancy techniques, no weird ingredients you’ll only use once, just straightforward holiday baking that actually works.
I started making these a few years ago when I wanted to jazz up the classic peanut butter blossom cookies my mom used to make. Don’t get me wrong, those are delicious, but I was craving something a little more festive and a lot more red velvet. One experimental batch later, and these beauties were born — and honestly, they’ve been the star of every cookie swap since.

Little Snapshot: What This Recipe Delivers
These Peppermint Red Velvet Blossoms combine the tender crumb of classic red velvet cake with the nostalgic charm of a blossom cookie, topped with creamy peppermint candy kisses and crushed candy canes for a festive finish that’s ready in about 45 minutes.
Why You’ll Love This Recipe 🌸
- These Peppermint Red Velvet Blossoms look like you spent hours decorating, but they’re actually easier than wrapping presents without tape sticking to your fingers.
- They’re perfectly portioned for cookie exchanges, holiday parties, or strategic midnight snacking — no judgment here.
- The red velvet base stays soft for days (if they last that long), so you can bake ahead without stress.
- According to Serious Eats’ comprehensive cookie guide, chilling cookie dough improves both texture and flavor — and this recipe proves exactly why that 30-minute chill time is totally worth it.
Quick Facts ⚡
Here’s the quick scoop on this Peppermint Red Velvet Blossoms recipe.
- CourseDessert
- Prep Time15 minutes
- Chill Time30 minutes
- Cook Time10-12 minutes
- Total Time57 minutes
- Servings18-20 cookies
- DifficultyEasy
Table of Contents
Peppermint Red Velvet Blossoms with Candy Cane Kisses
Equipment
- Medium mixing bowl
- Large mixing bowl
- Hand mixer or stand mixer
- Whisk
- Measuring cups and spoons
- Plastic wrap
- Baking sheets
- Parchment paper
- Wire cooling rack
Ingredients
Dry Ingredients
- 1 ¼ cups all-purpose flour
- ¼ cup unsweetened cocoa powder
- 1 tsp baking powder
- ½ tsp baking soda
- ¼ tsp salt
Wet Ingredients
- ½ cup unsalted butter softened
- ¾ cup granulated sugar
- 1 large egg
- 1 tsp vanilla extract
- 1 tbsp red food coloring gel preferred
- 1 tbsp buttermilk
Topping
- 18-20 peppermint candy kisses unwrapped
- crushed candy canes or peppermint candies for garnish
Instructions
- Whisk together flour, cocoa powder, baking powder, baking soda, and salt in a medium bowl. Set aside.
- In a large bowl, cream butter and sugar with a mixer until light and fluffy. Beat in egg and vanilla until smooth.
- Add red food coloring and buttermilk, then gradually mix in the dry ingredients until a soft dough forms.
- Cover and chill dough for 30 minutes to firm up and prevent spreading.
- Preheat oven to 350°F (175°C). Line baking sheets with parchment paper.
- Roll chilled dough into 1-inch balls and place on prepared sheets, spacing 2 inches apart. Lightly flatten each ball.
- Bake 10–12 minutes until edges are set and centers still soft.
- Immediately press a peppermint candy kiss into the center of each cookie. Sprinkle crushed candy canes on top.
- Cool 5 minutes on the pan, then transfer to a wire rack to cool completely.
Notes
Nutritional Peek
Here’s what you’re getting in each festive bite — because knowing never hurts, even during cookie season.
| Nutrient | Amount per Cookie |
|---|---|
| Calories | 145 |
| Protein | 2g |
| Carbohydrates | 21g |
| Fat | 6g |
| Fiber | 1g |
| Sugar | 14g |
Ingredients
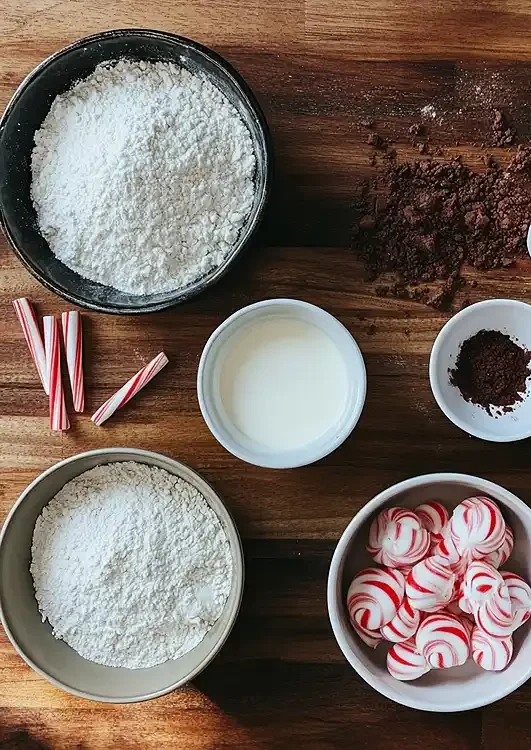
These peppermint red velvet blossoms start with pantry staples you probably already have hanging around. For the dry ingredients — all-purpose flour, unsweetened cocoa powder, baking powder, baking soda, and salt — you’ll want to whisk them together thoroughly to avoid any cocoa clumps.
For the wet ingredients — softened unsalted butter, granulated sugar, egg, vanilla extract, red food coloring, and buttermilk — room temperature is your best friend here for smooth mixing.
| Amount | Ingredient |
|---|---|
| 1 ¼ cups | all-purpose flour |
| ¼ cup | unsweetened cocoa powder |
| 1 tsp | baking powder |
| ½ tsp | baking soda |
| ¼ tsp | salt |
| ½ cup | unsalted butter, softened (yes, real butter — margarine just doesn’t deliver that same rich flavor) |
| ¾ cup | granulated sugar |
| 1 large | egg |
| 1 tsp | vanilla extract |
| 1 tbsp | red food coloring (gel preferred for that gorgeous vibrant red without making your dough watery) |
| 1 tbsp | buttermilk |
| 18-20 | peppermint candy kisses, unwrapped (save yourself some time and unwrap these while the dough chills) |
| as needed | crushed candy canes or peppermint candies for garnish |
Tools You’ll Actually Use
- Medium mixing bowl
- Large mixing bowl
- Hand mixer or stand mixer
- Whisk
- Measuring cups and spoons
- Plastic wrap
- Two baking sheets
- Parchment paper
- Wire cooling rack
Step-by-Step Instructions
Making these Peppermint Red Velvet Blossoms with Candy Cane Kisses is honestly one of the most satisfying baking projects for the holidays. You’ll love how the dough comes together — it’s soft, slightly sticky, and that gorgeous red color is just instant holiday cheer. Let’s get into it.
Step 1: Prepare the dry ingredients
In a medium bowl, whisk together the 1 ¼ cups all-purpose flour, ¼ cup unsweetened cocoa powder, 1 teaspoon baking powder, ½ teaspoon baking soda, and ¼ teaspoon salt until everything’s evenly distributed and there are no cocoa lumps hiding in the corners. Set this aside — you’ll fold it into the wet ingredients in just a bit.
Step 2: Cream the butter and sugar
In a large bowl, using a hand mixer or stand mixer fitted with the paddle attachment, cream together the ½ cup softened unsalted butter and ¾ cup granulated sugar on medium-high speed until the mixture is light, fluffy, and pale in color — this should take about 2-3 minutes. Beat in the 1 large egg and 1 teaspoon vanilla extract, mixing until everything’s silky smooth and combined. If you’ve got a stand mixer like my trusty red velvet thumbprint cookies recipe uses, this step is basically hands-free bliss.
Step 3: Add the red velvet magic
With the mixer on low speed, add the 1 tablespoon red food coloring (I’m telling you, gel food coloring is worth it here for that vibrant ruby hue) and 1 tablespoon buttermilk to the wet ingredients, mixing just until you achieve that signature red velvet color. Gradually add the prepared dry ingredients to the bowl, mixing on low speed just until the dough comes together into a soft, slightly sticky mass — don’t overmix or your cookies will be tough instead of tender.
Step 4: Chill the dough
Cover the bowl tightly with plastic wrap and pop it in the refrigerator for at least 30 minutes — this step is non-negotiable because it helps the cookies maintain their beautiful round shape while baking instead of spreading into sad little pancakes. I usually use this time to unwrap all my peppermint kisses and catch up on my favorite show.
Step 5: Preheat and prep
Preheat your oven to 350°F (175°C) and line two baking sheets with parchment paper to prevent sticking. If you’re feeling fancy, you can prep these ahead and refrigerate them so you can bake in batches without waiting.
Step 6: Shape and bake the cookies
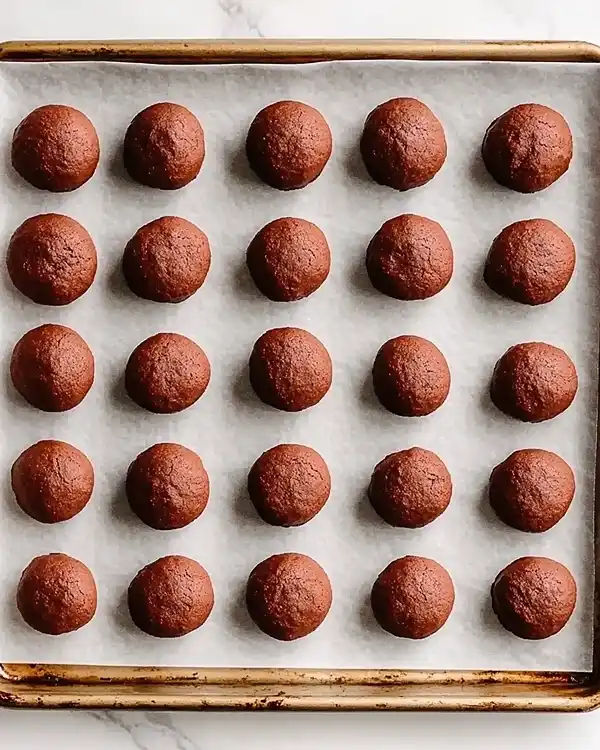
Roll the chilled red velvet dough into 1-inch balls using your hands (about a tablespoon of dough each) and place them 2 inches apart on your prepared baking sheets — they’ll spread just a little, so give them room to breathe. Lightly flatten each dough ball with the palm of your hand to create a slightly flattened disc shape. Bake for 10-12 minutes, or until the cookies have set around the edges but still look soft and slightly underdone in the center — they’ll continue cooking on the hot pan after you pull them out.
Step 7: Top with peppermint kisses
As soon as the cookies come out of the oven (like, immediately — don’t even wait to admire them), gently press one peppermint candy kiss into the center of each warm cookie, creating that classic blossom look. Right away, sprinkle crushed peppermint candies or candy cane pieces around the base of each kiss while the cookies are still warm so the peppermint bits stick to the surface and create that festive sparkle.
Step 8: Cool completely
Allow the cookies to cool on the baking sheet for 5 minutes to let everything set up properly, then carefully transfer them to a wire rack to cool completely — the peppermint kisses will soften from the residual heat of the cookies but will firm back up as they cool. Once they’re room temperature, they’re ready to devour or package up for gift-giving.
Claire’s Pro Tips & Gentle Guidance
These classic blossom cookies with a red velvet twist are pretty forgiving, but I’ve learned a few tricks that make them even better. Trust me, I’ve made every mistake in the book so you don’t have to.
Use gel food coloring instead of liquid if you can find it — you’ll get that gorgeous, vibrant red color without adding extra liquid to your dough. The liquid stuff works too, but you’ll need more of it and your dough might be slightly softer.
Don’t skip the chilling step, even if you’re in a rush. I tried it once when I was running late for a cookie exchange, and my cookies spread into weird oval shapes that looked more like red velvet UFOs than blossoms. Thirty minutes in the fridge makes all the difference.
Press those peppermint kisses in while the cookies are still hot from the oven — if you wait even a minute or two, the cookies will have cooled enough that you’ll crack them trying to push the candy in. I learned this the hard way during my first batch, and let’s just say I ended up with some “rustic” looking cookies.
If your dough feels too sticky to roll into balls even after chilling, lightly dust your hands with flour or powdered sugar. A tiny bit goes a long way, and it makes handling the dough so much easier. According to King Arthur Baking’s expert holiday cookie advice, working with properly chilled dough is one of the secrets to perfectly shaped cookies every single time.
Quick Fixes for Peppermint Red Velvet Blossoms
Problem: My cookies spread too much and lost their shape. Your butter was probably too warm or you skipped the chilling step. Next time, make sure your butter is softened but still cool to the touch (not melty), and definitely chill that dough for the full 30 minutes before baking.
Problem: The peppermint kisses cracked my cookies when I pressed them in. You waited a bit too long after pulling them from the oven — those kisses need to go in immediately while the cookies are still super soft. Set up your workspace with unwrapped kisses ready to go before you even open the oven.
Problem: My cookies came out too cake-like instead of soft and chewy. You might’ve overbaked them slightly or added too much flour. Red velvet cookies should look slightly underdone in the center when you pull them out — they’ll finish cooking on the pan. Also, measure your flour by spooning it into the measuring cup and leveling it off, not scooping directly from the bag.
Problem: The red color came out pink instead of vibrant red. This usually means you didn’t use enough food coloring or you used liquid instead of gel. Gel food coloring is way more concentrated, so a tablespoon gives you that gorgeous red velvet hue without making your dough watery.
Variations & Fun Twists
Want to make these peppermint red velvet blossoms your own? Here are some ideas I’ve tried (and loved):
Swap the peppermint kisses for regular Hershey’s Kisses if you’ve got peppermint-haters in your life — they’re still gorgeous and delicious. Or try dark chocolate kisses for a more grown-up flavor that plays beautifully with the cocoa in the cookie base.
Make them gluten-free by using your favorite 1:1 gluten-free flour blend in place of the all-purpose flour. I’ve tested this with Bob’s Red Mill and King Arthur’s gluten-free blends, and both work like a dream. Just like my pumpkin pie cookies, these adapt really well to dietary swaps.
For a fancy presentation, drizzle cooled cookies with melted white chocolate and add extra crushed candy canes on top. It looks super impressive but takes literally five extra minutes.
Try a cream cheese frosting swirl under the peppermint kiss for an extra red-velvet-cake vibe — just pipe a tiny dollop of cream cheese frosting into the center of each warm cookie before pressing in the candy kiss.
Serving, Storage & Reheating
Serve these Peppermint Red Velvet Blossoms with Candy Cane Kisses at room temperature when the peppermint kisses have fully set — that’s when the flavor and texture are absolutely perfect. They’re stunning on a simple white platter, or you can get fancy and arrange them on a tiered stand with other holiday cookies like my no-bake pumpkin cheesecake balls for a gorgeous dessert spread.
Store these beauties in an airtight container at room temperature with parchment paper between layers so they don’t stick together, and they’ll stay soft and delicious for up to 5 days. Don’t refrigerate them unless your kitchen is super warm — cold temps can make the cookies dry out.
These cookies don’t really need reheating since they’re meant to be enjoyed at room temperature, but if you want to warm them slightly for that just-baked feel, pop them in a 300°F oven for about 3-4 minutes. Just watch that the peppermint kisses don’t start melting.
No-Waste Kitchen Magic
Got leftover crushed candy canes after making these cookies? Stir them into hot chocolate, sprinkle them over vanilla ice cream, or fold them into homemade whipped cream for a peppermint twist. They also make a gorgeous rimming sugar for holiday cocktails.
If you’ve got extra peppermint kisses lying around (though honestly, when does that ever happen?), toss them into brownie batter before baking or press them into the tops of chocolate cupcakes while they’re still warm. They’re also amazing melted into hot milk for an instant peppermint cocoa.
Day-old cookies that have lost a bit of their softness are perfect crumbled over vanilla ice cream or yogurt for a festive breakfast parfait. Or crush them completely and use them as a crust for a no-bake peppermint cheesecake — waste not, want not.
Peppermint Red Velvet Blossoms FAQs
Does red velvet go with peppermint?
Absolutely — red velvet’s subtle cocoa flavor and slight tanginess pair beautifully with cool, refreshing peppermint. The chocolate notes in red velvet aren’t overwhelming, so the peppermint really shines through without competing. It’s like how chocolate and mint have always been best friends, but with a softer, more sophisticated vibe.
What gives red velvet its tangy flavor?
The buttermilk in red velvet recipes is what creates that signature subtle tang you can’t quite put your finger on. It reacts with the baking soda to create a tender, fine crumb while adding a slight acidity that balances the sweetness. Some traditional recipes also used vinegar, but buttermilk does the job perfectly in these cookies.
What should be the taste of red velvet cookies?
Red velvet cookies should taste like a subtle chocolate cookie with a hint of tang from the buttermilk — not super chocolatey like a brownie, but with a gentle cocoa flavor that’s almost velvety smooth. The texture should be soft and tender, kind of like a cross between a sugar cookie and a chocolate cookie. They’re sweet but not overly so, with that characteristic red velvet balance that makes them totally addictive.
What are the ingredients in made good red velvet cookies?
Made Good’s packaged red velvet cookies typically include gluten-free flour blends, vegetables like spinach and beets for color and nutrition, cocoa powder, and natural sweeteners. They’re designed to be allergy-friendly and contain hidden vegetables for added nutrition. However, these homemade Peppermint Red Velvet Blossoms use traditional all-purpose flour, real butter, cocoa powder, buttermilk, and red food coloring for that classic red velvet taste and gorgeous color — they’re a totally different beast but equally delicious in their own way
There’s a whole world of classic comfort foods waiting for you over at the Classic Comfort Foods collection. Each one is made with the same love and attention, and they’re all absolutely worth trying. Happy cooking!
Cozy Closing
These Peppermint Red Velvet Blossoms with Candy Cane Kisses have become my go-to holiday cookie because they’re festive, easy, and always disappear faster than I can make them. There’s something magical about that combination of soft red velvet and cool peppermint that just screams celebration.
I’d love to see your spin on these Peppermint Red Velvet Blossoms! Drop a comment below with your photos — I’d love to see how you made them your own. Did you try any of the variations? Swap in different candies? These cookies are so versatile, and I bet you’ve got amazing ideas already brewing.
Happy baking, and here’s to cookies that make the whole house smell like Christmas came early! 🎄
I’m Claire Whitmore — a dessert daydreamer from Asheville, NC. For me, baking isn’t about perfect pastries — it’s about the joy of sharing something sweet (and maybe sneaking an extra cookie when no one’s looking).