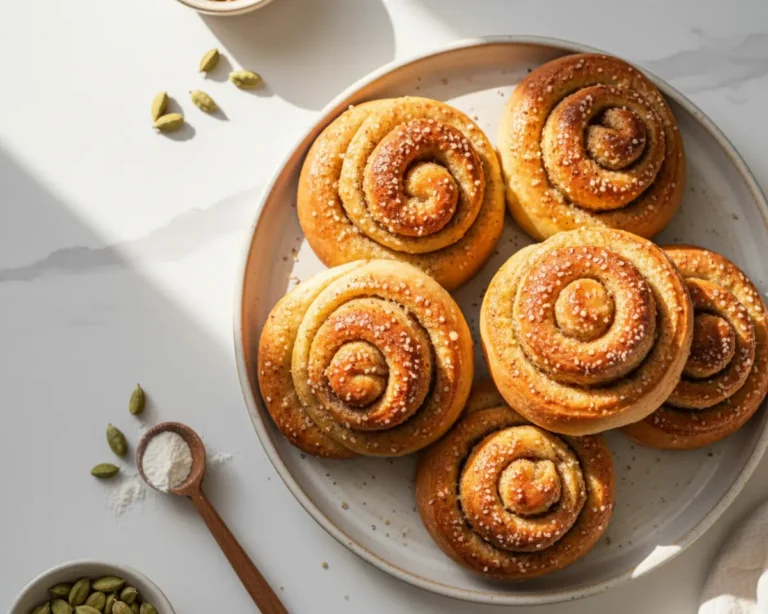
Christmas Cookie Pinwheels
This Christmas cookie pinwheel recipe is my secret weapon for holiday entertaining. They look like you spent hours in the kitchen, but I promise you haven’t — and that’s exactly the magic we’re going for.
These festive beauties combine soft, buttery dough with bold red and green ribbons that spiral into the most Instagram-worthy cookies you’ll make all season. They’re elegant enough for a holiday cookie exchange, simple enough for baking with the kids, and honestly? They’re impossible to stop eating.
I first made these for a neighborhood cookie swap about five years ago, and people literally asked for the recipe before even taking a bite. That’s when I knew these pinwheel cookies were keepers. Fair warning: they disappear fast.
What This Recipe Delivers:
These festive Christmas cookie pinwheels combine an easy butter cookie dough with food coloring and a simple spiral technique to create elegant, bakery-worthy treats in about 3 hours (mostly chilling time). No special skills needed — just a rolling pin and patience for the chill time.
Why You’ll Love This Recipe 🌸
- These Christmas cookie pinwheels look fancy but take less time than folding laundry — most of the work is just waiting for the dough to chill.
- One simple dough, three colors, endless wow factor — they’re the definition of easy elegance for busy moms who want to impress without the stress.
- They’re perfect for gift-giving, cookie swaps, or just hoarding in your holiday tin (no judgment here).
- According to King Arthur Baking’s holiday cookie guide, the most beloved festive cookies balance visual appeal with approachable technique — and these pinwheels hit that sweet spot perfectly.
Quick Facts ⚡
Here’s the quick scoop on these Christmas cookie pinwheels.
- Course: Dessert
- Prep Time: 20 minutes (plus 2.5 hours chilling)
- Bake Time: 12–15 minutes
- Total Time: 3 hours
- Servings: 36–40 cookies
- Difficulty: Easy
Table of Contents

Christmas Cookie Pinwheels
Equipment
- Large mixing bowl
- Medium mixing bowl
- Electric mixer
- Whisk
- Measuring cups and spoons
- Plastic wrap
- Rolling Pin
- Parchment paper
- Sharp knife
- Baking sheet
- Wire cooling rack
Ingredients
Cookie Dough
- 2 cups All-purpose flour plus more for dusting
- ½ teaspoon Baking powder
- ¼ teaspoon Salt
- 12 tablespoons Unsalted butter at room temperature
- ¾ cup Granulated sugar
- 1 Egg
- 1 teaspoon Vanilla extract
- ½ to 1 teaspoon Red food coloring liquid or gel
- ½ to 1 teaspoon Green food coloring liquid or gel
Instructions
- Whisk together flour, baking powder, and salt in a medium bowl. Set aside.
- In a large bowl, beat butter and sugar until pale and fluffy, about 2–3 minutes.
- Add egg and vanilla, mixing until smooth and combined.
- Gradually add dry ingredients to the wet mixture in two additions. Mix just until combined.
- Divide dough into three parts: leave one plain, color one red, and color one green. Wrap and chill each for 1 hour.
- Roll each dough portion into a 10-inch square between parchment sheets. Chill 30 minutes.
- Stack colored doughs in order (red, white, green). Trim edges and roll into a tight log. Chill 1 hour.
- Preheat oven to 350°F (175°C). Slice the log into 1/4-inch rounds and place on parchment-lined baking sheets.
- Bake 12–15 minutes until edges are barely golden. Cool on sheet 5 minutes, then transfer to rack.
Notes
Nutritional Peek
| Nutrient | Amount per Cookie |
|---|---|
| Calories | 85 |
| Protein | 1g |
| Carbs | 10g |
| Fat | 4.5g |
| Fiber | 0g |
| Sugar | 6g |
Ingredients for Christmas Cookie Pinwheels
For this pinwheel cookie dough, you’ll need a mix of wet and dry ingredients that come together beautifully. The room-temperature butter is key — it creams perfectly with sugar to give you that light, fluffy base. The food coloring creates those gorgeous festive ribbons without affecting the dough’s texture.
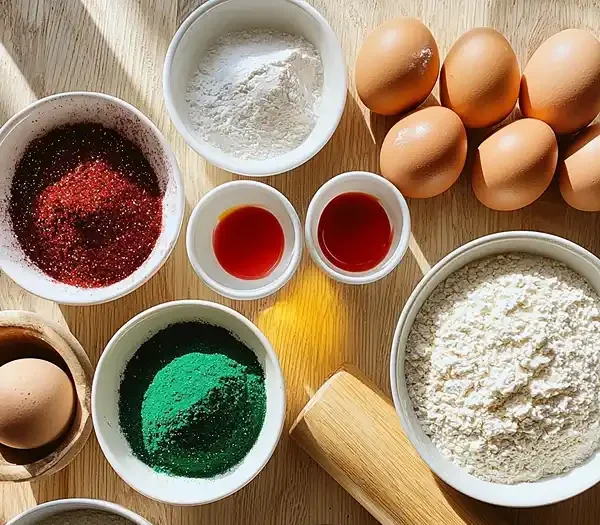
| Amount | Ingredient |
|---|---|
| 2 cups | All-purpose flour (plus more for dusting) |
| 1/2 teaspoon | Baking powder |
| 1/4 teaspoon | Salt |
| 12 tablespoons | Unsalted butter, at room temperature (yes, real butter — margarine just doesn’t cut it here) |
| 3/4 cup | Granulated sugar |
| 1 | Egg |
| 1 teaspoon | Vanilla extract |
| 1/2 to 1 teaspoon | Liquid red food coloring |
| 1/2 to 1 teaspoon | Liquid green food coloring |
Tools You’ll Actually Use
- Large mixing bowl
- Medium mixing bowl
- Electric mixer (or hand mixer)
- Whisk
- Measuring cups and spoons
- Plastic wrap
- Rolling pin
- Parchment paper
- Sharp knife for slicing
- Baking sheet
- Wire cooling rack
Step-by-Step Instructions for Christmas Cookie Pinwheels
1. Build Your Base In a medium bowl, whisk together the flour, baking powder, and salt until evenly combined. Set aside.
2. Cream the Butter & Sugar In a large bowl, beat the room-temperature butter and sugar together until the mixture is pale, fluffy, and looks almost cloud-like — about 2–3 minutes. This aerates the dough and sets you up for tender cookies.
3. Add Egg & Vanilla Add the egg and vanilla extract to the butter mixture, beating until everything is smooth and combined. Scrape down the sides of the bowl to catch any stray bits.
4. Bring It Together Gradually add the dry ingredients into the wet mixture in two additions, mixing on low speed until just combined. Don’t overmix — we want tender cookies, not tough ones.
5. Color Your Dough Divide the dough into three equal parts (eyeballing is totally fine here). Leave one part plain (this is your white layer). Add 1/2 to 1 teaspoon of red food coloring to the second part, kneading gently until the color is even. Do the same with the green food coloring for the third part. Wrap each portion in plastic and refrigerate for at least 1 hour.
6. Roll It Out Working with one dough portion at a time, roll it into a thin 10-inch square between two sheets of parchment paper. Chill each rolled square for 30 minutes so it holds its shape when stacked.
7. Stack & Roll Remove the parchment from each rolled square. Stack them in order: red on bottom, white in the middle, green on top. Trim the edges so they’re even, then roll everything tightly into a log (like you’re making a spiral cinnamon roll). Wrap the log in plastic and refrigerate for at least 1 hour until firm.
8. Slice & Bake Preheat your oven to 350°F. Slice the log into 1/4-inch rounds (this is where a sharp knife makes all the difference — you want clean slices, not squished ones). Place them on a parchment-lined baking sheet and bake for 12–15 minutes until the edges are just barely golden and your kitchen smells like a Paris café.
9. Cool Completely Let the cookies cool on the baking sheet for 5 minutes, then transfer to a wire rack to cool completely. This prevents them from overbaking and keeps them tender.

Claire’s Pro Tips & Gentle Guidance for Pinwheel Cookies
Making Christmas cookie pinwheels is honestly pretty forgiving, but a few little tricks take them from good to absolutely stunning. I’ve made these dozens of times, and I’m here to share what I’ve learned the hard way so you don’t have to.
Chill, Chill, Chill This dough needs its chill time — don’t skip it or rush it. If the dough is too warm when you’re rolling or stacking, it’ll be a sticky mess and your pretty spirals will blur together. I learned this the hard way at 11 p.m. on Christmas Eve (story of my life).
Use Gel Food Coloring, Not Liquid Gel coloring gives you bolder, more vibrant reds and greens without making the dough wet or altering the texture. Liquid coloring works, but you’ll need more of it, which can throw off your dough’s consistency. Trust me on this one.
Keep Your Knife Sharp & Clean When slicing the log into rounds, a dull knife will squish the dough instead of cutting it cleanly, and your beautiful spirals get all smooshed. Wipe your knife with a damp towel between slices to keep it clean.
Don’t Overbake These cookies should be just barely golden around the edges — still soft in the center. They’ll firm up as they cool, and you want them tender, not crispy.
Room-Temperature Butter Is Non-Negotiable Cold butter won’t cream properly with the sugar, and you’ll end up with a dense, crumbly dough. Let your butter sit on the counter for about 30 minutes before starting — it should be soft enough to leave a slight fingerprint.
According to King Arthur Baking’s cookie troubleshooting guide, proper creaming technique is the foundation of tender, bakery-quality cookies — and these pinwheels are proof of that.
This is the kind of recipe that makes you want to cook everything in sight. Lucky for you, the Christmas & Winter collection is full of exactly that. Go explore and find your new go-to dish.
Quick Fixes for Christmas Cookie Pinwheels
The Spirals Are Blurry (Not Crisp) Your dough layers weren’t cold enough before stacking. Make sure each rolled square is chilled for the full 30 minutes, and chill the stacked log for at least 1 hour. Cold dough holds its shape better during slicing and baking.
The Cookies Spread & Lose Their Shape The dough was too warm or the butter was too soft. Make sure your butter is at room temperature (not melted or mushy), and chill the dough log thoroughly before slicing. If your kitchen is super warm, work quickly and keep dough in the fridge between steps.
They’re Too Cakey or Dry You might’ve overmixed the dough or overbaked them. Mix just until combined — no more — and pull them out of the oven when the edges are barely golden. Remember, they continue cooking slightly as they cool.
The Food Coloring Stained My Hands Use gel coloring instead of liquid, or wear food prep gloves while kneading it into the dough. This makes cleanup way easier and keeps your hands from turning green (which, funny or not, isn’t ideal before a holiday party).
Variations & Fun Twists
Grown-Up Flavor Swap Swap the vanilla extract for peppermint or almond extract for a different holiday vibe. You can also add a tiny pinch of espresso powder to the plain dough for a subtle coffee kick.
Gluten-Free Version Use a 1:1 gluten-free flour blend in place of all-purpose flour. The technique stays exactly the same, and these turn out just as delicious.
White Chocolate Dip Melt white chocolate and dip the top edge of each cookie for extra elegance and a little sweetness boost.
Vegan Option Use plant-based butter and replace the egg with 2 tablespoons of aquafaba (liquid from canned chickpeas). The colors stay vibrant, and nobody will know the difference.
Rustic vs. Fancy Plating Stack them on a simple white plate for minimalist elegance, or arrange them in a pyramid on a tiered cake stand for holiday wow factor. Either way, they look bakery-worthy.
Serving, Storage & Reheating
Serve With Style These cookies are perfect on their own, but they’re also stunning served with a cup of hot cocoa, coffee, or mulled cider. Arrange them on a festive plate or in a pretty tin for gift-giving — they’re impressive enough to feel fancy but approachable enough for casual munching.
Storage Tips (If You Actually Have Leftovers, Which I Doubt) Store cooled cookies in an airtight container at room temperature for up to 5 days. Layer them between parchment paper so they don’t stick together. For longer storage, freeze them in a freezer-safe container for up to 3 months — they thaw beautifully at room temp in about 30 minutes.
Reheating Honestly, these are best enjoyed at room temperature or straight from the tin. If you do want to warm them up, pop them in a 300°F oven for about 5 minutes just to take the chill off. Don’t microwave them — that makes them tough and weird.
No-Waste Kitchen Magic
Leftover Dough Scraps If you have bits of colored dough left from trimming, knead them together to create a fun marble effect, then roll and slice as usual. It’s like edible modern art.
Broken or Misshapen Cookies Crumble them up and use them as a topping for vanilla ice cream or mix them into homemade cookie butter for gift-giving.
Day-Old Cookies These stay fresh for days, but if they start to soften, store them in the fridge instead of on the counter to keep them crisp.
FAQs About Christmas Cookie Pinwheels
What are the most common mistakes when making Christmas cookies?
The big ones are overbaking, overmixing the dough, and using cold butter. These three things account for 90% of cookie disasters. Overbaking makes them hard, overmixing creates tough cookies, and cold butter prevents proper creaming, which leads to dense, crumbly dough that doesn’t hold its structure.
How are pinwheel cookies made?
You divide a single dough into colored portions, roll each flat, stack the layers, roll it all into a tight log, chill it, then slice and bake. The magic happens in the spiral — when you cut through the log, those beautiful red, white, and green rings show up on every cookie.
What’s the golden rule in baking cookies?
Don’t overbake them. Seriously. Cookies continue cooking on the sheet after you pull them out, so they should look just barely done (almost underdone) when they hit the cooling rack. A minute or two too long and they go from tender to tough real fast.
Can I freeze Christmas cookie pinwheels?
Absolutely! You can freeze them two ways: freeze the unsliced dough log (wrap it tightly in plastic and foil for up to 3 months, then slice and bake from frozen — just add a minute or two to the bake time), or freeze baked cookies in an airtight container for up to 3 months. Both work beautifully.
Can I make the dough ahead of time?
Yes! Make the dough, wrap it in plastic, and refrigerate for up to 2 days, or freeze for up to 1 month. You can also prepare the colored dough portions separately and stack them right before rolling — just keep everything chilled between steps so the colors stay vibrant.
I’d love to see your spin on these Christmas cookie pinwheels! Drop a comment below with your photos — I want to see how you made them your own. Maybe you added peppermint, swapped in different colors, or created your own unique twist. This recipe is so versatile; I bet you’ve already got amazing variations in mind!
Don’t Miss these Delicious Recipes:
- Cream Cheese Spritz Cookies
- Peppermint Red Velvet Blossoms with Candy Cane Kisses
- High Protein Slow Cooker Garlic Butter Beef Bites
- Red Velvet Thumbprint Cookies
- Salted Caramel Apple Pie Cheesecake
I’m Claire Whitmore — a dessert daydreamer from Asheville, NC. For me, baking isn’t about perfect pastries — it’s about the joy of sharing something sweet (and maybe sneaking an extra scoop of icing). These pinwheel cookies have become my holiday tradition, and I hope they become yours too.