Classic Peanut Butter Blossoms
Hey there, I’m Claire Whitmore — a pastry whisperer in Asheville, NC, where butter totally counts as self-care. This Classic Peanut Butter Blossoms recipe is proof that dessert doesn’t have to be complicated to feel special.
You know what makes me smile? When a recipe looks like it came from a fancy bakery but actually just needs a bowl, a mixer, and your favorite cozy playlist. That’s the magic of Classic Peanut Butter Blossoms.
They’re the kind of treat that makes everyone lean in a little closer at holiday parties, asking if you’d share the recipe. (Spoiler: you will, because you’re generous like that.)
Little Snapshot: What This Recipe Delivers
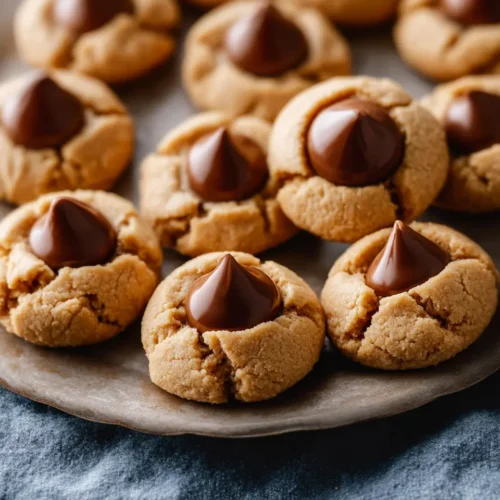
Classic Peanut Butter Blossoms are soft, chewy peanut butter cookies rolled in sparkling sugar and topped with a chocolate Hershey Kiss while still warm from the oven.
They’re ridiculously simple to make, require just one bowl for mixing, and deliver that nostalgic peanut butter-chocolate combo that never gets old — perfect for holiday Classic Peanut Butter Blossoms swaps or any time you need something sweet without the stress.
Why You’ll Love This Recipe 🌸
- This Peanut Butter Blossom Cookies recipe takes less time than folding laundry, but everyone will think you spent hours in the kitchen.
- They’re endlessly forgiving — even if your kitchen skills are more “enthusiastic experimenter” than “seasoned baker,” these cookies will still turn out beautifully.
- The combo of creamy peanut butter and chocolate is basically a hug in cookie form, and we could all use more of those.
- According to King Arthur Baking, chilling your dough creates better texture and flavor — and this recipe proves exactly why.
Quick Facts ⚡
Here’s the quick scoop on this Classic Peanut Butter Blossoms.
- CourseDessert
- Prep Time15 minutes
- Cook Time10 minutes
- Total Time1 hour 25 minutes (includes chilling)
- Servings48 cookies
- DifficultyEasy
Table of Contents
Nutritional Peek
Listen, I’m all about enjoying the moment and not stressing over every calorie, but if you’re curious about what’s in each Hershey Kiss Peanut Butter Cookie, here’s the scoop. Think of it as friendly information, not a rulebook.
| Nutrient | Amount per Cookie |
|---|---|
| Calories | 110 kcal |
| Protein | 2g |
| Carbohydrates | 14g |
| Total Fat | 5g |
| Saturated Fat | 2.5g |
| Fiber | 0.5g |
| Sugar | 9g |
Classic Peanut Butter Blossoms Ingredients
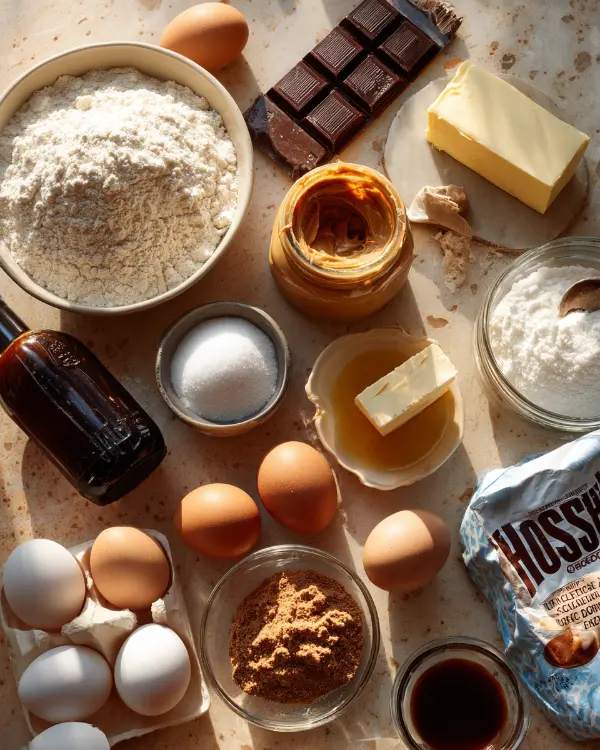
When you’re making Peanut Butter Kiss Cookies, you want ingredients that actually taste like something. None of that “barely there” flavor business. Here’s what you’ll need — and yes, real butter makes all the difference (margarine just doesn’t cut it here).
| Amount | Ingredient |
|---|---|
| 1 3/4 cups | All-Purpose Flour |
| 1 tsp | Baking Soda |
| 1/2 tsp | Salt |
| 1/2 cup | Creamy Peanut Butter |
| 1/2 cup | Unsalted Butter, room temperature |
| 1/2 cup | Granulated Sugar |
| 1/2 cup | Light Brown Sugar, lightly packed |
| 1 | Large Egg |
| 2 tbsp | Milk |
| 1 tsp | Vanilla Extract |
| 1/2 cup | Granulated Sugar (additional, for coating) |
| 11 oz | Bag of Hershey Kisses (about 48 kisses) |
Tools You’ll Actually Use
You probably have most of these already hanging out in your kitchen:
- Medium mixing bowl
- Hand mixer or stand mixer with paddle attachment
- Measuring cups and spoons
- Rubber spatula (for scraping down the bowl)
- 2 baking sheets
- Parchment paper or silicone baking mats
- Small bowl (for rolling sugar)
- Airtight container (for storage)
Step-by-Step Instructions
Alright, let’s make some Classic Peanut Butter Blossoms that’ll have everyone asking for seconds (and thirds, but who’s counting?).
Step 1: Mix Your Dry Ingredients
In a medium bowl, whisk together the all-purpose flour, baking soda, and salt. This is your dry crew — they’re just hanging out until it’s their turn to shine. Set this bowl aside for now.
Step 2: Cream the Good Stuff
Grab your mixer and cream together the peanut butter, unsalted butter, granulated sugar, and light brown sugar on medium-high speed. You want everything well blended and looking a little fluffy — like it’s ready for a party. This usually takes about 2-3 minutes.
Step 3: Add the Wet Ingredients
Toss in the egg, milk, and vanilla extract. Mix until everything’s cozy together, and don’t forget to scrape down the sides of the bowl. (There’s always that sneaky bit of butter trying to hide from the action.)
Step 4: Bring It All Together
Reduce your mixer speed to low and gradually add in that dry mixture you set aside earlier. Mix just until everything’s completely blended — no flour streaks, but don’t overmix or your Classic Peanut Butter Blossoms will get tough and cranky.
Step 5: The Patience Part (aka Chilling)
Place your cookie dough in a well-sealed container or wrap the top of your mixing bowl tightly with plastic wrap. Pop it in the fridge for at least 1 hour. I know, I know — waiting is the hardest part.
But trust me, this step makes the cookies hold their shape and develop way better flavor.
Step 6: Prep for Baking
After your dough has chilled out (literally), line 2 baking sheets with parchment paper or silicone mats. Adjust your oven rack to just above center, and preheat to 375°F. Unwrap those Hershey Kisses while you’re at it — you’ll need them ready to go.
Step 7: Shape and Sugar Roll
Using a spoon and your clean hands, roll the dough into 1-inch balls. Roll each one in that additional granulated sugar until they’re sparkling like little edible disco balls. Place them about 1 1/2 to 2 inches apart on your lined baking sheets.
Step 8: First Bake
Slide those beauties into the oven and bake for 7-8 minutes. They should look slightly puffed but not fully done yet — don’t worry, we’re not finished.
Step 9: The Star Moment
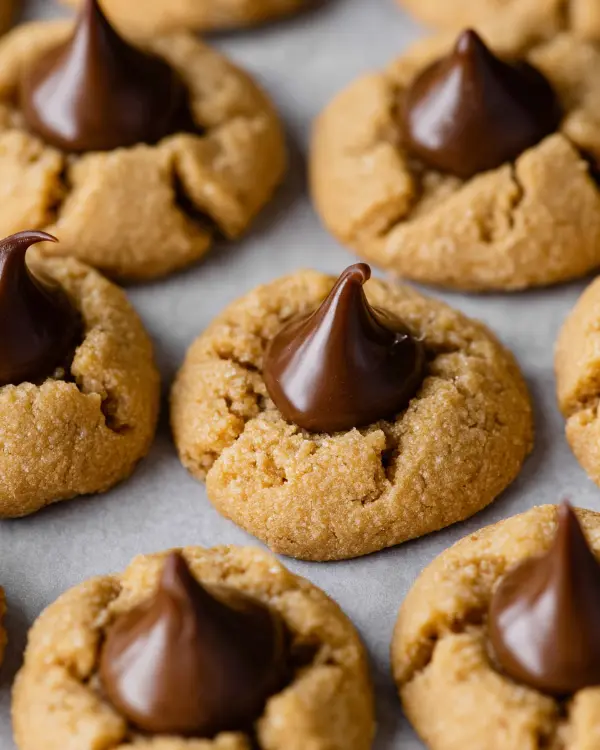
Remove the Classic Peanut Butter Blossoms from the oven and immediately place a Hershey Kiss on each one, pressing down gently. You’ll see those gorgeous crackly edges form around the chocolate — that’s the magic happening right there.
Step 10: Finish Baking
Pop the Classic Peanut Butter Blossoms back in the oven for 2 more minutes. They’ll firm up just enough while staying wonderfully soft in the center.
Step 11: Cool Down
Let the cookies cool on the baking sheet for 5-10 minutes (this helps them set without falling apart). Then transfer them to a cooling rack to cool completely. Or, you know, sneak one while it’s still warm. I won’t tell.
Claire’s Pro Tips & Gentle Guidance
Making Peanut Butter Blossom Cookies is pretty forgiving, but here are a few secrets I’ve learned from my own kitchen adventures (and mishaps):
Room Temperature Butter is Non-Negotiable
If your butter is cold and hard, it won’t cream properly with the sugars. You want it soft enough that you can press your finger into it but not so soft it’s melting. I usually take mine out about 45 minutes before I start baking.
Don’t Skip the Chill
I used to think, “Oh, I’ll just skip the fridge time and bake them right away.” Big mistake. The Peanut Butter Blossom Cookies spread like crazy and lost their beautiful shape.
That hour in the fridge is what keeps them thick and chewy instead of flat and crispy. The folks at Epicurious swear by chilling dough — and after many batches, I couldn’t agree more.
Press the Kiss While They’re Hot
Timing matters here. If you wait too long, the Peanut Butter Blossom Cookies will crack when you press the chocolate in. But if you do it right when they come out after that first bake, the warmth helps the kiss nestle in perfectly and creates those iconic crinkly edges.
The Bread Trick for Storage
This might sound weird, but storing your cookies with a slice of bread keeps them soft and chewy for days. The cookies absorb moisture from the bread, and somehow the bread doesn’t get the cookies soggy. It’s kitchen magic, I swear.
Use Natural Peanut Butter? Maybe Not This Time
I’m usually all for natural ingredients, but natural peanut butter (the kind with oil on top) can make these cookies too oily and affect the texture. Stick with regular creamy peanut butter like Jif or Skippy for the best results.
Quick Fixes for Classic Peanut Butter Blossoms
Even the best bakers hit a few bumps. Here’s how to troubleshoot common cookie conundrums:
Peanut Butter Blossom Cookies Spreading Too Much?
Your butter was probably too warm, or you skipped the chilling step. Make sure your dough gets that full hour in the fridge, and don’t let your butter get melty before mixing.
Cookies Too Dry or Crumbly?
You might’ve added a touch too much flour (it happens when we scoop directly from the bag). Try spooning flour into your measuring cup and leveling it off instead. Also, don’t overbake — they should look slightly underdone when you pull them out after that first bake.
Hershey Kisses Sliding Off?
You probably waited too long to press them in. They need to go on immediately after that first bake while the cookies are still super soft. Work quickly!
Peanut Butter Blossom Cookies Too Hard?
Overbaking is usually the culprit. Remember, they’re going back in for that second round, so don’t let them get golden brown after the first 7-8 minutes. Also, that bread storage trick will help soften them up if they’ve already hardened.
Cookies Losing Their Shape?
Make sure you’re using baking soda (not baking powder) and that it’s fresh. Old leavening agents can make cookies behave unpredictably. Also double-check that chill time — it really does make all the difference.
Variations & Fun Twists
One of the things I love about Hershey Kiss Peanut Butter Cookies is how easy they are to customize. Here are some fun ways to switch things up:
Go Seasonal
Swap regular Hershey Kisses for seasonal flavors — caramel-filled for fall, peppermint for winter, or cherry cordial for Valentine’s Day. Each one gives the cookie a totally different personality.
Try Different Chocolates
Not married to Hershey Kisses? Press in a Rolo, a mini peanut butter cup, or even a chunk of your favorite chocolate bar. Just make sure whatever you use is about the same size so the Peanut Butter Blossom Cookies bake evenly.
Make Them Gluten-Free
Use a 1:1 gluten-free flour blend in place of all-purpose flour. The texture might be slightly different, but they’ll still be delicious. I’ve had good luck with Bob’s Red Mill.
Add Some Crunch
Mix in 1/2 cup of finely chopped peanuts to the dough for extra texture and nutty flavor. It makes them taste even more peanut-forward, which some people absolutely love.
Rustic vs. Fancy Plating
For a casual vibe, pile them high on a simple plate. For something more elegant, arrange them in a single layer on a vintage platter with a dusting of powdered sugar around the edges. Same cookie, totally different energy.
If you’re in the mood for more cozy baking inspiration, check out my Apple Cinnamon Rolls, Easy Classic Moist Banana Bread, or these festive Peppermint Chocolate Chip Cookies.
Serving, Storage & Reheating
Let’s talk about what happens after these Peanut Butter Kiss Cookies come out of the oven (if you actually have leftovers, which I doubt).
Serving
These Peanut Butter Blossom Cookies are perfect at room temperature with a cold glass of milk, a cup of coffee, or honestly just straight from the container while standing at the counter. No judgment here. They’re also amazing for cookie exchanges, bake sales, or as a homemade gift — just stack them in a clear cellophane bag tied with ribbon.
Storage
Store your cookies in an airtight container with a slice of white bread to keep them soft and chewy. They’ll stay fresh for up to a week at room temperature. Just replace the bread slice if it gets hard after a couple days.
Freezing
You can absolutely freeze these! Place cooled cookies in a freezer-safe container or bag, separating layers with parchment paper so the Kisses don’t stick. They’ll keep for up to 3 months. Thaw at room temperature for about 30 minutes before serving.
Freezing the Dough
Want to have fresh-baked cookies on demand? Roll the dough into balls, place them on a baking sheet, and freeze until solid. Transfer to a freezer bag and store for up to 3 months.
When you’re ready to bake, roll frozen dough balls in sugar and add 1-2 extra minutes to the baking time. Easy future you will thank present you.
No-Waste Kitchen Magic
I’m all about using what you have and not letting good ingredients go to waste. Here are some creative ways to make the most of everything:
Extra Hershey Kisses?
Chop them up and fold into brownie batter, sprinkle on top of hot cocoa, or melt them down for a quick chocolate drizzle over ice cream. You could also press them into the center of cupcakes before baking for a surprise chocolate center.
Cookie Crumbs
If a few cookies break or get overbaked, don’t toss them. Crush them up and use as a topping for yogurt parfaits, mix into ice cream, or sprinkle over a chocolate pudding. They’re also amazing as part of a cookie crust for cheesecake.
Day-Old Cookies Getting Firm?
Pop them in the microwave for about 8-10 seconds to soften them back up. Or crumble them and layer with whipped cream and chocolate sauce for a quick cookie trifle situation.
Leftover Peanut Butter
If you’ve got peanut butter hanging out in the jar, swirl it into brownies, make a quick peanut sauce for noodles, or blend it into a smoothie with banana and a touch of honey. It’s too good to let sit there unused.
Can’t get enough of these flavors? You’re going to love what’s waiting in the Classic Comfort Foods lineup. Every single recipe is made to impress without the stress. Happy cooking, friend!
Classic Peanut Butter Blossoms FAQs
Can I freeze Classic Peanut Butter Blossoms?
Absolutely! These cookies freeze beautifully. Just make sure they’re completely cooled first, then store them in an airtight container with parchment paper between the layers. They’ll stay delicious for up to 3 months.
Why do I need to chill the dough?
Chilling the dough does two important things: it helps the cookies hold their shape instead of spreading flat, and it lets the flavors develop and meld together. It’s worth the wait, I promise.
Can I use crunchy peanut butter instead of creamy?
You can, but the texture will be a bit different — you’ll get extra peanut bits throughout. If you like chunky cookies, go for it! Just know they won’t be quite as smooth.
Do I have to use Hershey Kisses, or can I use something else?
You can totally use other chocolates! Rolos, peanut butter cups, or even fancy dark chocolate pieces work great. Just keep the size similar so the cookies bake evenly.
My cookies are spreading too much. What am I doing wrong?
This usually means the dough wasn’t chilled long enough or the butter was too warm when you started. Make sure you give that dough the full hour in the fridge, and check that your butter is just room temp, not melted.
Cozy Closing
And there you have it — Classic Peanut Butter Blossoms that are soft, sparkly, and topped with a chocolate kiss (because everything’s better with a little chocolate on top, right?). These cookies have been making people smile for generations, and now they’re ready to do the same in your kitchen.
I’d love to see your spin on this Classic Peanut Butter Blossoms recipe! Leave a note below or tag me on Instagram so we can share a sweet moment together.
Did you try one of the fun twists? Swap the kisses for something unexpected? I’m all ears — and probably ready to steal your ideas for my next batch.
I’m Claire Whitmore — a dessert daydreamer from Asheville, NC. For me, baking isn’t about perfect pastries — it’s about the joy of sharing something sweet (and maybe sneaking an extra scoop of icing).
Classic Peanut Butter Blossoms
Equipment
- Medium mixing bowl
- Hand mixer or stand mixer with paddle attachment
- Measuring cups and spoons
- Rubber spatula
- 2 baking sheets
- Parchment paper or silicone baking mats
- Small bowl
- Airtight container
Ingredients
- 1 ¾ cups All-Purpose Flour
- 1 tsp Baking Soda
- ½ tsp Salt
- ½ cup Creamy Peanut Butter
- ½ cup Unsalted Butter room temperature
- ½ cup Granulated Sugar
- ½ cup Light Brown Sugar lightly packed
- 1 Large Egg
- 2 tbsp Milk
- 1 tsp Vanilla Extract
- ½ cup Granulated Sugar additional amount for coating cookies
- 11 oz Bag of Hershey Kisses about 48 kisses
Instructions
- In a medium bowl, whisk together the all-purpose flour, baking soda, and salt. This is your dry crew — they’re just hanging out until it’s their turn to shine. Set this bowl aside for now.
- Grab your mixer and cream together the peanut butter, unsalted butter, granulated sugar, and light brown sugar on medium-high speed. You want everything well blended and looking a little fluffy — like it’s ready for a party. This usually takes about 2-3 minutes.
- Toss in the egg, milk, and vanilla extract. Mix until everything’s cozy together, and don’t forget to scrape down the sides of the bowl.
- Reduce your mixer speed to low and gradually add in that dry mixture you set aside earlier. Mix just until everything’s completely blended — no flour streaks, but don’t overmix or your cookies will get tough and cranky.
- Place your cookie dough in a well-sealed container or wrap the top of your mixing bowl tightly with plastic wrap. Pop it in the fridge for at least 1 hour.
- After your dough has chilled out, line 2 baking sheets with parchment paper or silicone mats. Adjust your oven rack to just above center, and preheat to 375°F. Unwrap those Hershey Kisses while you’re at it — you’ll need them ready to go.
- Using a spoon and your clean hands, roll the dough into 1-inch balls. Roll each one in that additional granulated sugar until they’re sparkling. Place them about 1 1/2 to 2 inches apart on your lined baking sheets.
- Slide those beauties into the oven and bake for 7-8 minutes. They should look slightly puffed but not fully done yet.
- Remove the cookies from the oven and immediately place a Hershey Kiss on each one, pressing down gently. You’ll see those gorgeous crackly edges form around the chocolate.
- Pop the cookies back in the oven for 2 more minutes. They’ll firm up just enough while staying wonderfully soft in the center.
- Let the cookies cool on the baking sheet for 5-10 minutes. Then transfer them to a cooling rack to cool completely.