Flourless Chocolate Cake (Passover-Friendly)
Flourless Chocolate Cake is the Passover dessert that genuinely doesn’t feel like a compromise. It’s deeply chocolatey, naturally gluten-free, and made with just a handful of pantry staples — semi-sweet chocolate, butter, eggs, and sugar — no flour needed.
Hey there, I’m Claire Whitmore — a pastry whisperer in Asheville, NC, where butter totally counts as self-care. This flourless chocolate cake recipe is one of those rare gems that’s both a showstopping Passover dessert and a year-round gluten-free cake that everyone at the table devours.
I first made this for a Seder dinner years ago, a little nervous about the cracking dome and the three-stage bake. Spoiler: that crack is totally normal, and once it collapsed and I smoothed it down, it looked almost intentional. Almost.
Table of Contents
Little Snapshot: What This Recipe Delivers
This flourless chocolate cake is a rich, fudgy Passover dessert made with semi-sweet chocolate, butter, separated eggs, and a splash of Kahlua — ready in about 1 hour 15 minutes and serving 8.
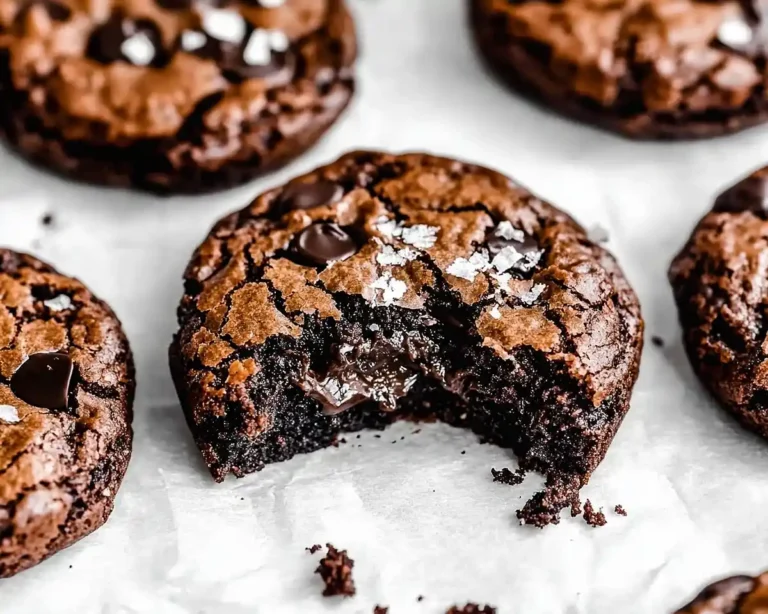
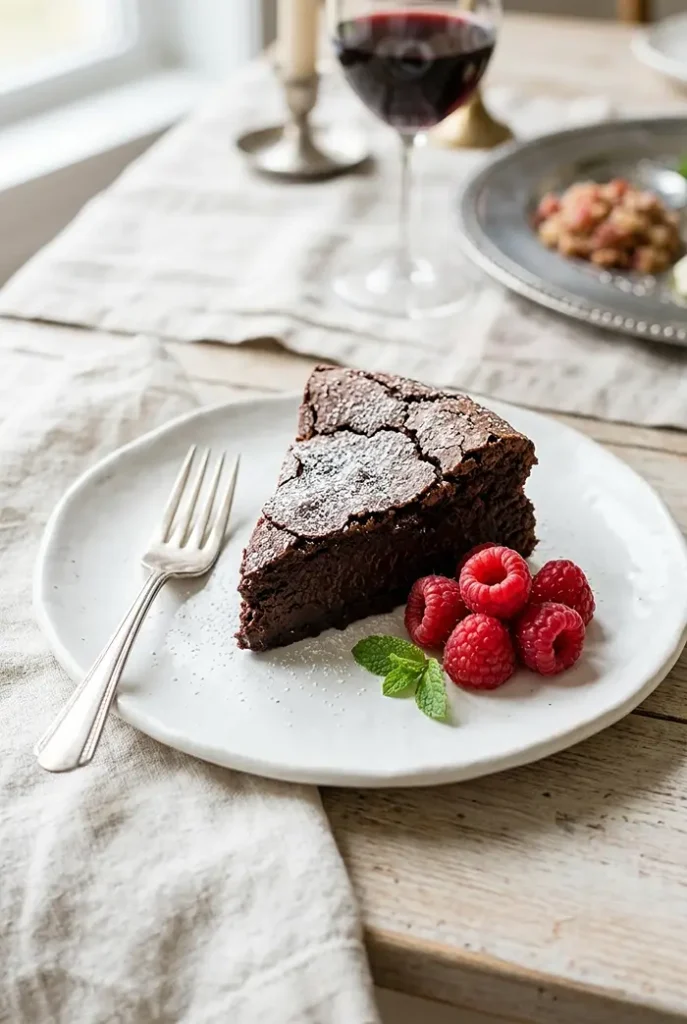
It’s naturally gluten-free, Passover-friendly, and delivers a dense, truffle-like texture with a beautifully crackled top that makes it look fancy with zero extra effort.
Why You’ll Love This Recipe
- This flourless chocolate cake takes less time than folding laundry — and tastes about a thousand times better.
- It’s a crowd-pleasing Passover dessert that also works for every gluten-free guest at the table, no awkward “I can’t eat that” moments.
- The three-step bake sounds fancy, but it’s really just adjusting the oven dial twice — you’ve totally got this.
- According to King Arthur Baking’s guide to Passover desserts, flourless chocolate cake is a go-to Seder treat because it’s unfailingly delicious and needs no special tools — and this recipe is proof of exactly that.
Quick Facts
Here’s the quick scoop on this flourless chocolate cake.
- CourseDessert
- Prep Time20 minutes
- Cook Time60 minutes
- Total Time1 hour 20 minutes (plus 30 min cool in oven)
- Servings8 servings
- DifficultyMedium
Nutritional Peek
| Nutrient | Amount Per Serving |
|---|---|
| Calories | ~390 kcal |
| Protein | 7 g |
| Carbohydrates | 38 g |
| Fat | 26 g |
| Fiber | 3 g |
| Sugar | 32 g |
Flourless Chocolate Cake Ingredients
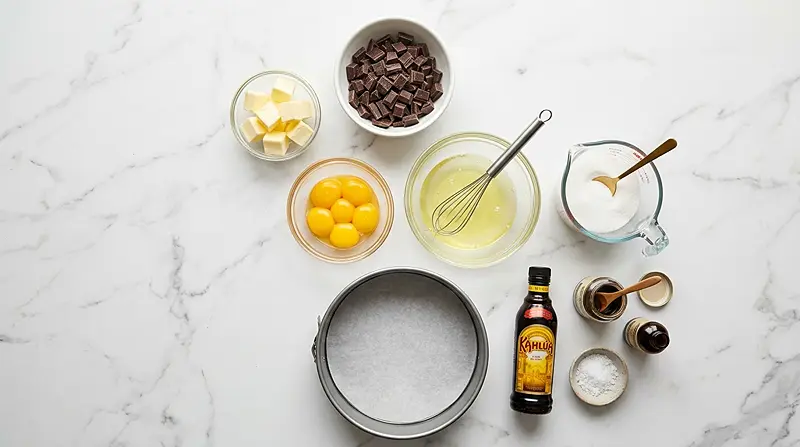
Here’s everything you need for this gluten-free cake — just six simple ingredients that work together beautifully.
For the chocolate base — semi-sweet chocolate and salted butter — you’ll want to melt these together gently so they’re silky smooth. For the egg components — yolks build richness while whipped whites create lift — make sure they’re at room temperature before you start.
| Amount | Ingredient |
|---|---|
| 10 oz | Semi-sweet chocolate, broken into pieces |
| 1/2 cup | Salted butter, cut into 8 pieces (yes, real butter — margarine just doesn’t cut it here) |
| 6 large | Eggs, separated, at room temperature |
| 3/4 cup + 1/4 cup | Granulated sugar, divided (3/4 for yolks, 1/4 for whites) |
| 2 tsp | Kahlua, dark rum, or creme de cacao (adds a lovely depth — don’t skip it) |
| 1/2 tsp | Vanilla paste, or 1 tsp vanilla extract |
Tools You’ll Actually Use
- 9-inch springform pan
- Parchment paper
- Microwave-safe bowl (for melting chocolate)
- Stand mixer or electric hand mixer
- Two large mixing bowls
- Rubber spatula (for folding)
- Oven thermometer (optional but helpful)
Step-by-Step Instructions for Flourless Chocolate Cake
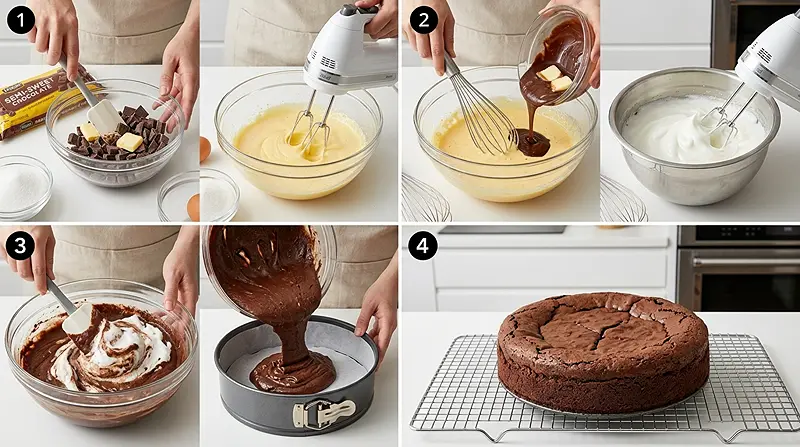
Get ready — this gluten-free Passover dessert comes together in a few satisfying stages, and your kitchen is about to smell incredible.
Step 1: Set Up Your Oven
Place the oven rack on the lowest level. Preheat your oven to 375°F. Starting on the bottom rack helps the cake bake evenly from below, which matters with this dense batter.
Step 2: Prepare the Springform Pan
Coat the bottom and sides of a 9-inch springform pan generously with butter, margarine, or oil. Place a circle of parchment paper on the bottom of the pan — this is your insurance policy for a clean release later.
Step 3: Melt the Chocolate and Butter
Place the 10 oz of semi-sweet chocolate pieces and 1/2 cup of salted butter into a microwave-safe bowl. Microwave in 30-second intervals, stirring in between, until fully melted and glossy. Set aside to cool slightly.
Step 4: Beat the Egg Yolks
In a large mixing bowl (or stand mixer), beat the 6 egg yolks at high speed. Gradually add 3/4 cup of the granulated sugar. Continue beating until the mixture turns pale yellow and thick — this takes about 4 to 6 minutes and is worth every second.
Step 5: Combine Chocolate and Yolk Mixture
Add the melted chocolate-butter mixture to the pale egg yolk mixture. Beat until completely smooth and glossy, scraping down the sides as needed.
Step 6: Add the Flavor
Add the 2 tsp of Kahlua (or dark rum or creme de cacao) and 1/2 tsp vanilla paste (or 1 tsp vanilla extract). Beat until fully blended. Set this chocolate base aside while you work on the whites.
Step 7: Whip the Egg Whites
In a clean, separate medium bowl, beat the 6 egg whites at high speed until soft peaks form. Gradually add the remaining 1/4 cup of granulated sugar and continue beating until stiff — but not dry — peaks form. They should hold their shape but still look glossy, not grainy.
Step 8: Fold It All Together
Using a rubber spatula, gradually fold the whipped egg whites into the chocolate mixture in three additions. Go slow and gentle here — you want to keep as much air in those whites as possible. The batter will be light and a little airy.
Step 9: Fill the Pan and Bake
Pour the batter into your prepared 9-inch springform pan. Smooth the top lightly.
Step 10: The Three-Stage Bake
Bake at 375°F for 15 minutes. Then reduce the oven temperature to 350°F and bake for another 15 minutes. Reduce the temperature one more time to 250°F and bake for a final 30 minutes.
This gradual temperature drop is the secret to a fudgy, crack-friendly flourless chocolate cake. Don’t rush it.
Step 11: Rest in the Oven
Turn off the oven and prop the door open slightly. Let the cake rest inside the oven for 30 more minutes. This slow cooldown prevents sudden temperature shock, which helps the texture stay beautifully dense.
Step 12: Cool Completely
Take the cake out of the oven. Place a damp paper towel gently over the top for 5 minutes, then remove it. Let the cake cool completely at room temperature.
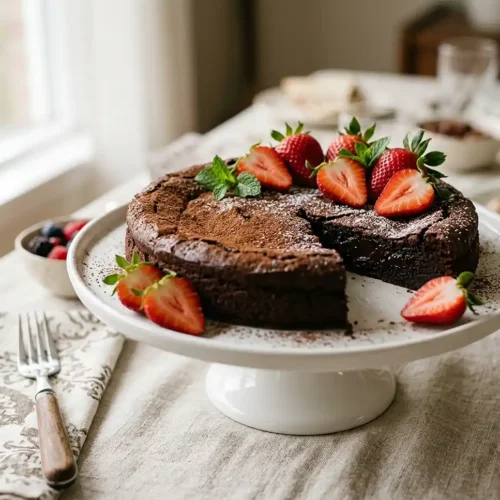
The dome will crack and collapse — this is completely normal and honestly part of the charm. You can gently press the top down to smooth it if you like.
Step 13: Serve
Remove the springform pan ring and transfer the cake to a serving platter. Serve at room temperature for the best texture and flavor. Slice and watch it disappear.
Claire’s Pro Tips for the Best Passover Dessert
A few little secrets make all the difference with this flourless chocolate cake. I’ve learned most of these the slightly embarrassing way, so you don’t have to.
Room-temperature eggs are non-negotiable. Cold egg whites won’t whip to their full potential. Pull your eggs out at least 30 minutes before baking.
Don’t over-beat the egg whites. Stiff but still glossy is your target. If they look dry and clumpy, they’ve gone too far — and folding them in will give you a grainy-textured cake.
Fold gently and patiently. This is not the moment to stir aggressively. Losing the air in those whites means losing the light, slightly airy structure that balances the dense chocolate base.
Don’t panic at the crack. The collapsing dome is not a mistake — it’s exactly what this Passover cake is supposed to do. Lean into it, dust it with cocoa powder, and call it rustic elegance.
Quick Fixes for Flourless Chocolate Cake
My cake sank too much in the middle
A little sinking is totally expected — that’s the nature of this cake. If it sinks dramatically and looks wet in the center, it likely needed a few more minutes in the oven. Use the 250°F bake stage to really let it set through.
The texture is too dense and fudgy
Check that your egg whites were beaten to stiff (not just soft) peaks before folding. Under-whipped whites don’t provide enough lift. Also make sure you’re folding in three additions, not all at once.
The cake is sticking to the pan
Always use parchment paper on the bottom — it’s the most important prep step for this recipe. Butter the sides generously too. If it’s still sticking, run a thin knife around the edge before releasing the springform.
The top looks dry and cracked before it’s done
That’s normal! The surface cracks are not a sign of overbaking. Trust the three-stage bake and the resting time in the oven — the interior will be perfectly moist.
My cake doesn’t look shiny or glossy
This usually means the chocolate and butter weren’t fully melted and blended before being added to the yolks. Make sure that mixture is completely smooth and slightly cooled (not hot) before mixing in.
Variations and Fun Twists on This Gluten-Free Cake
Once you’ve nailed the base recipe, this cake is your canvas. Here are a few ways to make it your own.
Add espresso powder: A teaspoon stirred into the melted chocolate deepens the chocolate flavor without making it taste like coffee. It’s a classic trick that really works.
Swap the Kahlua: Not a fan of coffee liqueur? Use dark rum, creme de cacao, or even a splash of orange liqueur for a citrusy twist. You can also leave it out entirely for an alcohol-free version — just add an extra 1/2 teaspoon of vanilla.
Top with ganache: Melt 1/2 cup of heavy cream with 4 oz of chopped semi-sweet chocolate and pour it over the cooled cake. It turns this into a truly next-level dessert.
Dust with cocoa or powdered sugar: Simple, beautiful, and it hides any imperfections in the top. A light dusting right before serving is all you need.
Serve with berries: Fresh raspberries or strawberries alongside a slice add brightness and color — perfect for a Seder table presentation.
Love easy spring desserts? You might also enjoy these coconut macaroon nests for spring celebrations — another naturally gluten-free treat!
If this recipe made your day, you’re in for a treat. The full Cakes & Cupcakes guide is filled with tried-and-true favorites that real home cooks swear by. Trust me, you won’t be able to pick just one.
Serving, Storage, and Reheating
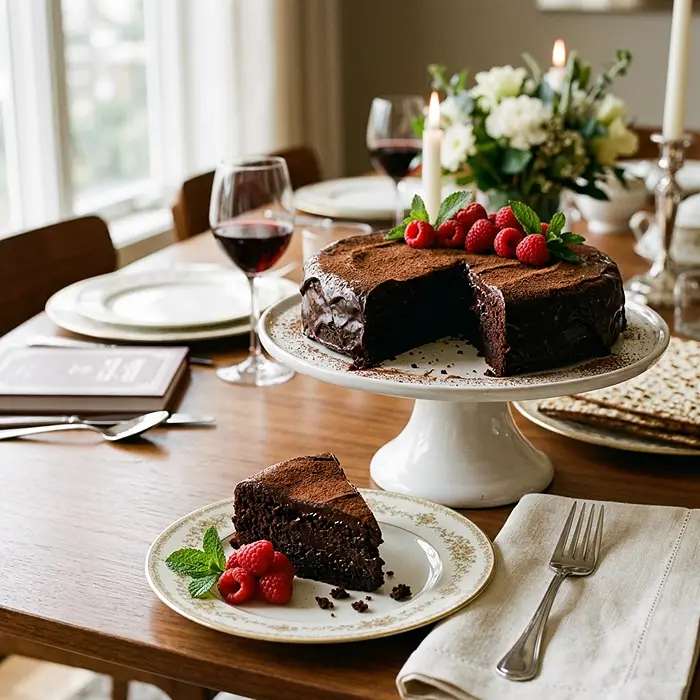
This flourless chocolate cake is best served at room temperature — that’s when the texture is most fudgy and the chocolate flavor really sings. Pair it with a dollop of freshly whipped cream or a scoop of vanilla ice cream for a simple but stunning finish.
Store any leftovers (if you actually have leftovers, which I genuinely doubt) tightly wrapped or in an airtight container at room temperature for up to 2 days. For longer storage, refrigerate for up to 5 days — just bring it back to room temperature before serving.
To reheat, let refrigerated slices sit at room temperature for 30 to 45 minutes. You can also warm a slice in the microwave for 10 to 15 seconds, but be careful not to overheat — you want fudgy, not dry.
No-Waste Kitchen Magic
If you have a couple of leftover slices, crumble them into a bowl and layer with whipped cream and berries for an instant chocolate trifle. Nobody needs to know it was a “planned leftover.”
Extra egg whites? Make a batch of meringue cookies or a simple pavlova. And if you have leftover melted chocolate from the process, drizzle it over fruit for a fast dessert the next day.
If you’re looking for more creative ways to use up ingredients from spring baking, check out these fresh spring rolls with peanut sauce — a totally different vibe but equally satisfying!
FAQs About Flourless Chocolate Cake
Can I make this flourless chocolate cake ahead of time?
Yes, and honestly it might be even better the next day. Bake the cake completely, cool it fully, then wrap it tightly and store at room temperature overnight or refrigerate for up to 5 days. Bring it to room temperature before serving for the best texture.
Can I freeze flourless chocolate cake?
You can! Wrap the fully cooled cake tightly in plastic wrap and then in foil. Freeze for up to 2 months. Thaw overnight in the refrigerator, then bring to room temperature before serving.
Is this flourless chocolate cake kosher for Passover?
Yes, as long as you use kosher-for-Passover certified chocolate, butter, and vanilla. Double-check your liqueur label as well — some are not kosher for Passover. When in doubt, simply omit the Kahlua and add extra vanilla.
Why do I need to separate the eggs for this recipe?
The separated eggs are what give this cake its structure. The yolks add richness and help the batter bind, while the whipped whites create a light, airy lift that balances the density of the chocolate. It’s a small extra step that makes a big difference.
What’s the best way to know when the flourless chocolate cake is done?
The edges should be set and slightly pulling away from the sides of the pan, while the center may still have a very slight jiggle. After the full three-stage bake and the 30-minute rest in the turned-off oven, the center will firm up perfectly.
Cozy Closing
This flourless chocolate cake has earned a permanent spot at my Seder table — and honestly at pretty much every celebration in between. It’s one of those recipes that sounds impressive, bakes up reliably, and makes everyone at the table feel a little bit spoiled.
I’d love to see your spin on this flourless chocolate cake! Drop a comment below with your photos — I’d love to see how you made it your own. Did you add ganache? Top it with raspberries? Go the espresso route? This flourless chocolate cake is so versatile, I bet you’ve already got amazing variations in mind!
I’m Claire Whitmore — a dessert daydreamer from Asheville, NC. For me, baking isn’t about perfect pastries — it’s about the joy of sharing something sweet (and maybe sneaking an extra scoop of icing).
Flourless Chocolate Cake
Equipment
- 9-inch springform pan
- Parchment paper
- Microwave-safe bowl
- Stand mixer or hand mixer
- Mixing bowls
- Rubber spatula
Ingredients
Cake
- 10 oz Semi-sweet chocolate broken into pieces
- 0.5 cup Salted butter cut into pieces
- 6 Eggs separated, room temperature
- 1 cup Granulated sugar divided (3/4 cup + 1/4 cup)
- 2 tsp Kahlua or dark rum optional
- 0.5 tsp Vanilla paste or 1 tsp vanilla extract
Instructions
- Preheat oven to 375°F and place rack on the lowest level.
- Grease a 9-inch springform pan and line the bottom with parchment paper.
- Melt chocolate and butter together in a microwave-safe bowl, stirring until smooth. Let cool slightly.
- Beat egg yolks with 3/4 cup sugar until pale, thick, and creamy.
- Mix melted chocolate into the yolk mixture until smooth, then add Kahlua and vanilla.
- In a separate bowl, whip egg whites to soft peaks, then add remaining sugar and beat to stiff glossy peaks.
- Fold egg whites gently into the chocolate mixture in three additions.
- Pour batter into prepared pan and smooth the top.
- Bake at 375°F for 15 minutes, then 350°F for 15 minutes, then 250°F for 30 minutes.
- Turn off oven, crack the door, and let cake rest inside for 30 minutes.
- Remove cake, cover briefly with a damp towel, then cool completely at room temperature.
- Release from pan, slice, and serve at room temperature.