No-Bake Oreo Lasagna
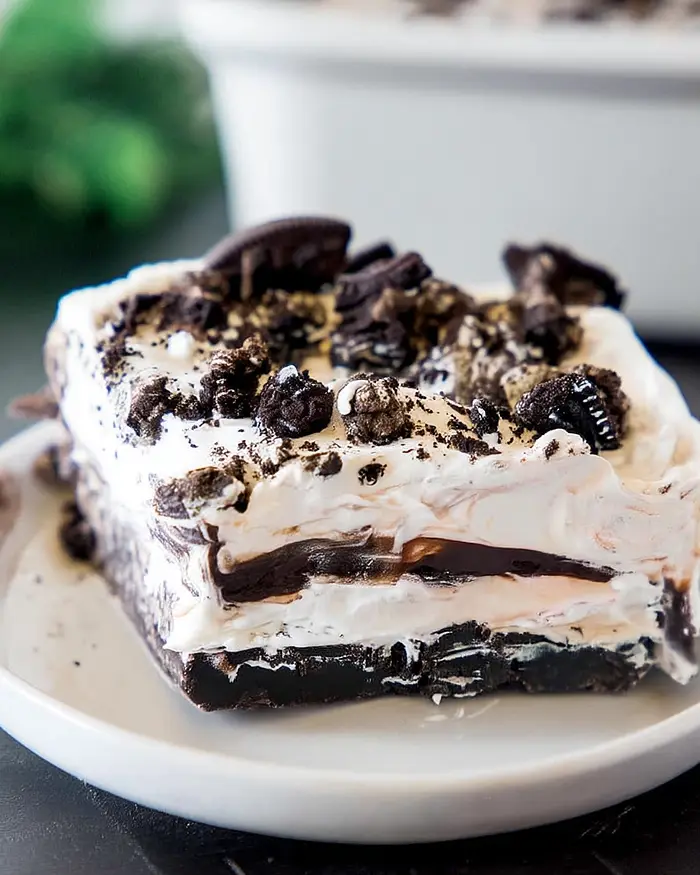
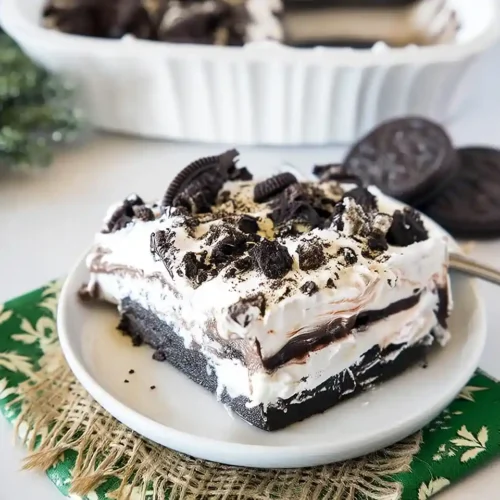
This No-Bake Oreo Lasagna is a show-stopping dessert with layers of crushed Oreos, cream cheese, chocolate pudding, and Cool Whip. Ready in 4 hours with zero oven time—perfect for busy weeknights!
Hey there, I’m Claire Whitmore — a pastry whisperer in Asheville, NC, where butter totally counts as self-care. This No-Bake Oreo Lasagna recipe is about to become your secret weapon for potlucks, birthday parties, and those nights when you need dessert but can’t be bothered to preheat anything.
We’re talking layers of crushed Oreo cookies, fluffy cream cheese filling, silky chocolate pudding, and clouds of Cool Whip — all stacked up like the world’s most delicious lasagna. It’s ridiculously easy, requires zero baking skills, and tastes like you spent hours in the kitchen (spoiler: you didn’t).
This oreo pudding lasagna comes together with simple ingredients you probably already have on hand — Oreos (obviously), cream cheese, instant pudding mix, and Cool Whip. The magic happens when these everyday staples layer into something seriously impressive.
Each bite delivers that perfect contrast of crunchy cookie crust, creamy filling, and rich chocolate that makes Oreo desserts so crave-worthy.
Table of Contents
Little Snapshot: What This Recipe Delivers
This No-Bake Oreo Lasagna is a layered icebox dessert featuring a buttery Oreo cookie crust, sweet cream cheese layer, chocolate pudding, and billowy Cool Whip topping.
Ready in just 4 hours of chill time with about 20 minutes of hands-on prep, it serves 10 people and requires zero oven time. Perfect for beginners, hot summer days, or anyone who needs a crowd-pleasing dessert without the fuss.
Why You’ll Love This Recipe 🌸
- This No-Bake Oreo Lasagna takes less time than folding a load of laundry — seriously, you’ll spend more time in the fridge than the kitchen.
- It looks fancy enough for special occasions but uses ingredients you can grab during a regular grocery run (no specialty shops required).
- The layers stay perfectly distinct when you slice it, giving you that gorgeous cross-section that makes everyone go “wow” on Instagram.
- According to King Arthur Baking’s guide to effortless summer desserts, the best warm-weather treats keep you out of the kitchen — and this oreo lasagna dessert proves exactly why.
Quick Facts ⚡
Here’s the quick scoop on this No-Bake Oreo Lasagna.
- CourseDessert
- Prep Time20 minutes
- Chill Time4 hours
- Total Time4 hours 20 minutes
- Servings10 servings
- DifficultyEasy
No-Bake Oreo Lasagna
Equipment
- 8-inch square baking dish
- Mixing bowls
- Electric hand mixer or stand mixer
- Whisk
- Spatula
- Measuring cups and spoons
- Plastic wrap or lid
- Rolling pin or food processor
Ingredients
For the Oreo Crust:
- 16 Oreo cookies crushed
- 4 tablespoons butter melted
For the First Layer:
- 4 ounces cream cheese softened
- ½ cup powdered sugar
- 1 cup Cool Whip
For the Second Layer:
- 1 box instant chocolate pudding mix 3.9 oz
- 1 ½ cups milk cold
For the Third Layer:
- 8 ounces Cool Whip about 2 3/4 cups
For the Topping:
- 8 Oreo cookies crushed
Instructions
- Spray an 8-inch square baking dish generously with non-stick cooking spray, making sure to get the corners and sides. This little step makes serving so much easier later when those perfect slices lift right out.
- In a medium bowl, mix together 16 crushed Oreo cookies (filling and all) with 4 tablespoons of melted butter until the mixture looks like wet sand and holds together when pressed. Dump this into your prepared baking dish and press it down firmly with the back of a spoon or your fingers—you want a solid, even layer that’ll hold up under all those creamy toppings. Pop it in the freezer for at least 30 minutes to firm up while you work on the layers.
- In a separate bowl, combine the 3.9-ounce box of instant chocolate pudding mix with 1 1/2 cups of cold milk. Whisk vigorously for about 2 minutes until the mixture is smooth and starting to thicken—it should look glossy and coat the back of your spoon. Cover this bowl and slide it into the fridge for 20 minutes to fully set up into that luscious pudding texture.
- While everything’s chilling, beat together 4 ounces of softened cream cheese and 1/2 cup of powdered sugar with an electric mixer until the mixture is light, fluffy, and completely smooth—about 2-3 minutes on medium speed. Gently fold in 1 cup of Cool Whip using a spatula, being careful not to deflate all that gorgeous airiness you just created. Pull your frozen crust from the freezer and spread this creamy mixture evenly over the top, working quickly before the crust warms up.
- Retrieve your set chocolate pudding from the fridge (it should be thick and jiggly now) and spread it carefully over the cream cheese layer. Use a spatula to smooth it out gently—you don’t want to disturb the layer underneath, so work with a light touch and spread from the center outward.
- Spread the remaining 8 ounces of Cool Whip (that’s most of one container, minus the cup you already used) over the chocolate pudding layer, creating fluffy peaks and swirls if you’re feeling fancy. Sprinkle the top generously with 8 crushed Oreos—this gives you that gorgeous cookies-and-cream look and adds a satisfying crunch to every forkful.
- Cover your masterpiece with plastic wrap or a lid and refrigerate for at least 4 hours, or pop it in the freezer for 90 minutes if you’re in a hurry. The chill time lets all the layers set properly so you get those picture-perfect slices when you serve. When you’re ready to dig in, cut into squares and watch everyone’s faces light up at those gorgeous layers.
Notes
Nutritional Peek
Here’s what you’re working with per serving — because sometimes it’s nice to know, even if we’re not counting too closely on dessert night!
| Nutrient | Amount per Serving |
|---|---|
| Calories | 385 kcal |
| Protein | 4g |
| Carbohydrates | 48g |
| Total Fat | 20g |
| Saturated Fat | 11g |
| Fiber | 1g |
| Sugar | 35g |
| Sodium | 310mg |
No-Bake Oreo Lasagna Ingredients
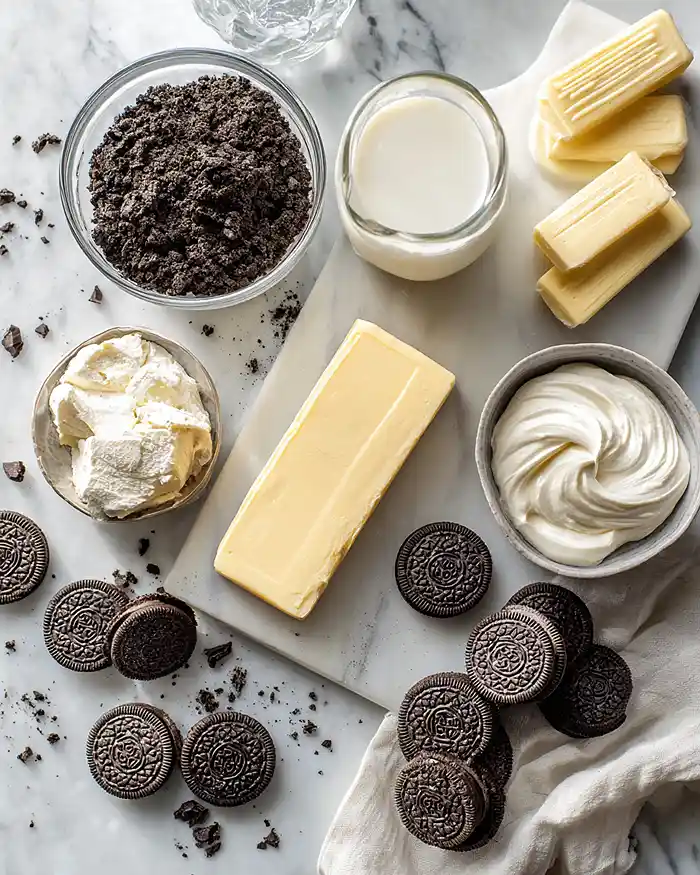
This oreo pudding lasagna comes together with a handful of simple ingredients that create something way more impressive than the sum of their parts.
For the Oreo crust — crushed cookies and melted butter — you’ll want to use regular Oreos (not Double Stuf) so the crust presses firmly and holds its shape. For the cream cheese layer — softened cream cheese, powdered sugar, and Cool Whip — make sure that cream cheese is at room temperature so it whips up light and fluffy without lumps.
The chocolate pudding middle uses instant pudding mix whisked with cold milk, and the Cool Whip topping gets crowned with extra crushed Oreos for that perfect cookie crunch in every bite.
| Amount | Ingredient |
|---|---|
| For the Oreo Crust: | |
| 16 | Oreo cookies, crushed |
| 4 tablespoons | butter, melted |
| For the First Layer: | |
| 4 ounces | cream cheese, softened |
| 1/2 cup | powdered sugar |
| 1 cup | Cool Whip |
| For the Second Layer: | |
| 1 (3.9 oz) box | instant chocolate pudding mix |
| 1 1/2 cups | cold milk |
| For the Third Layer: | |
| 8 ounces | Cool Whip (about 2 3/4 cups) |
| For the Topping: | |
| 8 | Oreo cookies, crushed |
Tools You’ll Actually Use
- 8-inch square baking dish
- Mixing bowls (medium and large)
- Electric hand mixer or stand mixer
- Whisk
- Spatula
- Measuring cups and spoons
- Plastic wrap or lid for covering
- Rolling pin or food processor (for crushing Oreos)
Step-by-Step Instructions
Let’s build this gorgeous No-Bake Oreo Lasagna layer by delicious layer — it’s easier than assembling flat-pack furniture, I promise.
Step 1: Prep Your Pan Spray an 8-inch square baking dish generously with non-stick cooking spray, making sure to get the corners and sides. This little step makes serving so much easier later when those perfect slices lift right out.
Step 2: Create the Oreo Crust In a medium bowl, mix together 16 crushed Oreo cookies (filling and all) with 4 tablespoons of melted butter until the mixture looks like wet sand and holds together when pressed.
Dump this into your prepared baking dish and press it down firmly with the back of a spoon or your fingers — you want a solid, even layer that’ll hold up under all those creamy toppings. Pop it in the freezer for at least 30 minutes to firm up while you work on the layers.
Step 3: Whip Up the Chocolate Pudding In a separate bowl, combine the 3.9-ounce box of instant chocolate pudding mix with 1 1/2 cups of cold milk. Whisk vigorously for about 2 minutes until the mixture is smooth and starting to thicken — it should look glossy and coat the back of your spoon.
Cover this bowl and slide it into the fridge for 20 minutes to fully set up into that luscious pudding texture.
Step 4: Make the Cream Cheese Layer While everything’s chilling, beat together 4 ounces of softened cream cheese and 1/2 cup of powdered sugar with an electric mixer until the mixture is light, fluffy, and completely smooth — about 2-3 minutes on medium speed.
Gently fold in 1 cup of Cool Whip using a spatula, being careful not to deflate all that gorgeous airiness you just created. Pull your frozen crust from the freezer and spread this creamy mixture evenly over the top, working quickly before the crust warms up.
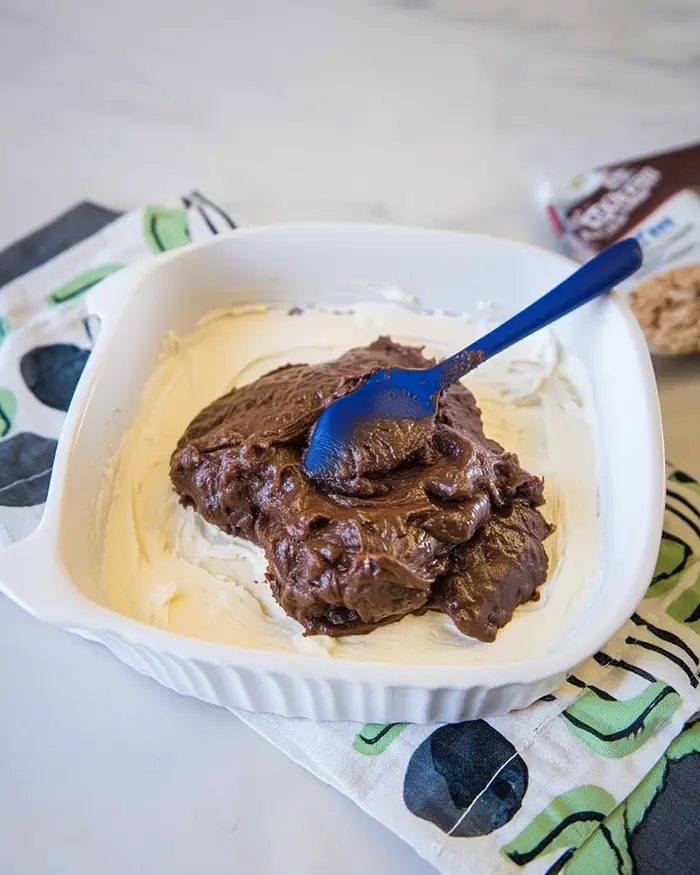
Step 5: Layer on the Chocolate Pudding Retrieve your set chocolate pudding from the fridge (it should be thick and jiggly now) and spread it carefully over the cream cheese layer. Use a spatula to smooth it out gently — you don’t want to disturb the layer underneath, so work with a light touch and spread from the center outward.
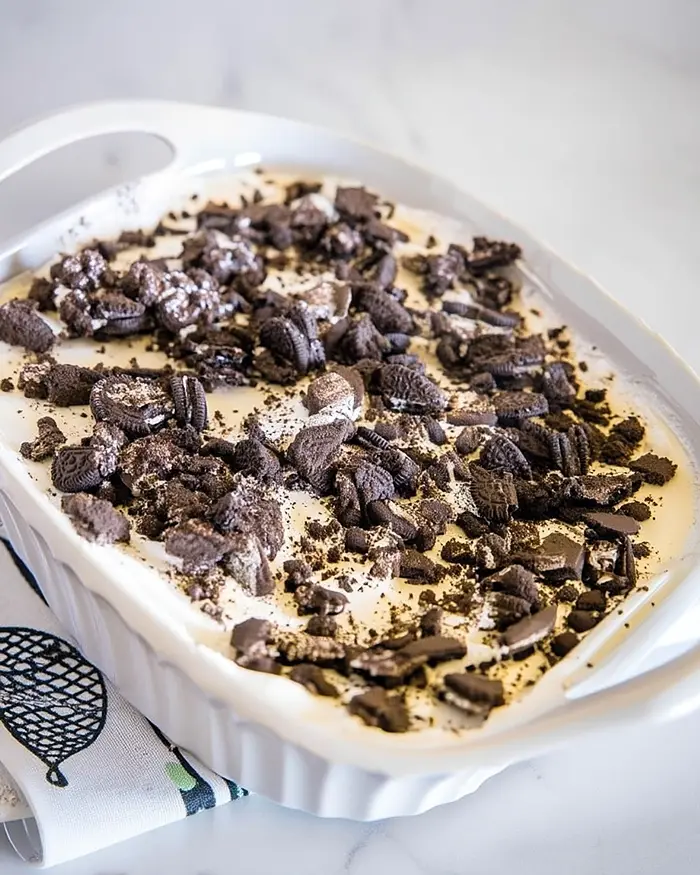
Step 6: Add the Cool Whip Cloud Spread the remaining 8 ounces of Cool Whip (that’s most of one container, minus the cup you already used) over the chocolate pudding layer, creating fluffy peaks and swirls if you’re feeling fancy.
Sprinkle the top generously with 8 crushed Oreos — this gives you that gorgeous cookies-and-cream look and adds a satisfying crunch to every forkful.
Step 7: The Waiting Game (But Worth It) Cover your masterpiece with plastic wrap or a lid and refrigerate for at least 4 hours, or pop it in the freezer for 90 minutes if you’re in a hurry.
The chill time lets all the layers set properly so you get those picture-perfect slices when you serve. When you’re ready to dig in, cut into squares and watch everyone’s faces light up at those gorgeous layers.
Claire’s Pro Tips & Gentle Guidance
This chocolate oreo lasagna is pretty foolproof, but these little tricks will take it from great to absolutely incredible.
Let your cream cheese come to room temperature before mixing. I know it’s tempting to microwave it, but trust me — room temp cream cheese whips up so much smoother and lighter. If you’re in a rush, cut it into small cubes and let it sit on the counter for 15-20 minutes.
Use cold milk for the pudding layer. The colder your milk, the better your pudding will set up. I keep mine in the back of the fridge where it’s coldest, and sometimes I’ll even chill the bowl for a few minutes before mixing.
Press that Oreo crust FIRMLY into the pan. This is the one step where you can’t be gentle — use the bottom of a measuring cup or glass to really pack it down. A loose crust will crumble when you try to slice, and nobody wants that kind of drama at dessert time.
For cleaner slices, use a hot knife. Run your knife under hot water, wipe it dry, then make your cut. Wipe the knife clean and reheat it between slices — this keeps the layers distinct and gorgeous instead of turning into a smushed mess.
According to Sally’s detailed baking guide, patience with chill time makes all the difference in layered desserts — and I’ve learned this the hard way after trying to serve this too early and watching it slide all over the plate!
This is the kind of recipe that makes you want to cook everything in sight. Lucky for you, the Pasta Casseroles collection is full of exactly that. Go explore and find your new go-to dish.
Quick Fixes for No-Bake Oreo Lasagna
Problem: My crust is crumbly and won’t hold together. Make sure you’re using enough melted butter — those cookie crumbs need enough moisture to stick. If your crust still seems dry, add another tablespoon of melted butter and mix well before pressing into the pan.
Problem: The cream cheese layer has lumps. Your cream cheese was probably too cold. Next time, let it sit at room temperature for at least 30 minutes, or cut it into small chunks to soften faster. If you’re already mid-recipe with lumpy cream cheese, beat it longer on high speed — sometimes the friction will smooth things out.
Problem: The layers are sliding around when I cut into it. You didn’t chill it long enough, friend. This dessert really does need that full 4 hours in the fridge (or 90 minutes in the freezer) for everything to firm up properly. Pop it back in the fridge for another hour and try again — patience is a virtue when it comes to no-bake desserts.
Problem: My pudding layer is too runny. Make sure you’re using instant pudding mix, not cook-and-serve pudding (they’re not interchangeable here). Also check that you whisked it for a full 2 minutes and let it set in the fridge for 20 minutes. If it’s still too soft, give it another 10-15 minutes in the fridge before layering.
Variations & Fun Twists
This oreo lasagna dessert is crazy versatile — here are some of my favorite ways to mix things up.
Mint Chocolate Version: Swap regular Oreos for Mint Oreos and add a few drops of peppermint extract to the cream cheese layer. It tastes like a Girl Scout cookie had a baby with a lasagna (in the best way possible).
Peanut Butter Lovers: Use peanut butter Oreos and swap the chocolate pudding for vanilla pudding mixed with 1/3 cup of creamy peanut butter. Top with chopped Reese’s cups instead of crushed Oreos for a candy bar-inspired dessert.
Birthday Cake Style: Use Golden Oreos for the crust and topping, vanilla pudding for the middle layer, and add rainbow sprinkles between each layer. Kids go absolutely bonkers for this version at birthday parties.
If you’re looking for more kid-friendly breakfast treats, my French toast casserole recipe is another crowd-pleaser that’s perfect for special mornings.
Coffee Twist: Add 2 teaspoons of instant espresso powder to the chocolate pudding mixture for a subtle mocha flavor that makes this feel a little more grown-up. Perfect for dinner parties where you want to impress the adults, just like my standing rib roast does for the main course.
Serving, Storage & Reheating
This No-Bake Oreo Lasagna is best served chilled, straight from the fridge. I like to let it sit at room temperature for about 5 minutes before slicing — it makes cutting cleaner and the flavors taste more vibrant when they’re not ice-cold.
Serve it on pretty dessert plates with a cold glass of milk, or go full-on indulgent with a drizzle of chocolate sauce.
Store any leftovers (if you actually have leftovers, which I doubt) covered tightly with plastic wrap or in an airtight container in the refrigerator for up to 4 days. The crust might soften slightly after day two, but honestly, it’s still delicious — just a little less crunchy.
You can also freeze individual slices wrapped in plastic wrap and placed in a freezer bag for up to 2 months. Let them thaw in the fridge for a few hours before serving, or eat them semi-frozen for an ice-cream-cake-style treat on hot summer days.
No-Waste Kitchen Magic
Got leftover Oreos from making this? Crush them up and sprinkle over ice cream, stir into vanilla yogurt for a cookies-and-cream snack, or save them in an airtight container to use as a topping for your next batch of brownies.
If you have extra Cool Whip, freeze it in dollops on a parchment-lined baking sheet, then transfer to a freezer bag. You’ll have perfect little portions ready to top hot chocolate, coffee drinks, or a quick slice of pie without thawing the whole container.
Day-old slices that have gotten a bit too soft? Blend them up with some milk and ice cream for an Oreo lasagna milkshake — it sounds weird but tastes like genius in a glass.
No-Bake Oreo Lasagna FAQs
Can I freeze this No-Bake Oreo Lasagna?
Absolutely! This dessert freezes beautifully for up to 2 months. Just wrap the whole pan tightly in plastic wrap and aluminum foil, or slice it first and freeze individual portions. Thaw in the fridge for several hours before serving, or enjoy it partially frozen for an icebox cake texture.
What’s the best way to store No-Bake Oreo Lasagna?
Keep it covered in the refrigerator for up to 4 days. I like to press plastic wrap directly onto the surface before covering the whole pan to prevent the top from drying out or absorbing fridge odors.
Can I make this oreo pudding lasagna ahead of time?
Yes, and honestly, it’s even better when made a day ahead! The flavors meld together and the crust softens just slightly in a really good way. Make it up to 24 hours before you plan to serve it for easiest party prep.
How do I know when my No-Bake Oreo Lasagna is set enough to slice?
The dessert should feel firm when you gently press the center, and a knife inserted in the middle should come out with distinct layers (not a mushy mixture). If it’s been in the fridge for 4 hours or the freezer for 90 minutes, you should be good to go.
Will the Oreo crust stay crunchy?
The bottom crust will soften slightly from the moisture in the layers above it (that’s just physics, friend), but it stays pleasantly tender-crisp rather than mushy. The Oreos sprinkled on top stay nice and crunchy since they’re not sitting in moisture.
No-Bake Oreo Lasagna Closing
I’d love to see your spin on this No-Bake Oreo Lasagna! Drop a comment below with your photos or tell me which variation you tried — I’m always looking for new twists on this crowd-pleaser.
This No-Bake Oreo Lasagna is so versatile and easy to customize; I bet you’ve already got amazing flavor ideas brewing. Whether you keep it classic or go wild with mix-ins, this dessert is guaranteed to make you look like a kitchen rockstar with minimal effort.
Now grab those Oreos and get layering — your fridge is about to become the most popular spot in the house!
I’m Claire Whitmore — a dessert daydreamer from Asheville, NC. For me, baking isn’t about perfect pastries — it’s about the joy of sharing something sweet (and maybe sneaking an extra spoonful of Cool Whip when nobody’s looking).
Life’s too short for complicated recipes, so I’m here to prove that impressive desserts can be ridiculously easy.