Eggless Brownies Recipe
This eggless brownies recipe delivers fudgy, rich chocolate squares with a crackly top—no eggs needed. Perfect for egg-free baking with simple pantry ingredients and foolproof instructions.
Hey there, I’m Claire Whitmore — a pastry whisperer in Asheville, NC, where butter totally counts as self-care. This eggless brownies recipe is my go-to when I’m craving deep, fudgy chocolate but need something egg-free.
These brownies pack serious chocolate punch with bittersweet chocolate, cocoa powder, and dark chocolate chips, plus they’re made with everyday ingredients like yogurt, milk, and butter. They’re quick to prep, use simple techniques, and deliver that crackly-top, gooey-center magic every single time.
Table of Contents
Little Snapshot: What This Recipe Delivers
This eggless brownies recipe uses yogurt and a clever gluten paste technique to create ultra-fudgy, bakery-style brownies without a single egg. With just 10 minutes of prep and 35 minutes of baking, you’ll have rich chocolate squares with a shiny crackly top and gooey center that rivals any traditional brownie recipe.
Why You’ll Love This Recipe 🌸
- This eggless brownies recipe takes less time than convincing your toddler to wear matching socks — seriously, it’s ready in under an hour.
- You probably have everything in your pantry already (except maybe the fancy chocolate, but regular chocolate chips work too).
- The gluten paste trick gives these brownies structure and chewiness without eggs, so they’re never dry or cakey.
- According to King Arthur Baking’s guide to egg substitutes, yogurt adds moisture and richness to baked goods — and this recipe proves exactly why.
Quick Facts ⚡
Here’s the quick scoop on this eggless brownies recipe.
- CourseDessert
- Prep Time10 minutes
- Cook Time35 minutes
- Total Time45 minutes
- Servings12-16 brownies
- DifficultyEasy
Nutritional Peek
Here’s what you’re getting per brownie square (based on 16 servings):
| Nutrient | Amount per Serving |
|---|---|
| Calories | 185 kcal |
| Protein | 2g |
| Carbohydrates | 24g |
| Total Fat | 10g |
| Saturated Fat | 6g |
| Fiber | 2g |
| Sugar | 17g |
| Sodium | 85mg |
Ingredients
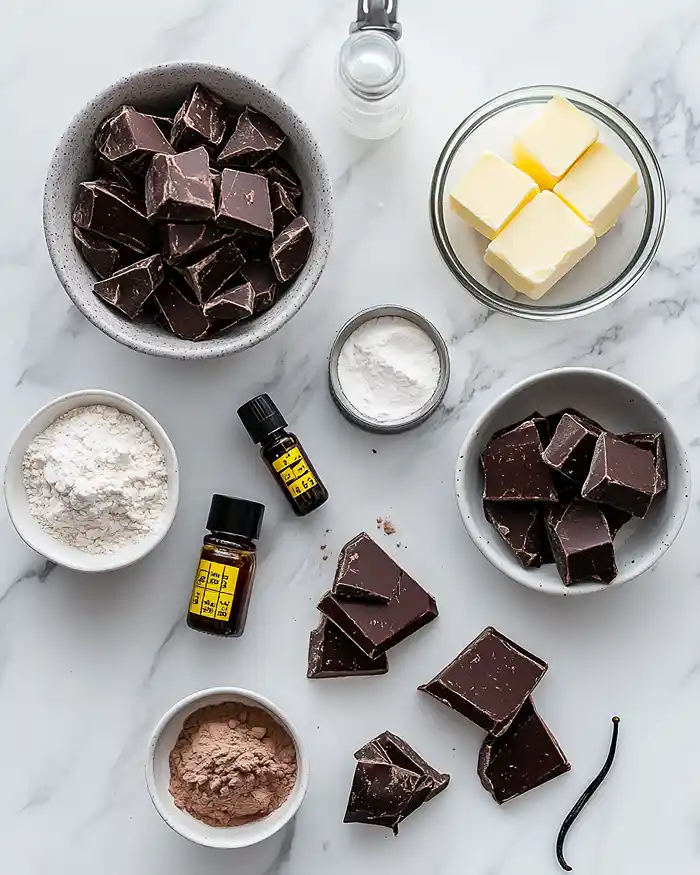
When you’re ready to whip up this brownie easy recipe, you’ll need some chocolate-forward ingredients that work together like a dream. For the wet base — whole milk, plain yogurt, vanilla extract, and melted butter — make sure everything’s at room temperature so it blends smoothly without seizing up the chocolate.
For the dry team — all-purpose flour, cocoa powder, salt, and baking powder — sift them together to avoid lumps and create that tender crumb.
| Amount | Ingredient |
|---|---|
| ¼ cup (60ml) | Whole milk — yes, whole milk matters here; it adds richness that skim just can’t match |
| ¼ cup (60ml) | Full fat plain yogurt, divided — this is your egg replacer magic, so don’t skimp on the fat content |
| ½ cup (100g) | Granulated sugar |
| ½ cup (110g) | Packed dark brown sugar — the molasses adds depth and chewiness |
| 1 teaspoon (5ml) | Pure vanilla extract — the real stuff, not imitation |
| 7 oz (200g) | Bittersweet chocolate with 70% cocoa solids, coarsely chopped — this is where the fudgy magic lives |
| 6 tablespoon (84g) | Unsalted butter — real butter, not margarine; I’m not budging on this |
| 1 cup (142g) | All-purpose flour, divided |
| 2 tablespoon (12g) | Cocoa powder — Dutch-process or natural both work |
| ½ teaspoon | Salt |
| Scant ¼ teaspoon | Baking powder — that means just under ¼ teaspoon, not a full measure |
| ½ cup (85g) | Dark chocolate chips — because more chocolate is always the answer |
Tools You’ll Actually Use
- 8-inch square baking pan
- Parchment paper
- Large mixing bowl
- Small mixing bowl
- Microwave-safe bowls (2)
- Whisk
- Rubber spatula
- Fine mesh sieve or sifter
- Wire cooling rack
- Toothpick or skewer for testing
Step-by-Step Instructions
Let’s make this eggless brownies recipe happen! Trust me, it’s easier than parallel parking.
Step 1: Prep your space
Preheat the oven to 350°F and line an 8-inch square baking pan with parchment paper, leaving some overhang on the sides so you can lift the brownies out easily later. This is non-negotiable unless you enjoy chiseling brownies out of pans.
Step 2: Create the sugar-milk base
Heat the ¼ cup whole milk in a microwave-safe bowl for about 20 seconds until it’s steaming hot but not boiling. In a large bowl, combine the warm milk, 2 tablespoons of the yogurt (save the other 2 tablespoons for later), both the granulated sugar and dark brown sugar, and the vanilla extract.
Whisk vigorously until everything looks syrupy and glossy. Rub a bit between your fingers — the sugar should feel mostly dissolved with just a hint of grittiness left.
Step 3: Make the gluten paste (your egg substitute hero)
In a small bowl, combine the remaining 2 tablespoons of yogurt with 2 tablespoons of the flour. Stir it like you mean it — really work that spoon — until the mixture tightens up and becomes thick, stringy, and elastic like bread dough.
It’ll go from loose and milky to tight and stretchy in about 30 seconds of vigorous stirring. This gluten paste mimics the structure eggs usually provide, so don’t skip this step or your brownies will be flat and sad.
Step 4: Melt the chocolate and butter
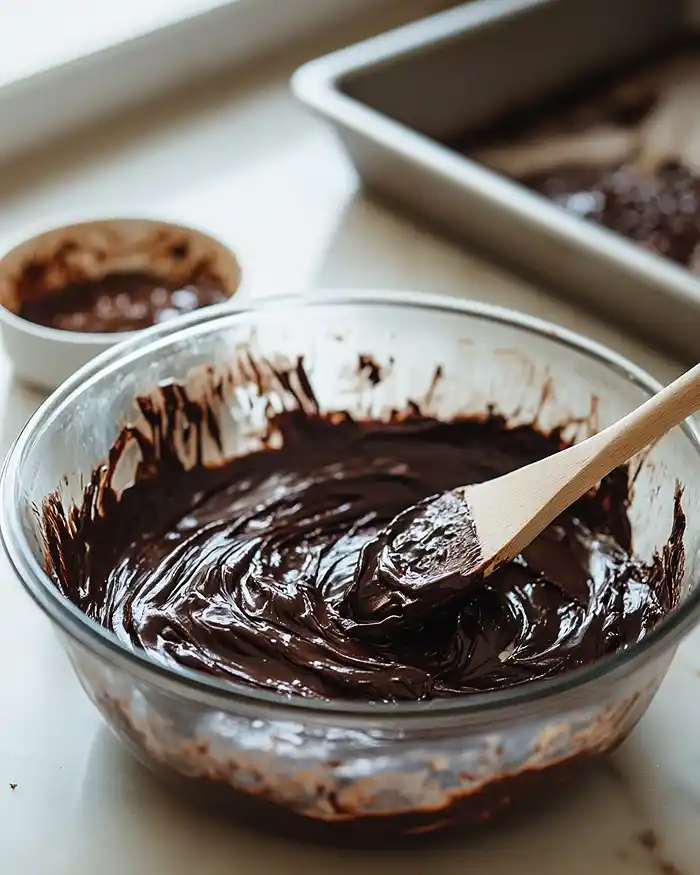
Combine the 7 ounces of chopped bittersweet chocolate and 6 tablespoons of butter in a separate microwave-safe bowl. Heat in 20-second increments, stirring thoroughly between each round, until the mixture is completely melted, smooth, and glossy. Don’t rush this — burnt chocolate tastes like regret.
Step 5: Bring it all together
Add the melted chocolate-butter mixture to your milk-sugar base and whisk well until everything’s evenly combined and looks shiny and luxurious. Add the gluten paste and whisk it in thoroughly until it’s completely incorporated and you can’t see any streaks.
Step 6: Add the dry ingredients
Sift the remaining flour, cocoa powder, baking powder, and salt over the chocolate mixture.
Gently fold everything together with a rubber spatula until just combined — don’t overmix or you’ll develop too much gluten and end up with cakey brownies instead of fudgy ones. Fold in the dark chocolate chips for extra pockets of melty chocolate goodness.
Step 7: Bake to fudgy perfection
Spread the batter into your prepared pan and smooth out the surface with your spatula. Bake for about 35 minutes until the brownies have risen evenly and a toothpick or skewer inserted into the center comes out with some moist, sticky crumbs attached.
If it comes out completely clean, you’ve overbaked them (but they’ll still be delicious, I promise). Transfer the pan to a wire rack and let the brownies cool completely before lifting them out using the parchment overhang and slicing into squares. I know waiting is torture, but warm brownies are crumbly — cooled ones slice like a dream.
Claire’s Pro Tips & Gentle Guidance
Let me share some sweets to make in air fryer wisdom and other brownie secrets I’ve learned through many batches (and a few kitchen disasters).
The gluten paste is your best friend here. If you skip it or don’t stir it vigorously enough, your brownies won’t have the structure they need and might turn out flat or gummy. You want it to look stretchy and elastic, almost like pizza dough. Watch for that texture change — it’s super satisfying when it happens.
Room temperature ingredients matter more than you think. If your milk or yogurt is straight from the fridge, the chocolate might seize up when you combine everything, and you’ll end up with grainy, separated batter instead of smooth, glossy heaven.
Don’t overbake these babies! The toothpick test should show moist crumbs, not a clean toothpick. Brownies continue cooking slightly as they cool in the pan, so pulling them out when they look almost done is the secret to that fudgy center.
According to Serious Eats‘ detailed baking guide, underbaking by just a few minutes is what separates fudgy brownies from cakey ones.
The parchment paper overhang is genius for cleanup. You can lift the whole brownie slab out in one piece, slice it on a cutting board, and your pan stays spotless. It’s like a magic trick but better because there’s chocolate involved.
Quick Fixes for Eggless Brownies Recipe
Brownies turned out cakey instead of fudgy:
You probably overbaked them or overmixed the batter after adding the flour. Next time, pull them out when the toothpick has moist crumbs, and fold the dry ingredients in gently — like you’re tucking a baby in, not kneading bread dough.
The top didn’t get that shiny, crackly crust:
Your sugar might not have dissolved enough in the warm milk. Make sure you whisk it really well in Step 2 until it feels smooth and syrupy. Also, ensure your oven temperature is accurate — an oven thermometer is worth every penny.
Brownies are gummy in the center:
This usually means the gluten paste wasn’t thick enough. Stir it more vigorously until it really tightens up and becomes stretchy. If your brownies are already baked and gummy, pop them in the fridge overnight — they’ll firm up and the texture will improve.
Chocolate seized up and got grainy:
This happens when cold ingredients hit hot chocolate. Make sure your yogurt and milk mixture is still warm (not cold) when you add the melted chocolate. If it does seize, try whisking in a tablespoon of hot water to smooth it out.
This recipe is just the beginning. Over in the Cookies & Brownies collection, you’ll find even more dishes that are just as easy and packed with flavor. Go take a peek — your next favorite is waiting.
Variations & Fun Twists
This how to make brownie base is super versatile, so let’s get creative!
Mint chocolate dream: Swap the vanilla extract for peppermint extract (use just ½ teaspoon because it’s strong) and add crushed peppermint candies on top before baking.
Espresso brownies: Add 1 tablespoon of instant espresso powder to the cocoa powder. The coffee deepens the chocolate flavor without making them taste like coffee — it’s wild how well it works.
Nutty and crunchy: Fold in ½ cup of toasted walnuts or pecans with the chocolate chips. For extra luxury, swirl in 2 tablespoons of almond butter before baking.
Vegan version: Swap the butter for vegan butter, use plant-based yogurt (coconut or soy work best), and replace the whole milk with oat milk or almond milk. Everything else stays the same!
Salted caramel swirl: Drizzle 3 tablespoons of salted caramel sauce over the batter before baking and swirl it in with a knife. Sprinkle flaky sea salt on top for that sweet-salty magic.
Serving, Storage & Reheating
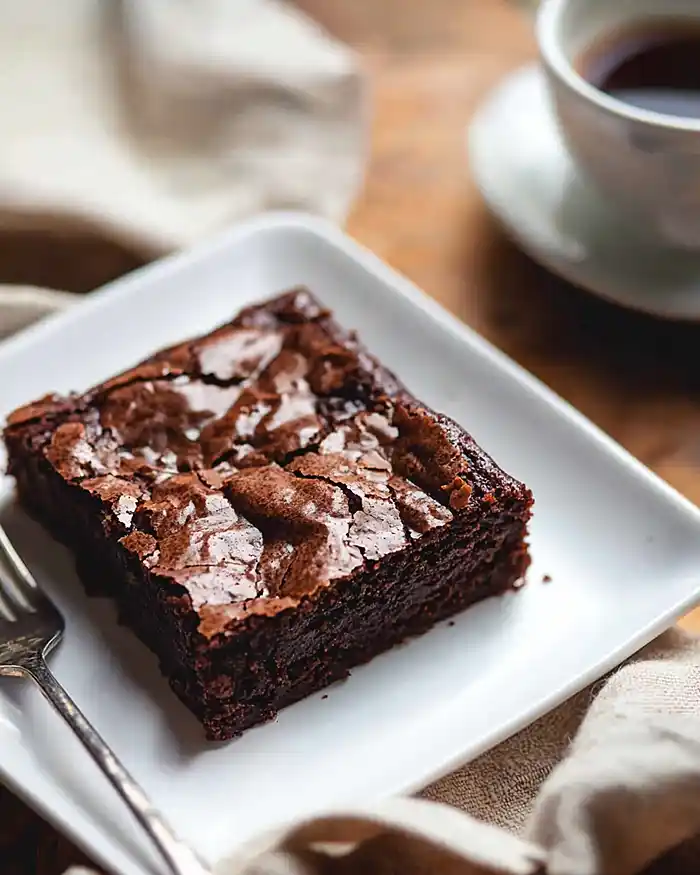
Your eggless brownies recipe masterpiece deserves proper treatment, so here’s how to keep them perfect.
Serve these brownies at room temperature for maximum fudginess, or slightly warm with a scoop of vanilla ice cream if you’re feeling fancy. Dust them with powdered sugar, drizzle with chocolate ganache, or pair them with fresh raspberries to cut through the richness.
If you actually have leftovers (which I doubt), they’re amazing crumbled over yogurt for breakfast — I won’t tell.
Store brownies in an airtight container at room temperature for up to 4 days, or in the fridge for up to a week. If you refrigerate them, they’ll firm up more but will still be delicious. Layer them between parchment paper to prevent sticking.
To reheat, pop individual brownies in the microwave for 10-15 seconds until they’re just warmed through and gooey again. You can also warm the whole pan in a 300°F oven for 10 minutes if you’re serving a crowd. Don’t overheat or they’ll dry out — just a gentle warm-up is all you need.
No-Waste Kitchen Magic
Let’s make sure every bit of this brownie easy recipe gets used!
Day-old brownie transformation: Crumble up any brownies that are starting to dry out and layer them in a parfait glass with whipped cream and fresh berries. You’ve just made a fancy trifle that looks way harder than it actually was.
Brownie ice cream mix-ins: Chop up leftover brownies into chunks and fold them into softened vanilla ice cream, then refreeze. Homemade brownie ice cream is exponentially better than store-bought.
Chocolate truffle bites: Mash up brownie scraps with a tablespoon of cream cheese until it forms a paste, roll into balls, and coat in cocoa powder or melted chocolate. Instant truffles that everyone will think you bought from a fancy chocolatier.
Save that parchment paper: The parchment liner from the pan is usually still in good shape after one use. Let it cool, fold it up, and reuse it for your next batch of brownies or for lining cookie sheets.
Eggless Brownies Recipe FAQs
Can I freeze this eggless brownies recipe?
Absolutely! Wrap individual brownies tightly in plastic wrap, then place them in a freezer-safe container or bag. They’ll keep for up to 3 months. Thaw at room temperature for about an hour, or microwave for 20-30 seconds if you need them immediately.
What’s the best way to store eggless brownies to keep them fudgy?
Keep them in an airtight container at room temperature with a slice of bread tucked in the corner. The bread trick keeps them moist without making them soggy. Replace the bread every couple of days if your brownies last that long.
Why should I use 70% bittersweet chocolate in this eggless brownies recipe?
The higher cocoa content gives you intense chocolate flavor without excessive sweetness. Since there’s already sugar in the recipe, the bittersweet chocolate balances everything perfectly. You can use chocolate with 60-72% cocoa — just don’t go below 60% or they’ll be too sweet.
Is this eggless brownie recipe suitable for people with egg allergies?
Yes, it contains absolutely no eggs, egg whites, or egg products. However, always check your chocolate and other ingredient labels to ensure they weren’t processed in facilities that handle eggs if you have a severe allergy.
Cozy Closing
I’d love to see your take on this eggless brownies recipe! Drop a comment below with your brownie photos — I’d love to see how you made it your own.
This eggless brownies recipe is so versatile; I bet you’ve got amazing variations already in mind! Maybe you’ll try the mint version, or add some peanut butter swirls, or just make them exactly as written because sometimes perfect is perfect.
Whether you’re baking for egg-free friends, dealing with an empty egg carton, or just trying something new, these brownies deliver every single time. They’re proof that you don’t need eggs to make something absolutely magical happen in your kitchen.
For more chocolate inspiration, check out my carrot chocolate covered strawberries, Easter basket bundt cake recipe, or this adorable easy Easter bunny cake — because life’s too short for boring desserts.
Now go forth and bake something fudgy. Your kitchen’s about to smell absolutely incredible.
I’m Claire Whitmore — a dessert daydreamer from Asheville, NC. For me, baking isn’t about perfect pastries — it’s about the joy of sharing something sweet (and maybe sneaking an extra brownie square when no one’s looking).

Eggless Brownies Recipe
Equipment
- 8-inch square baking pan
- Parchment paper
- Large mixing bowl
- Small mixing bowl
- microwave-safe bowls
- Whisk
- Rubber spatula
- Fine-mesh sieve or sifter
- Wire cooling rack
- Toothpick or skewer
Ingredients
- ¼ cup whole milk 60ml – yes, whole milk matters here; it adds richness that skim just can’t match
- ¼ cup full fat plain yogurt, divided 60ml – this is your egg replacer magic, so don’t skimp on the fat content
- ½ cup granulated sugar 100g
- ½ cup packed dark brown sugar 110g – the molasses adds depth and chewiness
- 1 teaspoon pure vanilla extract 5ml – the real stuff, not imitation
- 7 oz bittersweet chocolate with 70% cocoa solids, coarsely chopped 200g – this is where the fudgy magic lives
- 6 tablespoon unsalted butter 84g – real butter, not margarine; I’m not budging on this
- 1 cup all-purpose flour, divided 142g
- 2 tablespoon cocoa powder 12g – Dutch-process or natural both work
- ½ teaspoon salt
- ¼ teaspoon baking powder scant – that means just under 1/4 teaspoon, not a full measure
- ½ cup dark chocolate chips 85g – because more chocolate is always the answer
Instructions
- Preheat the oven to 350°F and line an 8-inch square baking pan with parchment paper, leaving some overhang on the sides so you can lift the brownies out easily later.
- Heat the 1/4 cup whole milk in a microwave-safe bowl for about 20 seconds until it’s steaming hot but not boiling. In a large bowl, combine the warm milk, 2 tablespoons of the yogurt (save the other 2 tablespoons for later), both the granulated sugar and dark brown sugar, and the vanilla extract. Whisk vigorously until everything looks syrupy and glossy. Rub a bit between your fingers — the sugar should feel mostly dissolved with just a hint of grittiness left.
- In a small bowl, combine the remaining 2 tablespoons of yogurt with 2 tablespoons of the flour. Stir vigorously until the mixture tightens up and becomes thick, stringy, and elastic like bread dough. It’ll go from loose and milky to tight and stretchy in about 30 seconds of vigorous stirring. This gluten paste mimics the structure eggs usually provide.
- Combine the 7 ounces of chopped bittersweet chocolate and 6 tablespoons of butter in a separate microwave-safe bowl. Heat in 20-second increments, stirring thoroughly between each round, until the mixture is completely melted, smooth, and glossy.
- Add the melted chocolate-butter mixture to your milk-sugar base and whisk well until everything’s evenly combined and looks shiny and luxurious. Add the gluten paste and whisk it in thoroughly until it’s completely incorporated and you can’t see any streaks.
- Sift the remaining flour, cocoa powder, baking powder, and salt over the chocolate mixture. Gently fold everything together with a rubber spatula until just combined. Fold in the dark chocolate chips.
- Spread the batter into your prepared pan and smooth out the surface with your spatula. Bake for about 35 minutes until the brownies have risen evenly and a toothpick or skewer inserted into the center comes out with some moist, sticky crumbs attached. Transfer the pan to a wire rack and let the brownies cool completely before lifting them out using the parchment overhang and slicing into squares.