Carrot Chocolate Covered Strawberries
Carrot Chocolate Covered Strawberries transform fresh berries into adorable Easter treats with orange candy melts and chocolate drizzle — ready in just 20 minutes with only 3 ingredients!
Carrot Chocolate Covered Strawberries are the cutest Easter strawberry dessert you’ll make this spring — seriously, they’re so adorable you might not want to eat them (but you totally will). Hey there, I’m Claire Whitmore — a pastry whisperer in Asheville, NC, where chocolate-covered anything totally counts as a food group.
These Easter desserts use just three simple ingredients, take about 20 minutes from start to finish, and look like they came straight from a fancy bakery. Plus, the orange candy melts give them that perfect carrot color without any food dye or complicated techniques.
Table of Contents
Little Snapshot: What This Recipe Delivers
These Carrot Chocolate Covered Strawberries combine fresh strawberries with smooth orange candy melts and a decorative chocolate drizzle to create adorable Easter-themed treats in just 20 minutes.
With only 3 ingredients and no baking required, they’re perfect for Easter parties, spring celebrations, or anyone who wants an easy Easter dessert that looks professionally made.
Why You’ll Love This Recipe 🌸
- These Carrot Chocolate Covered Strawberries take less time than actually finding all those hidden Easter eggs — about 20 minutes from start to sparkly finish.
- You only need 3 ingredients, which means less shopping and more time for the fun stuff (like sneaking a few extra strawberries for “quality control”).
- They’re so stinkin’ cute that your Instagram feed will thank you — trust me, everyone will want the recipe.
- According to Food Network’s guide to Easter treats for kids, the best holiday desserts are ones the whole family can make together — and this recipe proves exactly why.
Quick Facts ⚡
Here’s the quick scoop on these Carrot Chocolate Covered Strawberries.
- Course: Dessert
- Prep Time: 10 minutes
- Setting Time: 10 minutes
- Total Time: 20 minutes
- Servings: 24-30 strawberries (depending on size)
- Difficulty: Easy
Nutritional Peek
Here’s the nutritional breakdown per chocolate-covered strawberry (approximate, based on medium strawberries):
| Nutrient | Amount per Serving |
|---|---|
| Calories | 45-50 |
| Protein | 0.5g |
| Total Carbohydrates | 8g |
| Sugar | 6g |
| Total Fat | 2g |
| Saturated Fat | 1.5g |
| Fiber | 0.5g |
These adorable little Easter strawberry treats are light enough that having two (or three) won’t derail your day.
Ingredients
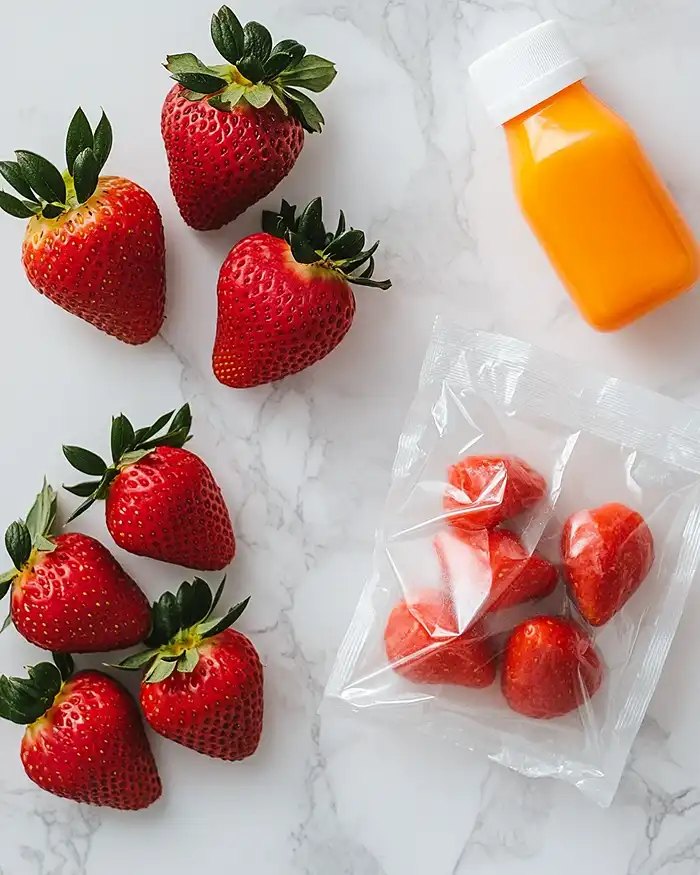
When you’re making these Easter desserts, you’ll want everything at room temperature and ready to go before you start dipping. For the chocolate coating — orange candy melts are your best friend here because they melt smoothly and set with that perfect shiny finish that looks bakery-professional.
The strawberries themselves should be fresh, firm, and completely dry (seriously, water is chocolate’s enemy). For the decorative drizzle — you can use the same orange candy melts or switch to regular chocolate for contrast, and a squeeze bottle or zip-tight bag makes this step ridiculously easy.
| Amount | Ingredient |
|---|---|
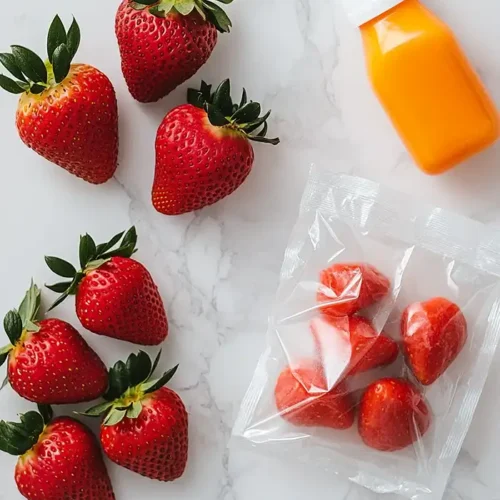
| 2 lbs | Fresh strawberries, rinsed and completely dried with paper towels |
| 1 (12 oz.) bag | Orange Chocolate Melts (Wilton brand works beautifully — the color is spot-on carrot orange) |
| As needed | Wax paper or parchment paper |
| 1 | Candy squeeze tube or zip-tight bag with a small corner snipped off |
Pro tip: Don’t skip the drying step. Even a tiny bit of moisture will make your chocolate seize up and get all clumpy — learned that one the hard way during my first attempt.
Tools You’ll Actually Use
- Microwave-safe glass or ceramic bowl (for melting the chocolate melts)
- Paper towels (for drying those strawberries completely)
- Wax paper or parchment paper (for setting the dipped strawberries)
- Baking sheet or cutting board (to hold the wax paper)
- Candy squeeze tube or zip-tight plastic bag (for the decorative drizzle)
- Small spatula or spoon (for stirring the melted chocolate)
Optional but helpful: A toothpick for fixing any chocolate drips or imperfections before they set.
Step-by-Step Instructions
Making Carrot Chocolate Covered Strawberries is honestly one of the most stress-free Easter cupcakes easy alternatives you’ll find — no baking, no complicated techniques, just dip and drizzle.
Step 1: Melt the Orange Chocolate Melts
Pour the entire 12 oz. bag of orange chocolate melts into a microwave-safe glass or ceramic bowl. Pop it into the microwave for 1 minute on medium power, then stir with a spoon until smooth and creamy.
If there are still chunks (totally normal), microwave for another 30 seconds and stir again until you’ve got that silky, pourable consistency. The chocolate should be warm but not hot — you want it flowing like honey, not thick like frosting.
Step 2: Prep Your Strawberries
Make absolutely sure your rinsed strawberries are bone-dry by patting them thoroughly with paper towels. I know I already mentioned this, but it’s worth repeating — even one drop of water will ruin your smooth chocolate coating. Leave the green leaves attached; they make adorable “carrot tops” and give you something to hold while dipping.
Step 3: Set Up Your Drying Station
Lay out a large piece of wax paper or parchment paper on your work surface or baking sheet. This is where your freshly dipped strawberries will hang out while the chocolate sets.
Step 4: Dip Those Berries
Hold each strawberry by its green leaves and dip it straight down into the bowl of melted orange chocolate, spinning gently to coat it completely. You can dip it all the way up to the leaves for a full “carrot” look, or leave about 1/4 inch of red showing at the top — both ways look adorable.
Hold the dipped strawberry over the bowl for a few seconds, letting the excess chocolate drip back in (this prevents puddles on your wax paper). Place each chocolate-covered strawberry gently on the wax paper to set.
Step 5: Create the Decorative Drizzle
Once all your strawberries are dipped and the chocolate has set for about 5 minutes (it should feel dry to the touch but doesn’t need to be completely hard), fill your squeeze tube or zip-tight bag with some of the remaining melted orange chocolate.
If the chocolate has cooled and thickened, just pop it back in the microwave for 20-30 seconds. Snip a tiny corner off the bag if you’re using one — start small because you can always cut more but you can’t undo a too-big hole.
Step 6: Add the Carrot Lines
Working with one strawberry at a time, hold your squeeze bottle or bag over it and pipe thin horizontal lines back and forth across the berry, starting from the top near the leaves and working your way down toward the pointed bottom.
Don’t stress about making them perfect — those little imperfections actually make them look more like real carrots with their natural ridges. The drizzle should go on fairly easily, creating those sweet little textured lines that scream “I’m a carrot!”
Step 7: Let Them Set
Leave your finished Carrot Chocolate Covered Strawberries on the wax paper to air dry at room temperature for about 10 minutes, or until the chocolate is completely firm and no longer tacky when you gently touch it. If your kitchen is super warm, you can pop them in the fridge for 5 minutes to speed things up.
Claire’s Pro Tips & Gentle Guidance
When you’re working with these Easter strawberry treats, a few little tricks can make the difference between “cute” and “absolutely Instagram-worthy.” I’ve made about a million batches of these by now (okay, maybe not a million, but close), and I’ve picked up some secrets along the way.
Room temperature is your chocolate’s happy place. If your strawberries are too cold from the fridge, condensation will form when they hit the warm chocolate, and you’ll end up with spotty, streaky coverage instead of that smooth, glossy finish we’re going for.
Don’t toss that leftover melted chocolate! After you’ve dipped all your strawberries, drizzle the extra chocolate over pretzels, graham crackers, or even apple slices for bonus treats. You can also pour it into silicone molds to make little candies — waste not, want not.
The squeeze bottle makes all the difference. I’ve tried piping with zip-tight bags, and while they work in a pinch, a proper candy squeeze tube gives you so much more control for those delicate drizzle lines.
According to Wilton’s detailed chocolate melting guide, using the right tools prevents frustration and gives you professional-looking results every single time.
Work in batches if you’re making a ton. The melted chocolate stays workable for about 20-30 minutes, so if you’re coating more than 2 lbs of strawberries, plan to reheat the chocolate periodically. Just 20-30 seconds in the microwave brings it right back to that perfect dipping consistency.
Quick Fixes for Carrot Chocolate Covered Strawberries
Problem: The chocolate is too thick to dip smoothly.
Add a tiny bit of coconut oil or vegetable shortening (start with 1/2 teaspoon) and stir it in. This thins out the chocolate without affecting the flavor or the way it sets. Microwave for 10-15 seconds if needed to blend it in completely.
Problem: The chocolate is clumping or getting grainy while you work.
You probably got a drop of water in there, or the chocolate overheated. Unfortunately, seized chocolate is tough to save. Your best bet is to start fresh with a new batch of melts and make absolutely sure everything stays dry this time.
Problem: The drizzle lines are too thick or blobby.
Your hole is too big, or the chocolate is too warm and flowing too fast. If it’s the hole, grab a new bag and cut a tinier opening. If it’s the chocolate temperature, let it cool for 2-3 minutes until it’s slightly thicker before piping.
Problem: The chocolate is sliding off the strawberries.
Your berries weren’t dry enough, or they were too cold. Pat them down again with paper towels and let them sit at room temperature for 10 minutes before re-dipping with fresh chocolate.
Variations & Fun Twists
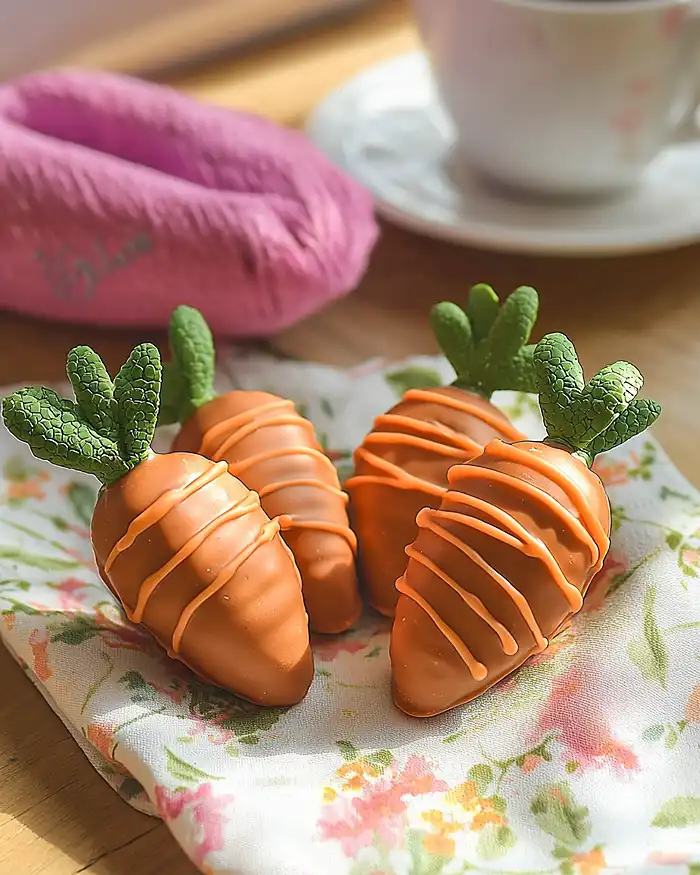
These Carrot Chocolate Covered Strawberries are adorable as-is, but here are some fun ways to switch things up for different occasions or dietary needs.
For a two-tone carrot look: Dip the strawberries halfway in orange chocolate melts, let them set for 5 minutes, then dip the bottom half in dark chocolate or regular milk chocolate. It creates this gorgeous ombré effect that looks super fancy.
Make them extra festive: Before the orange chocolate sets completely, sprinkle on some edible gold dust or pearl dust for a shimmery, elegant Easter strawberry dessert that’s perfect for more formal spring gatherings.
White chocolate “carrot tops”: Use melted green candy melts or tint white chocolate with green food coloring, then pipe little leaf shapes at the top of each strawberry using a small piping tip. It’s an extra step, but it takes the cuteness factor through the roof.
Sugar-free version: Wilton and other brands make sugar-free candy melts that work exactly the same way. They’re perfect if you’re watching sugar intake but still want to join the Easter treats fun.
Different berry options: This technique works beautifully on other berries too! Try it with extra-large raspberries or blackberries for variety, though strawberries definitely give you that classic carrot shape.
Serving, Storage & Reheating
These Easter cupcakes easy alternatives are best served fresh, but I’ve got you covered for storage if you need to make them ahead.
Arrange your finished Carrot Chocolate Covered Strawberries on a pretty platter or in a shallow box lined with tissue paper for gifting. They look absolutely stunning displayed on a tiered dessert stand alongside other spring treats.
For storage, place the chocolate-covered strawberries in a single layer in an airtight container with a paper towel on the bottom to catch any condensation. Store them in the refrigerator for up to 2 days — but honestly, fresh strawberries are at their best within 24 hours, so try to make these the day you plan to serve them.
If you absolutely must make them ahead, keep them refrigerated and take them out about 15-20 minutes before serving so they come to room temperature. This prevents condensation from forming on the chocolate and keeps that beautiful glossy finish intact.
No-Waste Kitchen Magic
Got leftover melted orange chocolate? Don’t let it go to waste! Pour it into silicone candy molds or ice cube trays to make little chocolate candies for later. They’ll keep in an airtight container at room temperature for up to 2 months.
If you have strawberries that aren’t quite pretty enough for dipping (maybe they’re a little soft or oddly shaped), chop them up and freeze them for smoothies. I always save the less-than-perfect berries for my morning green smoothie the next day — no waste, all flavor.
The leftover chocolate can also be drizzled over popcorn, pretzels, or graham crackers for an easy snack. Spread whatever you’re coating on parchment paper, drizzle the chocolate over top, and let it set. Instant homemade treats that taste way better than store-bought.
You can even save small amounts of chocolate in a zip-tight bag in the freezer. When you’ve collected enough from various projects, melt it all together for your next dipping adventure.
Carrot Chocolate Covered Strawberries FAQs
Can I freeze Carrot Chocolate Covered Strawberries?
I don’t recommend it, honestly. Frozen strawberries release water when they thaw, which makes the chocolate get all spotty and the berries mushy. These treats are best enjoyed fresh or within 2 days of making them.
What’s the best way to store Carrot Chocolate Covered Strawberries?
Keep them in a single layer in an airtight container in the fridge with a paper towel underneath to absorb moisture. They’ll stay fresh for up to 48 hours, but the texture is definitely best on day one.
How do I know when the chocolate is ready for dipping?
The melted chocolate should flow smoothly off your spoon like honey or thick cream. If it’s too thick and gloppy, microwave it for another 15-20 seconds and stir. If it’s too thin and runny (this is rare with candy melts), let it cool for a minute or two.
Will the chocolate crack or fall off the strawberries?
As long as your strawberries are completely dry before dipping and you let the chocolate set fully, it should stay put perfectly. The chocolate might crack if the berries get too cold too fast, so avoid temperature shock by letting them come to room temp gradually.
Can I use milk chocolate chips instead of candy melts?
You can, but it’s trickier because chocolate chips contain stabilizers that keep their shape (great for cookies, not ideal for dipping). If you go this route, add a teaspoon of coconut oil or shortening to help thin them out, and be extra careful not to overheat.
This is the kind of recipe that makes you want to cook everything in sight. Lucky for you, the Delicious Desserts collection is full of exactly that. Go explore and find your new go-to dish.
Cozy Closing
I absolutely love hearing about your Carrot Chocolate Covered Strawberries adventures! Drop a comment below with photos of how yours turned out — I’d especially love to see your creative drizzle patterns or any fun variations you tried.
These Carrot Chocolate Covered Strawberries are one of those recipes that never gets old, and every time I make them, someone asks for the recipe (which is basically the highest compliment a baker can get).
If you loved this recipe, you might also enjoy my Low Carb Chicken Casserole for an easy weeknight dinner, my Easy Vegetable Upma for a cozy breakfast, or my Easy Pizza Eggs for a fun brunch twist!
Happy dipping, and may your Easter table be filled with adorable chocolate-covered treats! 🍓🐰
I’m Claire Whitmore — a dessert daydreamer from Asheville, NC. For me, baking isn’t about perfect pastries — it’s about the joy of sharing something sweet (and maybe sneaking an extra chocolate-covered strawberry when no one’s looking).
Carrot Chocolate Covered Strawberries
Equipment
- Microwave-safe glass or ceramic bowl
- Paper towels
- Wax paper or parchment paper
- Baking sheet or cutting board
- Candy squeeze tube or zip-tight plastic bag
- Small spatula or spoon
Ingredients
- 2 lbs Fresh strawberries rinsed and completely dried with paper towels
- 1 12 oz. bag Orange Chocolate Melts Wilton brand works beautifully
- As needed Wax paper or parchment paper
Instructions
- Pour the entire 12 oz. bag of orange chocolate melts into a microwave-safe glass or ceramic bowl. Microwave for 1 minute on medium power, then stir with a spoon until smooth and creamy. If there are still chunks, microwave for another 30 seconds and stir again until you’ve got that silky, pourable consistency. The chocolate should be warm but not hot — you want it flowing like honey, not thick like frosting.
- Make absolutely sure your rinsed strawberries are bone-dry by patting them thoroughly with paper towels. Leave the green leaves attached; they make adorable “carrot tops” and give you something to hold while dipping.
- Lay out a large piece of wax paper or parchment paper on your work surface or baking sheet. This is where your freshly dipped strawberries will hang out while the chocolate sets.
- Hold each strawberry by its green leaves and dip it straight down into the bowl of melted orange chocolate, spinning gently to coat it completely. You can dip it all the way up to the leaves for a full “carrot” look, or leave about 1/4 inch of red showing at the top. Hold the dipped strawberry over the bowl for a few seconds, letting the excess chocolate drip back in. Place each chocolate-covered strawberry gently on the wax paper to set.
- Once all your strawberries are dipped and the chocolate has set for about 5 minutes (it should feel dry to the touch), fill your squeeze tube or zip-tight bag with some of the remaining melted orange chocolate. If the chocolate has cooled and thickened, pop it back in the microwave for 20-30 seconds. Snip a tiny corner off the bag if you’re using one — start small because you can always cut more.
- Working with one strawberry at a time, hold your squeeze bottle or bag over it and pipe thin horizontal lines back and forth across the berry, starting from the top near the leaves and working your way down toward the pointed bottom. Don’t stress about making them perfect — those little imperfections actually make them look more like real carrots with their natural ridges.
- Leave your finished Carrot Chocolate Covered Strawberries on the wax paper to air dry at room temperature for about 10 minutes, or until the chocolate is completely firm and no longer tacky when touched.