Dark Chocolate Sea Salt Nut Bars
Dark Chocolate Sea Salt Nut Bars are crunchy, sweet-salty snack bars loaded with toasted nuts, puffed rice, and rich dark chocolate — ready in under 40 minutes with just 8 ingredients.
Hey there, I’m Claire Whitmore — a dessert daydreamer from Asheville, NC, where every batch of cookies comes with a side of “oops, I ate half the dough.” These Dark Chocolate Sea Salt Nut Bars are my go-to when I need something that feels indulgent but won’t keep me chained to the oven.
They’re crunchy, naturally sweetened with brown rice syrup, packed with toasted nuts and puffed rice, and finished with a dark chocolate drizzle that makes you look like you know what you’re doing in the kitchen.
I first whipped these up during a frantic pre-holiday baking marathon when I realized I’d run out of time (and patience) for anything fussy. I needed something quick, crowd-pleasing, and sturdy enough to wrap up as gifts without falling apart.
Table of Contents
Little Snapshot: What This Recipe Delivers
These Dark Chocolate Sea Salt Nut Bars combine toasted cashews, peanuts, and almonds with crispy puffed rice, all held together with brown rice syrup and vanilla, then dipped and drizzled in melted dark chocolate.
They’re naturally gluten-free, ready in under 40 minutes, and require zero fancy equipment — just a sheet pan, a bowl, and a little patience while the chocolate sets.
Why You’ll Love This Recipe 🌸
- This Dark Chocolate Sea Salt Nut Bars recipe takes less time than scrolling through your phone and delivers way more satisfaction.
- They’re naturally gluten-free and refined-sugar-free, so you can feel good about sneaking a second (or third) bar.
- Minimal cleanup — just one bowl, one pan, and zero frosting bags to wash later.
- According to Food Network’s guide to efficient cooking, prepping ingredients ahead makes everything smoother — and this recipe proves exactly why.
Quick Facts ⚡
Here’s the quick scoop on this Dark Chocolate Sea Salt Nut Bars recipe.
- CourseSnack / Dessert
- Prep Time10 minutes
- Cook Time25 minutes
- Total Time35 minutes (plus cooling time)
- Servings10-12 bars
- DifficultyEasy
Nutritional Peek
Here’s what you’re getting per bar (because sometimes it’s nice to know):
| Nutrient | Amount per Serving |
|---|---|
| Calories | 220 |
| Protein | 6g |
| Carbohydrates | 18g |
| Fat | 15g |
| Fiber | 3g |
| Sugar | 9g |
These sweet snacks recipes are packed with healthy fats from nuts and just enough natural sweetness to keep things interesting.
Ingredients
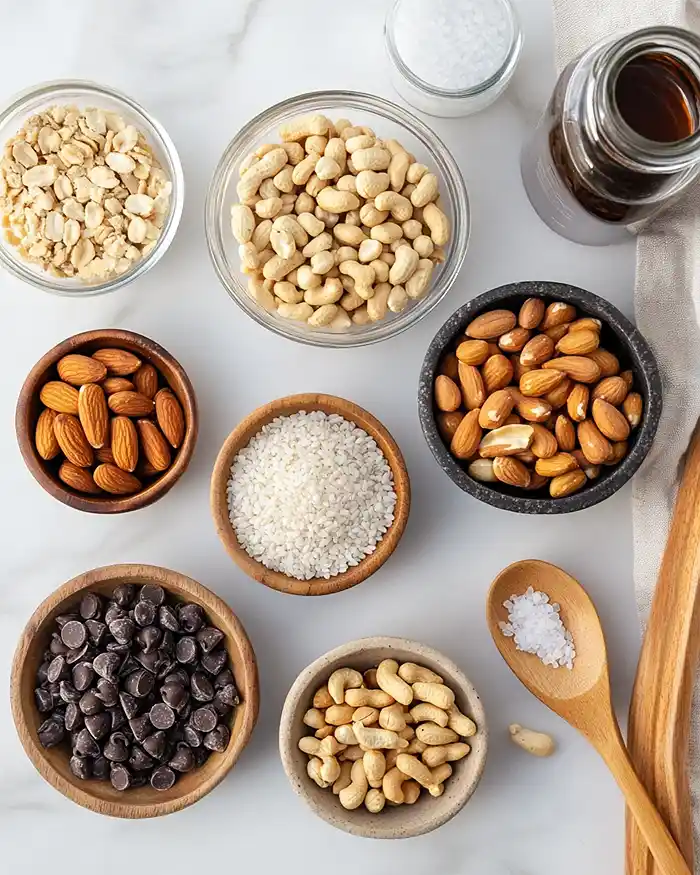
When you’re building these quick recipes snacks, you want ingredients that pull their weight — and trust me, every single one here does.
For the nut base, grab unsalted cashews, peanuts, and almonds (or swap in whatever nuts you’ve got hanging out in your pantry). The puffed rice adds that satisfying crunch without weighing things down.
Brown rice syrup acts as the glue — it’s sticky, naturally sweet, and way easier to work with than honey (which can crystallize). For the chocolate coating, dark chocolate chips and a touch of coconut oil keep things smooth and glossy.
| Amount | Ingredient |
|---|---|
| 2 ½ cups | Unsalted nuts of choice (¾ cup cashews, ¾ cup peanuts, 1 cup almonds) |
| ½ cup | Puffed rice |
| ¼ cup | Brown rice syrup |
| 1 ½ tsp | Vanilla extract |
| ½ tsp | Sea salt |
| 1 cup | Dark chocolate chips |
| 2 tsp | Coconut oil |
| Optional | Flaky salt for topping (yes, really — it’s the secret weapon) |
Tools You’ll Actually Use
- Rimmed sheet pan (for toasting nuts)
- 8×8-inch baking pan
- Parchment paper
- Large mixing bowl
- Microwave-safe bowl (or small saucepan if you prefer stovetop)
- Whisk or spoon
- Sharp knife
Step-by-Step Instructions
Let’s turn these ingredients into the sweet dishes recipes you’ll be making on repeat.
Step 1: Toast the Nuts
Preheat your oven to 325°F (160°C). Spread the unsalted cashews, peanuts, and almonds in a single layer on a rimmed sheet pan. Bake for 5-8 minutes, until they smell nutty and golden (watch them closely — burnt nuts are a tragedy). Remove from the oven and let them cool slightly while you prep everything else.
Step 2: Prep Your Pan
Line an 8×8-inch baking pan with parchment paper, leaving a little overhang on two sides so you can lift the whole thing out later. This trick saves you from wrestling with sticky bars.
Step 3: Combine the Nut and Rice Base
In a large mixing bowl, toss together the toasted nuts and puffed rice until evenly mixed. Set this aside while you work on the binding syrup.
Step 4: Warm the Brown Rice Syrup
Add the brown rice syrup to a microwave-safe bowl and microwave for 30 seconds. This loosens it up so it’s way easier to stir and coat the nuts evenly.
Whisk in the vanilla extract and sea salt until everything’s combined and smooth, then pour this mixture over the nut-puffed rice combo. Stir until every piece is coated — you want that syrup hugging every nut.
Step 5: Press and Bake
Transfer the sticky nut mixture to your prepared 8×8-inch pan and press it down firmly into an even layer. Use the back of a spatula or your hands (slightly damp helps prevent sticking) to really compact it — this ensures the bars hold together.
Bake for 18-20 minutes, until the edges are just starting to turn golden. Remove from the oven and let cool for about 30 minutes.
Step 6: Cut the Bars
Once cooled, lift the whole slab out of the pan using the parchment overhang and transfer to a cutting board. Cut in half lengthwise, then slice each half into 5-6 thin bars. Let them cool completely before moving on to the chocolate — warm bars = melted chocolate mess.
Step 7: Melt the Chocolate
Add the dark chocolate chips and coconut oil to a microwave-safe bowl. Microwave in 30-second intervals, stirring well between each burst, until the chocolate is fully melted and silky smooth. The coconut oil keeps the chocolate glossy and easy to work with.
Step 8: Dip and Drizzle
Dip the bottom of each bar into the melted chocolate, then transfer to a baking sheet lined with parchment paper. Drizzle the top of each bar with the remaining melted chocolate using a spoon or a piping bag (or just go freehand — rustic is chic).
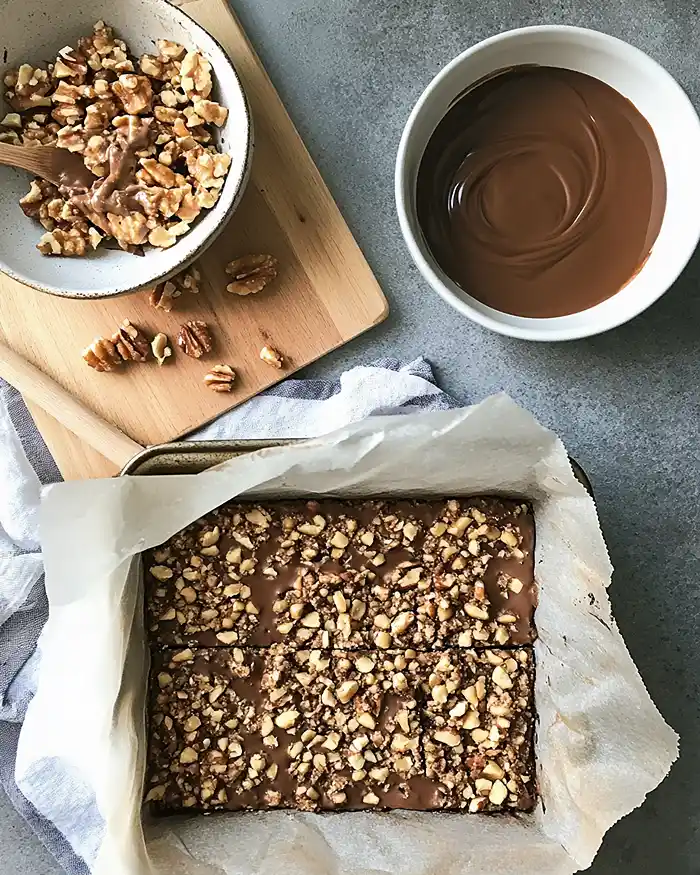
Sprinkle with flaky salt while the chocolate’s still wet. Refrigerate until the chocolate is set, about 15-20 minutes, then dig in.
Claire’s Pro Tips & Gentle Guidance
Here’s where I share the little sweet snacks recipes secrets I’ve learned the hard way.
Toast your nuts — seriously. Skipping this step means you’re missing out on all that toasty, caramelized flavor that makes these bars taste next-level. Just don’t walk away from the oven — nuts go from perfect to burnt in about 30 seconds.
Press the mixture firmly. If you don’t really pack down the nut-syrup mixture, your bars will crumble when you cut them. Use some elbow grease here — you want them tight and compact.
Let them cool completely before cutting. I know waiting is hard, but warm bars = sticky, messy disaster. Give them the full 30 minutes to firm up, and your future self will thank you.
Use good chocolate. This isn’t the time for waxy chocolate chips. Spring for something with at least 60% cacao — it makes a huge difference in flavor and texture. According to Serious Eats‘ detailed chocolate tempering guide, quality chocolate melts smoother and sets with a better snap.
Store them in the fridge. The chocolate stays firm, and the bars keep their crunch longer. Plus, cold chocolate + sea salt = heaven.
Quick Fixes for Dark Chocolate Sea Salt Nut Bars
Problem: My bars are falling apart.
You probably didn’t press the mixture firmly enough before baking, or you cut them while they were still warm.
Next time, really compact that mixture and let it cool completely. If they’ve already crumbled, crumble them fully and use as a crunchy topping for yogurt or ice cream — waste not!
Problem: The chocolate isn’t sticking.
Make sure your bars are completely cool before dipping. Warm bars will cause the chocolate to slide right off. Also, don’t skip the coconut oil — it helps the chocolate adhere and gives it that glossy finish.
Problem: The bars are too sweet.
Cut back on the brown rice syrup by a tablespoon or two, and make sure you’re using dark chocolate (not semi-sweet or milk chocolate). The sea salt also helps balance sweetness, so don’t skip it.
Problem: My chocolate seized up.
This usually happens if water gets into the chocolate or if you overheat it. Make sure your bowl is completely dry, and heat in short intervals, stirring frequently. If it does seize, whisk in a teaspoon of coconut oil to bring it back.
Variations & Fun Twists
These Dark Chocolate Sea Salt Nut Bars are super adaptable — here’s how to make them your own.
Go nut-free: Swap the nuts for an equal amount of sunflower seeds, pumpkin seeds, or a mix of both. You’ll get the same crunch without the allergens.
Make them vegan: Just double-check your chocolate chips are dairy-free (most dark chocolate chips are, but always read labels).
Try different chocolate: Milk chocolate makes them sweeter and more kid-friendly, while white chocolate + dried cranberries gives you a sweet-tart vibe that’s perfect for the holidays.
Add dried fruit: Toss in ½ cup of chopped dried apricots, cherries, or dates for a chewy contrast to the crunchy nuts.
Spice things up: Add ½ teaspoon of cinnamon or a pinch of cayenne to the brown rice syrup mixture for a warm, spicy kick.
Make them fancy: Drizzle with melted white chocolate in addition to the dark chocolate, or press edible gold flakes into the chocolate before it sets. Suddenly you’ve got a gift-worthy treat.
This is just one of the many gems in our Cookies & Brownies series. Every recipe there has been tested and loved in real kitchens, and I promise there’s something for every craving. Go see for yourself.
Serving, Storage & Reheating
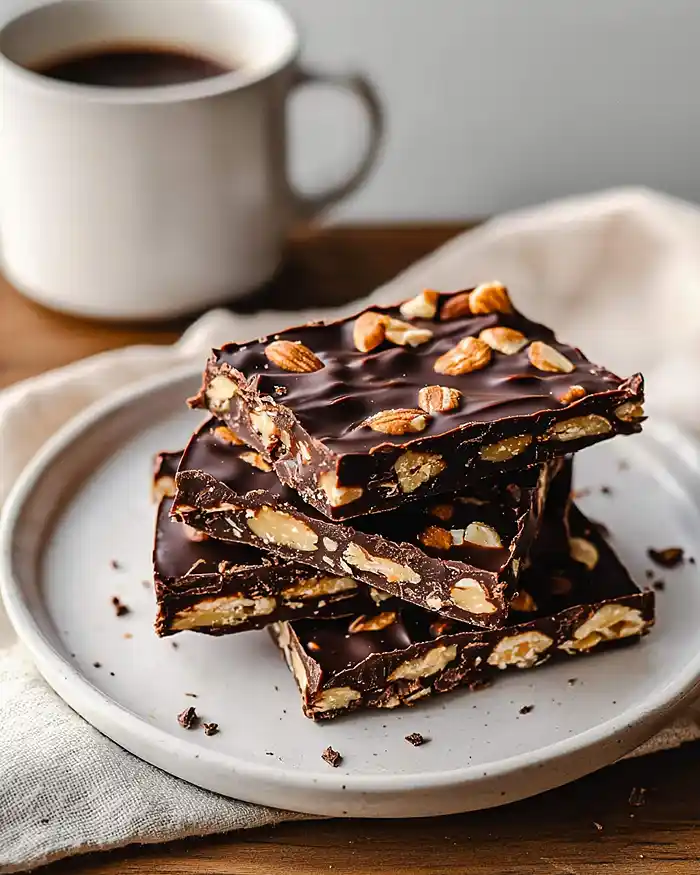
These quick recipes snacks are best enjoyed straight from the fridge when the chocolate is firm and the bars are nice and crunchy.
Storage: Keep them in an airtight container in the fridge for up to 2 weeks. Layer parchment paper between bars if you’re stacking them to prevent sticking. You can also freeze them for up to 3 months — just thaw in the fridge overnight before eating.
Reheating: No need to reheat these! They’re meant to be enjoyed cold or at room temperature. If they’ve been frozen, let them sit at room temp for about 10 minutes to soften slightly.
Check Out These Delish Recipes:
Easy Easter Bunny Cake
Easter Basket Bundt Cake Recipe
No-Waste Kitchen Magic
Leftover nuts? Toast them with a little maple syrup and sea salt, then toss on salads or oatmeal for a crunchy, sweet topping.
Extra puffed rice? Mix with melted nut butter and a drizzle of honey, press into a pan, and cut into squares for no-bake puffed rice treats.
Chocolate drips? Scrape up any leftover melted chocolate from the bowl and drizzle over fresh fruit, or let it harden and chop it up for mixing into cookie dough.
Broken bars? Crumble them over vanilla ice cream, stir into yogurt parfaits, or mix into homemade trail mix. Nothing goes to waste here.
Dark Chocolate Sea Salt Nut Bars FAQs
Can I freeze Dark Chocolate Sea Salt Nut Bars?
Absolutely! These bars freeze beautifully. Just wrap them individually in parchment paper, then store in a freezer-safe container for up to 3 months. Thaw in the fridge overnight and they’ll taste just as good as fresh.
What’s the best way to store Dark Chocolate Sea Salt Nut Bars?
Keep them in an airtight container in the fridge for up to 2 weeks. The cold keeps the chocolate firm and the bars crunchy. If you leave them at room temp too long, the chocolate gets soft and sticky.
How do I know when the nut mixture is baked enough?
Look for lightly golden edges and a firm, set texture. If it still feels liquidy or jiggly when you gently shake the pan, give it another 2-3 minutes. You want it just firm enough to hold together once cooled.
Why should I use brown rice syrup in Dark Chocolate Sea Salt Nut Bars?
Brown rice syrup is less sweet than honey or corn syrup, and it stays chewy without crystallizing. It also has a neutral flavor that lets the nuts and chocolate shine. If you can’t find it, you can swap in honey, but the bars will be a bit stickier and sweeter.
Could I make these bars without puffed rice?
Sure! Just increase the nuts to 3 cups total. The bars will be denser and more filling, but still delicious. You could also swap in puffed quinoa or Rice Krispies for a similar crunch.
Cozy Closing
I’d love to see your spin on these Dark Chocolate Sea Salt Nut Bars! Drop a comment below or tag me with your photos — I’m always curious to see how you make these your own.
Maybe you added pistachios, or went wild with white chocolate, or just demolished the whole pan in one sitting (no judgment — been there). These bars are endlessly customizable, so have fun with them.
Happy baking, friend. You’ve got this.
I’m Claire Whitmore — a dessert daydreamer from Asheville, NC. For me, baking isn’t about perfect pastries — it’s about the joy of sharing something sweet (and maybe sneaking an extra scoop of icing).
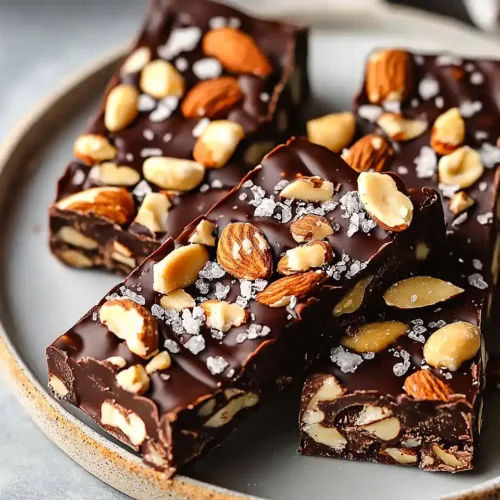
Dark Chocolate Sea Salt Nut Bars
Equipment
- Rimmed sheet pan
- 8×8-inch baking pan
- Parchment paper
- Large mixing bowl
- Microwave-safe bowl
- Whisk or spoon
- Sharp knife
Ingredients
For the Nut Base
- 2 ½ cups unsalted nuts of choice 3/4 cup cashews, 3/4 cup peanuts, 1 cup almonds
- ½ cup puffed rice
- ¼ cup brown rice syrup
- 1 ½ tsp vanilla extract
- ½ tsp sea salt
For the Chocolate Coating
- 1 cup dark chocolate chips
- 2 tsp coconut oil
- flaky salt for topping optional
Instructions
- Preheat your oven to 325°F (160°C). Spread the unsalted cashews, peanuts, and almonds in a single layer on a rimmed sheet pan. Bake for 5-8 minutes, until they smell nutty and golden (watch them closely — burnt nuts are a tragedy). Remove from the oven and let them cool slightly while you prep everything else.
- Line an 8×8-inch baking pan with parchment paper, leaving a little overhang on two sides so you can lift the whole thing out later. This trick saves you from wrestling with sticky bars.
- In a large mixing bowl, toss together the toasted nuts and puffed rice until evenly mixed. Set this aside while you work on the binding syrup.
- Add the brown rice syrup to a microwave-safe bowl and microwave for 30 seconds. This loosens it up so it’s way easier to stir and coat the nuts evenly. Whisk in the vanilla extract and sea salt until everything’s combined and smooth, then pour this mixture over the nut-puffed rice combo. Stir until every piece is coated — you want that syrup hugging every nut.
- Transfer the sticky nut mixture to your prepared 8×8-inch pan and press it down firmly into an even layer. Use the back of a spatula or your hands (slightly damp helps prevent sticking) to really compact it — this ensures the bars hold together. Bake for 18-20 minutes, until the edges are just starting to turn golden. Remove from the oven and let cool for about 30 minutes.
- Once cooled, lift the whole slab out of the pan using the parchment overhang and transfer to a cutting board. Cut in half lengthwise, then slice each half into 5-6 thin bars. Let them cool completely before moving on to the chocolate — warm bars = melted chocolate mess.
- Add the dark chocolate chips and coconut oil to a microwave-safe bowl. Microwave in 30-second intervals, stirring well between each burst, until the chocolate is fully melted and silky smooth. The coconut oil keeps the chocolate glossy and easy to work with.
- Dip the bottom of each bar into the melted chocolate, then transfer to a baking sheet lined with parchment paper. Drizzle the top of each bar with the remaining melted chocolate using a spoon or a piping bag (or just go freehand — rustic is chic). Sprinkle with flaky salt while the chocolate’s still wet. Refrigerate until the chocolate is set, about 15-20 minutes, then dig in.