Fudgy Red Velvet Crinkle Cookies
Fudgy Red Velvet Crinkle Cookies are soft, chocolatey, and stunning—perfect for holidays, Valentine’s Day, or just because. Get Claire’s foolproof recipe with pro tips inside!
Hey there, I’m Claire Whitmore — a pastry whisperer in Asheville, NC, where butter totally counts as self-care. This Fudgy Red Velvet Crinkle Cookies recipe is one of those magical bakes that looks like you spent hours in the kitchen but actually comes together with simple ingredients and minimal fuss.
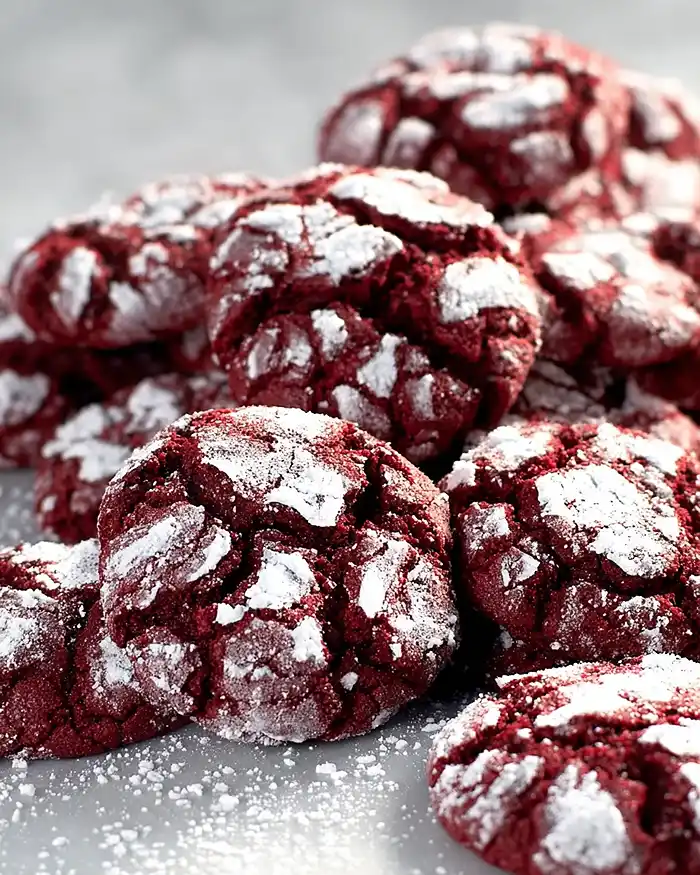
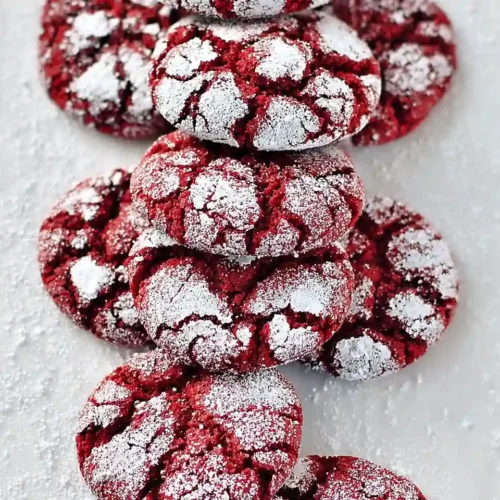
These cookies deliver a soft, fudgy center with that signature crinkle look, plus rich cocoa flavor, a hint of vanilla, and melty white chocolate chips in every bite.
You’re getting red velvet’s gorgeous color, a tender crumb that practically melts on your tongue, and that wow-factor presentation that makes everyone think you moonlight as a pastry chef.
They’re perfect for Valentine’s Day, Christmas cookie swaps, or any Tuesday when you need something a little special. Plus, they’re made with everyday pantry staples — no weird ingredients or fancy equipment required.
Table of Contents
Little Snapshot: What This Recipe Delivers
Fudgy Red Velvet Crinkle Cookies are soft, chocolatey cookies with a vibrant red color, classic crinkle appearance, and white chocolate chips throughout. With just 12 minutes of bake time and simple ingredients like cocoa powder, butter, and red gel food coloring, they’re easy enough for beginner bakers but impressive enough for any celebration.
Why You’ll Love This Recipe 🌸
- This red velvet crinkle cookies recipe looks absolutely bakery-worthy but takes less time than folding a basket of laundry.
- They stay soft and fudgy for days (if they last that long), so you can bake ahead without the stress.
- The double sugar coating creates that gorgeous crackled look without any fussy techniques — just roll and bake.
- According to Serious Eats in their guide to cookie science, chilling cookie dough develops flavor and prevents spreading — and this recipe proves exactly why.
Quick Facts ⚡
Here’s the quick scoop on this fudgy red velvet crinkle cookie recipe.
- CourseDessert
- Prep Time15 minutes
- Chill Time2 hours
- Cook Time12 minutes
- Total Time2 hours 27 minutes
- Servings26 cookies
- DifficultyEasy
Fudgy Red Velvet Crinkle Cookies
Equipment
- Medium mixing bowl
- Large mixer bowl
- Stand mixer or hand mixer
- Whisk
- Rubber spatula
- Medium cookie scoop
- Two baking sheets
- Parchment paper
- Two shallow bowls
- Wire cooling rack
Ingredients
Cookie Dough
- 2 cups all-purpose flour 280 g
- ⅓ cup unsweetened natural cocoa powder 32 g
- 1 tsp baking powder 5 g
- ¼ tsp baking soda
- ½ tsp salt 3 g
- ½ cup unsalted butter 112 g, at room temperature
- ¾ cup granulated sugar 150 g
- ½ cup light brown sugar 100 g
- 2 large eggs 100 g
- 1 tsp vanilla extract 4 g
- 1 tsp lemon juice 5 g
- 1 Tbsp red gel food coloring 21 g
- 1 ½ Tbsp milk 22 g
- ¾ cup white chocolate chips 128 g
For Rolling
- ½ cup granulated sugar 100 g
- ½ cup powdered sugar 60 g
Instructions
- In a medium bowl, whisk together 2 cups all-purpose flour, 1/3 cup unsweetened natural cocoa powder, 1 teaspoon baking powder, 1/4 teaspoon baking soda, and 1/2 teaspoon salt until everything’s evenly combined. In a large mixer bowl, beat 1/2 cup room-temperature unsalted butter with 3/4 cup granulated sugar and 1/2 cup light brown sugar at medium speed until the mixture looks light, fluffy, and creamy, about 2 minutes. Add 2 large eggs one at a time, beating after each addition until they’re fully incorporated. Beat in 1 teaspoon vanilla extract, 1 teaspoon lemon juice, and 1 tablespoon red gel food coloring until the color is vibrant and evenly distributed throughout the dough.
- Reduce your mixer speed to low and gradually add the flour mixture to the butter-sugar mixture, beating just until you can’t see any more dry flour. Add 1 1/2 tablespoons milk and mix on low speed just until combined, then use a rubber spatula to gently fold in 3/4 cup white chocolate chips until they’re evenly distributed.
- The dough will be thick, soft, and slightly sticky at this point. Cover the bowl tightly with plastic wrap or a lid and chill in the refrigerator for 2 hours.
- When you’re ready to bake, preheat your oven to 350°F and line two baking sheets with parchment paper. Place 1/2 cup granulated sugar in one shallow bowl and 1/2 cup powdered sugar in another shallow bowl.
- Spray a medium cookie scoop lightly with nonstick spray. Scoop out balls of dough that are about 1 1/2 inches wide (approximately 30 grams each). Roll each ball first in the granulated sugar to coat completely, then roll generously in the powdered sugar until it’s covered in a thick white coating. Place the coated dough balls two inches apart on your prepared baking sheets.
- Bake the cookies for 12 minutes, rotating the pans halfway through baking, until the cookies are puffed, cracked with beautiful red showing through the white coating, and the edges are set but the centers still look slightly soft. If you want flatter cookies with more crinkles, tap the baking sheets sharply once or twice on the counter right when they come out of the oven. Let the cookies cool for 5 minutes on the baking sheets, then transfer them to a wire rack to cool completely.
Notes
Nutritional Peek
Here’s a little peek at what each cookie brings to the table (because we believe in enjoying treats mindfully):
| Nutrient | Amount per Serving |
|---|---|
| Calories | 145 kcal |
| Protein | 2 g |
| Carbohydrates | 22 g |
| Fat | 6 g |
| Fiber | 1 g |
| Sugar | 14 g |
Note: Nutritional values are approximate and based on one cookie.
Fudgy Red Velvet Crinkle Cookies Ingredients
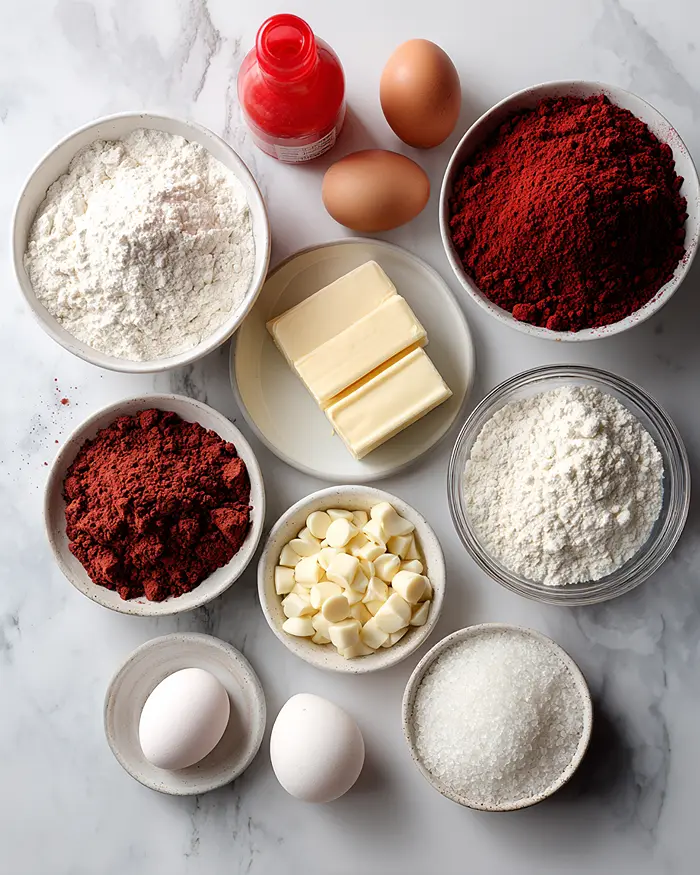
This red velvet crinkle cookie recipe easy version uses ingredients you probably already have hanging out in your pantry. For the wet ingredients — butter, eggs, vanilla extract, and a splash of lemon juice — you’ll want everything at room temperature so they blend smoothly without lumps.
For the dry mix — flour, cocoa powder, baking powder, baking soda, and salt — sift them together if you can, or at least give them a good whisk to avoid any cocoa clumps.
| Amount | Ingredient |
|---|---|
| 2 cups (280 g) | all-purpose flour |
| 1/3 cup (32 g) | unsweetened natural cocoa powder |
| 1 tsp (5 g) | baking powder |
| 1/4 tsp | baking soda |
| 1/2 tsp (3 g) | salt |
| 1/2 cup (112 g) | unsalted butter, at room temperature (yes, real butter — margarine just doesn’t cut it here) |
| 3/4 cup (150 g) | granulated sugar |
| 1/2 cup (100 g) | light brown sugar |
| 2 large | eggs (100 g) |
| 1 tsp (4 g) | vanilla extract |
| 1 tsp (5 g) | lemon juice (don’t skip this — it brightens the cocoa!) |
| 1 Tbsp (21 g) | red gel food coloring |
| 1 1/2 Tbsp (22 g) | milk |
| 3/4 cup (128 g) | white chocolate chips |
For Rolling
| Amount | Ingredient |
|---|---|
| 1/2 cup (100 g) | granulated sugar |
| 1/2 cup (60 g) | powdered sugar |
Tools You’ll Actually Use
- Medium mixing bowl
- Large mixer bowl (stand mixer or hand mixer works great)
- Whisk
- Rubber spatula
- Medium cookie scoop (about 1.5 tablespoons)
- Two baking sheets
- Parchment paper
- Two shallow bowls (for rolling sugars)
- Wire cooling rack
Step-by-Step Instructions
Let’s make these stunning Fudgy Red Velvet Crinkle Cookies happen. Trust me, the process is way easier than they look.
Step 1: Make the dough
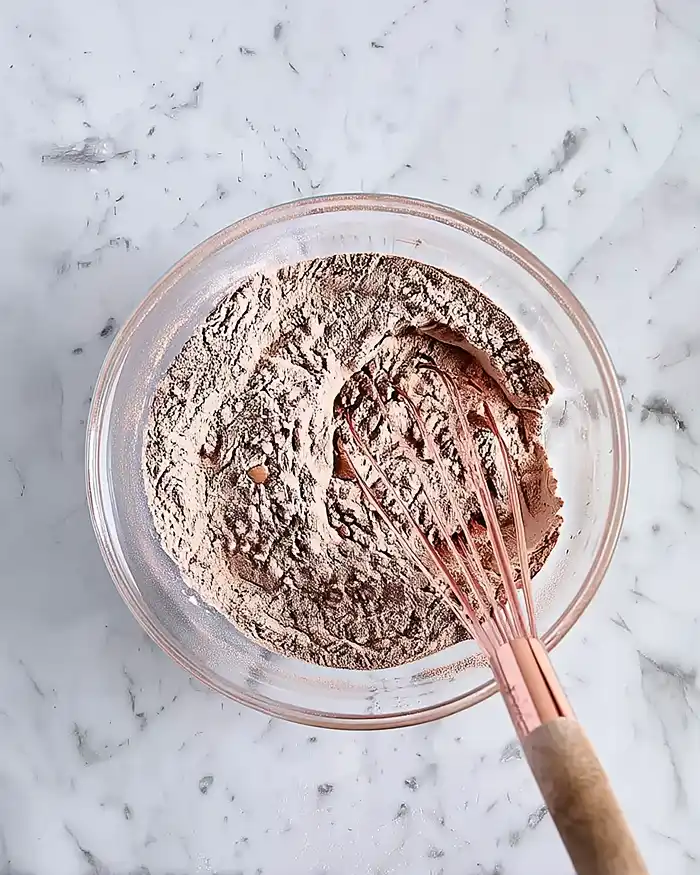
In a medium bowl, whisk together 2 cups all-purpose flour, 1/3 cup unsweetened natural cocoa powder, 1 teaspoon baking powder, 1/4 teaspoon baking soda, and 1/2 teaspoon salt until everything’s evenly combined — no cocoa streaks allowed.
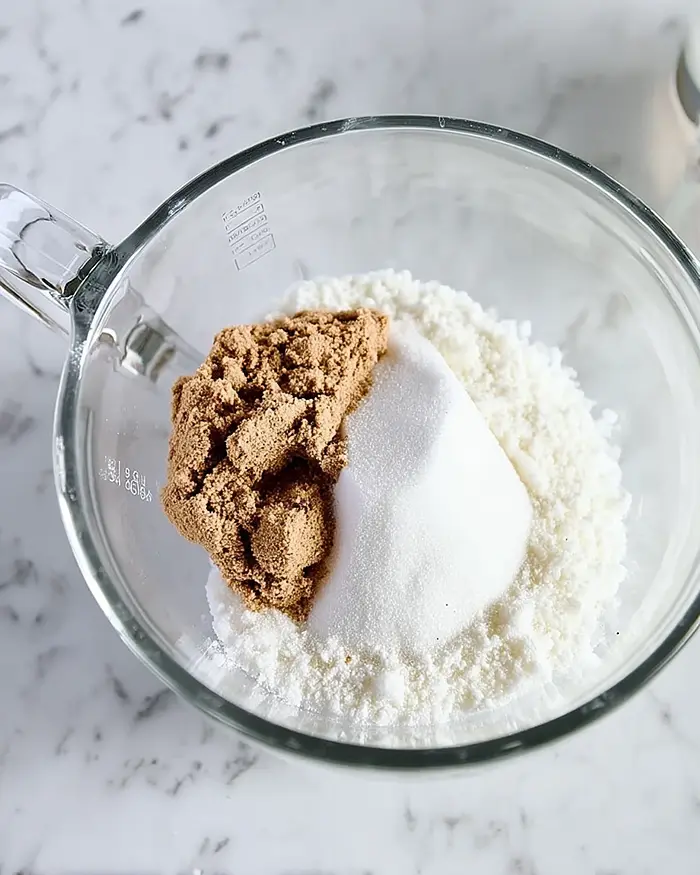
In a large mixer bowl, beat 1/2 cup room-temperature unsalted butter with 3/4 cup granulated sugar and 1/2 cup light brown sugar at medium speed until the mixture looks light, fluffy, and creamy, about 2 minutes. Add 2 large eggs one at a time, beating after each addition until they’re fully incorporated.
Beat in 1 teaspoon vanilla extract, 1 teaspoon lemon juice, and 1 tablespoon red gel food coloring until the color is vibrant and evenly distributed throughout the dough.
Step 2: Combine wet and dry
Reduce your mixer speed to low and gradually add the flour mixture to the butter-sugar mixture, beating just until you can’t see any more dry flour — don’t overmix or your cookies will turn out tough instead of tender.
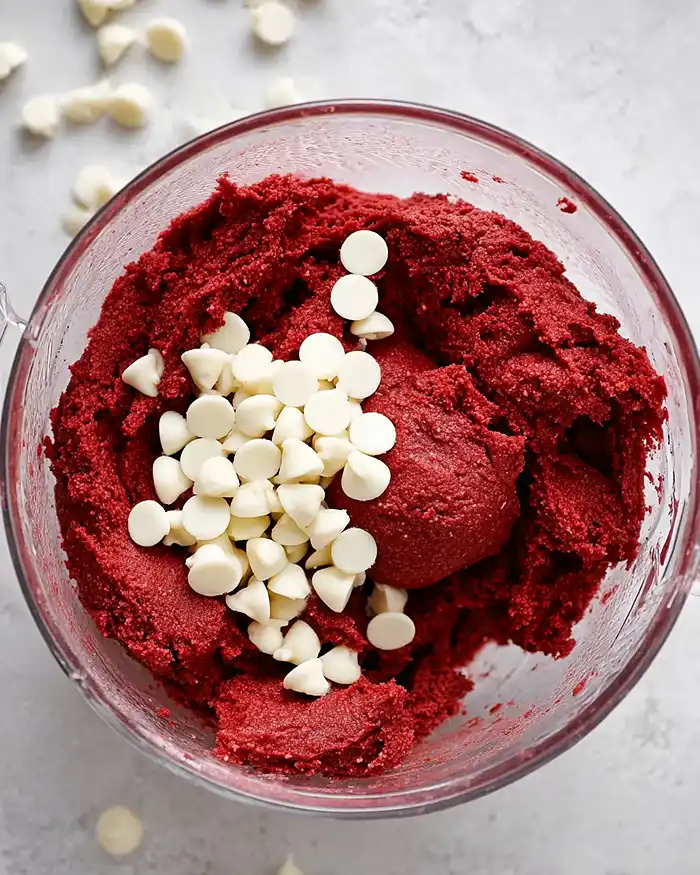
Add 1 1/2 tablespoons milk and mix on low speed just until combined, then use a rubber spatula to gently fold in 3/4 cup white chocolate chips until they’re evenly distributed.
Step 3: Chill the dough
The dough will be thick, soft, and slightly sticky at this point — that’s exactly what you want. Cover the bowl tightly with plastic wrap or a lid and chill in the refrigerator for 2 hours. This step is crucial for getting that perfect crinkle texture and preventing the cookies from spreading too much in the oven.
Step 4: Preheat and prep
When you’re ready to bake, preheat your oven to 350°F and line two baking sheets with parchment paper. Place 1/2 cup granulated sugar in one shallow bowl and 1/2 cup powdered sugar in another shallow bowl — these are your rolling stations.
Step 5: Roll the cookies
Spray a medium cookie scoop lightly with nonstick spray so the dough releases easily. Scoop out balls of dough that are about 1 1/2 inches wide (approximately 30 grams each if you want to be precise).
Roll each ball first in the granulated sugar to coat completely, then roll generously in the powdered sugar until it’s covered in a thick white coating — don’t be shy with that powdered sugar; it’s what creates those gorgeous cracks. Place the coated dough balls two inches apart on your prepared baking sheets.
Step 6: Bake to perfection
Bake the cookies for 12 minutes, rotating the pans halfway through baking to ensure even browning, until the cookies are puffed, cracked with beautiful red showing through the white coating, and the edges are set but the centers still look slightly soft.
If you want flatter cookies with more crinkles, tap the baking sheets sharply once or twice on the counter right when they come out of the oven. Let the cookies cool for 5 minutes on the baking sheets — they’ll firm up as they cool — then transfer them to a wire rack to cool completely. They’ll smell like a bakery and look absolutely stunning.
One recipe down, and so many more to explore! Head over to our complete Cookies & Brownies lineup for more delicious ideas that’ll keep your kitchen buzzing. Bookmark this one — you’ll thank yourself later.
Claire’s Pro Tips & Gentle Guidance
These fudgy red velvet cookies are pretty foolproof, but I’ve learned a few things that’ll make yours even better.
Don’t skip the chill time — I know 2 hours feels like forever when you want cookies NOW, but this step is non-negotiable. It firms up the butter, prevents spreading, and develops the flavor. If you’re really in a pinch, you can chill for at least 1 hour, but 2 is ideal.
Use gel food coloring, not liquid. Gel is more concentrated and won’t mess with your dough consistency. I like Americolor or Wilton’s red gel for that vibrant hue without adding extra liquid.
For the whitest, most dramatic crinkles, coat your dough balls really generously in that powdered sugar. I’m talking a thick layer. It might seem like too much, but it bakes down and creates those stunning cracks.
Room temperature ingredients matter here. Cold butter won’t cream properly with the sugar, and cold eggs can cause the dough to seize up. Just set everything out on the counter about 30 minutes before you start baking.
According to King Arthur Baking’s detailed guide on ingredient temperature , room-temperature ingredients emulsify better and create a smoother, more uniform dough texture — which is exactly what we want.
If your cookies spread too much, your dough might’ve been too warm. Next time, make sure it’s properly chilled, and consider popping the rolled dough balls back in the fridge for 15 minutes before baking.
Quick Fixes for Fudgy Red Velvet Crinkle Cookies
Problem: My cookies spread into flat pancakes instead of staying puffy.
Your dough was probably too warm when it went into the oven. Make sure you chill the dough for the full 2 hours, and if your kitchen is warm, stick the rolled dough balls in the fridge for 15 minutes before baking.
Also double-check that your oven is actually at 350°F — an oven thermometer is your friend.
Problem: The cookies turned out cakey instead of fudgy.
You might’ve overbaked them slightly or overmixed the dough. Pull them from the oven when the edges are set but the centers still look a tiny bit underdone — they’ll continue cooking as they cool.
Also, mix just until the flour disappears; overmixing develops too much gluten and creates a cakey texture.
Problem: The crinkles aren’t showing up — my cookies just look red.
You didn’t use enough powdered sugar! Roll those dough balls like you’re coating them for winter. The thick powdered sugar layer is what cracks and reveals the red underneath. Also make sure your dough is properly chilled before rolling.
Problem: My cookies are dry and crumbly.
This usually means they were overbaked. Red velvet cookies should come out when they still look slightly soft in the center. Also check your flour measurement — if you packed it into the measuring cup, you might’ve added too much. Spoon it in and level it off for accuracy.
Variations & Fun Twists
This red velvet crinkle cookies recipe is super versatile once you’ve got the base down.
For Valentine’s Day, press a few mini chocolate chips or a small chocolate heart into the top of each cookie right when they come out of the oven. You can also swap the white chocolate chips for dark chocolate chips or even pink and red M&Ms for extra festive vibes.
Going gluten-free? Use a 1:1 gluten-free baking flour blend like Bob’s Red Mill or King Arthur Measure for Measure. The texture will be slightly different but still delicious. You might need to add an extra tablespoon of milk if the dough seems too stiff.
Make them minty by adding 1/4 teaspoon peppermint extract along with the vanilla. It’s like a candy cane in cookie form and perfect for Christmas baking.
Want them extra fudgy? Underbake by 1 minute and let them cool completely on the baking sheet. They’ll stay incredibly soft and almost brownie-like in the center.
Create a cookies and cream version by replacing the white chocolate chips with chopped Oreos. The crunch is everything.
If you’re feeling fancy, drizzle cooled cookies with melted white chocolate or dust them with extra powdered sugar and edible glitter for special occasions. They’re already showstoppers, but a little extra sparkle never hurt.
Serving, Storage & Reheating
These fudgy red velvet crinkle cookies are best served at room temperature when they’re soft and the white chocolate chips are just melty enough. They’re absolutely perfect with a cold glass of milk, a cup of coffee, or alongside my creamy sausage tortellini bake for a sweet-savory dinner combo.
Store the cookies in an airtight container at room temperature for up to 3 days — though honestly, good luck making them last that long. Stack them with parchment paper between layers so they don’t stick together or lose that beautiful powdered sugar coating.
If you want to freeze them, place cooled cookies in a freezer-safe container or bag with parchment between layers, and freeze for up to 2 months. Thaw at room temperature for about 30 minutes before serving. You can also freeze the dough balls after rolling them in sugar — just bake straight from frozen, adding 1-2 extra minutes to the bake time.
No-Waste Kitchen Magic
Got leftover cookies that are starting to go stale? (I mean, if that somehow happens in your house.) Crumble them up and layer them with whipped cream and fresh berries for a red velvet trifle situation. You could also crush them and use them as a crust for cheesecake — it’s incredibly decadent.
If you’ve got extra white chocolate chips hanging around, melt them and drizzle over the cooled cookies for an extra layer of sweetness. Or save them for my red velvet bear cookies — another Valentine’s Day favorite around here.
Day-old cookies that have lost their softness? Pop one in the microwave for 8-10 seconds to warm it up. It’ll taste freshly baked and the white chocolate will get melty again. Serve it with a scoop of vanilla ice cream and call it dessert.
Fudgy Red Velvet Crinkle Cookies FAQs
Can I freeze the dough for Fudgy Red Velvet Crinkle Cookies?
Absolutely! Roll the dough into balls, coat them in both sugars, and freeze them on a baking sheet until solid. Then transfer to a freezer bag and freeze for up to 3 months. Bake straight from frozen, adding 1-2 extra minutes to the bake time — no thawing needed.
What’s the best way to store red velvet crinkle cookies so they stay soft?
Store them in an airtight container at room temperature with a piece of bread tucked inside. The cookies will absorb moisture from the bread and stay soft for days. Replace the bread slice every day or two to keep things fresh.
Why should I use lemon juice in red velvet crinkle cookies?
The lemon juice reacts with the cocoa powder to enhance the red color and adds a subtle brightness that balances the richness. It’s a classic red velvet trick — you won’t taste the lemon, but you’ll notice if it’s missing because the color won’t be as vibrant.
Could I make these cookies without food coloring?
Sure, but they won’t be red velvet cookies anymore — they’ll just be chocolate crinkle cookies. If you want to skip the artificial coloring, you could try beet powder for a natural red hue, but it’ll be more subtle and might add an earthy taste.
Will these red velvet crinkle cookies work with brown sugar instead of white?
The recipe already uses both granulated and brown sugar for the perfect balance of sweetness and moisture. If you replaced all the granulated sugar with brown, the cookies would be softer and chewier with a deeper molasses flavor. Not bad, just different from the classic red velvet taste.
Cozy Closing
These Fudgy Red Velvet Crinkle Cookies are one of those recipes that’ll become your go-to whenever you need something that looks impressive but doesn’t require pastry school skills. They’re soft, chocolatey, stunning, and honestly perfect for just about any occasion — or no occasion at all.
I’d love to see your spin on this red velvet crinkle cookies recipe! Drop a comment below with your photos or tag me on social — I’d love to see how you made them your own. Did you add extra chocolate chips? Try the minty version? Make them for a cookie swap? Tell me everything!
Happy baking, friend. May your cookies be fudgy, your crinkles be dramatic, and your kitchen smell like pure magic. 🌸
I’m Claire Whitmore — a dessert daydreamer from Asheville, NC. For me, baking isn’t about perfect pastries — it’s about the joy of sharing something sweet (and maybe sneaking an extra cookie when no one’s looking).