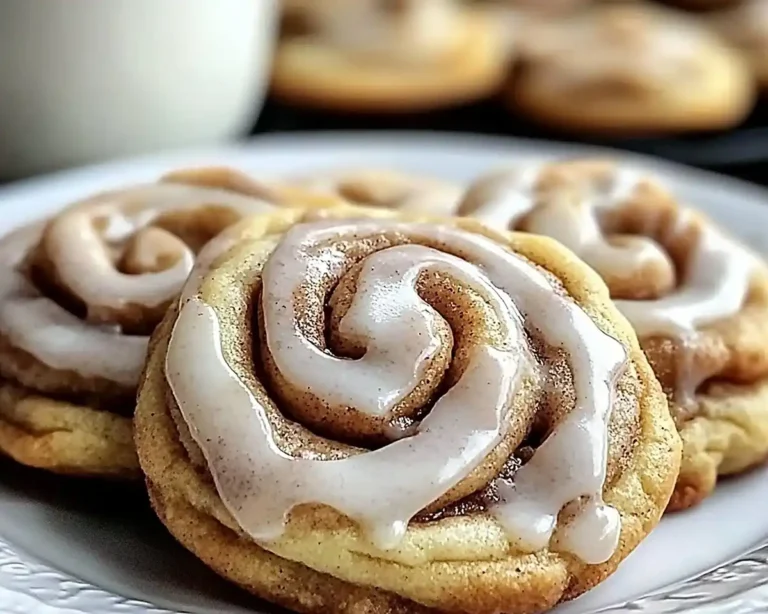
Red Velvet Bear Cookies for Valentine’s Day
Red Velvet Bear Cookies for Valentine’s Day are soft, sprinkle-covered treats made with cake mix, white chocolate, and adorable bear shapes—perfect for kids’ parties, classroom treats, or cozy baking dates.
Red Velvet Bear Cookies for Valentine’s Day are seriously the cutest way to show love this February—and they’re way easier than they look. Hey there, I’m Claire Whitmore, a pastry whisperer in Asheville, NC, where butter totally counts as self-care.
These soft red velvet cookies start with a cake mix shortcut, get rolled in festive sprinkles, and finish with melty white chocolate chips that look like little bear noses and ears. They’re simple enough for kids to help with but impressive enough to gift to your favorite people.
I’d been experimenting with cake mix cookies (because who has time to cream butter for an hour?) and realized that red velvet + bear shapes + sprinkles = instant Valentine’s magic. We made a batch, and they disappeared faster than I could say “save some for later.”
Table of Contents
Little Snapshot: What This Recipe Delivers
Red Velvet Bear Cookies for Valentine’s Day deliver soft, cake-like cookies with a vibrant red hue, sweet white chocolate accents, and festive sprinkles—all made in under 30 minutes of active time using just five ingredients.
They’re beginner-friendly, kid-approved, and require no chilling beyond 30 minutes, making them ideal for last-minute Valentine’s treats or classroom celebrations.
Why You’ll Love This Recipe 🌸
Why You’ll Love This Recipe 🌸
- This Red Velvet Bear Cookies for Valentine’s Day recipe takes less time than wrapping presents—seriously, you’ll be done before your coffee gets cold.
- They look bakery-fancy but use a cake mix shortcut, so you can skip the whole “sifting flour for twenty minutes” thing.
- Kids can totally help roll the dough and press on the chocolate chips, which means you get helper credit AND a snack.
- According to King Arthur Baking’s guide to cake mix cookies, using boxed mixes creates ultra-soft textures without the fuss—and this recipe proves exactly why.
Quick Facts ⚡
Here’s the quick scoop on this Red Velvet Bear Cookies for Valentine’s Day.
- CourseDessert
- Prep Time15 minutes
- Cook Time10 minutes
- Total Time55 minutes (includes chilling)
- Servings24 cookies
- DifficultyEasy


Red Velvet Bear Cookies for Valentine’s Day
Equipment
- Stand mixer or large mixing bowl with hand mixer
- Ice cream scoop
- Two large baking trays
- Greaseproof paper or parchment paper
- Wire cooling rack
- Small bowl for sprinkles
Ingredients
- 1 box Red velvet cake mix 468g / 16.5oz
- 80 ml Sunflower oil or vegetable oil, about ⅓ cup
- 2 large Eggs room temperature
- 340 g White chocolate chips about 2 cups
- 2 cups Pink and red sugar sprinkles
Instructions
- Preheat your oven to 175°C (350°F) and line two large baking trays with greaseproof paper so nothing sticks.
- Using a stand mixer (or a hand mixer if that’s what you’ve got), beat together the red velvet cake mix, sunflower oil, and room-temperature eggs until the mixture is fully combined and looks smooth and glossy. The dough will be a gorgeous deep red and slightly sticky—that’s exactly what you want.
- Pop the dough into the fridge for a minimum of 30 minutes to firm up. This step is key because it makes the dough way easier to roll into balls without turning into a sticky mess all over your hands.
- Once the dough is chilled, use an ice cream scoop to portion out a ball of cookie dough, then roll it gently between your palms until it’s smooth and round.
- Pour your pink and red sugar sprinkles into a small bowl, then roll each dough ball through the sprinkles until it’s completely coated—this is where the magic happens and they start looking like little festive bears.
- Place each sprinkle-covered ball onto your prepared cookie sheet, leaving about 2 inches between each one since they’ll spread a bit while baking. Repeat until you’ve got 11-12 cookies on each tray.
- Slide the first tray into the oven and bake for approximately 8 minutes—you want them just set but still soft in the center.
- Pull them out of the oven and immediately press white chocolate chips onto the top of each cookie to create bear ears and a nose (two chips for ears near the top, one chip for the nose in the center). Press them in slightly so they stick, then pop the tray back into the oven for another 2 minutes so the chocolate chips get just a little melty and adhere to the cookies.
- Remove the tray from the oven and let the cookies cool completely on a wire rack—trust me, they’ll firm up as they cool and become perfectly soft and chewy.
- Repeat these steps with the remaining dough until you’ve baked all 24 cookies, and then try not to eat them all before Valentine’s Day arrives.
Notes
Nutritional Peek
Here’s a quick nutritional snapshot per cookie—because we believe in balance, not guilt.
| Nutrient | Amount per Serving |
|---|---|
| Calories | 165 kcal |
| Protein | 2g |
| Carbohydrates | 24g |
| Fat | 7g |
| Fiber | 0.5g |
| Sugar | 16g |
Note: Nutritional values are approximate and may vary based on specific brands used.
I have a feeling you’ll love what’s next. The Valentine’s & Spring favorites are packed with recipes that disappear fast at every gathering. Go check them out before someone else snags them!
Ingredients

These Cinnamon Bear Cookies (well, red velvet-style!) come together with just five pantry staples—no fancy equipment or hard-to-find ingredients required. For the base, you’ll need a red velvet cake mix, which gives these cookies their signature color and soft texture without any from-scratch stress.
The sunflower oil keeps them moist and tender, while eggs bind everything into a scoopable dough. White chocolate chips become adorable bear features, and festive sprinkles add that Valentine’s Day sparkle.
| Amount | Ingredient |
|---|---|
| 1 box (468g / 16.5oz) | Red velvet cake mix |
| 80 ml (⅓ cup) | Sunflower oil (or vegetable oil) |
| 2 large | Eggs, room temperature |
| 340g (2 cups) | White chocolate chips |
| 2 cups | Pink and red sugar sprinkles |
Tools You’ll Actually Use
- Stand mixer or large mixing bowl + hand mixer
- Ice cream scoop (makes uniform cookies every time)
- Two large baking trays
- Greaseproof paper or parchment paper
- Wire cooling rack
- Small bowl for sprinkles
Step-by-Step Instructions
Making Red Velvet Bear Cookies for Valentine’s Day is honestly one of the easiest cookie projects you’ll ever tackle—no fancy techniques, just mix, chill, roll, and bake. Start by preheating your oven to 175°C (350°F) and lining two large baking trays with greaseproof paper so nothing sticks.
Using a stand mixer (or a hand mixer if that’s what you’ve got), beat together the red velvet cake mix, sunflower oil, and room-temperature eggs until the mixture is fully combined and looks smooth and glossy. The dough will be a gorgeous deep red and slightly sticky—that’s exactly what you want.
Pop the dough into the fridge for a minimum of 30 minutes to firm up. This step is key because it makes the dough way easier to roll into balls without turning into a sticky mess all over your hands.
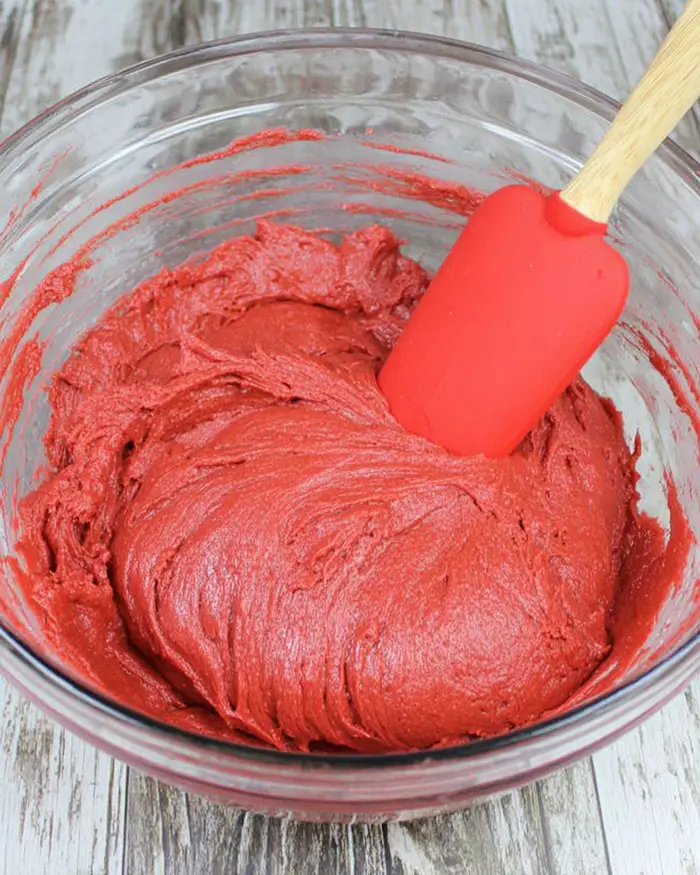
Once the dough is chilled, use an ice cream scoop to portion out a ball of cookie dough, then roll it gently between your palms until it’s smooth and round.
Pour your pink and red sugar sprinkles into a small bowl, then roll each dough ball through the sprinkles until it’s completely coated—this is where the magic happens and they start looking like little festive bears.
Place each sprinkle-covered ball onto your prepared cookie sheet, leaving about 2 inches between each one since they’ll spread a bit while baking. Repeat until you’ve got 11-12 cookies on each tray.
Slide the first tray into the oven and bake for approximately 8 minutes—you want them just set but still soft in the center. Pull them out of the oven and immediately press white chocolate chips onto the top of each cookie to create bear ears and a nose (two chips for ears near the top, one chip for the nose in the center).
Press them in slightly so they stick, then pop the tray back into the oven for another 2 minutes so the chocolate chips get just a little melty and adhere to the cookies.
Remove the tray from the oven and let the cookies cool completely on a wire rack—trust me, they’ll firm up as they cool and become perfectly soft and chewy. Repeat these steps with the remaining dough until you’ve baked all 24 cookies, and then try not to eat them all before Valentine’s Day arrives.
Claire’s Pro Tips & Gentle Guidance
These Bear Shaped Cookies are super forgiving, but a few little tricks will make them even better. First, always chill the dough for the full 30 minutes—I know it’s tempting to skip this step, but cold dough holds its shape way better and won’t spread into flat puddles in the oven.
If you’re baking with kids and they’re taking their time decorating, just pop the dough back in the fridge between batches so it stays firm.
When you press on the white chocolate chips, do it right when the cookies come out of the oven—they’ll stick perfectly to the warm surface. If you wait too long and the cookies cool down, the chips won’t adhere as well and might fall off later.
Use an ice cream scoop for portioning the dough because it keeps every cookie the same size, which means they bake evenly and look super professional. Plus, it’s just faster and way less messy than rolling by hand.
For even more baking wisdom on working with cake mix cookies, check out this detailed guide to cake mix cookie techniques—it’s packed with tips for getting that perfect soft texture every time.
Quick Fixes for Red Velvet Bear Cookies for Valentine’s Day
Cookies are spreading too much and losing their shape: If your dough wasn’t chilled long enough or your kitchen is super warm, the cookies will spread into flat discs instead of staying round and fluffy.
Make sure you chill the dough for at least 30 minutes, and if your house is warm, pop the shaped dough balls back in the fridge for 10 minutes before baking.
White chocolate chips are falling off after cooling: This happens if you add the chips too late or don’t press them in enough. Always press the chocolate chips onto the cookies immediately after the first 8-minute bake while they’re still hot and soft—that way the chips sink in slightly and stick as the cookies cool.
If you’re worried, you can also add a tiny dab of melted chocolate on the back of each chip before pressing.
Cookies are too cakey or dry: Overbaking is usually the culprit here. These cookies should look just set but still soft in the center when you pull them out at the 8-minute mark—they’ll firm up as they cool. If your oven runs hot, reduce the temperature by 10°C or check them at 7 minutes instead.
Variations & Fun Twists
Want to switch up these Red Velvet Soft Cookies? Try swapping the red velvet cake mix for chocolate, funfetti, or even strawberry for totally different flavor vibes. You can also use dark chocolate chips instead of white chocolate for a richer, less-sweet finish, or go full Valentine’s mode with pink and white candy melts shaped into hearts.
For a gluten-free version, just grab a gluten-free red velvet cake mix—the rest of the recipe stays exactly the same. If you’re feeling extra fancy, drizzle melted white chocolate over the cooled cookies and add a few more sprinkles on top for bakery-level vibes.
You could even sandwich two cookies together with cream cheese frosting for little bear cookie sandwiches that are almost too cute to eat.
Serving, Storage & Reheating
Serve these Red Velvet Bear Cookies for Valentine’s Day at room temperature for the best texture—they’re soft, slightly chewy, and the white chocolate stays perfectly melty. They’re adorable on a pink platter for a Valentine’s party, tucked into cellophane bags as gifts, or packed in lunchboxes for a sweet surprise.
Store leftover cookies (if you actually have any, which I doubt) in an airtight container at room temperature for up to 5 days. They’ll stay soft and delicious as long as they’re sealed tight—just don’t leave them out on the counter uncovered or they’ll get stale.
If you want to freeze them, layer the cooled cookies between sheets of parchment paper in a freezer-safe container and freeze for up to 3 months. Thaw at room temperature for about 30 minutes before serving, and they’ll taste just as fresh as the day you baked them.
No-Waste Kitchen Magic
Got leftover cookies that are starting to get a little stale? Crumble them up and use the crumbs as a topping for vanilla ice cream or yogurt parfaits—the red velvet flavor is amazing with creamy bases. You can also blitz the cookies in a food processor and mix the crumbs into milkshakes or use them as a crust for mini cheesecake bites.
If you’ve got extra white chocolate chips, melt them down and drizzle over brownies, cupcakes, or even these caramel apple bars for an extra layer of sweetness. And those sprinkles? Save them in a sealed jar for your next baking project—they’re perfect on sugar cookies, cupcakes, or mixed into homemade creamsicle ice cream .
Red Velvet Bear Cookies for Valentine’s Day FAQs
Can I freeze the dough for Red Velvet Bear Cookies for Valentine’s Day?
Absolutely! Roll the dough into balls, coat them in sprinkles, and freeze them on a baking tray until solid. Transfer to a freezer bag and freeze for up to 3 months. Bake from frozen—just add an extra 1-2 minutes to the baking time.
What’s the best way to store Red Velvet Bear Cookies for Valentine’s Day?
Keep them in an airtight container at room temperature for up to 5 days. If you stack them, put parchment paper between layers so the sprinkles don’t stick together.
How do I know when these Bear Shaped Cookies are done baking?
They should look just set around the edges but still soft in the center after 8 minutes. Don’t wait for them to firm up in the oven—they’ll continue cooking as they cool on the tray.
Will these cookies work with a different flavor of cake mix?
Yes! Try chocolate, funfetti, strawberry, or even lemon cake mix for different flavor twists. The method stays exactly the same, and they’ll still turn out adorable and delicious.
What can I use instead of white chocolate chips for the bear faces?
You can use milk chocolate chips, dark chocolate chips, or even candy melts in any color. Mini chocolate chips work great too if you want smaller bear features.
How do I prevent the cookies from sticking to the baking tray?
Always line your trays with greaseproof paper or parchment paper—it’s foolproof and makes cleanup a breeze. Silicone baking mats work great too.
Cozy Closing
I’d love to see your spin on these Red Velvet Bear Cookies for Valentine’s Day! Drop a comment below with your photos or tag me on social—I’m always blown away by how creative you all get with these recipes.
Whether you’re making them for a classroom party, a Galentine’s brunch, or just because Tuesdays need more sprinkles, I hope these little bear cookies bring some extra sweetness to your February.
These Red Velvet Bear Cookies for Valentine’s Day are so versatile—swap the colors for different holidays, try different cake mix flavors, or go wild with fun toppings. I bet you’ve already got amazing variations in mind, and I can’t wait to hear about them!
If you loved these, you might also want to try my heart-shaped thumbprint cookies or these ridiculously easy Valentine’s Day s’mores for more festive treats.
I’m Claire Whitmore—a dessert daydreamer from Asheville, NC. For me, baking isn’t about perfect pastries—it’s about the joy of sharing something sweet (and maybe sneaking an extra cookie when no one’s looking).