Creamsicle Ice Cream
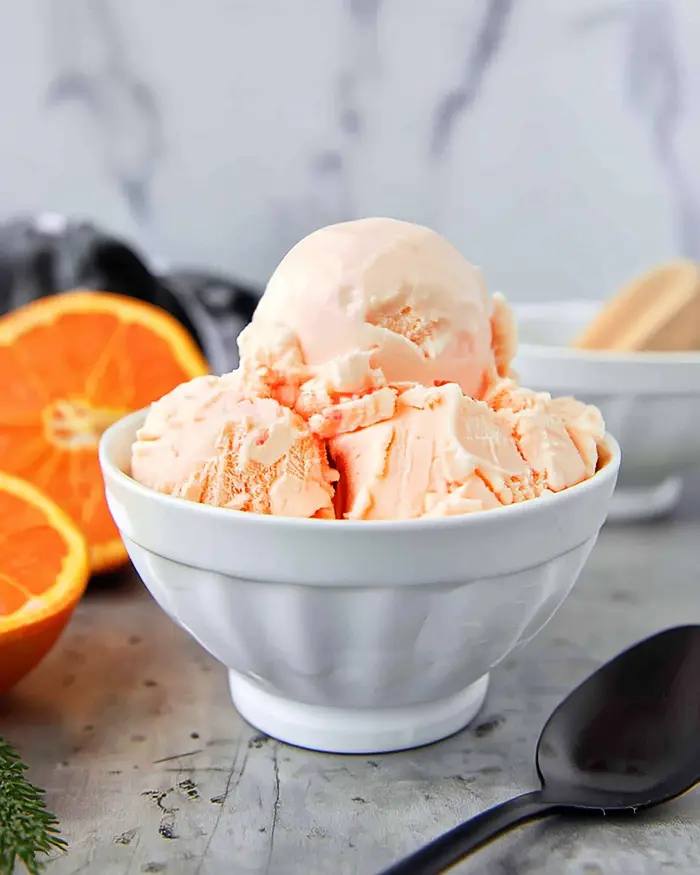
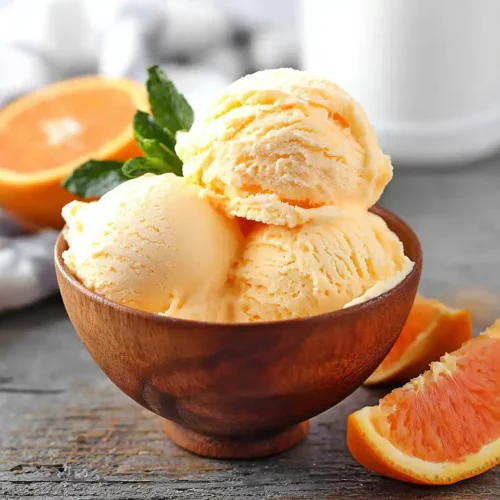
Orange Creamsicle Ice Cream brings back childhood summer memories with fresh-squeezed orange juice, vanilla cream, and zero eggs. Ready in 10 minutes of prep, this homemade orange ice cream is silky, tangy-sweet, and perfect for hot days when you need a frozen treat that tastes like sunshine.
Hey there, I’m Claire Whitmore — a dessert daydreamer in Asheville, NC, where ice cream totally counts as breakfast in July.
This Orange Creamsicle Ice Cream recipe is my love letter to those orange-and-vanilla popsicles we chased down as kids, except now it’s all grown up with fresh-squeezed orange juice, real vanilla extract, and a creamy base that doesn’t need any eggs.
It’s bright, nostalgic, and ridiculously simple to make with just seven ingredients and an ice cream maker.
Table of Contents
Little Snapshot: What This Recipe Delivers
This Orange Creamsicle Ice Cream delivers that classic dreamsicle flavor combo — bright orange citrus meets smooth vanilla cream — in a scoopable homemade ice cream that takes 10 minutes to prep and requires no eggs, no cooking, and no complicated steps.
Just fresh orange juice, heavy cream, and a handful of pantry staples churned into nostalgic frozen perfection.
Why You’ll Love This Recipe 🌸
- This Orange Creamsicle Ice Cream takes less time to prep than loading the dishwasher — seriously, it’s a 10-minute wonder.
- No eggs means no custard base, no tempering, and zero stress about scrambling anything (because we’ve all been there).
- Fresh-squeezed orange juice gives you that bright, real-fruit flavor that store-bought versions just can’t touch.
- According to King Arthur Baking’s expert guide to homemade ice cream success, the simplest recipes often yield the creamiest results — and this dreamsicle ice cream proves exactly why.
Quick Facts ⚡
Here’s the quick scoop on this Orange Creamsicle Ice Cream.
- CourseDessert
- Prep Time10 minutes
- Churn Time20-25 minutes
- Freeze Time4-6 hours
- Total Time5 hours (mostly hands-off)
- Servings16 scoops
- DifficultyEasy
Orange Creamsicle Ice Cream
Equipment
- Ice cream maker
- Large mixing bowl
- Whisk or spoon
- Citrus juicer
- Measuring cups and spoons
- Freezer-safe container
Ingredients
Ice Cream Base
- 2 cups Heavy whipping cream full fat
- 1.5 cups Whole milk full fat
- 1 cup Fresh-squeezed orange juice strained
- 1 cup Granulated sugar
- 1 tbsp Orange extract
- 2 tsp Vanilla extract pure
- Salt pinch
- Orange food coloring optional
Instructions
- Whisk together heavy cream, sugar, orange juice, milk, orange extract, vanilla, and salt until the sugar fully dissolves.
- Add a few drops of orange food coloring if desired and mix until evenly colored.
- Chill the mixture for 30 minutes if not already cold.
- Churn the mixture in an ice cream maker according to the manufacturer’s instructions until soft-serve consistency.
- Transfer to a freezer-safe container, press plastic wrap onto the surface, cover, and freeze until firm.
- Let sit briefly before scooping and serve.
Notes
Orange Creamsicle Ice Cream Nutritional Peek
Here’s what you’re getting in each dreamy scoop — because sometimes it helps to know, even when we’re totally indulging.
| Nutrient | Amount per Serving |
|---|---|
| Calories | 165 |
| Protein | 2g |
| Carbohydrates | 18g |
| Fat | 10g |
| Saturated Fat | 6g |
| Fiber | 0g |
| Sugar | 17g |
Based on 16 servings; actual nutrition may vary based on orange size and ingredient brands.
So glad you tried this one! The Delicious Desserts collection has even more recipes that are just as comforting and crowd-pleasing. Go ahead, take a look — your next favorite dish is right there.
Orange Creamsicle Ice Cream Ingredients
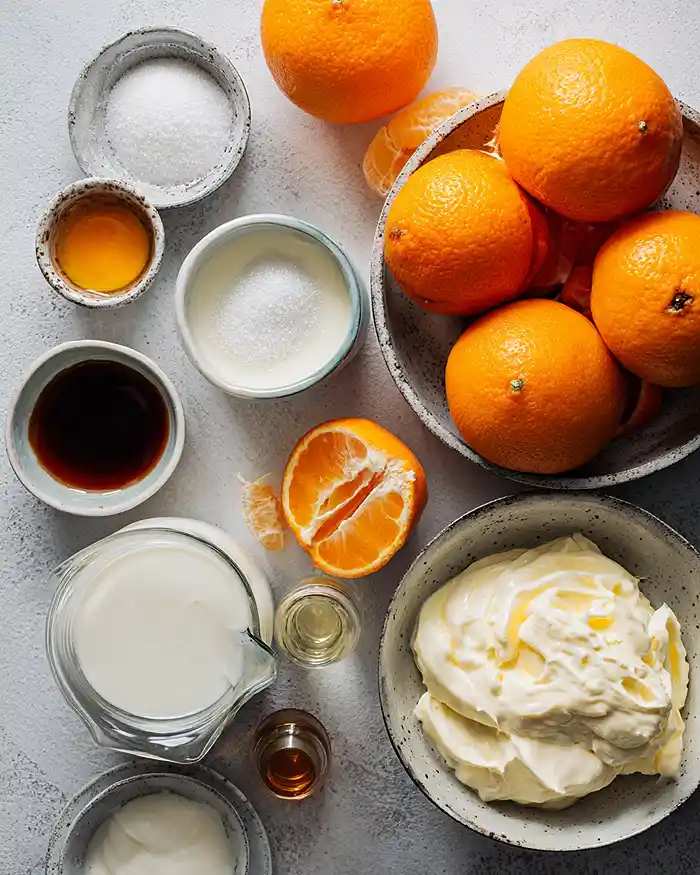
This dreamsicle ice cream comes together with just a handful of ingredients you probably already have in your fridge — no fancy extracts or hard-to-find additions required.
For the creamy base — heavy whipping cream and whole milk — you’ll want full-fat versions because they give you that silky, scoopable texture without ice crystals.
For the flavor duo — fresh orange juice, orange extract, and vanilla extract — the fresh-squeezed juice is non-negotiable here; it brings brightness that bottled juice just can’t match. The sugar dissolves right into the cold mixture, and a pinch of salt amplifies all those citrus and vanilla notes beautifully.
| Amount | Ingredient |
|---|---|
| 2 cups | Heavy whipping cream (yes, the real stuff — it’s what makes this creamy, not icy) |
| 1½ cups | Whole milk (full-fat is key here) |
| 1 cup | Fresh-squeezed orange juice (about 3 medium oranges — please don’t use bottled) |
| 1 cup | Granulated sugar |
| 1 tablespoon | Orange extract (this deepens the dreamsicle flavor) |
| 2 teaspoons | Vanilla extract (the real kind, not imitation) |
| Pinch | Salt (trust me on this — it makes everything taste brighter) |
| Optional | Orange food coloring (a few drops if you want that classic creamsicle look) |
Tools You’ll Actually Use
- Ice cream maker (this is the one tool you truly need — I use a 1.5 to 2-quart model)
- Large mixing bowl
- Whisk or wooden spoon
- Citrus juicer (or just your hands and a strainer)
- Measuring cups and spoons
- Freezer-safe container with lid (for storing your finished ice cream)
- Plastic wrap (to prevent freezer burn on top of the ice cream)
Step-by-Step Instructions
Making this Orange Creamsicle Ice Cream is honestly one of the easiest homemade ice cream projects you’ll ever tackle — no cooking, no waiting for custard to cool, just mix and churn.
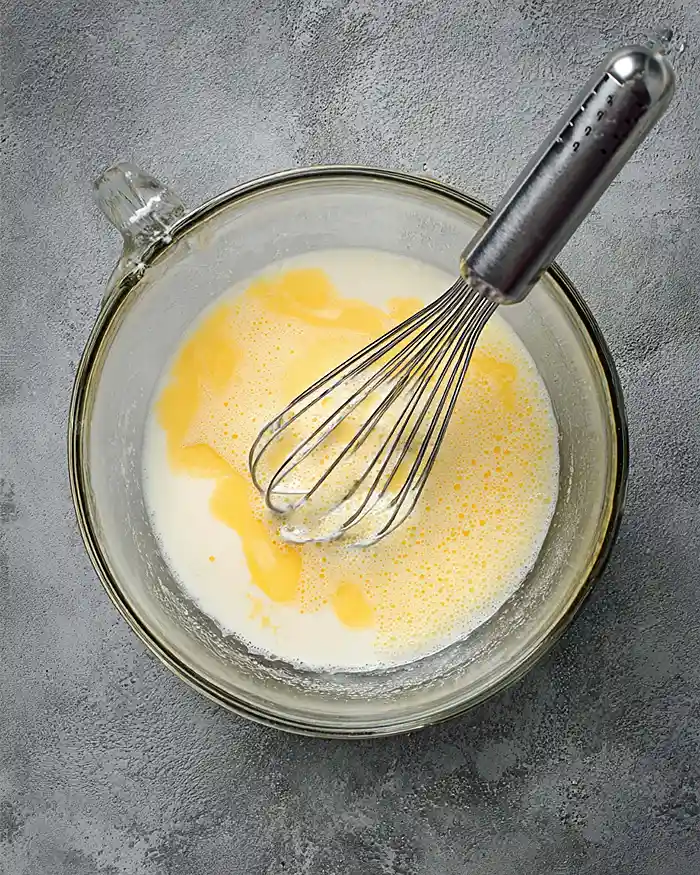
Step 1: Mix your base In a large mixing bowl, whisk together the 2 cups heavy whipping cream, 1 cup granulated sugar, 1 cup fresh-squeezed orange juice (strained of any pulp or seeds), 1½ cups whole milk, 1 tablespoon orange extract, and 2 teaspoons vanilla extract until the sugar dissolves completely.
This takes about 2 minutes of whisking — you’ll know it’s ready when you can’t feel any graininess on your whisk. Add a pinch of salt and stir it in to brighten all those flavors.
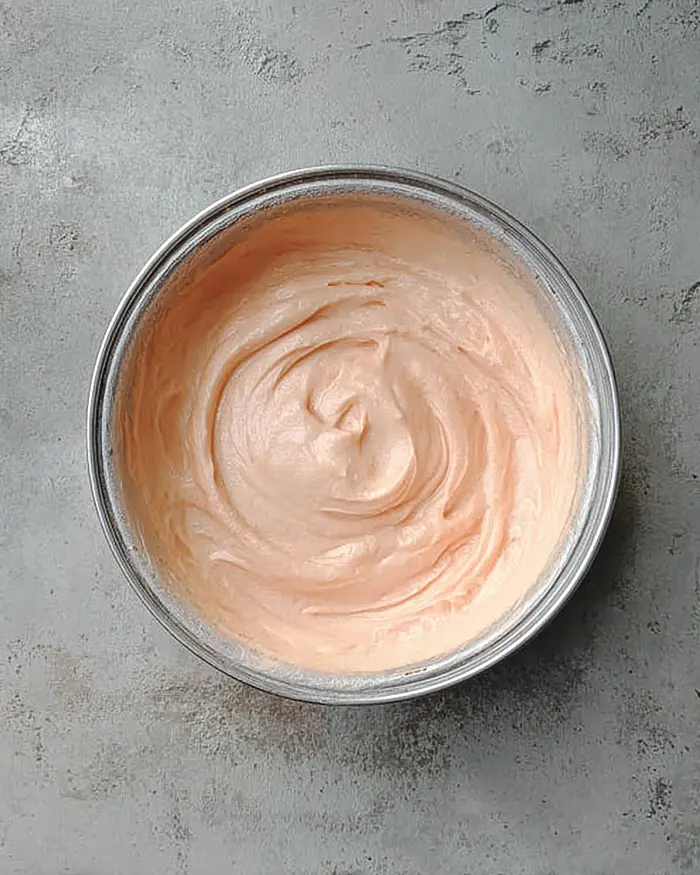
Step 2: Add color if you want If you’re going for that nostalgic orange creamsicle look, add 2-3 drops of orange food coloring and whisk it in until evenly distributed. I usually skip this because the natural pale orange color is pretty, but my kids love when it’s bright and fun.
Step 3: Chill if needed If your mixture isn’t already cold (like, straight-from-the-fridge cold), pop the whole bowl in the refrigerator for 30 minutes. Your ice cream maker works best with a cold mixture — it churns faster and creates smaller ice crystals, which means creamier ice cream.
Step 4: Churn it Pour everything into your ice cream maker and process according to your manufacturer’s instructions. For most machines, this takes about 20-25 minutes.
You’re looking for a soft-serve consistency — it should look thick, creamy, and hold soft peaks when you lift the paddle. The mixture will smell like summer in a bowl, all bright citrus and sweet vanilla.
Step 5: Freeze to firm up Transfer your churned ice cream to a freezer-safe container, press a piece of plastic wrap directly onto the surface (this prevents ice crystals from forming), and pop the lid on.
Freeze for 4-6 hours, or overnight if you can wait that long. This firming-up time is what takes it from soft-serve to scoopable perfection.
Step 6: Serve and enjoy Let the ice cream sit on the counter for 3-5 minutes before scooping — this makes it much easier to serve and gives you those perfect, creamy scoops. Pile it into bowls or cones, and watch everyone’s faces light up with that first nostalgic bite.
Claire’s Pro Tips & Gentle Guidance
After making batch after batch of this homemade orange ice cream all summer long, I’ve picked up a few tricks that make the whole process even smoother.
Juice those oranges yourself. I know it’s tempting to grab the bottled stuff, but fresh-squeezed orange juice has this bright, almost floral quality that makes this ice cream taste alive. Bottled juice tastes flat and processed in comparison — trust me, I’ve tried both, and there’s no contest.
Don’t skip the orange extract. Fresh juice alone can taste a bit one-dimensional once it’s frozen. The orange extract deepens that citrus flavor and gives you that classic creamsicle punch. You can find it in the baking aisle next to the vanilla extract.
Chill your ice cream base thoroughly. I learned this the hard way after an impatient attempt with room-temperature ingredients. A cold base churns faster, which means less time for ice crystals to form and a silkier final texture. If you’re in a rush, stick your mixing bowl in the freezer for 15 minutes while you prep.
Strain your orange juice well. Pulp is wonderful in a glass of OJ, but it can create little icy chunks in your ice cream. Pour your fresh juice through a fine-mesh strainer to catch seeds and pulp bits — it takes 30 seconds and makes a big difference.
Press plastic wrap directly on the surface before freezing. This is a professional trick I picked up from Serious Eats‘ comprehensive ice cream guide — it prevents that weird freezer-burn layer from forming on top. Just tear off a piece of plastic wrap, lay it right on the ice cream, and smooth it down gently before adding the lid.
Quick Fixes for Orange Creamsicle Ice Cream
Even simple recipes can throw you a curveball sometimes, so here’s how to troubleshoot the most common hiccups.
Ice cream turned out icy instead of creamy. This usually means your base wasn’t cold enough when you started churning, or your ice cream maker’s bowl wasn’t fully frozen.
Next time, freeze your ice cream maker bowl for at least 24 hours and chill your base completely before churning. You can also add an extra ¼ cup of heavy cream for more fat content, which helps prevent ice crystals.
It’s too soft even after freezing overnight. Check your freezer temperature — it should be at 0°F or below. Also, make sure you churned long enough to reach soft-serve consistency before transferring. If it’s still too soft, try adding 1-2 tablespoons of vodka or corn syrup to your next batch — both lower the freezing point slightly and keep things scoopable.
The orange flavor tastes weak. You might need more orange extract (try 1½ tablespoons instead of 1 tablespoon) or your oranges weren’t very flavorful. Valencia or Cara Cara oranges give you the best flavor, especially in winter months. You can also add 1 teaspoon of finely grated orange zest to the mixture before churning for extra punch.
It separated or looks curdled. This can happen if your orange juice is too acidic and curdles the dairy. Next time, add the orange juice more slowly while whisking constantly, or reduce the juice to ¾ cup and add ¼ cup of water to dilute the acidity slightly.
Variations & Fun Twists
Once you’ve mastered the classic version of this dreamsicle ice cream, there are so many fun ways to make it your own.
Swirl in some raspberry sauce right at the end of churning for an orange-raspberry creamsicle that’s even prettier than the original. Just drizzle ¼ cup of raspberry puree into the churned ice cream and gently fold it through with a spatula — don’t overmix or it’ll turn pink instead of staying swirled.
Make it blood orange creamsicle when blood oranges are in season (usually January through March). The flavor is a bit more complex — slightly berry-ish — and the natural pink-red color is stunning. Use the same amount of juice but expect a deeper, almost cranberry-like hue.
Go full adult-mode by adding 2 tablespoons of Cointreau or Grand Marnier in place of some of the orange extract. The alcohol keeps the ice cream a bit softer and adds a sophisticated edge that’s perfect for dinner parties.
Add white chocolate chunks in the last 2 minutes of churning for a richer, candy-bar vibe. Chop up 4 ounces of white chocolate into small pieces and let the paddle fold them in — they’ll create these delicious creamy pockets throughout.
Make push-pops for kids by spooning the soft churned ice cream into push-pop molds before the final freeze. They’re easier for little hands to manage and feel extra special for summer parties.
Serving, Storage & Reheating
This Orange Creamsicle Ice Cream is best served in generous scoops on a hot afternoon, ideally with someone you love and nowhere important to be.
Store your ice cream in an airtight, freezer-safe container with that plastic wrap pressed directly on the surface. It’ll keep beautifully for up to 2 weeks in the freezer, though I’ve never had a batch last that long. The flavor is actually best within the first week — after that, it’s still delicious but loses a bit of that bright citrus punch.
Let it sit on the counter for 3-5 minutes before scooping — this is key for getting those perfect, Instagram-worthy scoops instead of breaking your wrist with the ice cream scoop. If it’s been in the freezer for more than a week and has gotten rock-hard, let it soften for 8-10 minutes before serving.
No-Waste Kitchen Magic
Got leftover orange peels from all that juicing? Don’t toss them — they’re pure gold for your kitchen.
Candy those peels by simmering them in a simple syrup (equal parts sugar and water) for 20 minutes, then tossing them in sugar and letting them dry. Chop them up and fold into your next batch of ice cream, or use them as a gorgeous garnish.
Make orange-infused sugar by burying strips of orange zest in your sugar bowl for a week. The sugar takes on this gorgeous citrus perfume that’s perfect for rimming cocktail glasses or sprinkling on pastries.
Freeze your extra orange juice in ice cube trays if you juiced too many oranges. Pop a cube or two into smoothies, cocktails, or your next batch of ice cream — they’ll keep for up to 3 months in a freezer bag.
Turn softened ice cream into milkshakes if you somehow have leftovers that have gotten a bit melty or freezer-burned. Blend it with a splash of milk and you’ve got the most incredible orange cream shake.
Orange Creamsicle Ice Cream FAQs
Can I freeze this Orange Creamsicle Ice Cream in a container without an ice cream maker?
You can, but the texture won’t be as smooth and creamy. Pour your mixture into a shallow metal pan and freeze for 45 minutes, then use a fork to break up ice crystals and stir vigorously. Repeat this every 30 minutes for 3-4 hours until it’s frozen but scoopable — it’s more work, but it gets you close to churned ice cream.
How do I know when my Orange Creamsicle Ice Cream is done churning?
It should look like thick soft-serve and hold soft peaks when you lift the paddle — it’ll still be pretty soft at this stage, which is perfect. Most ice cream makers take 20-25 minutes to reach this point. Don’t over-churn or it can start to get grainy.
Can I make this dreamsicle ice cream dairy-free?
You can try using full-fat coconut cream in place of heavy cream and your favorite non-dairy milk, but the texture will be slightly different — more icy and less creamy. Add 2 tablespoons of vodka to help keep it scoopable, and expect it to freeze harder than the dairy version.
Is it okay to double this recipe?
Yes, but you’ll need to churn it in batches unless you have a large-capacity ice cream maker. The mixture keeps well in the fridge for up to 24 hours, so you can mix once and churn in two separate batches. Don’t overfill your ice cream maker bowl — it needs room to expand and incorporate air.
Cozy Closing
I hope this Orange Creamsicle Ice Cream becomes your go-to summer treat — the one you make when the kids are restless, when you need something cold and nostalgic, or when you just want to feel like a kid again for a few minutes.
I’d love to see your spin on this Orange Creamsicle Ice Cream! Drop a comment below with your photos or tell me how you made it your own — did you swirl in berries, add chocolate chips, or keep it classic? This Orange Creamsicle Ice Cream is so versatile, and I bet you’ve already got amazing variations in mind.
Maybe next time try pairing it with something savory like my easy weeknight dinner recipes for the perfect summer meal ending.
I’m Claire Whitmore — a dessert daydreamer from Asheville, NC. For me, making ice cream isn’t about fancy equipment or perfect swirls — it’s about recreating those childhood flavors that make you close your eyes and smile. (And maybe sneaking an extra scoop straight from the container at midnight.)