Salted Caramel Apple Bars
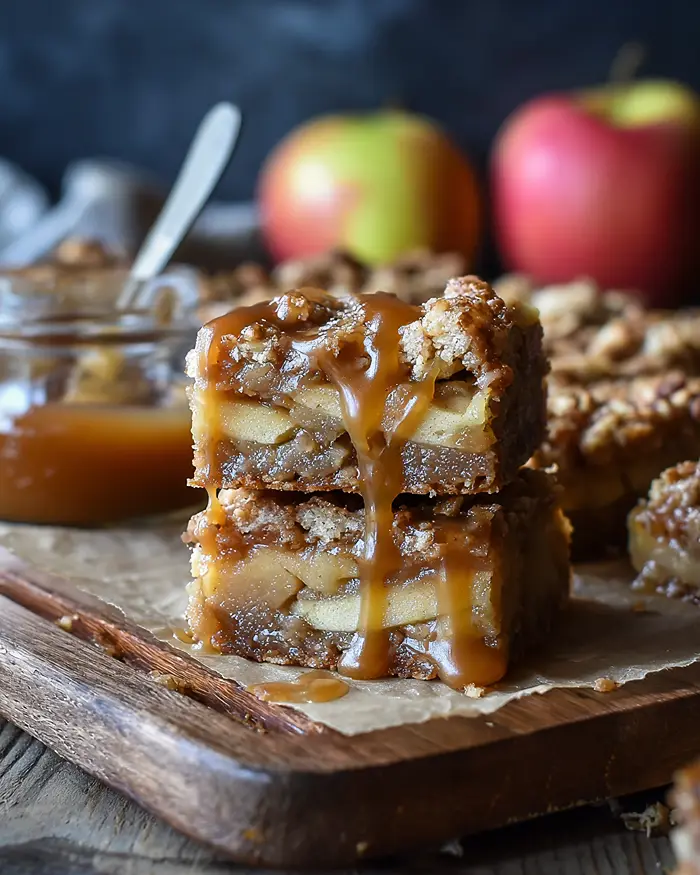
I’m Linda Sandra — a Charleston home chef who believes every dessert should feel like a warm hug, and these Salted Caramel Apple Bars are basically autumn wrapped in buttery shortbread. They’re what happens when apple pie meets cookie bars and gets drizzled with salted caramel magic.
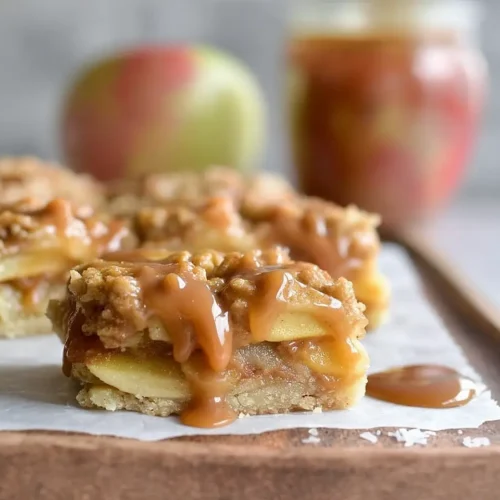
This apple pie bars recipe packs all the cozy spiced-apple goodness you crave without the pie-crust drama. We’re talking tender cinnamon apples nestled between a buttery shortbread base and a crumbly oat topping, then finished with ribbons of salted caramel that make everything better.
I started making these caramel apple bars when my kids wanted “apple pie but faster,” and honestly? They’ve become my go-to for potlucks, fall gatherings, and those random Tuesday nights when only something sweet and apple-y will do.
Table of Contents
Little Snapshot: What This Recipe Delivers
These Salted Caramel Apple Bars combine a buttery shortbread crust, cinnamon-spiced apple filling with caramel sauce, and a crumbly brown sugar oat topping — all baked in an 8×8 pan in under an hour.
You get all the flavors of salted caramel apple pie in portable, slice-and-serve bars that are easier to make and way less fussy than traditional pie.
Why You’ll Love This Recipe 🌸
- These Salted Caramel Apple Bars deliver all the apple pie vibes without rolling a single piece of dough — press, layer, bake, done.
- The sweet-salty caramel situation is absolutely perfect, especially if you add that extra drizzle at the end (which you absolutely should).
- They’re fancy enough for Thanksgiving but easy enough for a random Wednesday when you need something cozy.
- According to King Arthur Baking’s guide to why dessert bars work so well, bars offer better texture contrast than cookies — and these salted caramel apple pie bars prove exactly why.
Quick Facts ⚡
Here’s the quick scoop on these Salted Caramel Apple Bars.
- CourseDessert
- Prep Time20 minutes
- Cook Time52 minutes
- Total Time1 hour 12 minutes
- Servings16 bars
- DifficultyEasy
Salted Caramel Apple Bars
Equipment
- 8×8-inch square baking pan
- Parchment paper
- Mixing bowls
- Fork or pastry cutter
- Apple peeler and knife
- Measuring cups and spoons
- cooling rack
Ingredients
Shortbread Crust
- ½ cup salted butter room temperature
- 1 ¼ cups all-purpose flour
- 2 tablespoons brown sugar
- ¼ teaspoon salt
Salted Caramel Apple Filling
- 4 cups apples peeled and thinly sliced (4-5 medium apples)
- ¼ cup caramel sauce from jar
- ¼ teaspoon salt
- ½ teaspoon ground cinnamon
- 2 tablespoons brown sugar
- ¼ cup all-purpose flour
Crumble Topping
- 6 tablespoons salted butter room temperature
- ¾ cup brown sugar
- ½ cup all-purpose flour
- ½ cup old-fashioned oatmeal
- ¼ teaspoon ground cinnamon
For Finishing
- 2-3 tablespoons additional caramel sauce for drizzling
- 1 pinch flaky sea salt optional but amazing
Instructions
- Preheat your oven to 350°F and line an 8×8-inch square pan with parchment paper, leaving some overhang on the sides so you can lift the bars out later. This makes cutting them so much easier.
- In a medium mixing bowl, combine the 1/2 cup room-temperature salted butter, 1 1/4 cups flour, 2 tablespoons brown sugar, and 1/4 teaspoon salt. Use your hands or a fork to work everything together until it forms a crumbly mixture, then press it firmly and evenly into the bottom of your prepared pan. Bake this crust layer for 12 minutes until it’s just barely starting to turn golden at the edges.
- While the crust is baking, core, peel, and thinly slice 4-5 medium apples — whatever it takes to get 4 cups of sliced apples. I like a mix of Granny Smith and Honeycrisp for the perfect sweet-tart balance, but use what you’ve got.
- In a small bowl, whisk together 1/4 cup caramel sauce, 1/4 teaspoon salt, 1/2 teaspoon cinnamon, 2 tablespoons brown sugar, and 1/4 cup flour until smooth. Pour this gorgeous caramel mixture over your sliced apples and gently stir with a spatula until every apple slice is coated in that sweet, spiced caramel goodness.
- Once your crust comes out of the oven, spoon the caramel-coated apples evenly over the warm crust. Use your hands to gently press the apple slices down into a nice, even layer — you want them snug and cozy, not piled up in the middle.
- In a medium bowl, use a fork to combine 6 tablespoons room-temperature salted butter, 3/4 cup brown sugar, 1/2 cup flour, 1/2 cup oatmeal, and 1/4 teaspoon cinnamon. Work it together until you get those perfect crumbly bits — some small, some larger. This is what creates that irresistible crispy topping.
- Sprinkle your crumble topping evenly over the apple layer, then use your fingers to gently press it down so it sticks. Slide the pan back into your 350°F oven and bake for 35-40 minutes, or until the apples are tender when you poke them with a knife and your kitchen smells like heaven opened a bakery.
- Let the bars cool completely in the pan — I know it’s hard to wait, but cutting them warm leads to apple-y chaos. Once cool, drizzle with additional caramel sauce and sprinkle with a pinch of flaky sea salt if you’re feeling fancy (do it, trust me). Lift the whole thing out using the parchment overhang, cut into 16 squares, and try not to eat four immediately.
Notes
Salted Caramel Apple Bars Nutritional Peek
Here’s what you’re getting per bar (because knowing never hurts, and these are totally worth it):
| Nutrient | Amount per Serving |
|---|---|
| Calories | 195 kcal |
| Protein | 2g |
| Carbohydrates | 28g |
| Fat | 9g |
| Fiber | 2g |
| Sugar | 16g |
Salted Caramel Apple Bars Ingredients
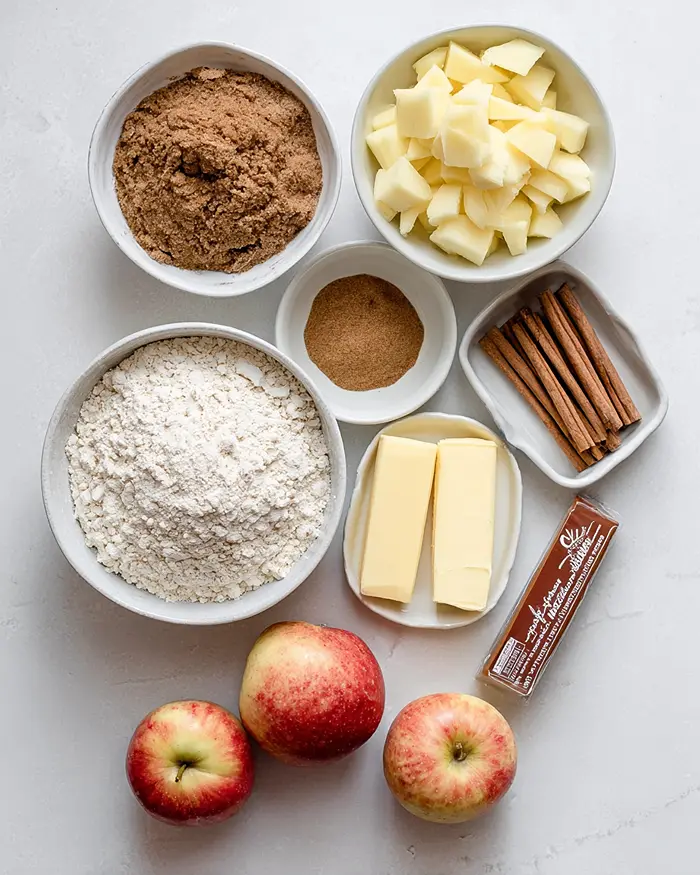
Let’s talk about what makes these Apple Pie Bars so incredibly good. For your shortbread base — salted butter, all-purpose flour, brown sugar, and a pinch of salt — you’ll want that butter at room temperature so it presses smoothly into the pan.
The apple filling layer is where the magic happens with caramel sauce (grab your favorite jarred kind), ground cinnamon, brown sugar, and just a touch of flour to thicken things up.
For your crumbly oat topping — more butter, brown sugar, flour, old-fashioned oatmeal, and cinnamon — this creates that irresistible crispy-sweet cap that makes bar desserts so addictive.
| Amount | Ingredient |
|---|---|
| Shortbread Crust | |
| 1/2 cup | salted butter, room temperature |
| 1 1/4 cups | all-purpose flour |
| 2 tablespoons | brown sugar |
| 1/4 teaspoon | salt |
| Salted Caramel Apple Filling | |
| 4 cups | peeled and thinly sliced apples (4-5 medium apples) |
| 1/4 cup | caramel sauce from jar |
| 1/4 teaspoon | salt |
| 1/2 teaspoon | ground cinnamon |
| 2 tablespoons | brown sugar |
| 1/4 cup | all-purpose flour |
| Crumble Topping | |
| 6 tablespoons | salted butter, room temperature |
| 3/4 cup | brown sugar |
| 1/2 cup | all-purpose flour |
| 1/2 cup | old-fashioned oatmeal |
| 1/4 teaspoon | ground cinnamon |
| For Finishing | |
| 2-3 tablespoons | additional caramel sauce for drizzling |
| pinch | flaky sea salt (optional but amazing) |
Tools You’ll Actually Use
- 8×8-inch square baking pan
- Parchment paper
- Mixing bowls (small, medium, and large)
- Fork or pastry cutter
- Apple peeler and knife
- Measuring cups and spoons
- Cooling rack
Step-by-Step Instructions
Making these Salted Caramel Apple Bars is honestly so straightforward you’ll wonder why you ever bothered with pie. Let’s break it down layer by delicious layer.
Step 1: Prep your pan and preheat
Preheat your oven to 350°F and line an 8×8-inch square pan with parchment paper, leaving some overhang on the sides so you can lift the bars out later. This makes cutting them so much easier.
Step 2: Make the shortbread crust
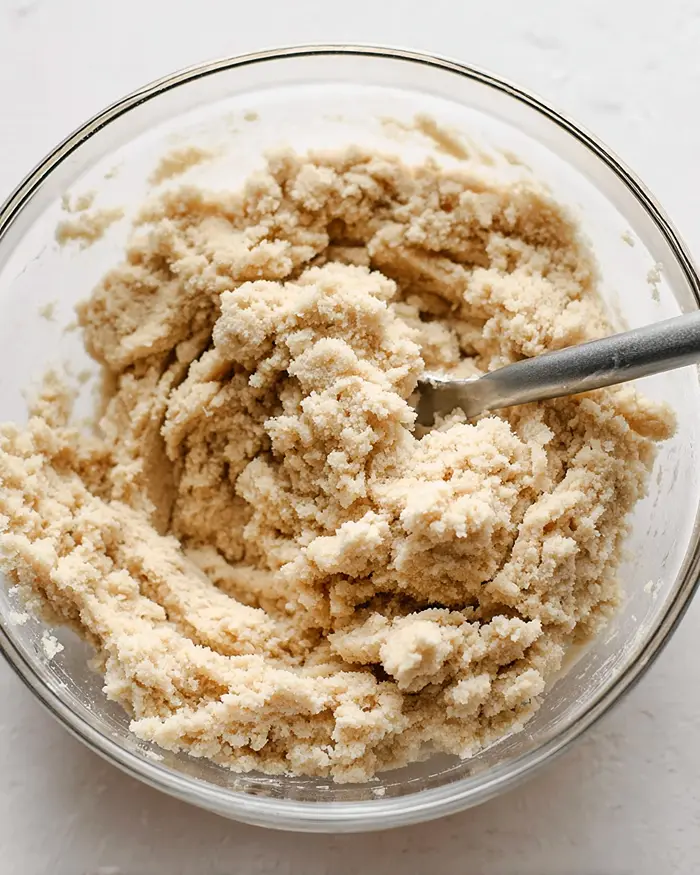
In a medium mixing bowl, combine the 1/2 cup room-temperature salted butter, 1 1/4 cups flour, 2 tablespoons brown sugar, and 1/4 teaspoon salt.
Use your hands or a fork to work everything together until it forms a crumbly mixture, then press it firmly and evenly into the bottom of your prepared pan. Bake this crust layer for 12 minutes until it’s just barely starting to turn golden at the edges.
Step 3: Slice those apples
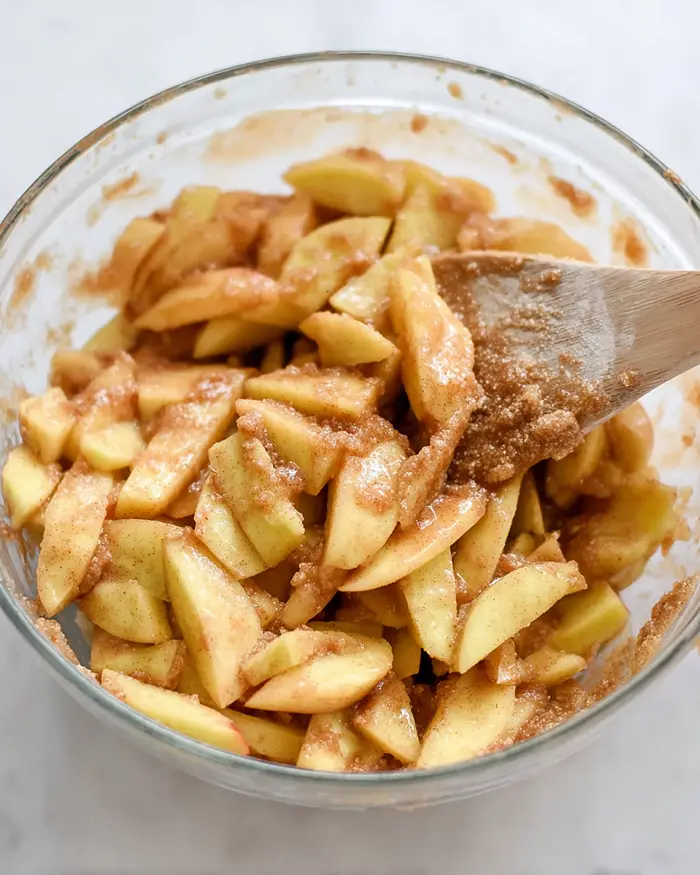
While the crust is baking, core, peel, and thinly slice 4-5 medium apples — whatever it takes to get 4 cups of sliced apples. I like a mix of Granny Smith and Honeycrisp for the perfect sweet-tart balance, but use what you’ve got.
Step 4: Create the caramel apple filling
In a small bowl, whisk together 1/4 cup caramel sauce, 1/4 teaspoon salt, 1/2 teaspoon cinnamon, 2 tablespoons brown sugar, and 1/4 cup flour until smooth. Pour this gorgeous caramel mixture over your sliced apples and gently stir with a spatula until every apple slice is coated in that sweet, spiced caramel goodness.
Step 5: Layer the apples
Once your crust comes out of the oven, spoon the caramel-coated apples evenly over the warm crust. Use your hands to gently press the apple slices down into a nice, even layer — you want them snug and cozy, not piled up in the middle.
Step 6: Make the crumble topping
In a medium bowl, use a fork to combine 6 tablespoons room-temperature salted butter, 3/4 cup brown sugar, 1/2 cup flour, 1/2 cup oatmeal, and 1/4 teaspoon cinnamon. Work it together until you get those perfect crumbly bits — some small, some larger. This is what creates that irresistible crispy topping.
Step 7: Top and bake
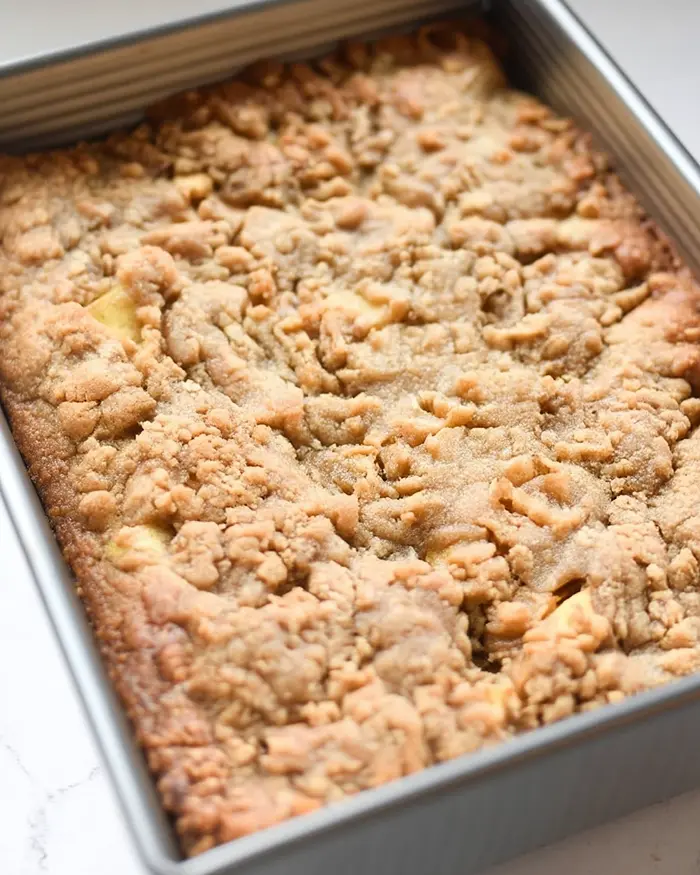
Sprinkle your crumble topping evenly over the apple layer, then use your fingers to gently press it down so it sticks. Slide the pan back into your 350°F oven and bake for 35-40 minutes, or until the apples are tender when you poke them with a knife and your kitchen smells like heaven opened a bakery.
Step 8: Cool and finish
Let the bars cool completely in the pan — I know it’s hard to wait, but cutting them warm leads to apple-y chaos. Once cool, drizzle with additional caramel sauce and sprinkle with a pinch of flaky sea salt if you’re feeling fancy (do it, trust me).
Lift the whole thing out using the parchment overhang, cut into 16 squares, and try not to eat four immediately.
Pro Tips & Gentle Guidance
Want to make these Caramel Apple Bars even better? Here’s what I’ve learned after making them approximately a million times.
Use firm, tart apples like Granny Smith, Honeycrisp, or Braeburn — they hold their shape during baking and won’t turn into applesauce. Softer apples like Red Delicious get mushy and release too much liquid.
Slice your apples thin and uniform, about 1/4-inch thick. This helps them cook evenly and creates those perfect tender layers. If your slices are too thick, the apples won’t soften completely in the baking time.
Don’t skip the parchment paper overhang. Seriously, it’s the difference between perfectly cut bars and a sticky mess that refuses to leave the pan. Let those edges hang over like little handles.
If you’re into that sweet-salty situation (and honestly, who isn’t?), finish these with a good flaky sea salt. It takes them from “really good” to “I need the recipe immediately.”
For more ideas on balancing sweet and salty flavors in baked goods, Sally’s Baking Addiction has expert guidance on achieving professional results that I reference all the time.
Quick Fixes for Salted Caramel Apple Bars
Problem: The crust is too crumbly and won’t hold together
Make sure your butter is truly at room temperature — not melted, not cold. If the mixture seems dry, add an extra tablespoon of softened butter and work it in with your hands until it holds together when pressed.
Problem: The bars are too soggy in the middle
You probably used apples that were too juicy or didn’t slice them thin enough. Next time, choose firmer apple varieties and make sure your slices are uniformly thin (about 1/4 inch). Also check that you baked them long enough — the apples should be completely tender.
Problem: The topping burned before the apples cooked through
Your oven might run hot, or the pan was on a rack that’s too close to the heating element. Try lowering the temperature to 325°F and baking a bit longer, or tent the pan loosely with foil during the last 15 minutes to protect the topping while the apples finish cooking.
Problem: The bars are falling apart when I cut them
You cut them too soon! These need to cool completely — like, actually room temperature — before cutting. The caramel and apples need time to set up, otherwise everything slides around. Pop them in the fridge for 30 minutes if you’re impatient.
Variations & Adaptations
These Apple Pie Bars are super flexible if you need to swap things around. Here are some twists that work beautifully.
Gluten-free: Use a 1-to-1 gluten-free flour blend in place of the all-purpose flour in all three layers. Make sure your oats are certified gluten-free too. The texture stays pretty much perfect.
Dairy-free: Swap the butter for vegan butter or coconut oil (solid, not melted) in all the layers. Just make sure it’s at room temperature so the textures work out right.
Pear caramel bars: Replace the apples with firm pears like Bosc or Anjou. Add a pinch of cardamom to the filling for something a little different and totally delicious.
Maple pecan version: Skip the caramel sauce and use pure maple syrup instead. Add 1/2 cup chopped pecans to the crumble topping. It’s like fall in bar form.
Berry apple twist: Use 2 cups apples and 2 cups fresh or frozen cranberries or raspberries. You might want to increase the brown sugar in the filling by a tablespoon since berries add tartness.
Serving, Storage & Reheating
These Salted Caramel Apple Bars are ridiculously good served slightly warm with a scoop of vanilla ice cream melting all over them. They’re also amazing at room temperature with your afternoon coffee, or straight from the fridge when you’re eating dessert for breakfast (no judgment here).
Store leftover bars in an airtight container at room temperature for up to 2 days, or in the refrigerator for up to 5 days. I actually prefer them cold from the fridge because the caramel gets a little chewier and the flavors meld together even more.
To reheat, warm individual bars in the microwave for 15-20 seconds, or place them on a baking sheet in a 300°F oven for 8-10 minutes until just warmed through. Don’t overheat or the caramel will get runny and the topping will lose its crunch.
No-Waste Kitchen Magic
Got leftover bars that are getting a little tired? Cut them into small cubes and layer them in parfait glasses with vanilla yogurt and granola for an amazing breakfast situation.
Day-old bars (if they last that long) make incredible ice cream sundae toppers — just crumble them up and sprinkle over vanilla or cinnamon ice cream with extra caramel sauce.
You can also pulse older bars in a food processor to make a streusel-like topping for muffins, quick breads, or even my French toast casserole recipe . Waste not, want not!
If this recipe made your day, you’re in for a treat. The full Cookies & Brownies guide is filled with tried-and-true favorites that real home cooks swear by. Trust me, you won’t be able to pick just one.
Salted Caramel Apple Bars FAQs
Can I freeze Salted Caramel Apple Bars?
Absolutely! Cut them into squares, wrap individually in plastic wrap, then store in a freezer-safe container for up to 3 months. Thaw overnight in the fridge or at room temperature for a couple hours before serving.
What’s the best way to store Salted Caramel Apple Bars?
Store them in an airtight container in the refrigerator for up to 5 days. They actually get better after a day as the flavors meld together, and I love them cold straight from the fridge.
What type of apples work best for Caramel Apple Bars?
Firm, tart apples like Granny Smith, Honeycrisp, Braeburn, or a mix work best. They hold their shape during baking and provide a nice contrast to the sweet caramel. Avoid softer apples like Red Delicious or McIntosh — they’ll turn mushy.
Will the bars hold up for a potluck or party?
Yes! They’re actually perfect for transporting. Just make sure they’re completely cool before cutting, and consider drizzling the extra caramel right before serving so it looks fresh and pretty.
Closing
So there you go — Salted Caramel Apple Bars that taste like you spent all day in the kitchen but actually took about an hour. They’re cozy, they’re delicious, and they make your house smell like a fall festival opened up in your oven.
I’d love to see your spin on these Salted Caramel Apple Bars! Drop a comment below with your photos or tell me what variations you tried — maybe you went with pears, or added pecans, or discovered some genius flavor combo I haven’t thought of yet. These bars are so versatile; I bet you’ve got amazing ideas already.
If you loved these, you’ll probably also love my banana oatmeal bars (perfect for breakfast), churro cheesecake (another easy bar dessert that looks fancy), or even my standing rib roast if you’re planning a holiday feast to go with these bars.
I’m Linda Sandra — a Charleston home chef and comfort-food daydreamer. Around here, cooking’s not about perfection — it’s about cozy vibes, creative twists, and food that feels like love.