Homemade Orange Candy Recipe
This Homemade Orange Candy Recipe brings back sweet memories with fresh orange juice, simple ingredients, and easy steps. Perfect for holidays, gifting, or whenever you need a citrusy treat!
Hey there, I’m Claire Whitmore — a dessert daydreamer from Asheville, NC, where “just one more bite” is basically my life motto. This Homemade Orange Candy Recipe is everything I love about old-fashioned sweets: bright citrus flavor, soft-chewy texture, and that nostalgic charm that makes you feel like you’re raiding Grandma’s candy dish.
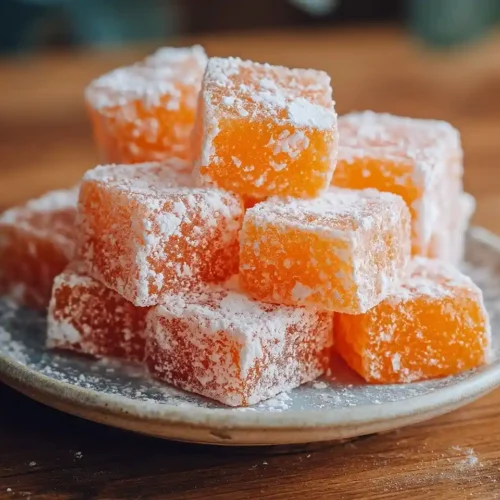
It’s made with fresh orange juice and zest, granulated sugar, and a touch of gelatin for that perfect melt-in-your-mouth consistency. Plus, it’s easier than you’d think — no candy thermometer drama, no fussy techniques, just straightforward steps that deliver gorgeous, glittering candy squares dusted with powdered sugar.
I first made these during a particularly cozy December when my daughter requested “something orange and sparkly” for her school’s holiday party. I wanted something homemade that wouldn’t require an engineering degree to pull off. These little gems were the answer — bursting with real orange flavor, naturally sweet, and endlessly giftable.
What This Recipe Delivers
This Homemade Orange Candy Recipe creates soft, chewy citrus candies using fresh oranges, sugar, gelatin, and butter in about 30 minutes of active prep time.
After setting in the fridge for 4-6 hours, you’ll have beautifully translucent candy squares with intense orange flavor — perfect for holiday gifting, party favors, or keeping stashed in your pantry for when you need a sweet pick-me-up.
Why You’ll Love This Recipe 🌸
- This Homemade Orange Candy Recipe uses real fresh oranges, so you’re getting genuine citrus flavor — not artificial extracts that taste like cleaning products.
- It’s ridiculously giftable — wrap these beauties in cellophane bags, tie them with a ribbon, and suddenly you’re the Martha Stewart of your friend group.
- No candy thermometer needed, which means one less thing to stress about (and one less gadget taking up drawer space).
- According to King Arthur Baking in their guide to homemade candy gifts, citrus-flavored candies are among the most popular homemade treats during the holidays — and this recipe proves exactly why.
Quick Facts ⚡
Here’s the quick scoop on this Homemade Orange Candy Recipe.
- Course: Dessert / Candy
- Prep Time: 15 minutes
- Cook Time: 20 minutes
- Setting Time: 5-8 hours
- Total Time: 6-9 hours
- Servings: About 36-48 pieces
- Difficulty: Easy
Table of Contents
Homemade Orange Candy
Equipment
- Medium saucepan
- Fine mesh strainer or zester
- Citrus juicer or reamer
- Small mixing bowl
- Wooden spoon or silicone spatula
- 8×8-inch baking dish or silicone candy molds
- Sharp knife
- Parchment paper or plastic wrap
Ingredients
Main
- 2 large Fresh oranges for juice and zest
- 2 cups Granulated sugar
- ¼ cup Corn syrup
- ½ cup Water
- 1 tablespoon Butter
- 1 packet Unflavored gelatin
- 1 teaspoon Orange extract optional
- Powdered sugar for dusting
- 1 pinch Salt optional
Instructions
- Zest and juice the oranges, setting aside both zest and strained juice.
- Combine juice, water, sugar, and corn syrup in a saucepan and heat until dissolved, then simmer.
- Simmer for about 10 minutes until slightly thickened and aromatic.
- Bloom gelatin in cold water, then stir it into the simmering syrup until dissolved.
- Add butter, zest, extract (optional), and salt, cooking 5 more minutes.
- Let mixture cool for 1–2 hours, stirring occasionally.
- Pour into a greased dish or molds and let set, then refrigerate 4–6 hours.
- Cut into squares and dust with powdered sugar.
Notes
Nutritional Peek
Here’s what you’re getting in each sweet little square (approximate values per piece, based on 48 servings):
| Nutrient | Amount per Serving |
|---|---|
| Calories | 45 kcal |
| Protein | 0.3 g |
| Carbohydrates | 11 g |
| Total Fat | 0.3 g |
| Fiber | 0.1 g |
| Sugar | 10 g |
Ingredients
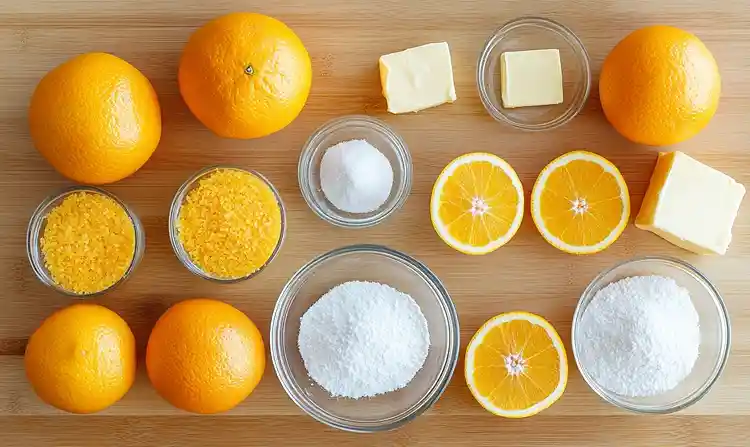
These sweet garnish ideas start with ingredients you probably already have on hand — no specialty store runs required. For the base of your candy, you’ll need fresh oranges (both the zest and juice), granulated sugar, corn syrup, and water to create that glossy, translucent texture.
For setting and structure, unflavored gelatin does the heavy lifting, while butter adds richness and helps prevent crystallization. Finally, powdered sugar for dusting keeps your finished candies from sticking together and adds a professional bakery finish.
| Amount | Ingredient |
|---|---|
| 2 large | Fresh oranges (for juice and zest — yes, fresh matters here!) |
| 2 cups | Granulated sugar |
| 1/4 cup | Corn syrup (the secret to that glossy sheen) |
| 1/2 cup | Water |
| 1 tablespoon | Butter (real butter, not margarine — trust me on this) |
| 1 packet | Unflavored gelatin (typically 2 1/4 teaspoons) |
| 1 teaspoon | Orange extract (optional, but it amplifies the citrus punch) |
| As needed | Powdered sugar (for dusting) |
| A pinch | Salt (optional, but it balances the sweetness beautifully) |
Tools You’ll Actually Use
- Medium saucepan
- Fine mesh strainer or zester (for the orange zest)
- Citrus juicer or reamer
- Small mixing bowl
- Wooden spoon or silicone spatula
- 8×8-inch baking dish or silicone candy molds
- Sharp knife (for cutting the set candy)
- Parchment paper or plastic wrap (for lining the dish)
Step-by-Step Instructions
Let me walk you through how to make candies at home that’ll have everyone asking for your “secret recipe.”
Step 1: Prep Your Oranges Zest both large fresh oranges using a fine grater or zester, collecting about 2 tablespoons of bright orange zest — just the outer colored part, not the bitter white pith underneath.
Juice the same oranges until you have roughly 3/4 cup of fresh orange juice, straining out any seeds or pulp. Set both the zest and juice aside while you prep your workspace.
Step 2: Create the Sugar Base In a medium saucepan, combine the 3/4 cup fresh orange juice, 1/2 cup water, 2 cups granulated sugar, and 1/4 cup corn syrup.
Place the pan over medium heat and stir continuously with a wooden spoon until every single sugar granule has dissolved into the liquid — you shouldn’t feel any grittiness when you drag the spoon along the bottom. Once smooth and clear, let the mixture come to a gentle simmer.
Step 3: Concentrate the Flavor Allow the orange syrup to simmer steadily for about 10 minutes, stirring occasionally to prevent scorching on the bottom. You’ll notice the mixture starting to thicken slightly and the orange aroma intensifying — your kitchen should smell like a citrus grove by now.
The bubbles will get smaller and more syrupy as the water evaporates and the sugars concentrate.
Step 4: Bloom and Add the Gelatin While your syrup simmers, sprinkle 1 packet of unflavored gelatin over 1/4 cup of cold water in a small bowl and let it sit undisturbed for 5 minutes until it looks wrinkly and swollen.
Once bloomed, add this gelatin mixture directly to your simmering orange syrup and stir constantly until the gelatin completely dissolves into the liquid with no lumps remaining — this usually takes about 1-2 minutes of steady stirring.
Step 5: Add Richness and Zest Stir in the 1 tablespoon butter (it’ll melt almost instantly), the reserved orange zest, optional orange extract if using, and a pinch of salt if you’d like.
Continue cooking for an additional 5 minutes, stirring constantly to prevent the mixture from sticking or burning on the pan bottom. The mixture should now coat the back of your spoon thickly and drip slowly like warm honey.
Step 6: Cool It Down Remove the saucepan from heat and let the mixture cool at room temperature for about 1-2 hours, stirring occasionally. This cooling period is crucial — it allows the candy to thicken further and prevents it from separating when you pour it into molds.
You want it cool enough that you can comfortably touch the outside of the pan without burning yourself.
Step 7: Pour and Set Lightly grease an 8×8-inch baking dish with butter or cooking spray, or prep your silicone candy molds by giving them a quick wipe. Pour the cooled orange mixture into your prepared dish or molds, spreading it evenly if using a dish.
Let it set at room temperature for 1-2 hours until it develops a slight skin on top, then transfer to the refrigerator for at least 4-6 hours or overnight until completely firm and no longer sticky to the touch.
Step 8: Cut and Dust Once your classic Christmas candy has set firm, run a knife around the edges of the dish and turn it out onto a cutting board. Use a sharp knife (dipped in hot water and dried between cuts for clean edges) to slice the candy into small squares or rectangles — I usually do 6 rows by 6 rows for bite-sized pieces.
Toss the cut pieces in powdered sugar to coat all sides, which prevents them from sticking together and adds a pretty snowy finish.
Step 9: Admire Your Work Arrange your beautiful homemade orange candies on a pretty plate or pack them into gift boxes lined with parchment paper. These sweets homemade with love are now ready to share, gift, or hoard for yourself — I won’t judge.
Claire’s Pro Tips & Gentle Guidance
These sweet garnish ideas are pretty foolproof, but I’ve learned a few tricks that make them even better.
Use Fresh Oranges, Not Bottled Juice I cannot stress this enough — fresh orange juice makes all the difference in flavor. Bottled juice tastes flat and sometimes weirdly metallic compared to the bright, complex flavor of freshly squeezed oranges. Plus, you need that fresh zest anyway, so you might as well use the whole fruit.
Don’t Skip the Blooming Step Letting your gelatin bloom in cold water before adding it to the hot syrup prevents clumping and ensures smooth, evenly-set candy. If you dump dry gelatin straight into hot liquid, you’ll get lumpy, rubbery bits that no amount of stirring can fix — learned that one the hard way.
Be Patient with Setting Time I know it’s tempting to cut into your candy after just a couple hours in the fridge, but trust me, give it the full 4-6 hours minimum. Cutting too early results in sticky, misshapen pieces that won’t hold their shape. Overnight is even better if you’ve got the patience.
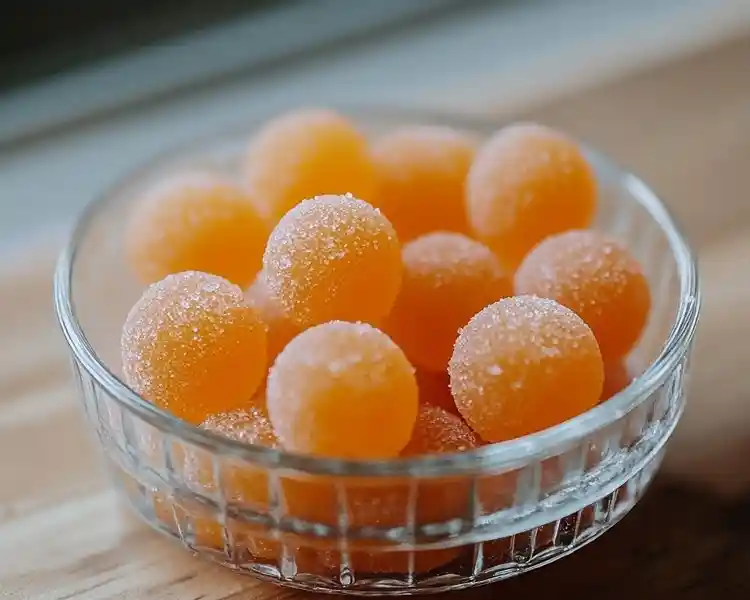
Customize Your Coating While powdered sugar is classic, you can also roll these in granulated sugar for sparkle, or leave them plain if you’re storing them in an airtight container where they won’t touch. According to Serious Eats’ comprehensive candy-making guide, different coatings serve different purposes — powdered sugar prevents sticking, while granulated adds textural contrast.
Quick Fixes for Homemade Orange Candy
Problem: My candy didn’t set properly and stayed sticky.
Solution: This usually means your mixture didn’t cook long enough or your gelatin ratio was off. Try refrigerating it for an additional 12 hours — sometimes it just needs more time. If it’s still too soft after that, you can gently reheat the mixture, add another half packet of gelatin dissolved in 2 tablespoons of cold water, cook for 3-4 minutes more, and reset it.
Problem: The candy turned out too hard and rubbery.
Solution: You probably cooked the mixture too long or at too high a temperature, which over-concentrated the sugars and activated the gelatin too aggressively. Next time, keep your heat at medium and watch the texture carefully — you want honey-thick, not cement-thick. Unfortunately, there’s no real fix for already-set candy that’s too firm, but it’ll still taste great, just with more jaw workout.
Problem: My candy has a cloudy, grainy texture instead of being translucent.
Solution: Sugar crystallization is the culprit here, which happens when undissolved sugar crystals form or when you stir too vigorously while the mixture is cooling. Make absolutely sure all your sugar dissolves completely at the beginning, and once you remove it from heat, minimize stirring. Adding a tiny bit more corn syrup next time will also help prevent crystallization.
Problem: The orange flavor is too subtle.
Solution: If your fresh oranges weren’t super flavorful or you’d like a more intense punch, add that optional teaspoon of orange extract, or even bump it up to 1 1/2 teaspoons. You can also add a tablespoon of orange liqueur like Grand Marnier during the cooling stage for a more sophisticated, adult flavor.
Variations & Fun Twists
This Homemade Orange Candy Recipe is wonderfully adaptable once you’ve mastered the basic technique.
Citrus Medley: Replace half the orange juice with fresh lemon, lime, or grapefruit juice for a mixed citrus version. Keep the orange zest for color, or mix zests to match your juice blend.
Holiday Spiced Orange: Add 1/4 teaspoon ground cinnamon and a pinch of ground cloves to the syrup along with the butter for a warm, festive twist that’s perfect for Christmas gift boxes.
Chocolate-Dipped Elegance: Once your candy is cut and set, melt some dark chocolate and dip half of each square for a fancy two-toned treat that looks like it came from a boutique candy shop.
Berry-Orange Fusion: Stir in 2 tablespoons of seedless raspberry or strawberry jam during the last few minutes of cooking for a fruity variation that adds both flavor and a beautiful blush color.
Sugar-Free Option: Replace the granulated sugar with a sugar substitute designed for candy-making (like Swerve or allulose) and use sugar-free syrup. Note that the texture might be slightly different, but it’ll still be delicious.
Serving, Storage & Reheating
These sweet garnish ideas are best served at room temperature when their texture is perfectly soft and chewy. I love setting out a small bowl of these during holiday gatherings alongside warm cinnamon rolls or serving them as a sweet finish after honey fried shrimp for a flavor contrast that really wakes up your palate.
Store your finished candies in an airtight container at room temperature for up to 1 week, or refrigerate them for up to 3 weeks if your kitchen runs warm. Layer them between sheets of parchment paper if you’re stacking, and keep them dusted with powdered sugar to prevent sticking.
These candies don’t really need reheating, but if they’ve gotten too firm from refrigeration, just let them sit at room temperature for 15-20 minutes before serving. If you accidentally left them out and they got too soft, pop them back in the fridge for 30 minutes to firm up again.
No-Waste Kitchen Magic
Don’t toss those orange halves after juicing — there’s still plenty of life in them! Simmer the spent orange halves in water with cinnamon sticks and cloves for a natural stovetop potpourri that’ll make your whole house smell amazing.
You can also freeze leftover orange zest in a small freezer bag for up to 3 months — it’s perfect for adding to no-bake cheesecake cups or stirring into fruit juice blends for an extra citrus kick.
If you made too much candy (is there such a thing?), freeze the cut and dusted pieces in a single layer on a baking sheet, then transfer to a freezer bag. They’ll keep for up to 3 months and thaw beautifully in about 20 minutes at room temperature.
Homemade Orange Candy FAQs
What candies are orange?
Orange-flavored candies include classics like orange slices (those sugar-coated jelly candies), Terry’s Chocolate Orange, orange Tic Tacs, Starburst orange chews, and old-fashioned orange hard candies. This homemade version gives you that nostalgic orange slice flavor in a softer, chewier format that tastes leagues better than store-bought versions.
How do you make candied orange?
Candied orange typically refers to candied orange peel, which involves simmering orange peel strips in sugar syrup multiple times until they’re translucent and sweet, then drying them. This recipe is different — we’re making orange-flavored candy using fresh juice and zest, which gives you the orange flavor without the slightly bitter peel texture. It’s a quicker, more approachable method that still delivers that gorgeous citrus taste.
What can I make from orange peel?
Orange peel is incredibly versatile! You can make candied orange peel, orange zest powder (by drying and grinding it), homemade orange extract by steeping it in vodka, orange sugar by mixing fresh zest with granulated sugar, or even orange peel tea. I also love adding strips of orange peel to my sangria recipes for natural citrus oils that infuse beautifully.
What can I make with lots of oranges?
If you’ve got a mountain of oranges, you’re in luck — fresh orange juice, orange marmalade, orange curd, orange pound cake, orange vinaigrette for salads, orange smoothies, or this candy recipe are all fantastic options. You can also segment them for fruit salads, freeze the juice in ice cube trays for smoothies later, or make orange-infused olive oil by gently heating orange zest in good olive oil.
Can I freeze this Homemade Orange Candy?
Yes, absolutely! Freeze the cut, dusted candy pieces in a single layer on a parchment-lined baking sheet until solid, then transfer to an airtight freezer bag or container. They’ll keep beautifully for up to 3 months and thaw at room temperature in about 20 minutes.
Wrap It Up
I hope this Homemade Orange Candy Recipe becomes your new go-to for gifting, holiday candy dishes, or just keeping a stash in your pantry for when you need something sweet and nostalgic. There’s something so satisfying about making candy from scratch with real ingredients — it feels both old-fashioned and special at the same time.
I’d love to see your spin on this Homemade Orange Candy Recipe! Drop a comment below with your photos or let me know if you tried any of the variations — I’d love to see how you made it your own. This recipe is so versatile; I bet you’ve got amazing flavor twists already in mind!
I’m Claire Whitmore — a dessert daydreamer from Asheville, NC. For me, baking isn’t about perfect pastries — it’s about the joy of sharing something sweet (and maybe sneaking an extra piece of candy when no one’s looking).