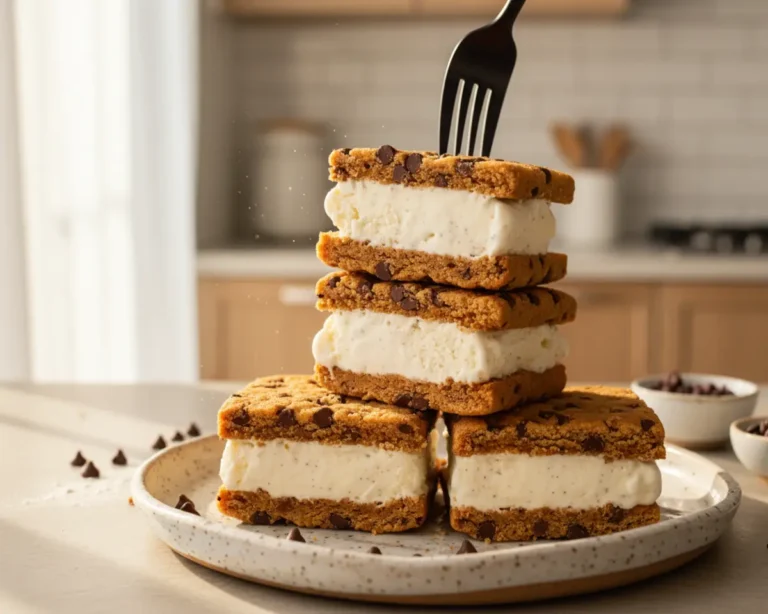
Homemade Choco Tacos Recipe
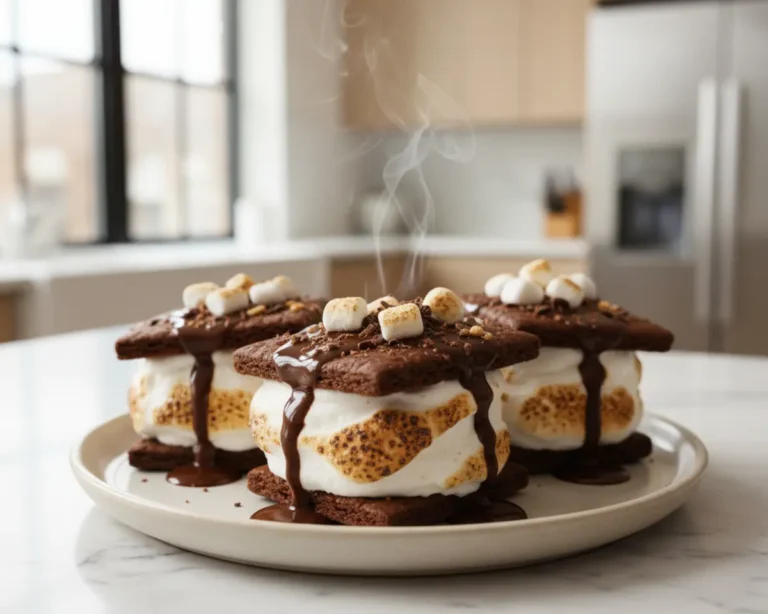
Homemade Choco Tacos bring back the nostalgic ice cream treat with vanilla fudge ripple ice cream, crispy waffle shells, and chocolate-peanut coating—better than the original!
Hey there, I’m Claire Whitmore — a dessert daydreamer from Asheville, NC, where ice cream is a year-round necessity and nostalgia tastes even better when it’s homemade. This Homemade Choco Tacos recipe brings back the iconic frozen treat with crispy waffle shells, swirled vanilla fudge ripple ice cream, and that signature chocolate-peanut coating.
It’s easier than you’d think, uses simple ingredients like heavy cream, sweetened condensed milk, and cocoa powder, and takes about 30 minutes of active prep time before freezing. Plus, you can customize the fillings and toppings to make them uniquely yours.
When Klondike discontinued Choco Tacos in 2022, the internet collectively mourned. I remember grabbing them from ice cream trucks as a kid, and honestly? This homemade version is even better—fresher, creamier, and way more satisfying to make from scratch.
Let me show you how to recreate this beloved frozen dessert right in your own kitchen, no ice cream truck required.
What This Recipe Delivers
Homemade Choco Tacos are crispy waffle cone shells shaped like tacos, filled with rich vanilla fudge ripple ice cream, and dipped in a chocolate-peanut coating. They take about 3-4 hours total (including freezing time), require no ice cream maker, and deliver that perfect crunch-meets-creamy texture that made the original so iconic.
Why You’ll Love This Recipe 🌸
- This Homemade Choco Tacos recipe takes less time than binge-watching your favorite show—and tastes way better than the store-bought version ever did.
- No ice cream maker needed! The no-churn ice cream base comes together in minutes with just a mixer and some patience.
- You get to play with toppings—swap peanuts for sprinkles, almonds, or crushed cookies depending on what your crew loves.
- According to Serious Eats’ guide to no-churn ice cream techniques, the secret to creamy homemade ice cream is whipping heavy cream to stiff peaks before folding in condensed milk — and this recipe proves exactly why.
Quick Facts ⚡
Here’s the quick scoop on this Homemade Choco Tacos recipe.
- CourseDessert
- Prep Time30 minutes
- Freeze Time3-4 hours
- Total Time4 hours 30 minutes
- Servings8-10 tacos
- DifficultyMedium
Table of Contents

Homemade Choco Tacos
Equipment
- Stand mixer or hand mixer
- Small saucepan
- loaf pan
- Waffle cone maker
- Tongs
- Mixing bowls
- Microwave-safe bowl
- Spatula or spoon
- Baking sheet
Ingredients
For the Fudge Ripple Ice Cream
- 2 cups heavy cream cold
- 1 14oz can sweetened condensed milk
- 1 tbsp vanilla bean paste or 2 tsp vanilla extract
- Pinch salt
For the Fudge Sauce
- 2 tbsp cocoa powder
- 2 tbsp granulated sugar
- 2 tbsp heavy cream
- 1 tbsp unsalted butter
- ½ tsp vanilla extract
- Pinch salt
For the Waffle Shells
- 2 egg whites
- 3 ½ tbsp granulated sugar
- 3 ½ tbsp brown sugar
- ¾ tsp vanilla extract
- ⅛ tsp salt
- ⅔ cup all-purpose flour
- 2 tbsp melted butter
For the Chocolate-Peanut Coating
- 1 ½ cups chocolate chips semi-sweet or milk chocolate
- 1 ½ tbsp coconut oil
- ¾ cup finely chopped peanuts or topping of choice
Instructions
- Make the fudge sauce by heating cocoa powder, sugar, and cream, then whisking in butter, vanilla, and salt until smooth. Let cool.
- Whip heavy cream to stiff peaks. In a separate bowl, mix condensed milk, vanilla, and salt. Fold in whipped cream gently.
- Layer ice cream base and fudge sauce in a loaf pan, swirl lightly, and freeze for at least 3 hours.
- Mix waffle batter, cook in a waffle cone maker, and shape into taco shells while warm.
- Fill shells with softened ice cream and freeze briefly to firm up.
- Melt chocolate with coconut oil, stir in peanuts, dip tacos in coating, and freeze until hardened.
Notes
Nutritional Peek
Here’s a quick nutritional breakdown per Choco Taco (because we all like to know what we’re indulging in):

| Nutrient | Amount per Serving |
|---|---|
| Calories | 425 kcal |
| Protein | 6g |
| Carbohydrates | 42g |
| Fat | 27g |
| Saturated Fat | 15g |
| Fiber | 2g |
| Sugar | 32g |
Ingredients
These Choco Tacos come together with three simple components: creamy no-churn ice cream, crispy waffle shells, and a chocolate-peanut topping that hardens into the perfect shell. For the ice cream base—heavy cream, sweetened condensed milk, and vanilla bean paste—make sure everything’s cold before you start whipping.
The waffle cone batter uses egg whites, both granulated and brown sugar, and melted butter to create that signature crispy texture. And for the topping—chocolate chips, coconut oil, and finely chopped peanuts—you’ll want everything melted and smooth before dipping.
For the Fudge Ripple Ice Cream:
| Amount | Ingredient |
|---|---|
| 2 cups | heavy cream, cold |
| 1 (14oz) can | sweetened condensed milk |
| 1 tbsp | vanilla bean paste (or 2 tsp vanilla extract) |
| Pinch | salt |
For the Fudge Sauce:
| Amount | Ingredient |
|---|---|
| 2 tbsp | cocoa powder |
| 2 tbsp | granulated sugar |
| 2 tbsp | heavy cream |
| 1 tbsp | unsalted butter |
| ½ tsp | vanilla extract |
| Pinch | salt |
For the Waffle Shells:
| Amount | Ingredient |
|---|---|
| 2 | egg whites |
| 3 ½ tbsp | granulated sugar |
| 3 ½ tbsp | brown sugar |
| ¾ tsp | vanilla extract |
| ⅛ tsp | salt |
| ⅔ cup | all-purpose flour |
| 2 tbsp | melted butter |
For the Chocolate-Peanut Coating:
| Amount | Ingredient |
|---|---|
| 1 ½ cups | chocolate chips (semi-sweet or milk chocolate) |
| 1 ½ tbsp | coconut oil |
| ¾ cup | finely chopped peanuts (or topping of choice) |
Tools You’ll Actually Use
- Stand mixer or hand mixer
- Small saucepan
- Loaf pan (for freezing ice cream)
- Waffle cone maker
- Tongs
- Mixing bowls (various sizes)
- Microwave-safe bowl
- Small spatula or spoon
- Baking sheet (for assembled tacos)
How to Make Homemade Choco Tacos Recipe
Let’s make some Homemade Choco Tacos that’ll have everyone asking for seconds!
Step 1: Make the fudge sauce for the ice cream ripple.
In a small saucepan over medium-low heat, whisk together 2 tablespoons cocoa powder, 2 tablespoons granulated sugar, and 2 tablespoons heavy cream until the mixture starts to warm and bubble slightly.
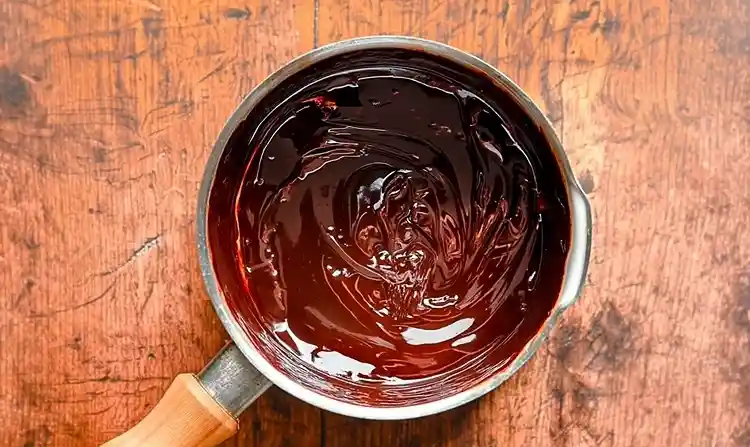
Add in 1 tablespoon unsalted butter and whisk continuously until the butter melts completely and the sauce becomes smooth and shiny—this takes about 2 minutes. Remove from heat, whisk in ½ teaspoon vanilla extract and a pinch of salt, then set aside to cool while you prep the ice cream base.
Step 2: Prepare the no-churn ice cream base.
Add 2 cups cold heavy cream to your stand mixer bowl (or a large bowl if using a hand mixer) and beat on medium-high speed until stiff peaks form—this usually takes 3-4 minutes, and you’ll know it’s ready when the cream holds its shape and doesn’t fall off the whisk.
In a separate large bowl, whisk together the 14oz can of sweetened condensed milk, 1 tablespoon vanilla bean paste (or 2 teaspoons vanilla extract), and a pinch of salt until smooth. Gently fold about 1 cup of the whipped cream into the condensed milk mixture to lighten it, then fold in the remaining whipped cream in two additions, using a spatula to fold (not stir) until no white streaks remain.
Step 3: Layer the fudge ripple ice cream.
Pour about ¼ of the ice cream base into a loaf pan, spreading it evenly with a spatula. Drizzle on about ⅓ of the cooled fudge sauce in ribbons across the ice cream layer. Repeat this layering process three more times—ice cream, fudge sauce, ice cream, fudge sauce—until you’ve used all the base and end with a final layer of plain ice cream on top (no fudge on the very top layer).
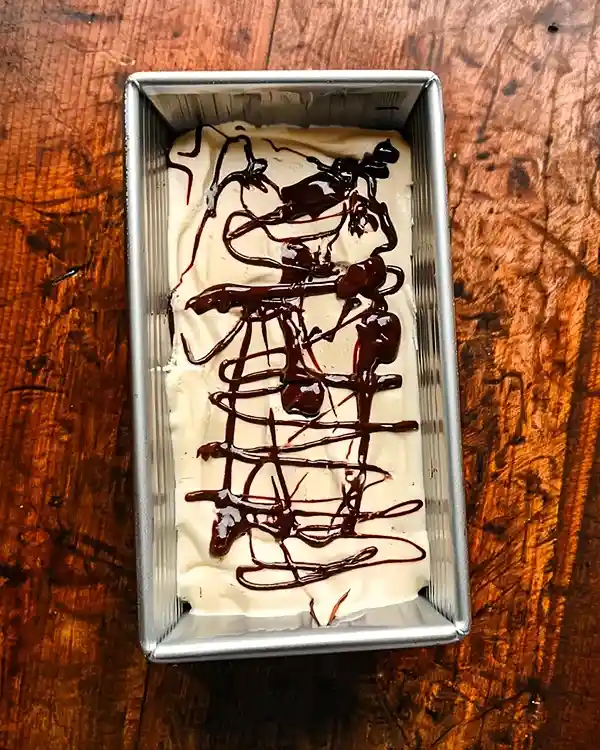
Use a butter knife to gently swirl the fudge through the layers if you want a marbled effect, but don’t overmix or you’ll lose the ripple. Cover tightly with plastic wrap and freeze for at least 3 hours, or until firm enough to scoop.
Step 4: Make the crispy waffle cone shells.
In a medium bowl, beat together 2 egg whites, 3 ½ tablespoons granulated sugar, 3 ½ tablespoons brown sugar, and ¾ teaspoon vanilla extract with a hand mixer until well combined and slightly frothy—about 1 minute. Add in ⅛ teaspoon salt and half of the ⅔ cup flour, mixing on low speed until smooth with no lumps.
Add the remaining flour and 2 tablespoons melted butter, then mix until you have a thick, smooth batter that falls slowly off the spoon. Preheat your waffle cone maker to just above medium heat (usually setting 3 or 4).

Place one heaping tablespoon of batter in the center of the waffle cone maker, close the lid, and cook for about 3 minutes or until golden brown—timing varies by maker, so check after 2 minutes the first time.
Using tongs, carefully remove the hot waffle and let it cool for about 5 seconds on the counter, then quickly shape it into a taco shell by folding it in half with your hands (be careful, it’s hot!) and holding the shape for about 15 seconds until it firms up. The shells will harden completely within a minute. Repeat with remaining batter—you should get 8-10 shells.
Step 5: Fill the shells with ice cream and freeze briefly.
Remove your ice cream from the freezer and let it soften at room temperature for about 5 minutes—it should be scoopable but not melty.
Using an ice cream scoop or large spoon, scoop ice cream into each taco shell, filling them generously and using a small spatula or the back of a spoon to smooth and pack the ice cream evenly. Place the filled tacos on a parchment-lined baking sheet and return them to the freezer for 10-15 minutes to firm up before coating.
Step 6: Prepare the chocolate-peanut topping and assemble.
Add 1 ½ cups chocolate chips and 1 ½ tablespoons coconut oil to a microwave-safe bowl. Microwave in 30-second intervals, stirring well between each interval with a spoon, until the chocolate is completely melted and smooth—this usually takes 1-2 minutes total.
Stir in ¾ cup finely chopped peanuts until evenly distributed throughout the chocolate. Remove one taco at a time from the freezer and quickly dip the top (ice cream side) into the chocolate-peanut mixture, letting any excess drip off. Return the coated taco to the baking sheet and immediately put it back in the freezer.
Repeat with remaining tacos, working quickly so the ice cream doesn’t melt. Freeze for an additional 5-10 minutes, or until the chocolate coating is completely hardened. Store in an airtight container or freezer bag in the freezer for up to 2 weeks.
Can’t get enough of these flavors? You’re going to love what’s waiting in the Classic Comfort Foods lineup. Every single recipe is made to impress without the stress. Happy cooking, friend!
Claire’s Pro Tips & Gentle Guidance
These Choco Tacos are surprisingly forgiving, but a few little tricks will make yours absolutely perfect.
Get your waffle shells shaped fast. The waffle cones harden in under a minute, so you’ve got to move quickly once they come off the maker. If one hardens before you can shape it, just pop it back on the hot waffle maker for 10 seconds to soften it up again—I’ve done this more times than I can count.
Let your ice cream soften slightly before scooping. Rock-hard ice cream will crack your delicate waffle shells, so give it 5 minutes at room temperature before filling. You want it soft enough to scoop easily but not melting—think soft-serve consistency.
Use coconut oil in your chocolate coating. This is the secret to getting that thin, crispy chocolate shell that cracks perfectly when you bite into it. Regular melted chocolate will be too thick and might not harden properly.
According to the Food Network’s chocolate tempering guide, adding coconut oil helps create a glossy, snap-worthy coating without the fuss of traditional tempering.
Make extra waffle shells. They’re delicate and can break, so I always make 2-3 extra shells just in case. Plus, any extras make fantastic ice cream bowls for the kids (or, let’s be honest, for you).
Customize your toppings endlessly. Swap peanuts for crushed pretzels, toffee bits, mini chocolate chips, or even sprinkles. I’ve done a birthday cake version with rainbow sprinkles that was an absolute hit at my daughter’s party.
Quick Fixes for Homemade Choco Tacos
Problem: Waffle shells are too soft and won’t hold their shape.
Your waffle maker might not be hot enough, or you’re not cooking them long enough. Make sure your maker is preheated fully (at least 5 minutes), and don’t rush the cooking time—they need to be golden brown, not pale. Also, make sure you’re holding the taco shape firmly for the full 15 seconds while it cools.
Problem: Ice cream is melting too fast when filling shells.
Your kitchen is probably too warm, or the ice cream hasn’t been frozen long enough. Make sure your ice cream is frozen solid for at least 3 hours before scooping, work in batches (keeping extras in the freezer), and consider chilling your baking sheet in the freezer before placing filled tacos on it.
Problem: Chocolate coating is too thick or clumpy.
You might need more coconut oil—add an extra ½ tablespoon and stir well until smooth. If your chocolate seized (got grainy), it probably got too hot or water got into it. Start over with fresh chocolate, and make sure your bowl is completely dry before melting.
Problem: Waffle shells are sticking to the maker.
Your waffle maker might need a light coating of cooking spray before each shell, especially if it’s not non-stick or if it’s new. Just a quick spritz before adding batter should do the trick.
Variations & Fun Twists
These Choco Tacos are endlessly adaptable depending on what your family loves!
Birthday cake Choco Tacos: Add 2 tablespoons rainbow sprinkles to your ice cream base before freezing, and use white chocolate instead of dark for the coating. Top with extra sprinkles before the chocolate hardens for a festive party treat.
Mint chocolate chip version: Replace the vanilla extract in the ice cream with 1 teaspoon peppermint extract and fold in ½ cup mini chocolate chips after whipping. Use dark chocolate for the coating and skip the peanuts for a clean mint-chocolate flavor.
Gluten-free option: Swap the all-purpose flour in the waffle shells with a 1:1 gluten-free baking blend. Bob’s Red Mill works great here, and you won’t notice a texture difference.
Peanut butter lovers: Swirl 3-4 tablespoons of creamy peanut butter into your ice cream along with the fudge sauce, and use peanut butter chips mixed with the chocolate coating instead of plain peanuts.
Vegan Choco Tacos: Use coconut cream (the thick part from a can of full-fat coconut milk) instead of heavy cream, and swap condensed milk with sweetened condensed coconut milk. Replace egg whites in the waffle batter with aquafaba (the liquid from a can of chickpeas)—use 3 tablespoons aquafaba for 2 egg whites.
Serving, Storage & Reheating
Serve these Desserts With Ice Cream Cones straight from the freezer on a hot summer day, or pack them for outdoor picnics in a cooler with plenty of ice packs. They’re perfect alongside other frozen treats or as the star dessert at birthday parties and backyard barbecues.
Store your Homemade Choco Tacos in an airtight freezer container or heavy-duty freezer bag with parchment paper between each taco to prevent sticking. They’ll stay fresh and delicious for up to 2 weeks in the freezer—though I doubt they’ll last that long once your family discovers them.
No reheating needed here! Just pull them straight from the freezer and let them sit at room temperature for about 2-3 minutes if you prefer a slightly softer bite. The chocolate coating and waffle shell maintain their perfect crunch even after freezing.
No-Waste Kitchen Magic
Leftover fudge sauce? Drizzle it over ice cream sundaes, stir it into coffee for a mocha treat, or warm it slightly and use as a dip for fresh strawberries. It keeps in the fridge for up to a week.
Broken waffle shells? Crumble them up and use as a crunchy topping for regular ice cream bowls, fold into milkshakes, or layer in parfaits with yogurt and berries. They’re basically fancy ice cream cone pieces.
Extra chocolate-peanut coating? Pour it onto a parchment-lined sheet, spread thin, and let it harden in the fridge for homemade chocolate bark. Break into pieces and store in an airtight container for snacking or gifting.
Softened ice cream from scooping? Don’t refreeze it in the loaf pan—instead, transfer it to a piping bag (or a ziplock with the corner cut off) and pipe it directly into any remaining shells for easier, cleaner filling.
Choco Tacos Recipe FAQs
Why was the Choco Taco banned?
The Choco Taco wasn’t actually “banned”—it was discontinued by Klondike in July 2022 due to what the company called an “unprecedented spike in demand” that made it difficult to produce. Basically, they couldn’t keep up with orders and decided to focus on other products instead, which left fans heartbroken and nostalgic.
Is Choco Taco discontinued?
Yes, the original Klondike Choco Taco was officially discontinued in 2022 after nearly 40 years on the market. The announcement sparked such a massive outcry on social media that some specialty stores and ice cream shops started creating their own versions to fill the void—which is exactly why homemade versions like this one became so popular.
Are Choco Tacos coming back in 2025?
As of now, Klondike hasn’t announced any plans to bring back the original Choco Taco. However, some independent ice cream brands and small shops have started selling their own takes on the classic treat, and honestly, making them at home gives you way more control over flavors and quality anyway.
Can I make Choco Tacos without a waffle cone maker?
You can try using a pizzelle maker or even a flat griddle, though shaping them into taco shells will be trickier without the proper tool. If you don’t have a waffle cone maker, consider using store-bought ice cream cones or waffle bowls and breaking them to create taco-shaped vessels—it won’t be quite the same, but you’ll still get that chocolate-ice cream-crunch combo
Cozy Closing
There you have it—your very own Homemade Choco Tacos that taste even better than the nostalgic original! I’d love to see your spin on this Homemade Choco Tacos recipe—drop a comment below with photos of your creations, or tag me on social if you try fun topping combinations.
These Choco Tacos are so customizable; I bet you’ve already got a dozen flavor ideas running through your head!
Craving more frozen treats? Check out my no-bake cheesecake cups for another easy dessert win, or try this refreshing dragon fruit juice to cool down on hot days. And if you’re in the mood for something sweet and nostalgic, my homemade orange candy will take you right back to childhood.
I’m Claire Whitmore — a dessert daydreamer from Asheville, NC. For me, baking isn’t about perfect pastries — it’s about the joy of sharing something sweet (and maybe sneaking an extra scoop of ice cream when no one’s looking).