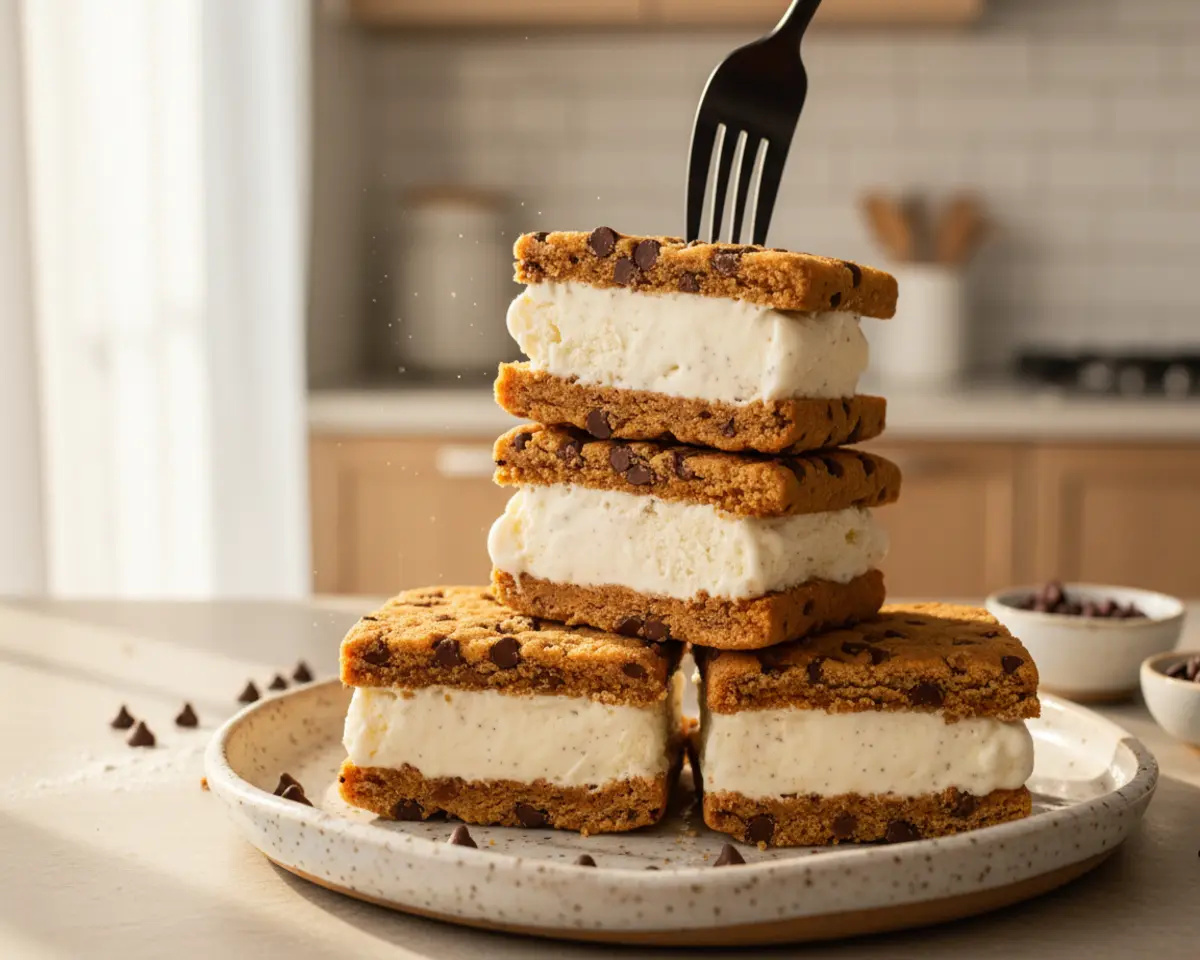
Chocolate Chip Cookie Dough Ice Cream Sandwiches
Chocolate Chip Cookie Dough Ice Cream Sandwiches are the ultimate no-bake frozen treat combining edible cookie dough layers with creamy vanilla ice cream. These handheld desserts are perfect for summer gatherings, birthday parties, or whenever you need a sweet escape that doesn’t require turning on the oven.
I’m Claire Whitmore, your friendly neighborhood dessert whisperer here in Asheville, NC. When I’m not daydreaming about buttercream, I’m dreaming up treats like these Chocolate Chip Cookie Dough Ice Cream Sandwiches that make life a little sweeter without the fuss.
Last summer, my niece asked if we could make ice cream sandwiches but skip the baking part because it was too hot. That request sparked this entire creation—edible cookie dough pressed into pans, layered with ice cream, frozen solid, and sliced into perfect handheld treats.
Table of Contents
Quick Overview
This recipe is just the beginning. Over in the Cookies & Brownies collection, you’ll find even more dishes that are just as easy and packed with flavor. Go take a peek — your next favorite is waiting.
Little Snapshot: What This Recipe Delivers
Chocolate Chip Cookie Dough Ice Cream Sandwiches combine two dessert favorites into one no-bake frozen treat. Heat-treated flour makes the cookie dough safe to eat raw, while vanilla ice cream adds creamy contrast to chewy, chocolatey layers.
Why You’ll Love This Recipe 🌸
- This Chocolate Chip Cookie Dough Ice Cream Sandwich takes less time than folding laundry and requires zero baking skills.
- The edible cookie dough satisfies every raw-dough craving without worry, making it perfect for busy moms who need a quick win.
- You can make a whole pan ahead and slice as needed, so there’s always a treat ready when life gets chaotic.
- According to FoodSafety.gov, heat-treating flour eliminates harmful bacteria — and this recipe proves exactly why that simple step unlocks so many delicious possibilities.
Quick Facts ⚡
Here’s the quick scoop on this Chocolate Chip Cookie Dough Ice Cream Sandwich.
- CourseDessert
- Prep Time20 minutes
- Cook Time8 minutes
- Total Time4 hours
- Servings12 sandwiches
- DifficultyEasy
Nutritional Peek
| Nutrient | Amount per serving |
|---|---|
| Calories | 380 |
| Protein | 5g |
| Carbohydrates | 52g |
| Fat | 18g |
| Fiber | 1g |
| Sugar | 36g |
What You’ll Need
This recipe requires basic kitchen tools you probably already own. The key pieces are two 8×8-inch square pans, parchment paper, and a little freezer space.
- Two 8×8-inch square baking pans
- Parchment paper
- Baking sheet
- Large mixing bowl
- Rubber spatula
- Instant-read thermometer
- Plastic wrap
- Sharp knife
Ingredients

Cookie Dough Ice Cream Sandwiches start with simple pantry staples transformed into safe-to-eat dough. The heat-treated flour is the magic ingredient that makes this entire recipe possible, while mini chocolate chips distribute perfectly throughout every bite.
| Group | Ingredient | Amount | Notes |
|---|---|---|---|
| Base | All-purpose flour | 2 cups | Must be heat-treated to 165°F for safety |
| Base | Unsalted butter, melted | 3/4 cup | Brings that rich, buttery flavor |
| Sweeteners | Light brown sugar, packed | 3/4 cup | Adds moisture and chewiness |
| Sweeteners | Granulated sugar | 1/2 cup | Balances the brown sugar |
| Wet | Milk | 2 tablespoons | Helps bind everything together |
| Wet | Vanilla extract | 1 tablespoon | Pure vanilla is always worth it |
| Seasoning | Salt | 1/2 teaspoon | Enhances all the sweet flavors |
| Mix-ins | Mini chocolate chips | 1 cup | Mini size distributes better than regular |
| Filling | Vanilla ice cream, slightly softened | 1 quart | Let it sit 10 minutes before spreading |
Step-by-Step Instructions
Let’s make this happen.
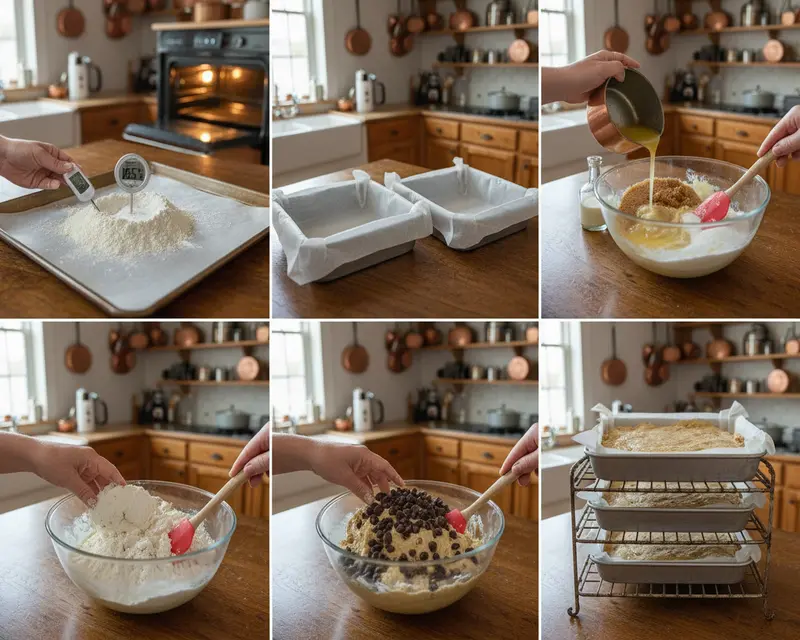
Chocolate Chip Cookie Dough Ice Cream Sandwiches begin with a crucial safety step: heat-treating your flour. Preheat your oven to 350°F and line a baking sheet with parchment paper to prevent sticking and make cleanup easier.
Spread 2 cups of all-purpose flour into an even layer across the prepared baking sheet. Bake for 7 to 8 minutes, stirring the flour with a rubber spatula at the halfway mark to ensure even heating throughout.
Use an instant-read thermometer to check that the flour reaches an internal temperature of 165°F, which eliminates any harmful bacteria. Set the heat-treated flour aside to cool completely before proceeding—warm flour will melt your butter prematurely.
While the flour cools, line two 8×8-inch square pans with parchment paper on all sides, leaving some overhang for easy removal later. This parchment step is essential for releasing your finished sandwiches without breaking them.
In a large bowl, combine 3/4 cup melted unsalted butter, 3/4 cup packed light brown sugar, 1/2 cup granulated sugar, 2 tablespoons milk, and 1 tablespoon vanilla extract. Stir with a rubber spatula until the sugars dissolve and the mixture looks smooth and glossy.
Add the cooled heat-treated flour and 1/2 teaspoon salt to your butter-sugar mixture. Fold everything together using your spatula until no streaks of flour remain visible in the dough.
Fold in 1 cup mini chocolate chips, distributing them evenly throughout the dough. The dough will feel slightly wet at this stage, but don’t worry—it firms up beautifully in the freezer.
Divide the cookie dough in half, spreading each portion into a flat, even layer in your prepared baking pans. Press firmly to eliminate air pockets and create uniform layers that will sandwich together perfectly.
Place both pans in the freezer to chill for 30 minutes, allowing the dough to firm up enough to handle. This chilling step makes assembly much easier and prevents the ice cream from melting into the dough.
After 30 minutes, remove one pan from the freezer and spread your slightly softened vanilla ice cream over the cookie dough layer. Pack it down firmly into an even layer, working quickly to prevent melting.
Remove the second pan of cookie dough from the freezer and invert it to release the dough slab from the pan. Place this slab directly on top of the ice cream layer, gently pressing around all edges to seal everything together.
Cover the assembled pan with plastic wrap and return it to the freezer to chill for at least 3 hours, or overnight for best results. This freezing time ensures clean slices and prevents squishing when you cut.
When you’re ready to serve, remove the pan from the freezer and let it sit at room temperature for 2 to 3 minutes. Use a sharp knife to slice into your desired size ice cream sandwiches, wiping the blade clean between cuts for neat edges.
Expert Tips
Cookie Dough Ice Cream Sandwiches are incredibly forgiving, but a few expert tricks take them from good to absolutely irresistible. These tips come straight from my kitchen experiments and late-night dessert emergencies.
Always measure your flour correctly by spooning it into measuring cups and leveling off, never scooping directly from the bag. Too much flour creates dry, crumbly cookie dough that won’t hold together properly in the freezer.
Let your ice cream soften just slightly before spreading—it should be spreadable but not melty. If it gets too soft, pop it back in the freezer for 10 minutes and try again.
For cleaner cuts, dip your knife in hot water and wipe it dry between each slice. This prevents the cookie dough from sticking and gives you those Instagram-worthy edges everyone loves.
Consider using a mix of mini chocolate chips and regular chips for varied texture throughout each bite. According to Serious Eats’ extensive cookie research, chip size dramatically affects distribution and mouthfeel in cookie-based desserts.
If you’re making these for a party, cut them into smaller squares and wrap individually in parchment paper. They’re easier to grab and less messy for guests, plus they look adorable stacked on a platter.
Variations
The beauty of these frozen treats is how easily they adapt to whatever you’re craving. Swap vanilla ice cream for chocolate, strawberry, or even cookie dough ice cream for a double cookie dough experience.
Try different mix-ins beyond chocolate chips—chopped peanut butter cups, toffee bits, or crushed pretzels all work beautifully. Just keep the total mix-in amount to about 1 cup so the dough stays cohesive.
For a fun twist, roll the edges of your assembled sandwiches in sprinkles, crushed cookies, or mini chocolate chips before the final freeze. This adds visual appeal and extra crunch to every bite.
Make them gluten-free by using your favorite gluten-free flour blend in place of all-purpose flour. Just make sure to heat-treat it the same way for food safety.
Create a brownie version by adding 1/4 cup cocoa powder to the cookie dough and reducing the flour slightly. Pair with mint chip ice cream for a refreshing chocolate-mint combination that rivals any ice cream shop creation.
Troubleshooting
Problem: The cookie dough is too crumbly and won’t press together.
Solution: Add an extra tablespoon of milk or melted butter to help bind the dough. The dough should feel slightly wet when you first mix it—it firms up during freezing.
Problem: The ice cream melts too quickly during assembly.
Solution: Work in a cold kitchen and have everything prepped before you start. Pop the ice cream back in the freezer between steps if needed, and consider chilling your mixing bowl ahead of time.
Problem: The sandwiches are too hard to bite into straight from the freezer.
Solution: Let them sit at room temperature for 3 to 5 minutes before serving. The cookie dough softens quickly, making them much easier to eat without waiting forever.
Problem: The layers separate when I slice them.
Solution: Make sure your ice cream layer is thick enough and that you pressed the top cookie dough layer firmly into the ice cream. A longer freeze time also helps everything bond together better.
Storage & Reheating
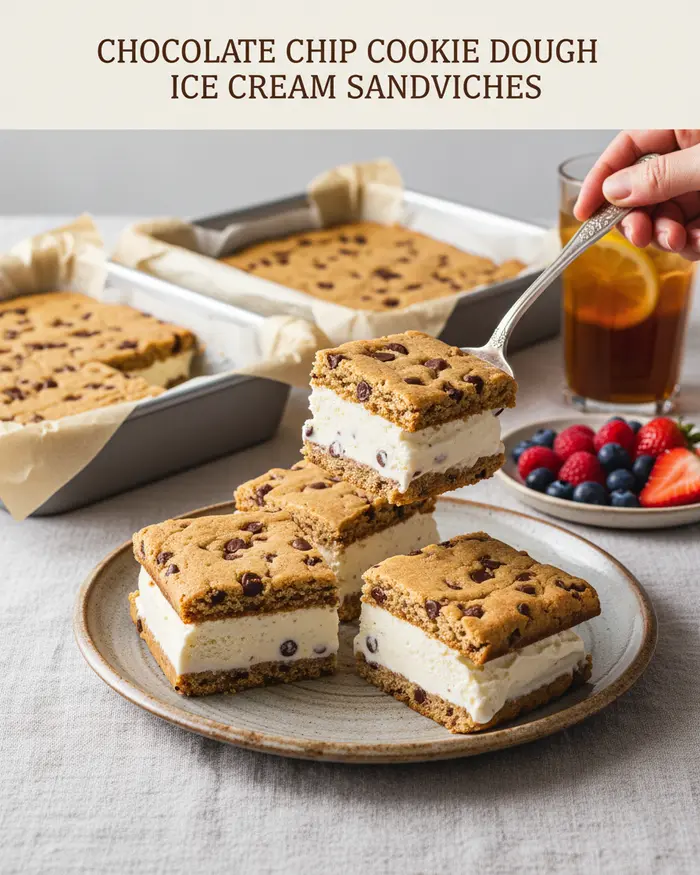
Cookie Dough Ice Cream Sandwiches keep beautifully in the freezer for up to 2 months when stored properly. Wrap individual sandwiches in parchment paper, then place them in an airtight container or freezer bag to prevent freezer burn and ice crystal formation.
For best texture, let the sandwiches sit at room temperature for 3 to 5 minutes before serving. This slight thaw makes them easier to bite into while keeping that satisfying frozen center everyone loves.
If you’re making these ahead for a party, cut all the sandwiches at once and wrap them individually for grab-and-go convenience. They stack beautifully in freezer-safe containers with parchment paper between layers.
| Storage Method | Duration | Best Practices |
|---|---|---|
| Freezer (whole pan) | Up to 2 months | Cover tightly with plastic wrap and foil |
| Freezer (individual) | Up to 2 months | Wrap in parchment, store in airtight container |
| Room temperature | 10-15 minutes max | Only for serving; return leftovers immediately |
No-Waste Kitchen Ideas
If you have leftover cookie dough, roll it into balls and freeze them for quick cookie dough bites. Pop them straight from the freezer for a safe-to-eat sweet snack whenever cravings hit.
Extra ice cream that’s gotten too soft during assembly doesn’t need to be wasted. Refreeze it in a separate container or use it immediately to make milkshakes or ice cream floats for the family.
Broken or misshapen sandwiches can be chopped into chunks and layered in parfait glasses with whipped cream and fudge sauce. This transforms any “mistakes” into an entirely new dessert that looks intentional and fancy.
The parchment paper from your pans can be wiped clean and reused for your next batch. I keep used parchment in a drawer specifically for projects like this where it doesn’t need to be pristine.
If you’re feeling ambitious, save those chocolate chip cookie crumbs that inevitably fall during slicing. Sprinkle them over vanilla ice cream or blend them into milkshakes for an extra cookie dough flavor boost that uses every last bit.
Frequently Asked Questions
Here are answers to the most common questions about making these frozen treats at home.
What is a Chocolate Chip Cookie Dough Ice Cream Sandwich?
A Chocolate Chip Cookie Dough Ice Cream Sandwich is a dessert that consists of cookie dough flavored ice cream sandwiched between two chocolate chip cookies. The ice cream typically contains chunks of edible cookie dough mixed throughout.
How should I store Chocolate Chip Cookie Dough Ice Cream Sandwiches?
Store them in the freezer at 0 degrees Fahrenheit or below in an airtight container or wrapped tightly in plastic wrap. This prevents freezer burn and keeps them fresh for up to 2-3 months. Keep them away from foods with strong odors as ice cream can absorb smells.
Can I make Chocolate Chip Cookie Dough Ice Cream Sandwiches at home?
Yes, you can make them at home by baking chocolate chip cookies, letting them cool completely, and then adding a scoop of cookie dough ice cream between two cookies. Press gently to spread the ice cream to the edges, then freeze for at least 2 hours before serving.
Are the cookie dough pieces in the ice cream safe to eat?
Yes, the cookie dough pieces in commercial ice cream are safe to eat because they are made without eggs or with heat-treated flour to eliminate any risk of foodborne illness. They are specifically manufactured to be eaten raw unlike traditional cookie dough.
How many calories are in a Chocolate Chip Cookie Dough Ice Cream Sandwich?
The calorie content varies by brand and size, but a typical Chocolate Chip Cookie Dough Ice Cream Sandwich contains between 250 to 400 calories. Homemade versions may have different calorie counts depending on the ingredients and portion sizes used.
Final Dish
These Chocolate Chip Cookie Dough Ice Cream Sandwiches prove that the best desserts don’t always require an oven or fancy techniques. With heat-treated flour, quality butter, and your favorite vanilla ice cream, you’ve got a crowd-pleasing treat that works for birthday parties, summer gatherings, or those nights when only something sweet and frozen will do.
I’d love to see how your batch turns out! Share your photos in the comments below or tag me on social media—nothing makes my day quite like seeing your kitchen creations come to life.
I’m Claire Whitmore — a dessert daydreamer from Asheville, NC. For me, baking isn’t about perfect pastries — it’s about the joy of sharing something sweet (and maybe sneaking an extra scoop of icing).
Chocolate Chip Cookie Dough Ice Cream Sandwiches
Ingredients
- 2 cups all-purpose flour
- ¾ cup unsalted butter melted
- ¾ cup packed light brown sugar
- ½ cup granulated sugar
- 2 tablespoons milk
- 1 tablespoon vanilla extract
- ½ teaspoon salt
- 1 cup mini chocolate chips
- 1 quart vanilla ice cream slightly softened
Instructions
- First, heat treat the flour. Preheat the oven to 350°F and line a baking sheet with parchment paper. Spread the flour out into an even layer on the baking sheet and bake for 7 to 8 minutes, stirring the flour with a rubber spatula halfway through, until the flour reaches an internal temperature of 165°F. Set aside to cool completely before using.
- Once the flour has cooled, make the cookie dough. Line two 8 x 8-inch square pans with parchment paper on all sides. Set aside.
- In a large bowl combine the melted butter, brown sugar, granulated sugar, milk and vanilla extract. Use a rubber spatula to stir to combine.
- Add the cooled flour and salt and fold together until no streaks of flour remain. Add the chocolate chips and fold to combine. The dough will feel a little wet, but it will firm up in the freezer!
- Divide the dough in half, spreading each half into a flat, even layer in the prepared baking pans. Place in the freezer to chill for 30 minutes.
- After 30 minutes, take out one of the pans and spread the softened ice cream over the cookie dough, packing it down into an even layer. Remove the second pan of cookie dough from the freezer and invert the pan to release the cookie dough slab. Place it on top of the ice cream, gently pressing it into the ice cream all around to seal together. Cover the pan with plastic wrap and place in the freezer to chill for at least 3 hours.
- When ready to eat, remove the pan from the freezer and slice into your desired size ice cream sandwiches. Enjoy!