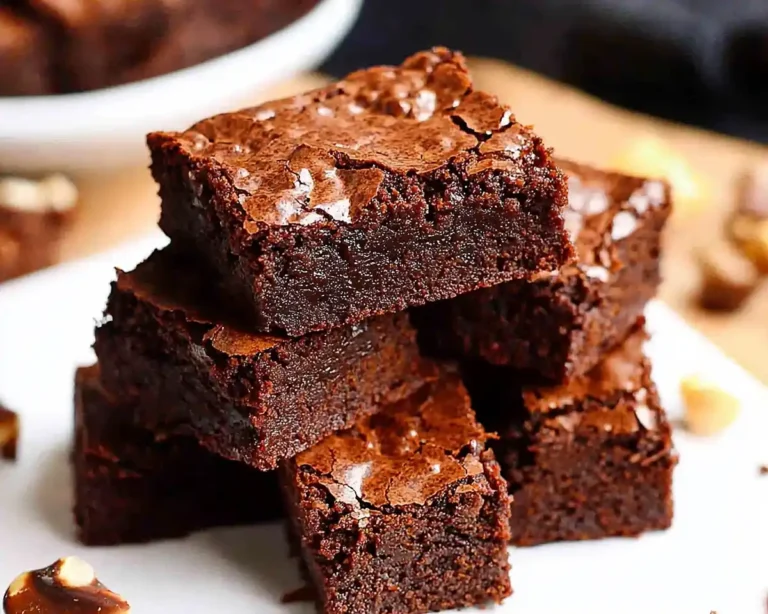
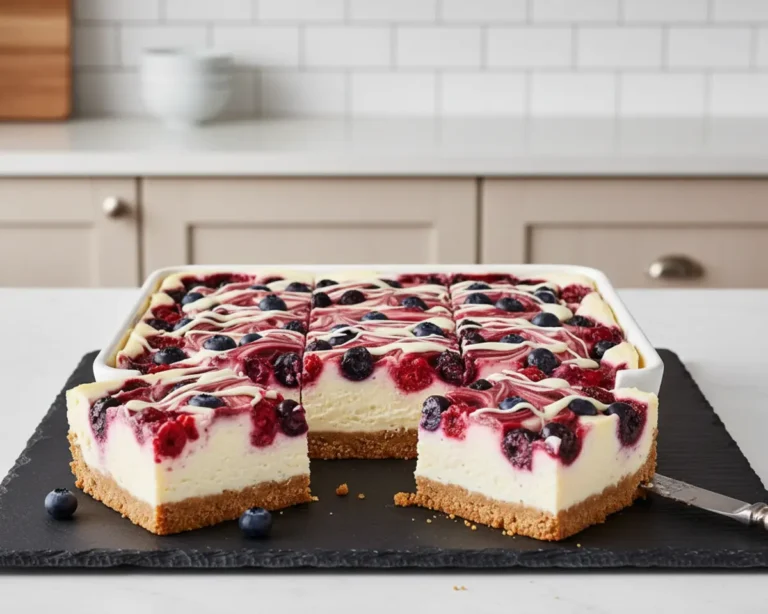
Banana Pudding Dessert Cups
Banana pudding dessert cups are the kind of treat that disappear before you even set them on the table. We’re talking creamy vanilla pudding, fresh banana slices, fluffy homemade whipped cream, and those iconic vanilla wafers — all layered up in individual cups that are as cute as they are delicious.
Hey there, I’m Claire Whitmore — a pastry whisperer in Asheville, NC, where butter totally counts as self-care. These banana pudding dessert cups are my go-to when I need a make-ahead dessert that looks fancy but asks absolutely nothing of me the day of the party.
I first made these for a backyard cookout a few summers back. I needed something I could prep the night before so I could actually enjoy the party instead of disappearing into the kitchen. One bite and everyone was hooked — and now they request them every single time.
Table of Contents
Little Snapshot: What This Recipe Delivers
Craving more sweet endings? Dive into our delightful Banana Pudding Dessert Cups – and if your sweet tooth is still calling, don’t forget to explore our full array of irresistible dessert recipes that are sure to impress!
These individual banana pudding dessert cups layer silky condensed-milk pudding, fresh bananas, homemade whipped cream, and vanilla wafers in single-serve plastic cups. They chill overnight and are ready to grab-and-go — perfect for cookouts, potlucks, or any make-ahead dessert situation. Eight servings, no baking required.
Why You’ll Love This Recipe
- These banana pudding dessert cups are a total make-ahead dream — assemble them the night before and walk into your party stress-free.
- Each cup is already portioned out, so no messy scooping or awkward serving moments at the table.
- They’re a crowd-pleasing cookout dessert cups situation — kids go wild for them, and adults somehow eat three.
- According to The Kitchn’s ultimate no-bake banana pudding guide, the magic of this dessert is in letting it rest overnight — and this recipe proves exactly why that patience pays off.
Quick Facts
Here’s the quick scoop on this banana pudding dessert cups recipe.
- CourseDessert
- Prep Time20 minutes
- Cook Time0 minutes
- Total Time20 minutes (plus overnight chill)
- Servings8 cups
- DifficultyEasy
Nutritional Peek
Here’s an approximate breakdown per serving for these individual banana pudding cups.
| Nutrient | Amount Per Serving |
|---|---|
| Calories | ~480 kcal |
| Carbohydrates | ~52 g |
| Protein | ~6 g |
| Fat | ~28 g |
| Saturated Fat | ~17 g |
| Sugar | ~38 g |
| Fiber | ~1 g |
Ingredients for Individual Banana Pudding Cups
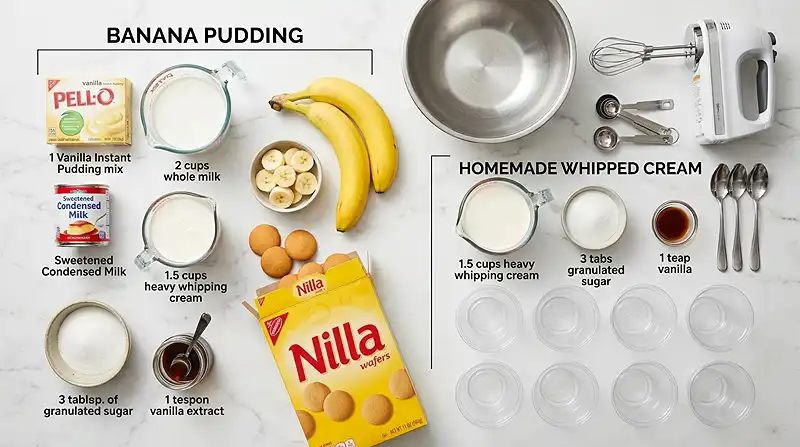
These make-ahead dessert cups come together with two simple components: the pudding mixture and the homemade whipped cream topping. Once you have both ready, assembly is just a fun little layering project.
For the pudding base, you’ll need your instant vanilla pudding mix, whole milk, and sweetened condensed milk — plus a batch of lightly whipped heavy cream folded right in. For the topping, a fresh batch of whipped cream made with heavy cream, sugar, and vanilla gives each cup that billowy, gorgeous finish.
| Amount | Ingredient |
|---|---|
| 1 box (5.1 oz) | Vanilla instant pudding mix |
| 2 cups | Whole milk |
| 12 oz | Sweetened condensed milk |
| 1 1/2 cups | Heavy whipping cream (for pudding) |
| 3 tablespoons | Granulated sugar (for pudding whipped cream) |
| 1 teaspoon | Vanilla extract (for pudding whipped cream) |
| 3-4 | Bananas, sliced |
| 1 box (11 oz) | Vanilla wafer cookies (you won’t use all of them) |
| Homemade Whipped Cream Topping | |
| 1 1/2 cups | Heavy whipping cream |
| 3 tablespoons | Granulated sugar |
| 1 teaspoon | Vanilla extract |
Tools You’ll Actually Use
- Electric hand mixer or stand mixer
- Large mixing bowl (x2)
- Medium mixing bowl
- Whisk
- 8 clear plastic cups (9 oz size works great)
- Spatula
- Measuring cups and spoons
How to Make Banana Pudding Dessert Cups Step by Step
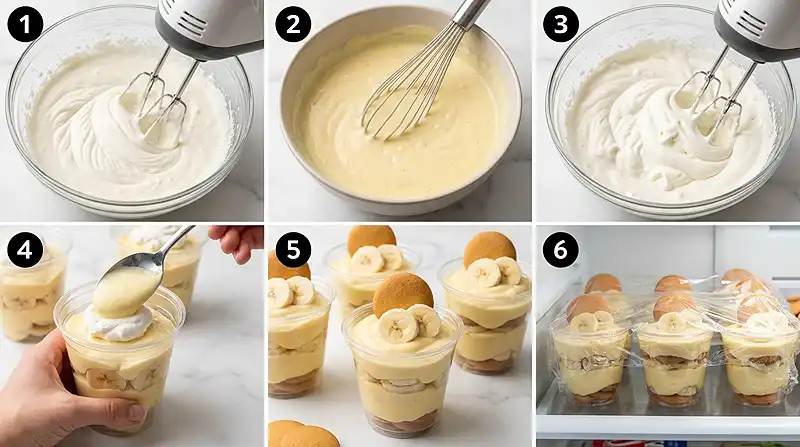
These cookout dessert cups are easier than you think. Follow the steps below and you’ll have eight gorgeous cups chilling in the fridge before bedtime.
Step 1: Make the Pudding Whipped Cream
In a large mixing bowl, use an electric mixer to beat together 1 1/2 cups heavy whipping cream, 3 tablespoons granulated sugar, and 1 teaspoon vanilla extract. Beat until stiff peaks form — this whipped cream gets folded into the pudding for an ultra-creamy texture. Set it aside.
Step 2: Mix the Pudding Base
In a medium mixing bowl, whisk together 2 cups whole milk and the 5.1 oz box of vanilla instant pudding mix until completely smooth with no lumps. Then pour in the full 12 oz can of sweetened condensed milk and whisk until evenly blended.
Step 3: Combine and Set Aside
Gently fold the whipped cream from Step 1 into the pudding mixture until everything is evenly blended and fluffy. The result should be a luscious, cloud-like pudding. Set this aside while you make your topping.
Step 4: Make the Whipped Cream Topping
In a clean large mixing bowl, beat together the remaining 1 1/2 cups heavy whipping cream, 3 tablespoons sugar, and 1 teaspoon vanilla extract with an electric mixer until stiff peaks form. This is your gorgeous finishing layer for each cup.
Step 5: Assemble the Cups
Place a layer of fresh banana slices into the bottom of each plastic cup. Add a layer of the pudding mixture, then a layer of whipped cream topping. Repeat the layers — bananas, pudding, whipped cream — until each cup is full, finishing with a generous swirl of whipped cream on top.
Step 6: Top and Chill
Place 2-3 vanilla wafer cookies on top of each cup along with a few extra banana slices for a pretty finish. Transfer all eight cups to the refrigerator and chill overnight — or for at least 6-8 hours — until completely set. Serve cold and enjoy every single layer.
Claire’s Pro Tips for Perfect Individual Banana Pudding
Individual banana pudding is pretty forgiving, but a few small tricks make a big difference in the final result. I’ve made enough batches to know what corners are worth cutting — and which ones definitely aren’t.
Use whole milk, not skim. The fat content in whole milk gives the pudding its rich, creamy body. Lower-fat milk makes it a little too thin and won’t set up as nicely overnight.
Don’t skip the overnight chill. I know it’s tempting to dig in after a couple of hours, but the overnight rest is what softens those vanilla wafers into that dreamy, almost cake-like texture. The wait is absolutely worth it.
Wait to add the cookies until the last 30 minutes if you prefer a bit of crunch. If you love a softer cookie (like I do), go ahead and add them during assembly. Both ways are totally valid — it’s really a personal preference call.
Slice the bananas right before layering to keep them from browning. If you’re prepping extra far ahead, a tiny squeeze of lemon juice on the slices can help slow the oxidation without affecting the flavor much.
Quick Fixes for Banana Pudding Dessert Cups
My pudding is too runny. This usually means the whipped cream wasn’t beaten to stiff peaks before folding in. Make sure your cream is cold and your bowl is clean — any fat residue can prevent it from whipping properly. Pop the assembled cups in the fridge and give them the full overnight chill; the pudding should firm up beautifully.
The bananas turned brown. This is totally normal and doesn’t affect the flavor at all. If browning bothers you, toss your banana slices in a tiny squeeze of lemon juice before layering. It slows oxidation without making the pudding taste citrusy.
The cookies are too soggy. You’ve got two options: add the wafers in the last 30 minutes before serving for crunch, or lean into the softness — most people actually prefer that melt-in-your-mouth texture after a full overnight chill.
My whipped cream topping deflated. This happens when the cream isn’t cold enough before whipping. Chill your bowl and beaters in the freezer for 10 minutes before you start, and make sure your heavy cream comes straight from the fridge.
Variations and Fun Twists
Once you’ve nailed the base recipe, these cookout dessert cups are incredibly easy to riff on. Here are some of my favorite ways to mix it up.
- Chocolate layer: Add a drizzle of chocolate sauce between pudding layers for a banana-chocolate combo that’s absolutely dreamy.
- Strawberry swap: Replace the bananas with fresh sliced strawberries for a spring-ready version that pairs perfectly with the vanilla pudding.
- Gluten-free option: Swap the vanilla wafers for your favorite gluten-free cookie. Gluten-free shortbread works beautifully here.
- Caramel drizzle: A little drizzle of salted caramel between layers adds a gorgeous depth of flavor that makes these cups feel extra special.
- Mason jar presentation: Use wide-mouth mason jars instead of plastic cups for a more rustic, farmhouse-chic look at dinner parties.
Serving, Storage and Reheating
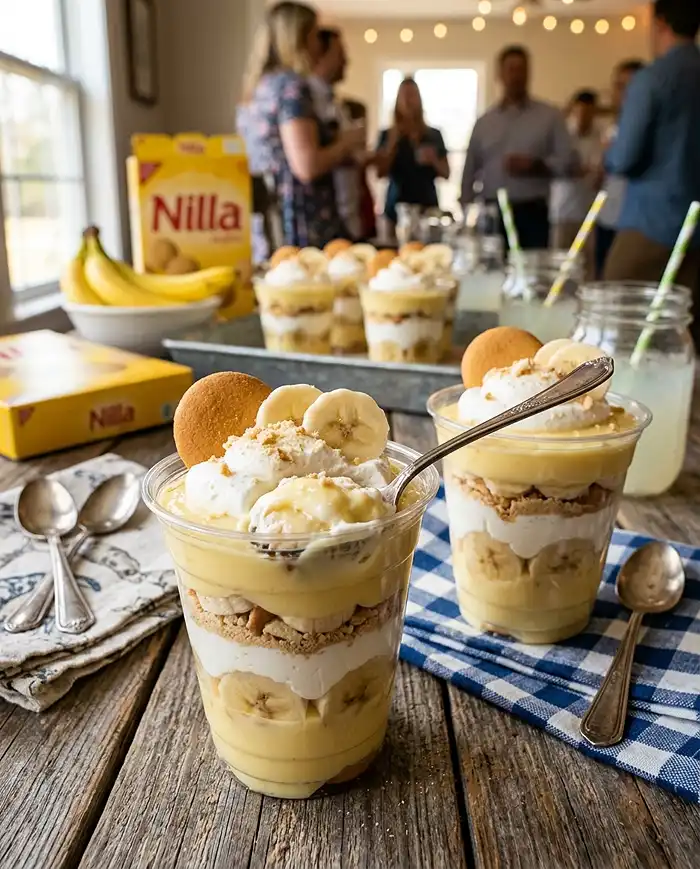
These individual banana pudding cups are best served straight from the fridge, ice cold. Pull them out right before serving and add any last-minute cookie or banana garnish so they look their best at the table — or the cookout spread.
Store any leftover cups covered loosely with plastic wrap in the refrigerator. They’ll keep well for up to two days, though the bananas will continue to soften and the cookies will get even more cake-like over time. Most people think Day 2 tastes even better, honestly.
These don’t need reheating — they’re a cold dessert through and through. Do not freeze these cups; the whipped cream and pudding don’t hold up well to freezing and thawing, and the banana slices will turn mushy.
No-Waste Kitchen Magic
Got extra vanilla wafers rattling around? Crush them up and use them as a topping for yogurt parfaits or ice cream sundaes — they add a lovely crunch.
Leftover sweetened condensed milk (if you have any) is magic stirred into your morning coffee or drizzled over fresh fruit. Don’t let a single drop go to waste.
Bananas that are a little too ripe for slicing are perfect candidates for banana bread. Toss them in the freezer until you’re ready to bake — frozen overripe bananas peel easily and mash like a dream.
Extra whipped cream keeps in the fridge for about 24 hours. Use it to top hot cocoa, pancakes, or a bowl of fresh berries the next morning. No shame in finishing it off with a spoon, either.
Serving Suggestions and Pairings
These make-ahead dessert cups pair beautifully with other easy cookout favorites. If you’re building out a full spread, try serving them alongside these antipasto tortellini skewers for a crowd-pleasing appetizer that’s just as easy to prep ahead.
For another no-bake dessert that works beautifully on the same table, the no-bake strawberry cream pie is a perfect partner to these banana pudding cups — two cool, creamy desserts that let the fresh fruit shine.
Conclusion
These banana pudding dessert cups are proof that the best desserts don’t require an oven or a lot of effort — just good ingredients and a little overnight patience.
Whether you’re bringing them to a cookout, setting them out at a family dinner, or making a batch just because it’s Tuesday, they never disappoint. Every layer is worth it.
I’d love to see your spin on these banana pudding dessert cups! Drop a comment below with your photos — I’d love to see how you made them your own. These cups are so versatile, I bet you’ve already got amazing variations in mind.
I’m Claire Whitmore — a dessert daydreamer from Asheville, NC. For me, baking isn’t about perfect pastries — it’s about the joy of sharing something sweet (and maybe sneaking an extra scoop of whipped cream straight from the bowl).
FAQs
Can I make banana pudding dessert cups the night before?
Yes, absolutely — and you actually should! These cups are designed to be made ahead and chilled overnight. The resting time lets the pudding fully set and the vanilla wafers soften into that dreamy, cake-like texture everyone loves.
How long do individual banana pudding cups last in the fridge?
These cups keep well for up to two days covered loosely in the refrigerator. The flavor actually deepens on Day 2, though the bananas will continue to soften. For the freshest appearance, add any cookie garnish right before serving.
Can I freeze banana pudding dessert cups?
Freezing is not recommended for these cups. The whipped cream and pudding layers don’t hold up well to freezing and thawing, and the banana slices will turn mushy. These are best enjoyed fresh from the refrigerator within two days of making.
What type of cups work best for individual banana pudding?
Clear plastic 9 oz cups are the classic choice and show off all those beautiful layers. Wide-mouth mason jars also work wonderfully for a more elevated presentation. Whatever you choose, make sure the cup is tall enough for at least two full rounds of layering.
Why should I use sweetened condensed milk in banana pudding cups?
Sweetened condensed milk adds a rich, silky sweetness that instant pudding alone can’t replicate. It deepens the flavor and gives the pudding mixture a luscious, thick texture that holds its layers beautifully after an overnight chill.
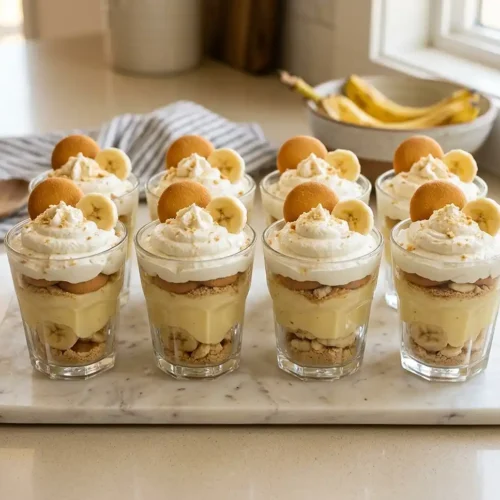
Banana Pudding Dessert Cups
Equipment
- Electric hand mixer or stand mixer
- Large mixing bowl
- Medium mixing bowl
- Whisk
- Clear plastic cups (9 oz)
- Spatula
- Measuring cups and spoons
Ingredients
Pudding Base
- 1 box (5.1 oz) Vanilla instant pudding mix
- 2 cups Whole milk
- 12 oz Sweetened condensed milk
- 1 ½ cups Heavy whipping cream for pudding
- 3 tablespoons Granulated sugar for pudding whipped cream
- 1 teaspoon Vanilla extract for pudding whipped cream
- 3-4 Bananas sliced
- 1 box (11 oz) Vanilla wafer cookies you won’t use all of them
Homemade Whipped Cream Topping
- 1 ½ cups Heavy whipping cream
- 3 tablespoons Granulated sugar
- 1 teaspoon Vanilla extract
Instructions
- In a large mixing bowl, beat together 1 1/2 cups heavy whipping cream, 3 tablespoons granulated sugar, and 1 teaspoon vanilla extract until stiff peaks form. Set aside.
- In a medium mixing bowl, whisk together 2 cups whole milk and vanilla instant pudding mix until smooth. Add sweetened condensed milk and whisk until evenly combined.
- Gently fold the whipped cream into the pudding mixture until fluffy and fully blended. Set aside.
- In a clean bowl, beat together the remaining 1 1/2 cups heavy whipping cream, 3 tablespoons sugar, and 1 teaspoon vanilla extract until stiff peaks form for the topping.
- Layer banana slices in the bottom of each cup, followed by pudding mixture and whipped cream topping. Repeat layers until cups are full, finishing with whipped cream.
- Top each cup with 2-3 vanilla wafer cookies and extra banana slices. Chill overnight or at least 6-8 hours before serving cold.