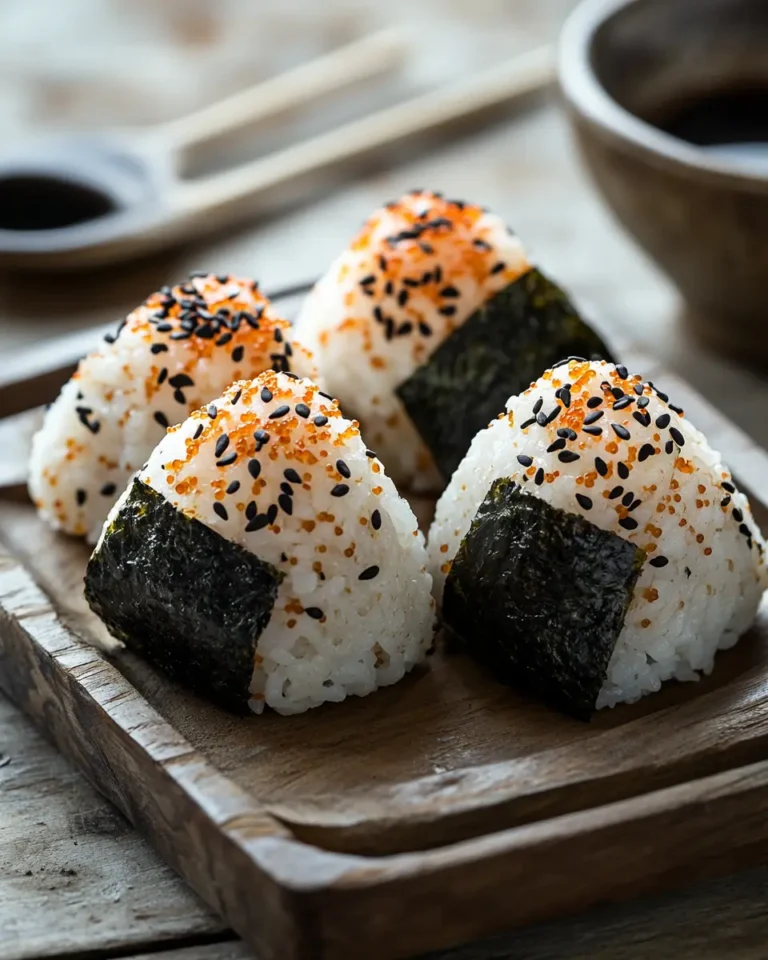
Yaki Onigiri: The Crispy Japanese Rice Ball
Hey there, I’m Claire Whitmore — a pastry whisperer in Asheville, NC, where butter totally counts as self-care. This Yaki Onigiri recipe is proof that savory snacks can be just as magical as dessert, and honestly? These crispy little rice triangles have completely stolen my heart.
I stumbled into the world of grilled rice balls during a late-night cooking show binge (don’t judge), and now I make them at least twice a week.
There’s something so satisfying about that crackling, caramelized crust giving way to soft, fluffy rice inside. It’s like the best parts of comfort food wrapped up in a handheld triangle of joy.
Little Snapshot: What This Recipe Delivers
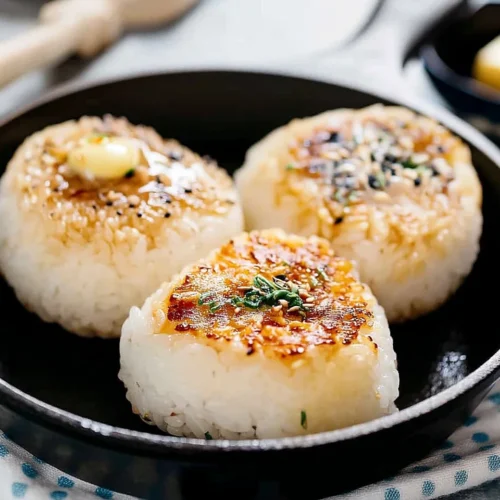
This Yaki Onigiri recipe transforms simple short-grain rice into crispy, golden-brown grilled rice balls with your choice of savory miso or soy sauce glaze.
Perfect as a snack, side dish, or light meal, these Japanese rice balls take about 30 minutes from start to finish and deliver restaurant-quality results right in your own kitchen.
Why You’ll Love This Recipe 🌸
- This Asian Rice Balls Recipe gives you that addictive crispy-on-the-outside, soft-on-the-inside texture that’ll have you making “just one more batch.”
- You get two flavor options (miso and soy sauce) so you can switch things up depending on your mood — or make both because why choose?
- They’re naturally gluten-free when you use tamari instead of soy sauce, making them perfect for feeding a crowd with different dietary needs.
- According to Serious Eats, the key to perfect rice balls is using freshly cooked rice while it’s still warm — and this recipe walks you through exactly that.
Quick Facts ⚡
Here’s the quick scoop on this Yaki Onigiri.
- CourseSnack/Side Dish
- Prep Time15 minutes
- Cook Time15 minutes
- Total Time30 minutes
- Servings6 rice balls
- DifficultyEasy
Table of Contents
Nutritional Peek
Here’s what you’re working with per serving (1 rice ball with miso flavoring):
| Nutrient | Amount per Serving |
|---|---|
| Calories | 185 kcal |
| Protein | 3g |
| Carbohydrates | 28g |
| Fat | 6g |
| Fiber | 1g |
| Sugar | 2g |
Note: Nutritional values are approximate and will vary based on which flavor option you choose.
Yaki Onigiri Ingredients
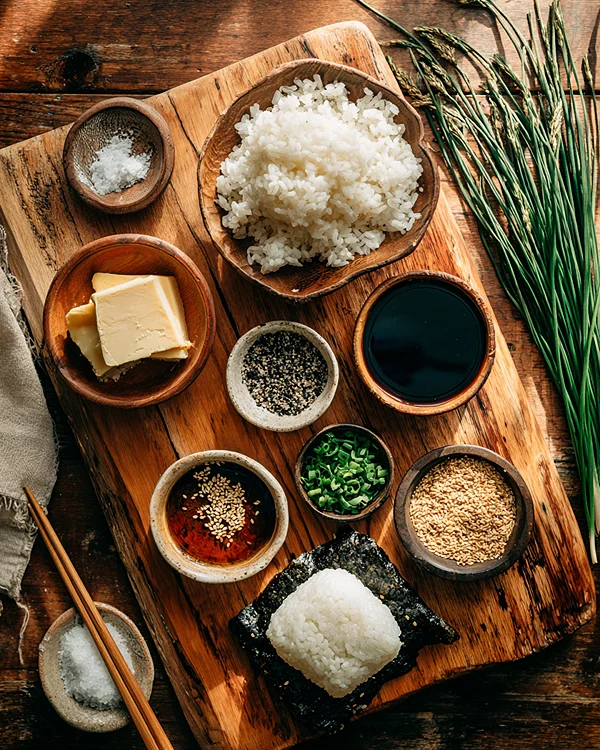
These grilled rice balls start with the simplest pantry staples, but the magic happens in how you bring them together.
| Amount | Ingredient |
|---|---|
| 2 cups | uncooked short grain rice (sushi rice works perfectly) |
| 2 cups | water |
| Miso Flavor | |
| 1 tbsp | miso paste (white or red — both work!) |
| 2 tsp | mirin |
| 2 tsp | sake |
| 2 tsp | sugar |
| 1.5 tbsp | butter (yes, real butter — this is not the time for substitutes) |
| 1 tsp | finely chopped chive for garnish |
| 1 tsp | sesame seeds for garnish |
| Soy Sauce Flavor | |
| 1.5 tbsp | vegetable oil |
| 1 tbsp | soy sauce (or tamari for gluten-free) |
| 1.5 tbsp | everything bagel seasoning (trust me on this) |
| 1.5 tbsp | butter |
Tools You’ll Actually Use
- Rice cooker (or a pot with a tight-fitting lid if you’re old-school)
- Cast iron skillet (this is key for that perfect crust)
- Mixing bowl
- Plastic wrap or cling film
- Pastry brush or spoon for glazing
- Measuring spoons and cups
Step-by-Step Instructions
Making Your Yaki Onigiri is honestly one of the most therapeutic cooking projects you can tackle on a weeknight.
Step 1: Cook the Rice
Start by cooking your short-grain rice according to your rice cooker’s instructions. If you’re doing it stovetop, rinse the rice until the water runs clear, then combine with 2 cups of water in a pot.
Bring to a boil, reduce to low, cover, and simmer for 15 minutes. Let it rest off the heat for 10 minutes — don’t peek!
Step 2: Prep Your Glaze
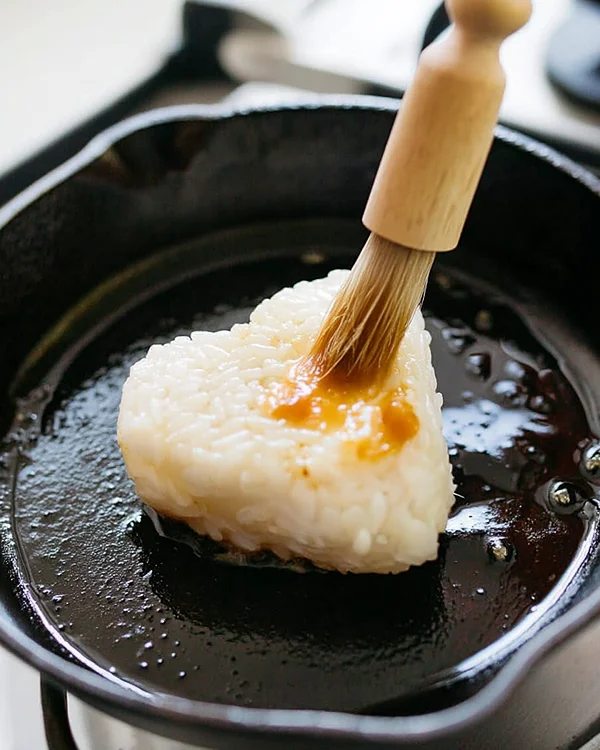
While the rice works its magic, mix together all your miso paste ingredients in a small bowl until they’re totally smooth. The mirin and sake add this gorgeous depth that makes the glaze taste way fancier than it actually is.
Step 3: Shape Those Triangles
Here’s where it gets fun. Divide your cooked rice into 6 equal portions (I just eyeball it, honestly). Grab a piece of plastic wrap, place a portion of rice in the center, and fold the wrap around it.
Now gently press and shape it into a triangle — you want it compact enough to hold together but not so tight that it turns into a rice brick. The goal is a triangle about 3/4-inch thick.
Step 4: Grill the Miso Version
Heat your cast iron skillet over medium heat and add that butter. Once it’s sizzling (but not browning), place your rice triangles in the pan. Let them grill for about 1 minute per side until they start to develop a light golden color.
Now brush on that miso mixture generously on each side and keep grilling, turning occasionally, until you get that deep golden-brown, slightly crispy crust. Your kitchen should smell absolutely incredible right about now.
Step 5: The Soy Sauce Route
If you’re going the soy sauce route, heat your skillet with vegetable oil instead. Grill each side for about 1 minute, then start brushing on the soy sauce with each flip.
You’ll flip these babies a few times, building up layers of that salty-sweet glaze until they’re gorgeously caramelized and crispy.
Step 6: Final Touches
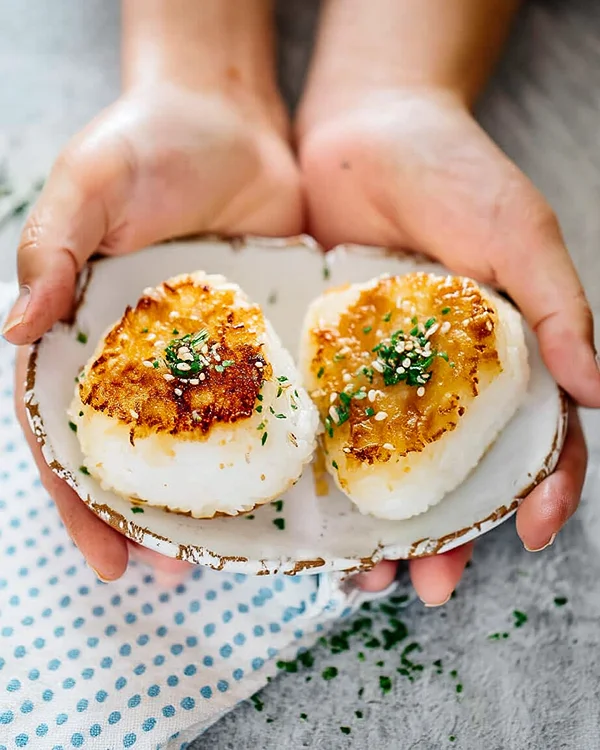
For the miso version, sprinkle with chives and sesame seeds. For the soy sauce version, top each rice ball with a little pat of butter (it’ll melt into all those crispy crevices) and shower with everything bagel seasoning. Serve immediately while they’re still warm and crackling.
Claire’s Pro Tips & Gentle Guidance
Listen, I’ve made my fair share of Japanese Yaki Onigiri mishaps, so let me save you some trouble:
The Rice Temperature Matters: Shape your rice balls while the rice is still warm — not scalding hot, but definitely not cold. Cold rice won’t stick together properly and you’ll end up with crumbly disasters.
I learned this the hard way during my first attempt when I got distracted by a phone call and let the rice cool completely. Yeah, that batch didn’t work out.
Don’t Skip the Plastic Wrap: Your hands will thank you. The plastic wrap prevents the rice from sticking to your hands and helps you shape perfect triangles without the frustration. Plus, it keeps your hands from getting scorching hot.
Patience on the Pan: The folks at Bon Appétit recommend letting each side develop a proper crust before flipping — and they’re absolutely right. If you flip too early, the rice ball might fall apart. Wait for that golden color and slight resistance when you try to lift it.
Butter is Your Friend: I know some recipes skip the butter, but it adds this nutty, rich flavor that takes these from “pretty good” to “I’m hiding these from my family so I can eat them all myself.”
Quick Fixes for Yaki Onigiri
Rice Balls Falling Apart?
Your rice might be too dry or too cold. Next time, use rice that’s still slightly warm and press the triangles more firmly. A light misting of water on your hands before shaping can also help.
Not Getting That Crispy Crust?
Make sure your skillet is properly preheated and don’t overcrowd the pan. Give each rice ball space to breathe and develop that crust. Also, resist the urge to move them around too much — let them sit and sizzle.
Glaze Burning Before Rice is Done?
Your heat’s probably too high. Drop it down to medium-low and be patient. The glaze should caramelize slowly, not scorch.
Rice Sticking to the Pan?
You need more fat in that skillet! Add a bit more butter or oil, and make sure the pan is hot before adding the rice balls.
If this recipe made your day, you’re in for a treat. The full Finger Foods & Bites guide is filled with tried-and-true favorites that real home cooks swear by. Trust me, you won’t be able to pick just one.
Variations & Fun Twists
The beauty of this Asian Rice Balls Recipe is how endlessly tweakable it is:
Filling Ideas: Try tucking a small piece of grilled salmon, pickled plum, or even a cube of cheese inside the rice before shaping. It’s like a surprise in every bite.
Spicy Kick: Mix a little sriracha or gochujang into your soy sauce glaze for a spicy version that’s absolutely addictive.
Furikake Lovers: Skip the everything bagel seasoning and go traditional with Japanese furikake (rice seasoning) sprinkled on top.
Veggie Boost: Mix some finely chopped scallions or shiso leaves directly into the rice before shaping for extra flavor and color.
Sweet & Savory: Add a tiny drizzle of honey to your soy sauce mixture for a teriyaki-ish vibe that’s ridiculously good.
Serving, Storage & Reheating
Your grilled rice balls are best enjoyed fresh off the skillet when they’re at peak crispiness, but I totally understand that life happens.
Serving Ideas: These are perfect alongside miso soup, a fresh cucumber salad, or even next to some garlic parmesan sweet potato wedges for a fun fusion meal. I also love packing them in lunch boxes with some edamame and fruit.
Storage: If you actually have leftovers (which I doubt), store them in an airtight container in the fridge for up to 3 days. Fair warning though — they’ll lose that crispy exterior, but they’re still delicious.
Reheating: The microwave will make them soft and mushy (not ideal), so I always reheat mine in a skillet over medium heat. Just add a tiny bit of butter or oil and grill each side for a minute or two until the crust comes back to life.
Freezing: You can totally freeze the shaped (but not grilled) rice balls for up to a month. Wrap each one individually in plastic wrap, then store in a freezer bag. Thaw in the fridge overnight before grilling.
No-Waste Kitchen Magic
Got extra rice? Don’t even think about tossing it.
Day-Old Rice Works Great: Actually, slightly dried-out day-old rice can make even better yaki onigiri because it holds its shape beautifully and crisps up faster.
Leftover Miso Paste: That extra miso glaze is incredible brushed on roasted vegetables, grilled chicken, or even mixed into salad dressing.
Rice Crumbs: If a rice ball breaks apart during cooking, don’t throw it away! Crumble it over a bowl of ramen or sprinkle it on salad for a crunchy topping.
Veggie Scraps: Use those leftover chive stems in your next batch of fried rice or easy dango for added flavor.
Yaki Onigiri FAQs
Can I make Yaki Onigiri ahead of time?
Absolutely! Shape the rice balls in advance and keep them covered in the fridge for a few hours. Just bring them back to room temperature before grilling so they cook evenly.
What if I don’t have a cast iron skillet?
Any heavy-bottomed pan will work, but cast iron really does give you the best crust. A non-stick pan works in a pinch — just watch the heat carefully.
Can I freeze grilled Yaki Onigiri?
I wouldn’t recommend freezing them after grilling because they lose that amazing texture. But you can freeze the shaped, uncooked rice balls and grill them fresh whenever you want.
Is there a vegan version of this recipe?
For sure! Just swap the butter for more vegetable oil or vegan butter. The miso version is already pretty vegan-friendly if you use vegan butter.
Why is my miso paste lumpy in the glaze?
Make sure you’re whisking it really well, and if needed, warm the mixture slightly to help everything dissolve smoothly. Some miso pastes are thicker than others, so a little patience goes a long way.
Cozy Closing
There’s something ridiculously satisfying about biting into a perfectly grilled Yaki Onigiri — that contrast between the crispy, caramelized outside and the soft, tender rice inside is pure comfort food magic.
Whether you go for the rich miso glaze or the savory soy sauce version, you’re in for a treat that’s way easier than it looks.
These little rice triangles have become one of my favorite things to make when I want something cozy but don’t want to spend hours in the kitchen. They’re perfect for those nights when you need comfort food that actually makes you feel good, not weighed down.
Plus, they’re just fun to make — there’s something meditative about shaping rice into triangles and watching them transform into golden, crispy perfection.
I’d love to see your spin on this Yaki Onigiri! Leave a note below or tag me on Instagram so we can share a sweet (or in this case, savory) moment together.
And if you’re feeling adventurous, check out my Japanese cotton candy Swiss cake roll for dessert — because balance, right?
I’m Claire Whitmore — a dessert daydreamer from Asheville, NC. For me, baking isn’t about perfect pastries — it’s about the joy of sharing something sweet (and maybe sneaking an extra scoop of icing).
Yaki Onigiri
Equipment
- Rice cooker
- Cast iron skillet
- mixing bowl
- Plastic wrap
- Pastry brush
- Measuring spoons
- Measuring cups
Ingredients
Base Ingredients
- 2 cups uncooked short grain rice sushi rice works perfectly
- 2 cups water
Miso Flavor
- 1 tbsp miso paste white or red
- 2 tsp mirin
- 2 tsp sake
- 2 tsp sugar
- 1.5 tbsp butter
- 1 tsp finely chopped chive for garnish
- 1 tsp sesame seeds for garnish
Soy Sauce Flavor
- 1.5 tbsp vegetable oil
- 1 tbsp soy sauce or tamari for gluten-free
- 1.5 tbsp everything bagel seasoning
- 1.5 tbsp butter
Instructions
- Cook your short-grain rice according to your rice cooker’s instructions. If using stovetop, rinse the rice until the water runs clear, then combine with 2 cups of water in a pot. Bring to a boil, reduce to low, cover, and simmer for 15 minutes. Let it rest off the heat for 10 minutes without peeking.
- While the rice cooks, mix together all your miso paste ingredients (miso, mirin, sake, sugar, and butter) in a small bowl until completely smooth.
- Divide your cooked rice into 6 equal portions. Grab a piece of plastic wrap, place a portion of rice in the center, and fold the wrap around it. Gently press and shape it into a triangle about 3/4-inch thick, compact enough to hold together but not too tight.
- For miso version: Heat your cast iron skillet over medium heat and add butter. Once sizzling, place rice triangles in the pan. Grill for about 1 minute per side until light golden. Brush on miso mixture generously on each side and keep grilling, turning occasionally, until deep golden-brown and crispy.
- For soy sauce version: Heat your skillet with vegetable oil over medium heat. Grill each side for about 1 minute, then start brushing on soy sauce with each flip. Flip several times, building up layers of glaze until gorgeously caramelized and crispy.
- For miso version, sprinkle with chives and sesame seeds. For soy sauce version, top each rice ball with a pat of butter and shower with everything bagel seasoning. Serve immediately while warm and crackling.