Strawberry Oatmeal Crumble Bars
Strawberry Oatmeal Crumble Bars are the kind of recipe that makes your whole kitchen smell like summer — buttery oat crust, jammy strawberry filling, and a golden crumble topping that practically begs to be eaten warm.
Hey there, I’m Claire Whitmore — a pastry whisperer in Asheville, NC, where butter totally counts as self-care. These Strawberry Oatmeal Crumble Bars use simple pantry ingredients, come together in one bowl, and deliver a crowd-pleasing flavor that’s equal parts rustic and irresistible.
I first made these on a rainy Saturday when I had a punnet of strawberries that were one day away from becoming compost. One bowl, a little lemon juice, and about an hour later — pure magic. Now they’re basically a staple in my house.
Table of Contents
Little Snapshot: What This Recipe Delivers
These Strawberry Oatmeal Crumble Bars feature a buttery oat-flour crust, a lightly sweetened fresh strawberry filling brightened with lemon juice, and a golden crumble topping — all baked in one 8-inch pan.
They’re easy enough for a weeknight and pretty enough to bring to a potluck. Ready in about an hour with 9 generous servings, this is your new go-to Strawberry Oatmeal Crumble Bar Recipe.
Why You’ll Love This Recipe
- These Strawberry Oatmeal Crumble Bars take less time to make than it takes to decide what to watch on Netflix — seriously, one bowl and you’re done.
- They’re made with fresh strawberries and oats, so you can feel like a responsible adult while eating dessert for breakfast.
- The whole thing is naturally crowd-pleasing — kids love them, adults sneak seconds, and nobody ever asks “what’s in this?”
- According to King Arthur Baking’s guide to easy berry bars, the secret to a great fruit bar is a buttery oat dough that does double duty as crust and topping — and that’s exactly what makes this recipe so effortless.
Quick Facts
Here’s the quick scoop on this Strawberry Oatmeal Crumble Bar Recipe.
- Course: Dessert / Snack
- Prep Time: 15 minutes
- Cook Time: 50 minutes
- Total Time: 1 hour 5 minutes (plus cooling)
- Servings: 9 bars
- Difficulty: Easy
Nutritional Peek
Here’s a rough nutritional breakdown per serving, based on 9 bars. These are estimates and will vary slightly based on your specific ingredients.
| Nutrient | Amount Per Serving |
|---|---|
| Calories | ~285 kcal |
| Carbohydrates | ~43 g |
| Protein | ~3 g |
| Total Fat | ~12 g |
| Fiber | ~2 g |
| Sugar | ~22 g |
Strawberry Oatmeal Crumble Bars Ingredients
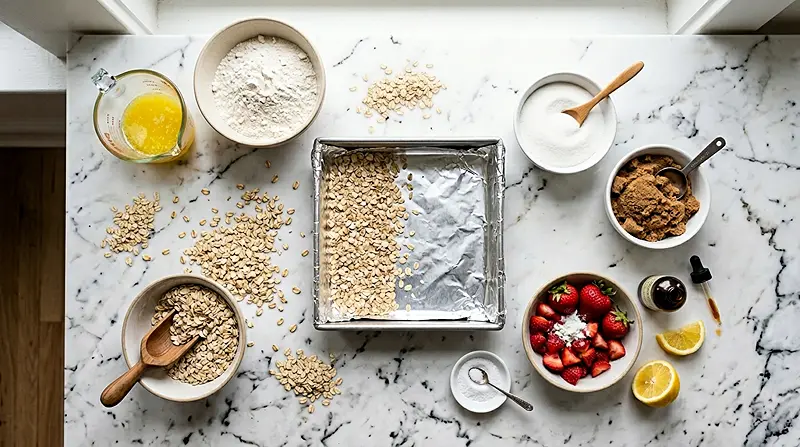
Recipes with strawberries and oats don’t get much simpler than this — and that’s exactly why they’re so magical.
For the crust and crumble — melted butter, all-purpose flour, old-fashioned oats, granulated sugar, light brown sugar, and salt — these all come together into a sandy, press-able base that doubles as your topping. For the strawberry layer — fresh strawberries, sugar, lemon juice, and cornstarch — you’ll toss them together raw and let the oven do the rest.
Crust and Crumble Topping
| Amount | Ingredient |
|---|---|
| ½ cup | Unsalted butter, melted (yes, real butter — margarine won’t give you that gorgeous, golden crust) |
| 1 cup | All-purpose flour |
| ¾ cup | Old-fashioned oats (not instant — these give you that beautiful chewy texture) |
| ½ cup | Granulated sugar |
| ¼ cup | Light brown sugar, packed |
| ½ tsp | Salt, or to taste |
Strawberry Layer
| Amount | Ingredient |
|---|---|
| 2 cups | Fresh strawberries, coarsely chopped (frozen can work in a pinch — see tips) |
| ⅓ cup | Granulated sugar |
| 2 tbsp | Fresh lemon juice (bottled works but fresh is better — trust me) |
| 2 tsp | Cornstarch |
Tools You’ll Actually Use
- 8-inch square baking pan
- Aluminum foil (for lining — makes cleanup so much easier)
- Cooking spray
- Large microwave-safe bowl
- Spatula or your fingers (for pressing the crust)
- Wire cooling rack
- Sharp knife for slicing
Step-by-Step Instructions for Strawberry Oatmeal Crumble Bars
Let’s get into it — these Strawberry Oatmeal Crumble Bars are so straightforward, you’ll have the whole thing in the oven before your first cup of coffee is done brewing.
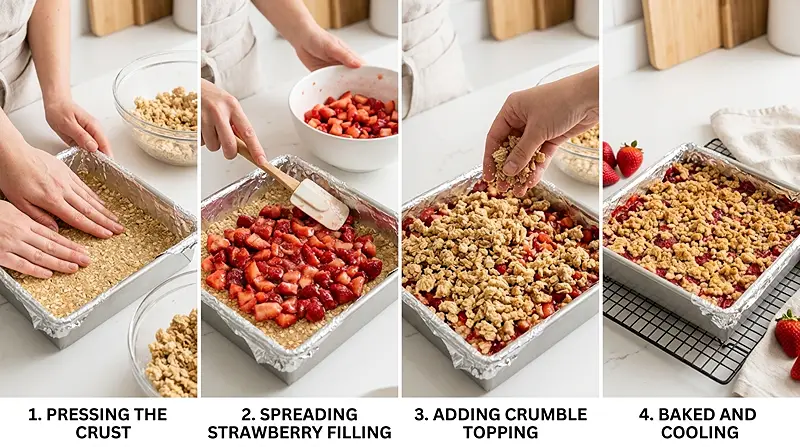
Step 1: Preheat and Prep Your Pan
Preheat your oven to 350°F. Line an 8-inch square baking pan with aluminum foil, making sure to leave some overhang on the sides — this little trick makes lifting the bars out so much easier. Spray the foil with cooking spray and set aside.
Step 2: Make the Crust and Crumble Mixture
In a large, microwave-safe bowl, melt the ½ cup of unsalted butter — about 1 minute on high power. Add the 1 cup all-purpose flour, ¾ cup old-fashioned oats, ½ cup granulated sugar, ¼ cup packed light brown sugar, and ½ teaspoon salt.
Stir everything together until combined. The mixture will look dry and sandy with some larger crumble pieces — that’s exactly what you want. It should remind you of a streusel topping, just a little more substantial.
Step 3: Press the Crust
Set aside 1 heaping cup of the oat mixture — this becomes your crumble topping later. Transfer the remaining mixture into your prepared pan.
Using a spatula or your fingers, hard-pack the mixture into an even, smooth, flat layer across the bottom. Press it firmly so it holds together when baked. Set the pan aside while you prepare the strawberry filling.
Step 4: Make the Strawberry Layer
Using the same large bowl (no need to wash it!), add the 2 cups coarsely chopped fresh strawberries, ⅓ cup granulated sugar, 2 tablespoons fresh lemon juice, and 2 teaspoons cornstarch. Toss everything together until the strawberries are coated.
Don’t worry if the sugar hasn’t fully dissolved — it will liquefy and turn into a luscious, jammy filling while baking. That bubbling, glossy strawberry goodness is a sign things are going perfectly.
Step 5: Assemble the Bars
Evenly distribute the strawberry mixture over the pressed crust, spreading it all the way to the edges. Then take your reserved heaping cup of crumble mixture and sprinkle it evenly over the strawberry layer.
Here’s Claire’s little trick: before sprinkling, squeeze the crumble mixture in your palm a few times to encourage bigger, chunky crumble pieces to form. Those clusters are the best part.
Step 6: Bake
Bake for about 50 minutes, or until the edges are set, the crumble topping looks pale golden, and the strawberry filling is visibly bubbling along the edges. If your strawberries were extra juicy, the bars may need up to 55 minutes.
Watch your bars, not the clock — ovens vary, and the visual cues (golden topping, bubbling filling) are your most reliable guide here. Your kitchen should smell absolutely incredible at this point.
Step 7: Cool Before Slicing
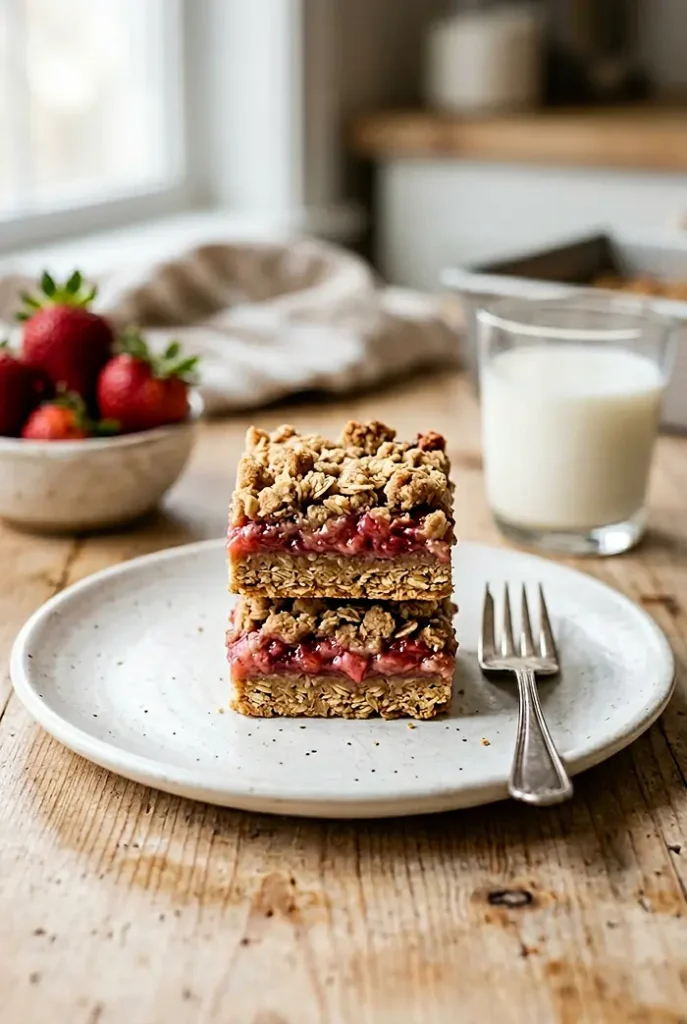
Place the pan on a wire rack and allow the bars to cool for at least 1 hour before slicing. This step is non-negotiable — I know it’s hard, but if you slice these too soon, they’ll fall apart into a delicious but messy pile. Patience pays off with clean, beautiful bars.
Claire’s Pro Tips for the Best Strawberry Bars
For the best Strawberry Bars Healthy enough to eat at any time of day, a few small details make a big difference.
I’ve made these bars more times than I can count and have learned a thing or two along the way — including a few lessons from batches that didn’t go as planned.
Use old-fashioned oats, not instant. Instant oats break down too much during baking and won’t give you that wonderful chewy, textured crumble. Old-fashioned rolled oats are the move here — they hold their shape and add that hearty bite.
Don’t skip the foil lining. I’ve made this mistake exactly once. Lifting bars cleanly out of an unlined pan is a test of patience nobody needs. Foil with overhanging sides = clean bars, happy baker.
Squeeze those crumble clusters. Before sprinkling the topping, squeeze handfuls of the mixture in your palm to form bigger chunks. Those golden clusters on top are where the magic lives.
Cool completely — seriously. I know waiting an hour feels like forever when your kitchen smells like strawberry heaven. But trust the process. Warm bars are delicious but structurally chaotic. Cooled bars are both delicious AND pretty.
Quick Fixes for Strawberry Oatmeal Crumble Bars
My crumble topping isn’t golden after 50 minutes.
Every oven runs a little differently. If the topping looks pale and underdone, add 5-minute increments until you see that pale golden color and the filling is bubbling at the edges. Cover loosely with foil if the top starts to brown too fast while the center is still underdone.
My bars are falling apart when I try to slice them.
This almost always means they haven’t cooled long enough. Give them the full hour on the wire rack — or pop the whole pan into the fridge for 20-30 minutes if you’re in a rush. Cold bars slice cleanly every time.
The strawberry layer seems too liquidy after baking.
This is totally normal while the bars are still warm. The cornstarch-thickened filling sets as it cools. If it’s still very loose after the full cool time, your strawberries were likely extra juicy — next time, pat them dry or add an extra half teaspoon of cornstarch.
My crust didn’t hold together.
Make sure you’re pressing the crust mixture firmly into the pan — really pack it down with your fingers or the bottom of a measuring cup. The mixture should feel solid and compact before you add the strawberry layer. If the mixture seemed too dry, your butter measurement may have been slightly short.
Variations and Fun Twists
These Recipes with Strawberries and Oats are a wonderful base for all kinds of creative spins.
Mixed berry version: Swap half the strawberries for blueberries or raspberries for a gorgeous mixed-berry filling. This is especially beautiful in summer when all the berries are in season at once.
Strawberry rhubarb: Replace ½ cup of the strawberries with finely sliced rhubarb for that classic sweet-tart combination. Add an extra tablespoon of sugar to balance the tartness.
Gluten-free option: Swap the all-purpose flour for a 1:1 gluten-free baking flour and use certified gluten-free oats. The texture will be slightly more crumbly but equally delicious.
Add a hint of spice: Stir ½ teaspoon of cinnamon or cardamom into the crust mixture for a warm, cozy depth of flavor that pairs beautifully with the strawberries.
Fancy it up: Serve warm bars with a scoop of vanilla ice cream and an extra drizzle of honey for a plated dessert that looks like it came from a restaurant.
Serving, Storage and Reheating
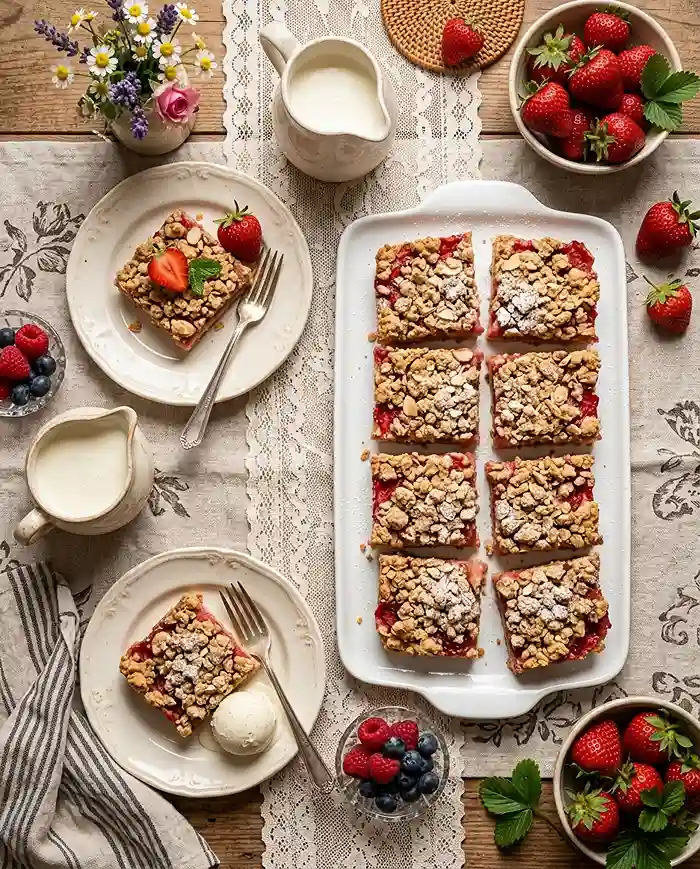
These bars are wonderful served slightly warm or at room temperature. Pair them with a scoop of vanilla ice cream, a dollop of whipped cream, or just a cup of tea — they shine in every setting. They also make a lovely addition to a brunch spread alongside these mini lemon meringue dessert cups for a beautiful fruit-forward dessert table.
Store leftover bars in an airtight container at room temperature for up to 2 days, or in the refrigerator for up to 5 days. The fridge actually helps them hold their shape better, especially in warmer months.
To reheat, pop individual bars in the microwave for 15-20 seconds or warm them in a 300°F oven for about 8 minutes. They won’t be quite as crisp on top, but honestly? Still completely wonderful.
No-Waste Kitchen Magic
Got leftover bars that are starting to soften? Crumble them over yogurt or oatmeal the next morning for an instant fruit-and-oat breakfast bowl. It’s basically granola, and nobody needs to know it started as dessert.
If your strawberry filling was extra juicy and leaked onto the foil, don’t toss it — scrape that concentrated strawberry syrup into a small jar. It’s incredible swirled into plain yogurt or drizzled over pancakes.
Have too many ripe strawberries before you’re ready to bake? Chop and freeze them in a zip-top bag. They work perfectly in this recipe straight from frozen — just add 5-8 extra minutes to the baking time.
This is the kind of recipe that makes you want to cook everything in sight. Lucky for you, the Morning Classics collection is full of exactly that. Go explore and find your new go-to dish.
FAQs About Strawberry Oatmeal Crumble Bars
Can I freeze Strawberry Oatmeal Crumble Bars?
Yes, absolutely! Let the bars cool completely, then wrap individual portions in plastic wrap and store in a freezer-safe bag for up to 3 months. Thaw overnight in the fridge or at room temperature for a couple of hours before serving.
Can I use frozen strawberries instead of fresh?
You can! Don’t thaw them first — add them frozen directly to the filling mixture. Just expect a slightly longer bake time (up to 60 minutes) since frozen berries release more moisture. The cornstarch will still help everything set up beautifully.
What’s the best way to store Strawberry Oatmeal Crumble Bars?
Store them in an airtight container in the fridge for up to 5 days. Refrigerating actually helps them hold their structure better than leaving them at room temperature, especially during warmer months. Layer parchment between bars to prevent sticking.
How do I know when the Strawberry Oatmeal Crumble Bars are done baking?
Look for three things: the crumble topping should be pale golden (not raw-looking), the edges of the pan should appear set and firm, and the strawberry filling should be visibly bubbling along the sides. Don’t rely solely on the timer — your eyes are the best guide here.
Why should I use cornstarch in the strawberry filling?
Cornstarch thickens the juices released by the strawberries during baking, transforming them from a watery pool into a luscious, jammy filling that holds together when sliced. Without it, you’ll end up with soggy bars and a very sad baker. Two teaspoons is all it takes.
Strawberry Oatmeal Crumble Bars Cozy Closing
There’s something just so satisfying about a recipe that delivers big on flavor without demanding much from you — and these Strawberry Oatmeal Crumble Bars do exactly that every single time.
Whether you’re making them for a lazy weekend, a potluck, or just because the strawberries on your counter are giving you a look, I hope they bring as much joy to your kitchen as they do to mine.
I’d love to see your spin on these Strawberry Oatmeal Crumble Bars! Drop a comment below with your photos — I’d love to see how you made them your own. Maybe you added rhubarb, threw in some blueberries, or went full-on fancy with ice cream on top. This Strawberry Oatmeal Crumble Bar recipe is so versatile; I bet you’ve got amazing variations already in mind!
I’m Claire Whitmore — a dessert daydreamer from Asheville, NC. For me, baking isn’t about perfect pastries — it’s about the joy of sharing something sweet (and maybe sneaking an extra bar before the pan is cool).
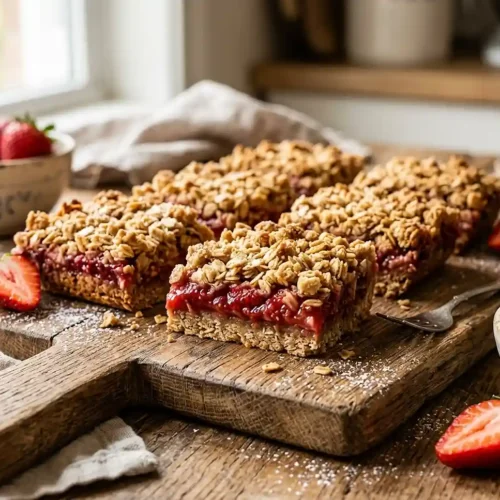
Strawberry Oatmeal Crumble Bars
Equipment
- 8-inch square baking pan
- Aluminum foil
- Cooking spray
- Large mixing bowl
- Spatula
- Wire cooling rack
- Knife
Ingredients
Crust and Crumble
- ½ cup Unsalted butter melted
- 1 cup All-purpose flour
- ¾ cup Old-fashioned oats
- ½ cup Granulated sugar
- ¼ cup Light brown sugar packed
- ½ teaspoon Salt
Strawberry Filling
- 2 cups Fresh strawberries chopped
- ⅓ cup Granulated sugar
- 2 tablespoons Lemon juice
- 2 teaspoons Cornstarch
Instructions
- Preheat oven to 350°F and line an 8-inch pan with foil, then spray with cooking spray.
- Melt butter in a large bowl, then mix in flour, oats, granulated sugar, brown sugar, and salt until crumbly.
- Reserve 1 heaping cup of the mixture, then press the rest firmly into the pan to form the crust.
- In the same bowl, mix strawberries, sugar, lemon juice, and cornstarch.
- Spread the strawberry mixture evenly over the crust.
- Sprinkle the reserved crumble mixture over the top.
- Bake for about 50 minutes until topping is golden and filling is bubbling.
- Cool completely for at least 1 hour before slicing into bars.