Mini Cheesecakes
Mini cheesecakes are everything you want in a dessert — rich, creamy, perfectly portioned, and surprisingly simple to make at home. Each one comes with a buttery graham cracker crust, a silky smooth cream cheese filling, and endless topping options.
We’re talking easy ingredients (cream cheese, eggs, sugar, vanilla), a quick 15-minute bake time, and results that look like you ordered them from a bakery. No water bath, no springform pan drama — just a regular muffin tin and a little patience while they chill.
Hey there, I’m Claire Whitmore — a pastry whisperer in Asheville, NC, where butter totally counts as self-care. These mini cheesecakes have been my go-to dessert for years, and honestly, they never get old.
I first made them for a friend’s birthday party when I needed something that looked impressive but wouldn’t take all day. One bite in and everyone was hooked. Now they’re my most-requested dessert, and I’m so excited to share them with you.
Table of Contents
Little Snapshot: What This Recipe Delivers
These mini cheesecakes are individually baked cheesecakes in a standard muffin pan, made with a buttery graham cracker crust and a smooth cream cheese filling. Ready in under 30 minutes of active prep, they chill into perfectly creamy, crowd-pleasing bites that serve 12 — with zero baking experience required.
Why You’ll Love This Recipe
- These mini cheesecakes look totally fancy but take less time than folding a pile of laundry — seriously, active prep is under 30 minutes.
- No springform pan, no water bath, no fuss — just a basic muffin tin you already own and a handful of pantry staples.
- They’re perfectly portioned for parties, potlucks, or when you just need your own little cheesecake moment without committing to an entire slice.
- According to King Arthur Baking’s in-depth guide to cheesecake cracking, room temperature ingredients and not over-mixing are the real secrets to a flawless cheesecake — and this recipe is built around exactly that.
Quick Facts
Here’s the quick scoop on this mini cheesecake recipe.
- CourseDessert
- Prep Time15 minutes
- Cook Time20 minutes
- Total Time35 minutes + 4 hours chilling
- Servings12 mini cheesecakes
- DifficultyEasy
Nutritional Peek
Here’s an approximate nutritional breakdown per mini cheesecake (without toppings). Keep in mind these values can vary slightly based on exact brands used.
| Nutrient | Amount Per Serving |
|---|---|
| Calories | 230 kcal |
| Protein | 4 g |
| Carbohydrates | 18 g |
| Fat | 16 g |
| Saturated Fat | 9 g |
| Fiber | 0.3 g |
| Sugar | 13 g |
Ingredients
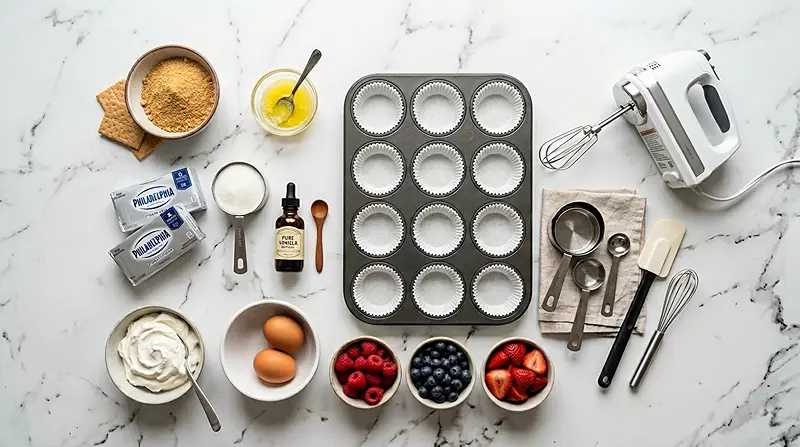
These mini cheesecakes come together with just a few simple ingredient groups — nothing fancy, all fridge and pantry staples you probably already have.
For the crust, you’ll need graham cracker crumbs and melted butter — those two create that satisfying, slightly crunchy base. For the filling, the stars are room-temperature cream cheese, granulated sugar, vanilla extract, and eggs. And for topping, keep it simple with whipped cream and fresh fruit, or go wild — totally your call.
| Amount | Ingredient |
|---|---|
| Crust | |
| 1 cup (113g) | Graham cracker crumbs |
| 4 Tbsp | Unsalted butter, melted |
| Cheesecake Filling | |
| 16 oz | Full fat cream cheese, softened to room temperature (Yes, full fat — this is not the time for low-fat shortcuts.) |
| 1/2 cup (99g) | Granulated sugar |
| 1 tsp | Vanilla extract |
| 2 large | Eggs, room temperature |
| Toppings | |
| As needed | Whipped cream |
| As needed | Fresh fruit (strawberries, blueberries, raspberries — all amazing) |
There’s a whole world of cakes & cupcakes waiting for you over at the Cakes & Cupcakes collection. Each one is made with the same love and attention, and they’re all absolutely worth trying. Happy cooking!
Tools You’ll Actually Use
- Standard 12-count muffin pan
- Paper muffin liners / cupcake liners
- Two mixing bowls (one for crust, one for filling)
- Electric hand mixer or stand mixer
- Measuring cups and spoons
- A 1/3 cup measure or flat-bottomed glass (for pressing the crust)
- Rubber spatula
- Wire cooling rack
- Plastic wrap (for overnight chilling)
Step-by-Step Instructions for Mini Cheesecakes
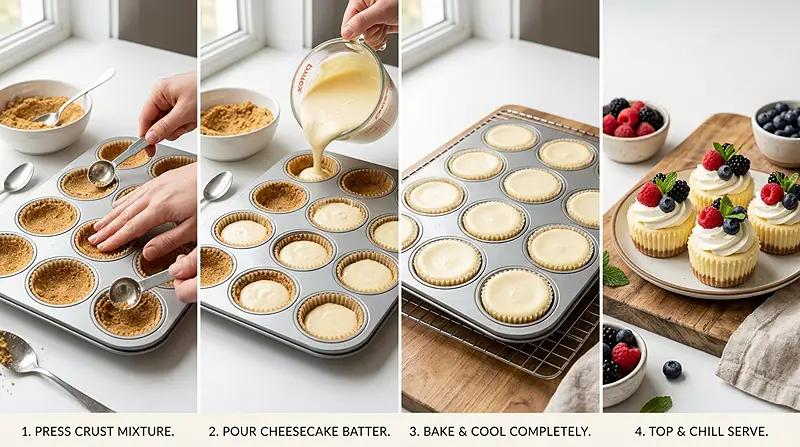
Step 1: Prep the Oven and Pan
Preheat your oven to 350°F. Line a standard 12-count muffin pan with paper muffin liners. Don’t skip the liners — they make removing the mini cheesecakes so much easier later.
Step 2: Make the Graham Cracker Crust
In a mixing bowl, combine 1 cup (113g) graham cracker crumbs and 4 Tbsp melted unsalted butter. Stir until the mixture looks like damp, coarse sand.
Spoon 1 to 2 tablespoons of the crust mixture into each muffin liner. Use a 1/3 cup measure or the bottom of a glass to press the crumbs down firmly and evenly into each cup.
Step 3: Pre-Bake the Crust
Slide the muffin pan into the oven and bake the crusts for 5 minutes. Then pull the pan out and set it aside to cool while you prepare the cheesecake filling. This quick bake sets the crust so it doesn’t go soggy.
Step 4: Make the Cheesecake Filling
In a large mixing bowl, beat 16 oz of room-temperature full fat cream cheese and 1/2 cup (99g) granulated sugar together using an electric mixer on medium speed until completely smooth, about 1 to 2 minutes.
Next, add 1 tsp vanilla extract. Then add the 2 large room-temperature eggs — and here’s the important part: mix just until the yolk breaks and the eggs are incorporated. Over-beating the eggs is the number one cause of air bubbles and cracking. Low and slow wins this round.
Step 5: Fill the Muffin Cups
Evenly divide the cream cheese batter among the 12 lined muffin cups, filling each liner all the way full. A small cookie scoop or spoon works great for keeping things tidy here.
Step 6: Bake the Mini Cheesecakes
Bake at 350°F for 15 to 17 minutes. You’re looking for set edges and a center that still has the tiniest jiggle when you gently tap the pan — like a barely-set custard. Your kitchen will start smelling incredible around the 12-minute mark.
Step 7: Cool and Chill
Let the mini cheesecakes cool to room temperature right in the pan, then transfer them to the refrigerator for at least 4 hours before serving. If you’re chilling them overnight, loosely cover with plastic wrap.
Do not rush this step. The chill time is what gives these their perfectly dense, creamy texture.
Step 8: Top and Serve
Once fully chilled, add a dollop of whipped cream, a handful of fresh berries, or a drizzle of chocolate ganache. Now comes the hard part — deciding who gets the first one.
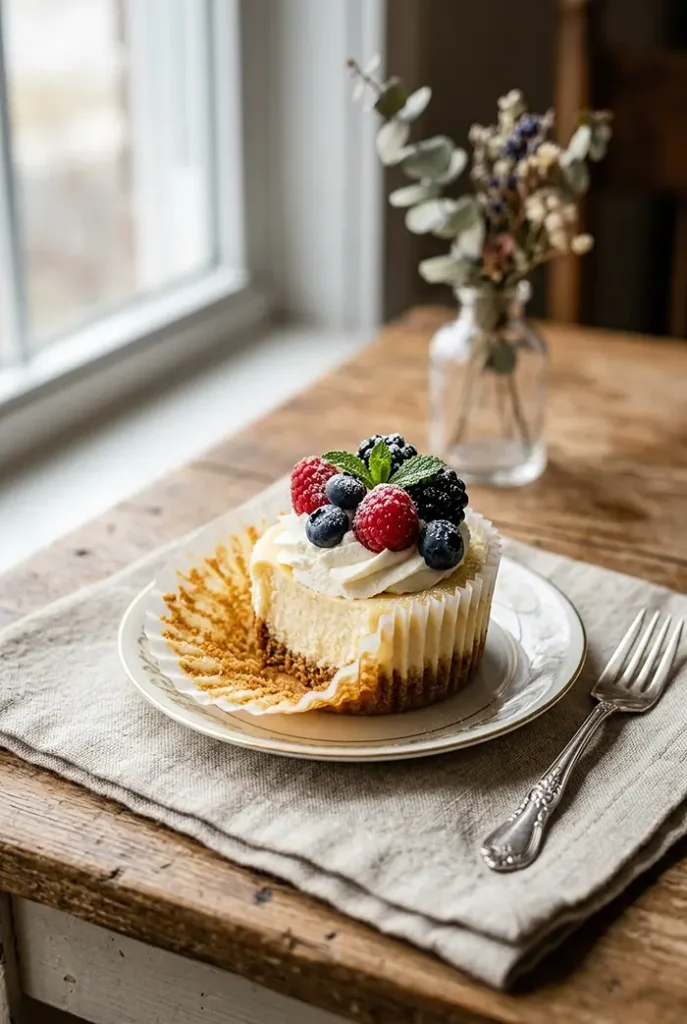
Claire’s Pro Tips for Perfect Mini Cheesecakes
These mini cheesecakes are pretty forgiving, but a few small habits make a big difference between good and absolutely perfect. Here’s what I’ve learned from making these more times than I can count.
Room temperature ingredients are non-negotiable. Cold cream cheese will leave lumps in your batter no matter how long you beat it. Pull your cream cheese and eggs out of the fridge at least an hour before you start baking.
Don’t over-mix after adding the eggs. I know it’s tempting to keep going until everything looks absolutely perfect, but extra air in the batter creates bubbles and cracks as the cheesecake bakes. Mix just until combined and stop.
Press the crust firmly. A loosely packed crust will crumble when you peel the liner off. Use the flat bottom of a 1/3 cup measuring cup and really press down — you want it compact and sturdy.
Trust the jiggle test. When the edges are set but the center still has a slight wobble, those mini cheesecakes are done. They’ll finish firming up as they cool and chill. Pull them out too late and they’ll be dense and dry instead of silky smooth.
If you love easy, crowd-pleasing desserts like these, you might also want to check out this gooey strawberry earthquake cake — it’s another one that disappears fast at parties.
Quick Fixes for Mini Cheesecakes
My cheesecake tops cracked.
The most likely cause is over-mixing the eggs or overbaking. Next time, mix the eggs on low speed just until combined, and pull the cheesecakes when the centers still have a slight jiggle. The good news? A crack is easily hidden under whipped cream or fruit.
The centers sank after baking.
A little sinking is totally normal and expected — it’s just the cheesecake settling as it cools. Think of it as a built-in bowl for your toppings. If the sinking is dramatic, the cheesecakes may have been slightly underbaked.
My filling has lumps.
This almost always means the cream cheese wasn’t soft enough before mixing. Make sure it’s been sitting at room temperature for at least an hour. If you spot lumps mid-mix, keep beating on medium speed until they smooth out — before adding the eggs.
The crust is crumbling when I remove the liner.
The crust wasn’t pressed firmly enough before baking. Next time, use the flat bottom of a glass or measuring cup to really compact the crumbs. Also, make sure you’re letting the cheesecakes chill fully — a warm cheesecake will always be more fragile.
The cheesecakes stuck to the liners.
Let them chill the full 4 hours (or overnight) before peeling the liners. A fully chilled mini cheesecake releases cleanly every time. Trying to peel warm or barely-chilled cheesecakes is where things get messy.
Variations and Fun Twists
Once you’ve mastered the base mini cheesecake recipe, the fun really starts. Here are some of my favorite ways to mix things up.
Oreo Crust: Swap the graham cracker crumbs for crushed Oreo cookies (filling and all) for a chocolatey base that pairs perfectly with the cream cheese filling.
Lemon Mini Cheesecakes: Add 2 teaspoons of fresh lemon zest and 1 tablespoon of lemon juice to the filling for a bright, tangy twist. Top with fresh blueberries for a gorgeous color contrast.
Chocolate Ganache Top: Melt equal parts heavy cream and dark chocolate chips, stir until smooth, and spoon a little over each chilled cheesecake. Fancy-looking, zero effort.
Strawberry Swirl: Drop 1 teaspoon of strawberry jam onto each filled cup before baking and swirl lightly with a toothpick. The result is stunning and takes about 30 extra seconds.
Gluten-Free Version: Simply use certified gluten-free graham crackers for the crust. The filling is naturally gluten-free, so that’s the only swap you need.
Mini Pumpkin Cheesecakes: Add 1/4 cup pumpkin puree and 1 teaspoon pumpkin pie spice to the filling for a cozy fall twist. Finish with a dollop of cinnamon whipped cream.
Serving, Storage, and Reheating
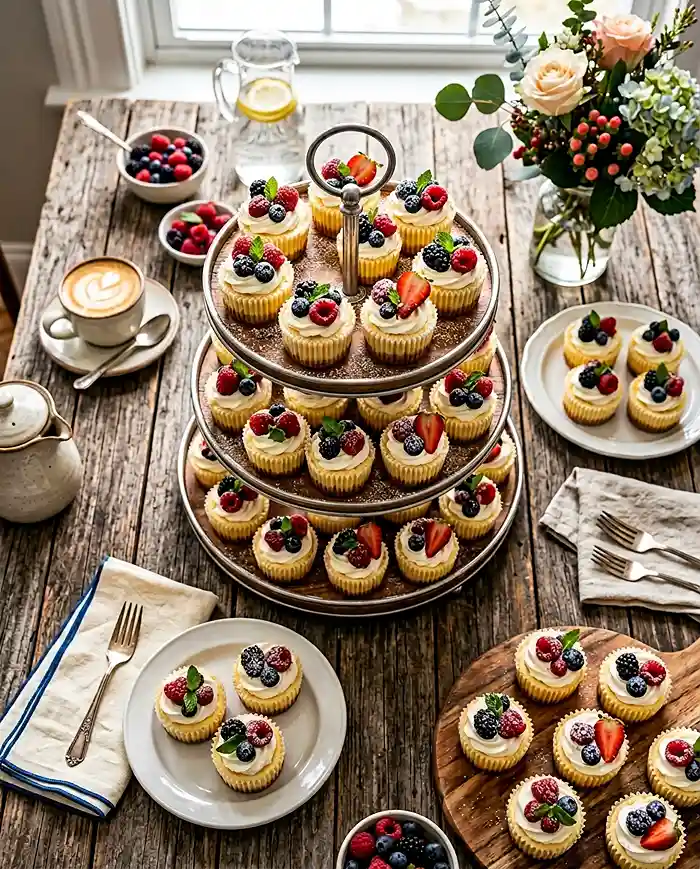
These mini cheesecakes are best served cold, straight from the fridge. Add your toppings right before serving for the freshest presentation — fresh fruit especially looks prettiest when it hasn’t been sitting on the cheesecake for hours.
Store leftover mini cheesecakes in an airtight container in the refrigerator for up to 5 days. If you actually have leftovers — which I sincerely doubt — loosely cover them so the tops don’t dry out.
These do not need to be reheated — they’re meant to be served cold! However, if you’ve frozen them, thaw overnight in the refrigerator before serving. Do not microwave to thaw, or the texture will suffer.
No-Waste Kitchen Magic
Got leftover graham cracker crumbs? Store them in a zip-top bag in the pantry and use them as a topping for yogurt, ice cream, or pudding cups through the week.
Have extra cream cheese filling after filling your cups? Pour it into a small ramekin and bake it alongside the muffin pan for a bonus mini crustless cheesecake. Consider it your baker’s treat.
Whipped cream going a little past its prime? Dollop it onto hot cocoa or fold it into pudding before it turns. Nothing has to go to waste in this kitchen.
Day-old mini cheesecakes are also wonderful crumbled over fresh fruit for an effortless, no-bake cheesecake parfait situation. Layer in a glass and call it dessert. You’re welcome.
FAQs About Mini Cheesecakes
Can I freeze mini cheesecakes?
Yes, mini cheesecakes freeze beautifully for up to 3 months. Place them on a baking sheet to freeze individually first, then transfer to a freezer-safe container with the liners still on. Thaw in the refrigerator overnight before serving — do not thaw at room temperature or the texture will change.
What’s the best way to store mini cheesecakes?
Store them in an airtight container in the refrigerator for up to 5 days. If you’re stacking them, place a sheet of parchment between layers to keep the tops looking clean. Add toppings like fresh fruit right before serving, not before storing.
How do I know when mini cheesecakes are done baking?
Look for set edges and a center that still has a slight jiggle when you gently tap the pan — similar to a barely-set custard. The cheesecakes will continue to firm up as they cool and chill. If the centers look completely solid and puffed up in the oven, they’ve likely been baked too long.
Why should I use full fat cream cheese in mini cheesecakes?
Full fat cream cheese gives you that rich, dense, classically creamy texture that makes a cheesecake a cheesecake. Low fat or whipped cream cheese contains more water and air, which can make the filling runny and prevent it from setting properly. It’s worth the splurge every single time.
Can I make mini cheesecakes the day before?
Absolutely — and honestly, I recommend it. Mini cheesecakes actually taste better after they’ve had a full overnight chill in the refrigerator. The texture gets even more dense and creamy. Just cover them loosely with plastic wrap and add your toppings right before serving the next day.
Let’s Wrap This Up
These mini cheesecakes are one of those recipes that look like you worked way harder than you did — and that’s exactly the kind of energy we’re all about around here. Creamy, individual, customizable, and genuinely foolproof.
I’d love to see your spin on this mini cheesecake recipe! Drop a comment below with your photos — I’d love to see how you topped them and made them your own. This mini cheesecake recipe is so versatile; I bet you’ve already got some amazing flavor ideas in mind!
I’m Claire Whitmore — a dessert daydreamer from Asheville, NC. For me, baking isn’t about perfect pastries — it’s about the joy of sharing something sweet (and maybe sneaking an extra scoop of whipped cream while no one’s looking).
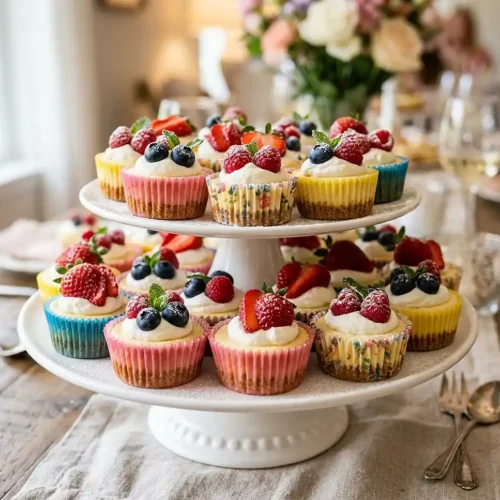
Mini Cheesecakes
Equipment
- 12-count muffin pan
- Paper muffin liners
- Mixing bowls
- Electric mixer
- Measuring cups and spoons
- Flat-bottomed glass or measuring cup
- Rubber spatula
- Wire cooling rack
- Plastic wrap
Ingredients
Crust
- 1 cup Graham cracker crumbs
- 4 tbsp Unsalted butter melted
Cheesecake Filling
- 16 oz Cream cheese softened, full fat
- ½ cup Granulated sugar
- 1 tsp Vanilla extract
- 2 Eggs room temperature
Toppings
- as needed Whipped cream
- as needed Fresh fruit
Instructions
- Preheat oven to 350°F and line a 12-count muffin pan with paper liners.
- Mix graham cracker crumbs and melted butter until combined.
- Press 1–2 tablespoons of the mixture firmly into each liner to form the crust.
- Bake crusts for 5 minutes, then remove and let cool.
- Beat cream cheese and sugar until smooth and creamy.
- Add vanilla extract, then mix in eggs just until combined without overmixing.
- Divide filling evenly among muffin cups, filling each to the top.
- Bake for 15–17 minutes until edges are set and centers slightly jiggle.
- Cool to room temperature, then refrigerate for at least 4 hours.
- Top with whipped cream or fruit before serving.