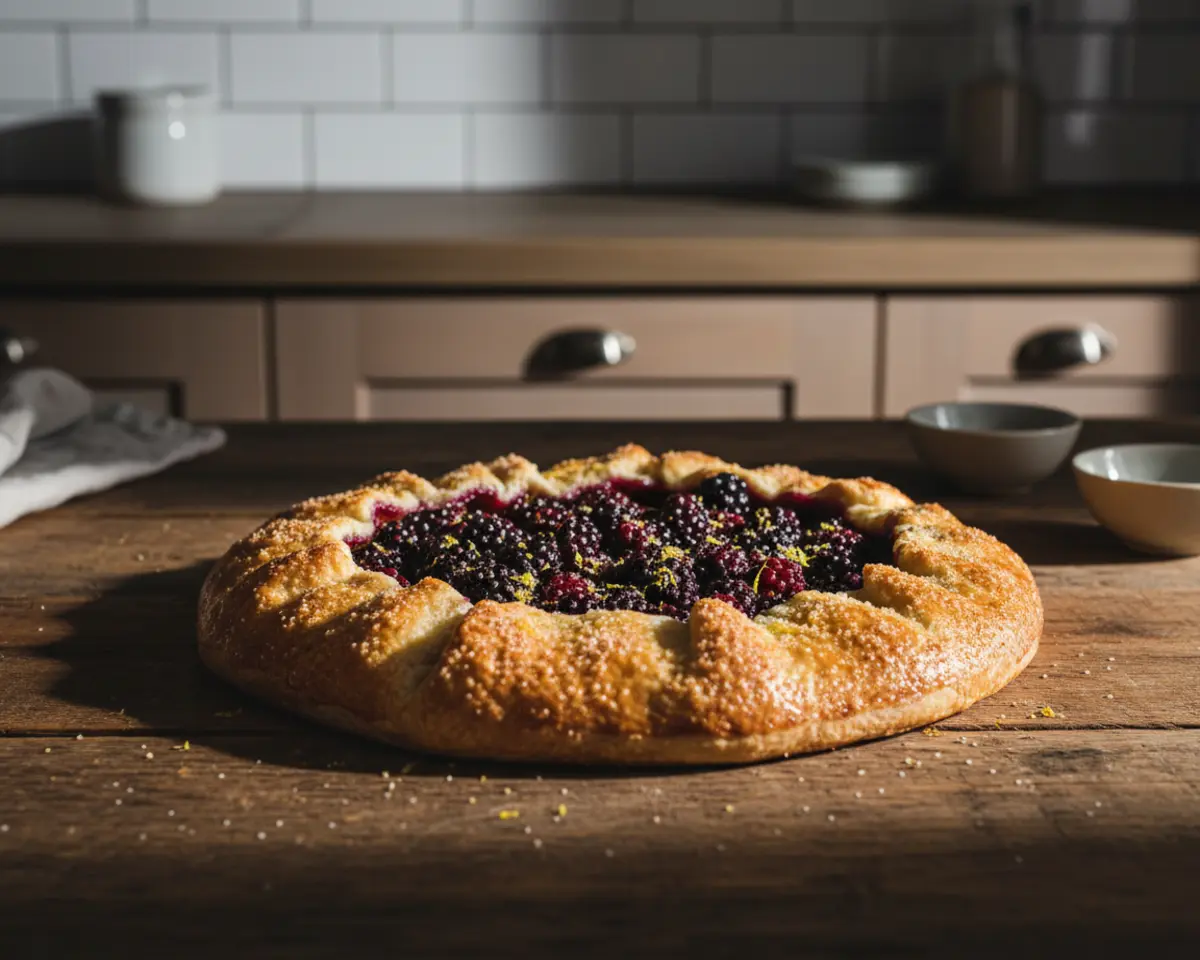
Easy Rustic Blackberry Galette Recipe
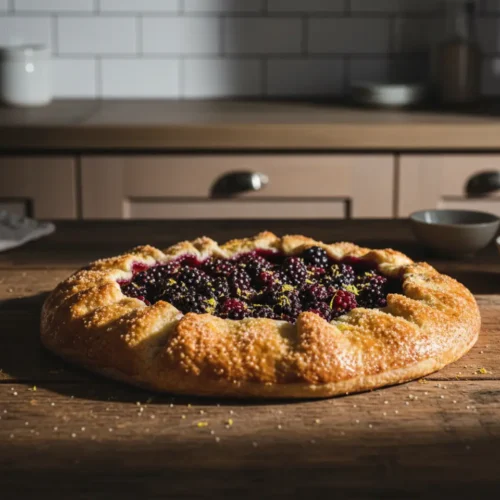
This blackberry galette is a rustic, buttery dessert that showcases sweet summer berries wrapped in a flaky, golden crust. It’s easier than pie, more elegant than a crumble, and absolutely perfect for home bakers who want stunning results without fussy details.
I’m Linda Sandra, and in my Charleston kitchen, the blackberry galette is my favorite way to celebrate berry season without the stress of a perfect pie. It’s forgiving, gorgeous, and always gets compliments.
I learned to make galettes one afternoon when I was too impatient to fuss with pie weights and fancy crimping. I rolled out dough, piled on berries, folded the edges, and slid it into the oven. What emerged was imperfectly perfect—golden, bubbling, and absolutely delicious.
Table of Contents
Quick Overview
If this recipe made your day, you’re in for a treat. The full Classic Comfort Foods guide is filled with tried-and-true favorites that real home cooks swear by. Trust me, you won’t be able to pick just one.
Little Snapshot: What This Recipe Delivers
This blackberry galette recipe gives you a rustic, free-form tart with a buttery, flaky crust and juicy blackberry filling in about an hour of active work. It’s easier than traditional pie, requires no special pan, and delivers stunning, bakery-quality results every time.
Why You’ll Love This Recipe 🌸
- This blackberry galette takes less time than making a traditional pie and skips all the fussy crimping.
- It’s forgiving enough for first-timers but impressive enough to serve guests at Sunday supper.
- You can make the dough ahead and freeze it, so dessert is always within reach.
- According to Serious Eats, galettes are the most forgiving pastry for home bakers — and this recipe proves exactly why.
Quick Facts ⚡
Here’s the quick scoop on this blackberry galette.
- CourseDessert
- Prep Time20 minutes
- Cook Time35 minutes
- Total Time4 hours (includes chilling and cooling)
- Servings8 servings
- DifficultyMedium
Nutritional Peek
| Nutrient | Amount per serving |
|---|---|
| Calories | 285 |
| Protein | 4g |
| Carbohydrates | 38g |
| Fat | 14g |
| Fiber | 4g |
| Sugar | 16g |
What You’ll Need
You don’t need fancy equipment to make a stunning blackberry galette. Just a few trusty kitchen tools and you’re ready to bake.
- Large mixing bowl
- Whisk
- Pastry cutter or your fingers
- Rubber spatula
- Rolling pin
- Parchment paper (18 x 12 inches)
- Cutting board or back of a baking tray
- Slotted spoon
- Pastry brush
- Rimmed baking sheet
Ingredients
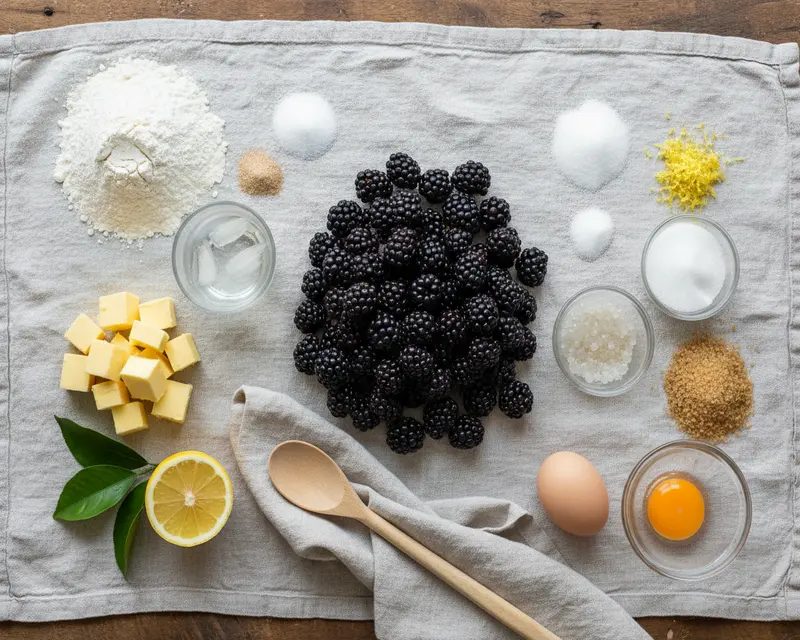
This blackberry galette starts with a simple, buttery pie dough and a luscious blackberry filling brightened with fresh lemon. Each ingredient plays a role in creating that flaky, golden crust and the sweet-tart berry center that makes every bite unforgettable.
| Group | Ingredient | Amount | Notes |
|---|---|---|---|
| Pie Dough | All-purpose flour | 1 1/4 cups (190g) | The foundation for flaky pastry |
| Pie Dough | Granulated sugar | 1 tablespoon (12g) | Just a hint of sweetness |
| Pie Dough | Kosher salt | 1/2 teaspoon | Balances the butter beautifully |
| Pie Dough | Unsalted butter | 10 tablespoons (142g) | Cold and cubed—this is key! |
| Pie Dough | Ice-cold water | 1/4 cup (or more) | Keeps the dough tender |
| Pie Dough | Lemon juice | 1/2 teaspoon | Adds a little tang to the dough |
| Blackberry Filling | Blackberries | 4 1/2 cups (572g) | Fresh or frozen work perfectly |
| Blackberry Filling | Granulated sugar | 1/3 cup (67g) | Adjust to taste if berries are tart |
| Blackberry Filling | Kosher salt | 1/4 teaspoon | Enhances the berry flavor |
| Blackberry Filling | Lemon juice | 1 tablespoon | Brightens the filling |
| Blackberry Filling | Lemon zest | 1 teaspoon | Adds lovely citrus aroma |
| Blackberry Filling | Tapioca | 1 1/2 tablespoons | Thickens the juices perfectly |
| Egg Wash & Topping | Large egg | 1 (50g) | For that golden, glossy finish |
| Egg Wash & Topping | Water | 1 teaspoon | Thins the egg wash |
| Egg Wash & Topping | Turbinado sugar | 2 tablespoons | Adds sparkle and crunch |
Step-by-Step Instructions
Let’s make this happen. You’ll start by mixing up a simple pie dough, then toss together juicy blackberries with lemon and sugar, and finally fold it all into a rustic, beautiful galette.
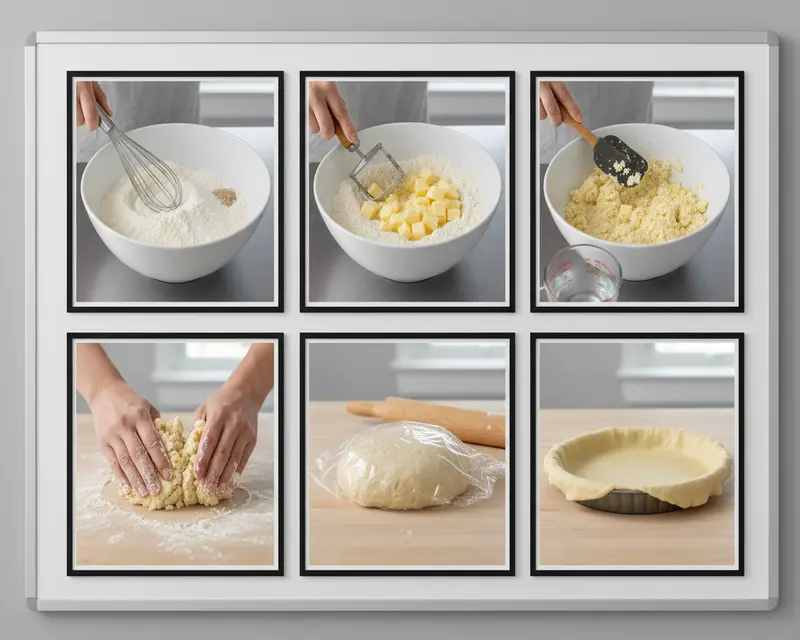
Make the Pie Dough
In a large bowl, whisk together the all-purpose flour, granulated sugar, and kosher salt until everything is evenly distributed. This dry mixture is the base of your flaky blackberry galette crust.
Cut the cold unsalted butter into 1/2-inch cubes and add them to the flour mixture. Use a pastry cutter or your fingertips to work the butter into the flour until the pieces are about pea-sized—this creates those gorgeous flaky layers.
Add 1/4 cup of ice-cold water and the lemon juice, then use a rubber spatula to toss everything together. The dough should look shaggy but hold together when you squeeze it—if it’s too dry, add water one teaspoon at a time.
Dump the dough onto a lightly floured surface and gently press it together, folding it over on itself a few times until it comes together in a cohesive mass. Don’t overwork it or your crust will be tough instead of tender.
Shape the dough into a disk about 1-inch thick, wrap it tightly in plastic wrap, and refrigerate for at least 45 minutes. Chilling the dough relaxes the gluten and keeps the butter cold for maximum flakiness.
Make the Blackberry Filling
Place the blackberries in a medium bowl and drizzle the lemon juice and lemon zest over them. Gently stir with a large spoon to coat the berries in that bright, citrusy goodness.
In a small bowl, combine the granulated sugar, kosher salt, and tapioca, then sprinkle this mixture over the blackberries. Stir gently until no white bits remain and the berries are evenly coated.
Taste the filling and adjust the sweetness if needed—add sugar one tablespoon at a time if your berries are especially tart. Pop the bowl in the fridge while you roll out your dough.
Bake the Galette
Lightly flour a large piece of parchment paper and roll out the chilled dough into a 12-inch circle. It doesn’t have to be perfect—rustic is the whole point of a galette!
Lift the parchment paper with the dough onto a cutting board or the back of a baking tray that fits in your fridge. Use a slotted spoon to pile the blackberry filling into the center of the dough, leaving about a 2-inch border around the edges and leaving the juices behind in the bowl.
Fold the edges of the dough over the berries in overlapping sections, creating a beautiful rustic border. Brush off any excess flour with a pastry brush, then refrigerate the whole galette for 20 minutes.
While the galette chills, preheat your oven to 400°F. Whisk together the egg and water to make a simple egg wash.
Remove the galette from the fridge and carefully transfer it (still on the parchment) to a rimmed baking sheet. Brush the crust generously with egg wash, making sure to get under the folds.
Sprinkle the turbinado sugar over the crust for a gorgeous sparkle and crunch. Spoon the reserved berry juices over the filling—this adds extra flavor and helps the berries stay moist.
Bake the blackberry galette for 35 minutes, rotating the baking sheet halfway through, until the crust is deep golden brown and the berry juices are bubbling vigorously. The darker the crust, the more flavor you’ll get.
Remove the galette from the oven and let it cool completely on the baking sheet for about 3 hours. This cooling time is crucial—it lets the filling set so you get clean, beautiful slices instead of a juicy mess.
Serve the blackberry galette on its own, with a scoop of vanilla ice cream, or with a dollop of whipped cream. Every bite is buttery, flaky, and bursting with sweet-tart berry goodness.
Pro Tips & Gentle Guidance
Making a blackberry galette is straightforward, but a few small techniques make all the difference between good and absolutely stunning. These tips come from my own kitchen experiments and a few happy accidents along the way.
If your dough feels sticky while rolling, pop it back in the fridge for 10 minutes. Cold dough is easier to work with and bakes up flakier.
Don’t skip the tapioca in the filling—it absorbs the berry juices and prevents a soggy bottom. Cornstarch can work in a pinch, but tapioca gives a clearer, glossier filling.
Brush egg wash under the folds of the galette crust, not just on top. This creates a beautiful seal and helps the layers puff and separate as they bake.
Let the galette cool completely before slicing. I know it’s tempting, but patience here means clean slices and a filling that holds together beautifully instead of running all over the plate.
If you want to make the dough ahead, wrap it tightly and freeze it for up to two months. Thaw it overnight in the fridge before rolling, and you’re halfway to dessert. According to King Arthur Baking, freezing pie dough actually improves its texture by keeping the butter extra cold.
Variations & Adaptations
The beauty of a galette is how adaptable it is. You can swap berries, add spices, or even make it gluten-free without losing that rustic charm.
Mixed Berry Galette: Swap half the blackberries for raspberries, blueberries, or sliced strawberries. The combination adds complexity and color to every slice.
Peach Blackberry Galette: Replace one cup of blackberries with sliced fresh peaches. The stone fruit adds sweetness and a soft, juicy texture that pairs beautifully with the berries.
Gluten-Free Crust: Use a 1:1 gluten-free baking flour blend in place of all-purpose flour. Add an extra tablespoon of cold water if the dough feels too dry.
Almond Galette: Spread a thin layer of almond paste or frangipane on the dough before adding the berries. It adds richness and a subtle nutty flavor that complements the fruit.
Spiced Blackberry Galette: Add 1/4 teaspoon of cinnamon or cardamom to the blackberry filling. The warm spice plays beautifully with the tart berries and buttery crust.
Honey-Sweetened Galette: Replace the granulated sugar in the filling with honey. It gives the berries a floral sweetness and a slightly deeper flavor.
Quick Fixes for Blackberry Galette
Problem: The crust is soggy on the bottom.
Solution: Make sure you’re using a slotted spoon to transfer the berries and leaving excess juice behind. You can also bake the galette on a preheated baking stone or steel for extra crispness.
Problem: The dough tears when you fold it.
Solution: If the dough is too cold, let it sit at room temperature for 5 minutes to soften slightly. You can also patch tears by pressing pieces of dough together—it’s rustic, so no one will notice!
Problem: The filling is too runny after baking.
Solution: Make sure you’re using enough tapioca and letting the galette cool completely. The filling continues to set as it cools, so give it the full 3 hours.
Problem: The crust didn’t brown enough.
Solution: Brush the crust generously with egg wash and sprinkle with turbinado sugar before baking. If it’s still pale after 35 minutes, bake for an extra 5 minutes, watching closely.
Problem: The berries taste too tart.
Solution: Taste your filling before assembling the galette and add sugar one tablespoon at a time until it’s sweet enough. Blackberries vary widely in sweetness depending on the season.
Storage & Reheating
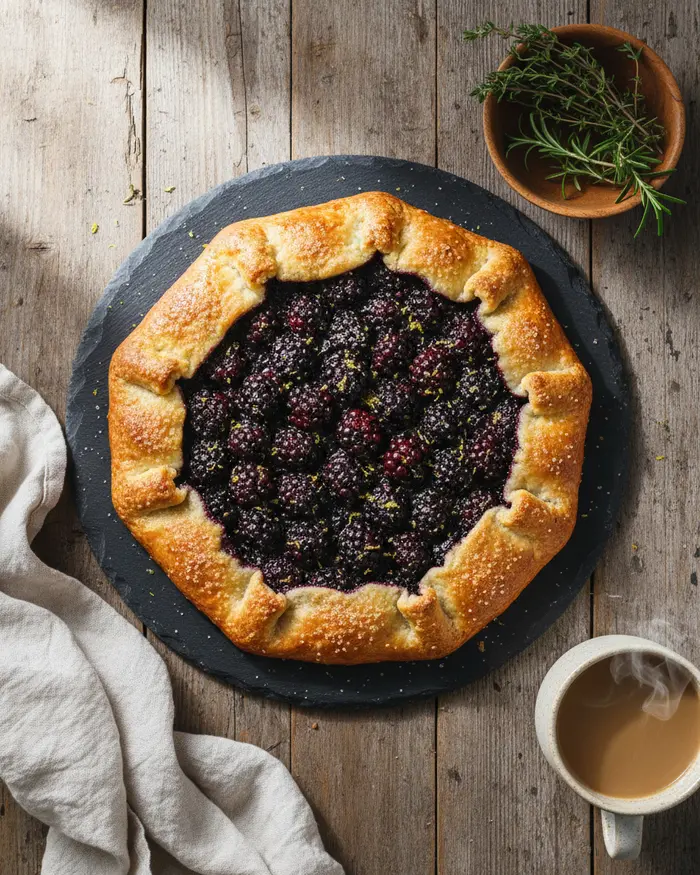
This blackberry galette is best enjoyed the day it’s baked, but you can store leftovers and even freeze it for later. Proper storage keeps the crust crisp and the filling fresh.
Serving: Serve the galette at room temperature with a scoop of vanilla ice cream, a dollop of whipped cream, or a drizzle of heavy cream. It’s also delicious on its own with a cup of coffee for breakfast.
Storage: Cover the cooled galette loosely with foil or plastic wrap and store it at room temperature for up to 2 days, or in the refrigerator for up to 4 days. The crust will soften slightly in the fridge, but it’s still delicious.
Reheating: Reheat individual slices in a 350°F oven for 8-10 minutes to crisp up the crust. Avoid the microwave—it makes the pastry soggy instead of flaky.
| Storage Method | Duration | Best For |
|---|---|---|
| Room Temperature (covered) | Up to 2 days | Maximum crust crispness |
| Refrigerator (covered) | Up to 4 days | Longer storage |
| Freezer (wrapped tightly) | Up to 2 months | Make-ahead dessert |
| Reheated in oven | 8-10 minutes at 350°F | Crisp, warm slices |
No-Waste Kitchen Magic
Don’t let a single bit of your blackberry galette go to waste. Here are some creative ways to use up every scrap and leftover.
Dough Scraps: Roll out leftover pie dough, sprinkle it with cinnamon sugar, and bake at 375°F for 10 minutes for quick, crispy cookies. They’re perfect for snacking while the galette cools.
Extra Berry Filling: If you have leftover berry mixture, spoon it over yogurt, oatmeal, or crispy ravioli for a sweet twist. You can also simmer it into a quick compote for pancakes or waffles.
Reserved Berry Juice: The juices you left behind in the bowl make a fantastic base for a berry cocktail or mocktail. Mix with sparkling water and a squeeze of fresh lemon for a refreshing drink.
Leftover Galette: Crumble day-old galette over ice cream or fold it into a trifle with whipped cream and fresh berries. It’s a delicious way to repurpose slices that have lost their crispness.
Egg Wash Leftovers: Brush any remaining egg wash over bread before toasting, or scramble it into your morning eggs. Waste not, want not!
Frequently Asked Questions
Here are answers to the most common questions about making this gorgeous blackberry galette.
What is a blackberry galette?
A blackberry galette is a rustic, free-form French tart made with fresh blackberries encased in a buttery, flaky pastry crust. Unlike traditional pies, galettes are folded over the filling without a pan, creating an attractive rustic appearance with exposed fruit in the center.
How do I prevent my blackberry galette from getting soggy?
To prevent a soggy galette, toss the blackberries with cornstarch or flour to absorb excess juice, avoid overfilling, and make sure to chill the dough before baking. You can also brush the bottom crust with egg white or sprinkle breadcrumbs before adding the fruit to create a moisture barrier.
Can I use frozen blackberries for a galette?
Yes, you can use frozen blackberries for a galette. However, do not thaw them before using, as this will release too much liquid. Use them straight from the freezer and add an extra tablespoon of thickener like cornstarch to compensate for the additional moisture they release during baking.
How long does a blackberry galette stay fresh?
A blackberry galette stays fresh for up to 2 days at room temperature when covered loosely with foil or plastic wrap. For longer storage, refrigerate it for up to 4 days in an airtight container. The crust may soften slightly when refrigerated, but you can crisp it up by reheating in the oven.
What should I serve with blackberry galette?
Blackberry galette pairs wonderfully with vanilla ice cream, whipped cream, or creme fraiche. You can also serve it with a dollop of mascarpone, Greek yogurt, or simply dusted with powdered sugar. It is delicious warm, at room temperature, or chilled.
Final Dish
This blackberry galette is everything I love about baking—simple, forgiving, and absolutely stunning on the table. It’s the kind of dessert that looks like you spent hours in the kitchen, but really, it comes together with ease and a little bit of love. Whether you’re serving it to guests or sneaking a slice with your morning coffee, it never disappoints.
I’d love to see how your blackberry galette turns out! Share your photos, tag me, or drop a comment below with your favorite way to serve it. Did you add peaches? Go heavy on the lemon zest? Let’s celebrate your kitchen wins together.
I’m Linda Sandra — a Charleston home chef and comfort-food daydreamer. Around here, cooking’s not about perfection — it’s about cozy vibes, creative twists, and food that feels like love.
Blackberry Galette
Ingredients
Pie Dough
- 1 ¼ cups 190 grams all-purpose flour
- 1 tablespoon 12 grams granulated sugar
- ½ teaspoon kosher salt
- 10 tablespoons 142 grams unsalted butter (cold and cut into cubes)
- ¼ cup ice-cold water or more if required
- ½ teaspoon lemon juice
Blackberry Filling
- 4 ½ cups 572 grams blackberries
- ⅓ cup 67 grams granulated sugar
- ¼ teaspoon kosher salt
- 1 tablespoon lemon juice
- 1 teaspoon lemon zest
- 1 ½ tablespoons tapioca
Egg Wash and Topping
- 1 50 grams large egg
- 1 teaspoon water
- 2 tablespoons turbinado sugar
Instructions
- Put the flour, sugar, and salt in a large bowl and whisk to combine.
- Cut the butter into 1/2-inch cubes and add it to the flour mixture. Use a pastry cutter to cut the butter into the dry ingredients until the butter is pea-sized. If using your fingers toss the butter in the dry ingredients to coat the butter then mash the pieces of butter between your thumb and forefinger until the butter is pea-sized.
- Add 1/4 cup of ice water and use a rubber spatula to toss together. The dough will start to come together, but will still be slightly crumbly or shaggy but should hold together when squeezed into a ball. If more water is needed add one teaspoon at a time.
- Dump the dough onto a lightly floured surface and press the dough together, folding it over on itself until it starts to hold together. Try not to work the dough too much or it may become overdeveloped and tough.
- Shape the dough into disk 1-inch thick. Wrap it in plastic wrap and chill for at least 45 minutes. The dough can be refrigerated for up to 2 days and frozen for up to 2 months.
- Remove the pie dough from the refrigerator right before you begin making the blackberry filling.
- Place the berries in a medium sized bowl and sprinkle the lemon juice and lemon zest over the berries. Gently stir with a large spoon.
- Combine the sugar, kosher salt, and tapioca and sprinkle over the berries. Use a large spoon to combine the berries and dry ingredients until no white bits remain.
- Taste the berries and if you want them sweeter add sugar 1 tablespoon at a time until desired sweetness is reached. Refrigerate the berries while you roll out the pie dough.
- Lightly flour a large piece of parchment paper (18 x 12-inches) and roll out the dough into a 12-inch circle.
- Lift the parchment paper with dough onto a cutting board or the back of a baking tray that is large enough to hold the galette but small enough to fit in your refrigerator. Use a slotted spoon to spoon the berries into the center of the dough. Leave the juices in the bowl.
- Fold the dough over the berries in overlapping sections. Brush off any excess flour with a pastry brush. Refrigerate the galette for 20 minutes.
- Preheat the oven to 400°F while the galette is chilling. Whisk together the egg and water to make the egg wash.
- Remove the galette from the refrigerator and gently transfer it to a rimmed baking sheet. Brush it with the egg wash getting under the folds of the dough. Sprinkle it with the turbinado sugar. Take the reserved berry juice and spoon it over the berries.
- Place the galette in the oven and bake for 35 minutes (rotating halfway through the baking time) or until the crust is dark golden brown and the berry juices are bubbling.
- Remove the galette from the oven and allow to completely cool, about 3 hours before serving. Allowing the galette to cool will allow the fruit to set and make it easier to cut into nice clean slices.
- Serve the blackberry galette with ice cream or whipped cream or eat it all by itself.