Spring Pea Risotto
I’m Linda Sandra — a Charleston home chef who believes the best spring meals are the ones that taste like sunshine on a plate, and this Spring Pea Risotto is exactly that. It’s creamy, vibrant, and packed with fresh peas that bring all the bright, happy flavors of the season right to your dinner table.
This green risotto recipe is one of those dishes that looks elegant enough for guests but is totally doable on a Tuesday night. We’re talking tender Arborio rice, sweet peas blended into a silky puree, and a pop of lemon and mint that makes everything sing.
I started making this risotto during those first warm spring days when the farmer’s market is overflowing with fresh peas, and honestly, it’s become my go-to “impress everyone without breaking a sweat” recipe. It’s comforting but feels fancy, and that’s my favorite combo.
Table of Contents
Little Snapshot: What This Recipe Delivers
This Spring Pea Risotto delivers a creamy, vibrant green risotto made with Arborio rice, fresh peas, Pecorino cheese, and a bright lemon-mint finish. It takes about 35 minutes from start to finish, uses simple pantry staples, and creates a restaurant-quality dish that’s perfect for spring dinners or impressive weeknight meals.
Why You’ll Love This Recipe 🌸
- This Spring Pea Risotto looks like you spent hours in the kitchen, but it actually takes less time than binge-watching two episodes of your favorite show.
- The vibrant green color is totally natural — no food coloring here, just gorgeous fresh peas doing their thing.
- It’s fancy enough for date night but cozy enough for a solo dinner on the couch (no judgment, we’ve all been there).
- According to Serious Eats’ comprehensive risotto guide, the key to perfect risotto is patience and stirring — and this recipe proves exactly why that creamy texture is worth every gentle stir.
Quick Facts ⚡
Here’s the quick scoop on this Spring Pea Risotto.
- CourseMain Dish
- Prep Time10 minutes
- Cook Time25 minutes
- Total Time35 minutes
- Servings4 servings
- DifficultyMedium
Nutritional Peek
Here’s what you’re getting in each cozy bowl of this healthy green risotto dish — and honestly, with all those fresh peas and quality ingredients, you can feel really good about this one.
| Nutrient | Amount per Serving |
|---|---|
| Calories | 385 kcal |
| Protein | 12g |
| Carbohydrates | 52g |
| Fat | 13g |
| Fiber | 5g |
| Sugar | 5g |
Ingredients
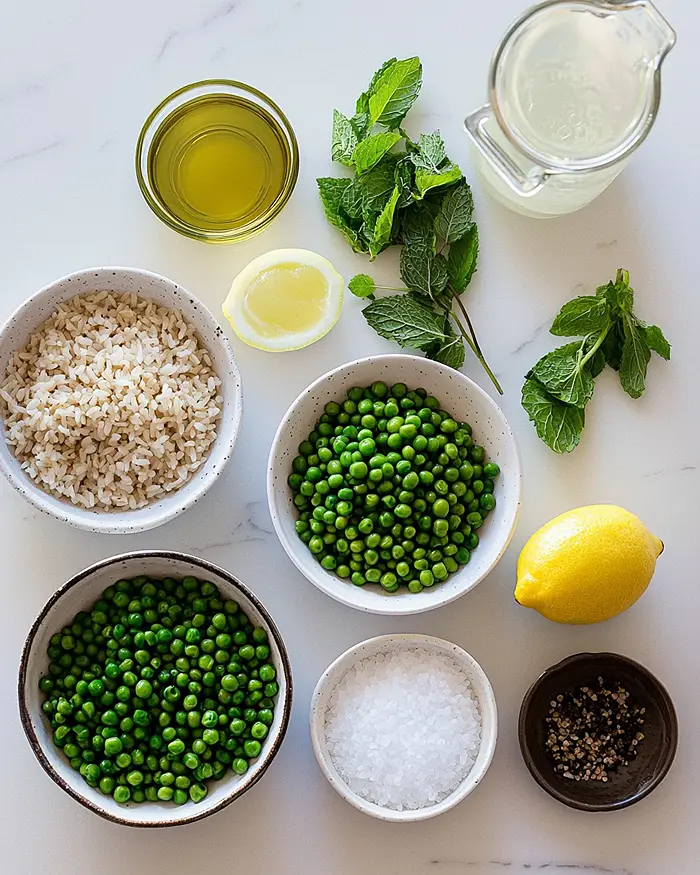
This green risotto dish comes together with ingredients you probably already have hanging out in your pantry, plus those gorgeous fresh peas that are the real stars here. For the aromatic base — shallots, garlic, and olive oil — you’ll want everything diced small so they melt into the rice.
The Arborio rice is non-negotiable (it’s what gives you that dreamy creaminess), and the vegetable broth needs to stay warm on the stove so it doesn’t shock the rice when you add it.
| Amount | Ingredient |
|---|---|
| 4 cups | Vegetable broth or chicken stock, warmed |
| 3 tablespoons | Olive oil, divided |
| 2 | Shallots (or sub 1 leek or 1 white onion), diced |
| 2 cloves | Garlic, rough chopped |
| 1 cup | Arborio rice |
| 1/2 cup | Dry white wine (or sub water with 1 teaspoon lemon juice) |
| 2 cups | Fresh peas, blanched (or sub frozen peas) |
| 1/2 cup | Grated Pecorino cheese (or sub Parmesan cheese) |
| 1 | Lemon, zested |
| – | Salt and pepper to taste |
| 1/4 cup | Fresh mint, packed, sliced |
| – | Truffle oil, for drizzling |
| Optional | Aleppo chili flakes or Urfa Biber, microgreens, sautéed mushrooms, pan-seared fish or scallops |
Tools You’ll Actually Use
- Heavy-bottom pot or Dutch oven
- Medium pot (for warming broth)
- Small pot (for blanching peas)
- Blender
- Wooden spoon or silicone spatula
- Microplane or zester
- Measuring cups and spoons
- Cutting board and knife
Step-by-Step Instructions
Let’s make this Spring Pea Risotto happen — it’s easier than you think, I promise.
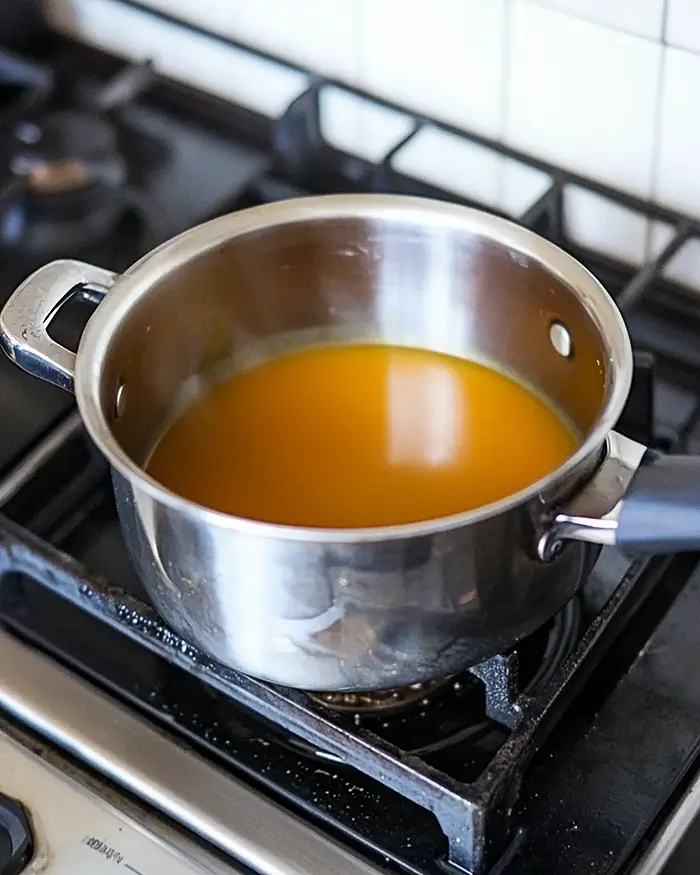
Step 1: Heat 4 cups vegetable broth in a medium pot over low heat and keep it warm on the stove. This is key because adding cold broth to your risotto will mess with the cooking process, and we want that rice tender and creamy.
Step 2: In a heavy-bottom pot or Dutch oven, heat 2 tablespoons olive oil over medium-low heat and sauté the diced shallots and rough-chopped garlic until they’re fragrant and golden, about 5 minutes, stirring occasionally. Your kitchen should smell amazing right about now.
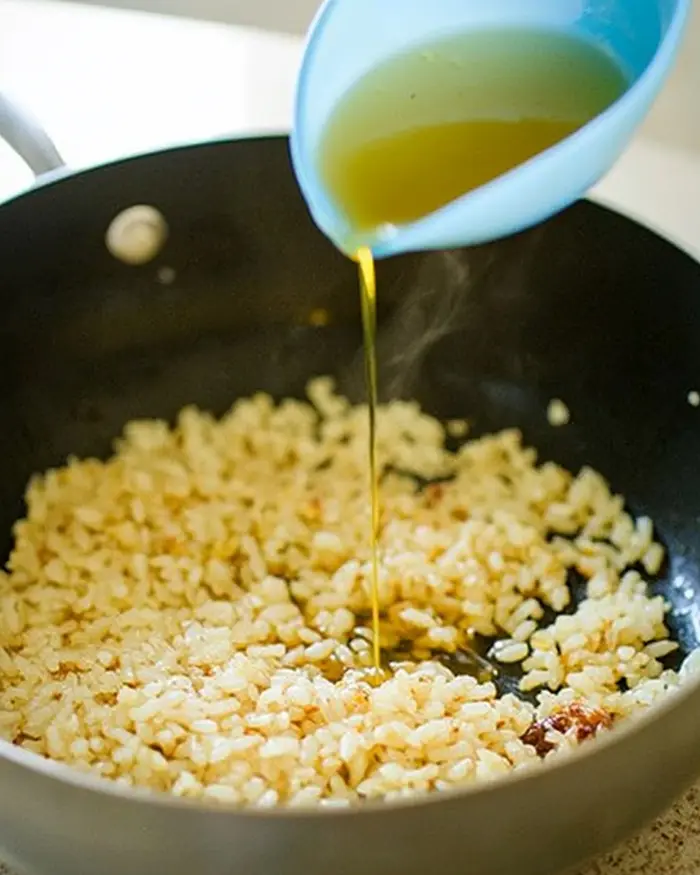
Step 3: Add the Arborio rice and stir to coat every grain in that garlicky oil for one minute — this toasts the rice slightly and helps it absorb all the liquid later. Pour in the white wine to deglaze the pan and simmer until the wine has completely been absorbed, stirring occasionally.
Step 4: Add one cup of hot broth to the rice and stir every 45-60 seconds, letting the rice absorb it slowly over medium-low heat, about 5 minutes.
Continue adding one cup of broth at a time, each time allowing the rice to slowly absorb the liquid until the rice is tender yet still holding its shape — this whole process will take about 20 minutes. Yes, you’ll be stirring a lot, but trust me, it’s worth it.
Step 5: While the risotto is doing its thing, blanch the fresh peas. Bring a small pot of salted water to boil, add the peas once it’s bubbling, and simmer for 2-3 minutes until tender. Drain and set aside — they should be bright green and sweet.
Step 6: Add 1/2 cup of the blanched peas to a blender with 1/2 cup water and 1 tablespoon olive oil. Blend until silky smooth — you can add a handful of spinach here to bump up that gorgeous green color even more. Blend until smooth again (it’s okay to add a little extra water to get the blades going). Set this vibrant pea puree aside.
Step 7: When the risotto is tender and you’re close to serving it, fold in the grated Pecorino cheese, lemon zest, the remaining blanched peas, and the pea puree you just made. Add salt and pepper to taste, then stir in 2/3 of the sliced mint, saving the rest for garnish.

Step 8: Taste and adjust the salt, pepper, and lemon, adding more if needed — this is your moment to make it perfect. Add chili flakes if you like a little kick.
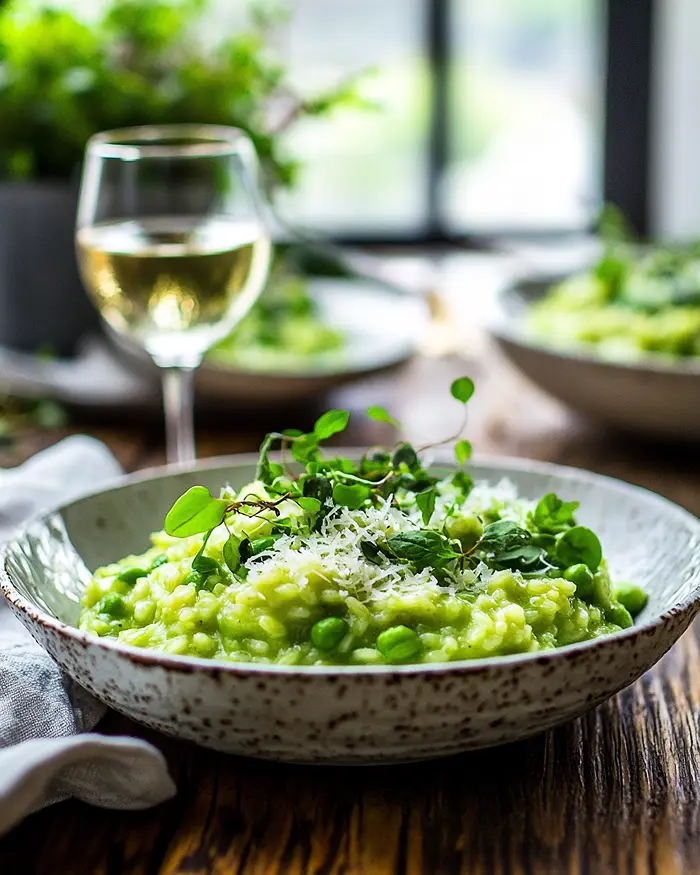
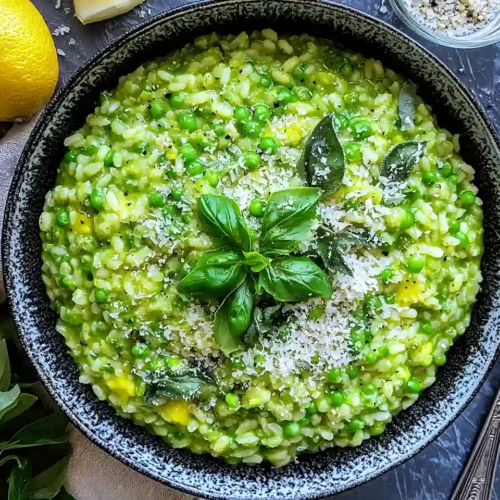
Step 9: Divide the Spring Pea Risotto among bowls, drizzle each serving with a touch of truffle oil to elevate things, and garnish with the reserved mint. Serve immediately while it’s hot and creamy.
Pro Tips & Gentle Guidance
Making a perfect green risotto recipe is all about patience and a few insider tricks that’ll make your life easier. Here’s what I’ve learned after making this more times than I can count.
Keep your broth warm the entire time you’re cooking. Cold broth will slow down the cooking process and throw off your timing, so just leave it on low heat on a back burner.
Don’t skip the stirring — I know it feels like a lot, but that constant motion is what releases the starch from the rice and creates that signature creamy texture. Put on a podcast and zen out.
If you’re new to making risotto, the Bon Appétit guide to mastering risotto techniques breaks down the science behind why this method works so well. It really helped me understand what I was doing when I first started.
Taste your rice as you go — you want it tender but with a tiny bit of bite in the center (that’s called al dente). Mushy risotto is sad risotto.
The truffle oil is optional but it adds such a luxurious finish that I always keep a bottle around. A little goes a long way, so just a light drizzle per bowl is perfect.
Quick Fixes for Spring Pea Risotto
Problem: My risotto is too thick and gluey. Add a splash more warm broth or water and stir it in gently until you get that loose, flowing consistency — it should spread slightly when you spoon it into a bowl, not sit there in a mound.
Problem: The rice is crunchy in the middle. You need more cooking time and more liquid. Keep adding broth 1/2 cup at a time and stirring until the rice is tender all the way through.
Problem: My risotto is too thin and soupy. Let it cook uncovered for a few more minutes, stirring constantly, so some of that liquid evaporates. The rice will also continue absorbing liquid as it sits.
Problem: The pea puree looks brown instead of bright green. Your peas may have been overcooked or oxidized. Next time, blanch them for less time (just 2 minutes), shock them in ice water immediately after draining, and blend them right away with the oil to preserve that vibrant color.
Variations & Adaptations
This healthy green risotto dish is super versatile, so feel free to make it your own based on what you have or what sounds good.
For a vegan version, skip the Pecorino and use nutritional yeast or a plant-based parmesan — you’ll still get that savory, cheesy flavor. Use vegetable broth instead of chicken stock, obviously.
Want to add protein? Top each bowl with pan-seared scallops, grilled shrimp, or crispy sautéed mushrooms. I’ve also done this with leftover rotisserie chicken folded right in, and it’s delicious.
Try swapping the mint for fresh basil if that’s more your vibe — it gives the risotto a more Italian, pesto-like flavor that’s really lovely. Or use both for extra herbiness.
For a fall twist, replace half the peas with roasted butternut squash and swap the mint for sage. Same creamy texture, totally different season.
If you can’t find fresh peas, frozen peas work beautifully here — just skip the blanching step and add them directly to the blender and to the risotto in the last few minutes of cooking.
Serving, Storage & Reheating
Serve this Spring Pea Risotto immediately while it’s hot and creamy, with a little extra Pecorino and a handful of microgreens on top if you’re feeling fancy. It pairs beautifully with simple sides like my honey-roasted carrots with feta.
Store any leftovers in an airtight container in the fridge for up to 3 days. The risotto will thicken as it sits, which is totally normal — the rice keeps absorbing liquid even when it’s cold.
To reheat, add a splash of broth or water to a pan over medium-low heat, add the risotto, and stir gently until it’s warmed through and creamy again. You can also microwave it in 30-second intervals, stirring between each one and adding a little liquid to loosen it up.
No-Waste Kitchen Magic
If you’ve got leftover Spring Pea Risotto, don’t let it go to waste — there are so many delicious ways to transform it.
Form the cold risotto into patties, coat them in breadcrumbs, and pan-fry them until golden and crispy on both sides. These risotto cakes are incredible with a dollop of sour cream or a fried egg on top.
Stuff leftover risotto into hollowed-out tomatoes or bell peppers, top with cheese, and bake until everything is bubbly and golden. It’s like arancini’s easier cousin.
Mix cold risotto with a beaten egg and some extra cheese, then bake it in a muffin tin for portable risotto bites that are perfect for lunches or snacks.
Use day-old risotto as a base for a frittata — just spread it in an ovenproof skillet, pour beaten eggs over the top, and bake until set.
Spring Pea Risotto FAQs
Can I freeze this Spring Pea Risotto?
I wouldn’t recommend freezing this one — rice tends to get grainy and weird when frozen and thawed, and you’ll lose that creamy texture. It’s best enjoyed fresh or within a few days from the fridge.
What’s the best way to store Spring Pea Risotto leftovers?
Store it in an airtight container in the fridge for up to 3 days. The risotto will thicken up as it cools, so just add a splash of broth when you reheat it to bring back that creamy consistency.
How do I know when the risotto is done?
Taste the rice — it should be tender with just a tiny bit of resistance in the center (al dente), not mushy or crunchy. The texture should be creamy and flowing, not thick or gluey.
Can I make this Spring Pea Risotto ahead of time?
Risotto is really best made right before serving because it thickens as it sits. If you need to prep ahead, you can cook it about 80% of the way through, then finish it with the last bit of broth and the peas right before serving.
Closing
So there you go — Spring Pea Risotto that feels fancy but is secretly easy, and tastes like spring in a bowl. I’d love to see your spin on this Spring Pea Risotto! Drop a comment below with your photos — did you add scallops? Go heavy on the truffle oil?
I’d love to see how you made it your own. This green risotto recipe is so versatile; I bet you’ve got amazing variations already in mind.
Serve this at your next dinner party or make it on a random Wednesday just because you deserve something special. Either way, you’re going to love it.
If you’re looking for more spring-inspired dishes, try my <a href=”https://www.edenplate.com/spring-couscous-salad/”>spring couscous salad</a> for a lighter side that pairs beautifully with this risotto.
Happy cooking, and don’t forget to grab a glass of that white wine for yourself while you’re stirring — you’ve earned it!
I’m Linda Sandra — a Charleston home chef and comfort-food daydreamer. Around here, cooking’s not about perfection — it’s about cozy vibes, creative twists, and food that feels like love.
Spring Pea Risotto
Equipment
- Heavy-bottom pot or Dutch oven
- Medium pot
- Small pot
- blender
- Wooden spoon or silicone spatula
- Microplane or zester
- Measuring cups and spoons
- Cutting board and knife
Ingredients
Main Ingredients
- 4 cups vegetable broth or chicken stock warmed
- 3 tablespoons olive oil divided
- 2 shallots or sub 1 leek or 1 white onion, diced
- 2 cloves garlic rough chopped
- 1 cup Arborio rice
- ½ cup dry white wine or sub water with 1 teaspoon lemon juice
- 2 cups fresh peas blanched, or sub frozen peas
- ½ cup grated Pecorino cheese or sub Parmesan cheese
- 1 lemon zested
- salt and pepper to taste
- ¼ cup fresh mint packed, sliced
- truffle oil for drizzling
Optional Additions
- Aleppo chili flakes or Urfa Biber
- microgreens
- sautéed mushrooms
- pan-seared fish or scallops
Instructions
- Heat 4 cups vegetable broth in a medium pot over low heat and keep it warm on the stove. This is key because adding cold broth to your risotto will mess with the cooking process, and we want that rice tender and creamy.
- In a heavy-bottom pot or Dutch oven, heat 2 tablespoons olive oil over medium-low heat and sauté the diced shallots and rough-chopped garlic until they’re fragrant and golden, about 5 minutes, stirring occasionally. Your kitchen should smell amazing right about now.
- Add the Arborio rice and stir to coat every grain in that garlicky oil for one minute — this toasts the rice slightly and helps it absorb all the liquid later. Pour in the white wine to deglaze the pan and simmer until the wine has completely been absorbed, stirring occasionally.
- Add one cup of hot broth to the rice and stir every 45-60 seconds, letting the rice absorb it slowly over medium-low heat, about 5 minutes. Continue adding one cup of broth at a time, each time allowing the rice to slowly absorb the liquid until the rice is tender yet still holding its shape — this whole process will take about 20 minutes. Yes, you’ll be stirring a lot, but trust me, it’s worth it.
- While the risotto is doing its thing, blanch the fresh peas. Bring a small pot of salted water to boil, add the peas once it’s bubbling, and simmer for 2-3 minutes until tender. Drain and set aside — they should be bright green and sweet.
- Add 1/2 cup of the blanched peas to a blender with 1/2 cup water and 1 tablespoon olive oil. Blend until silky smooth — you can add a handful of spinach here to bump up that gorgeous green color even more. Blend until smooth again (it’s okay to add a little extra water to get the blades going). Set this vibrant pea puree aside.
- When the risotto is tender and you’re close to serving it, fold in the grated Pecorino cheese, lemon zest, the remaining blanched peas, and the pea puree you just made. Add salt and pepper to taste, then stir in 2/3 of the sliced mint, saving the rest for garnish.
- Taste and adjust the salt, pepper, and lemon, adding more if needed — this is your moment to make it perfect. Add chili flakes if you like a little kick.
- Divide the Spring Pea Risotto among bowls, drizzle each serving with a touch of truffle oil to elevate things, and garnish with the reserved mint. Serve immediately while it’s hot and creamy.