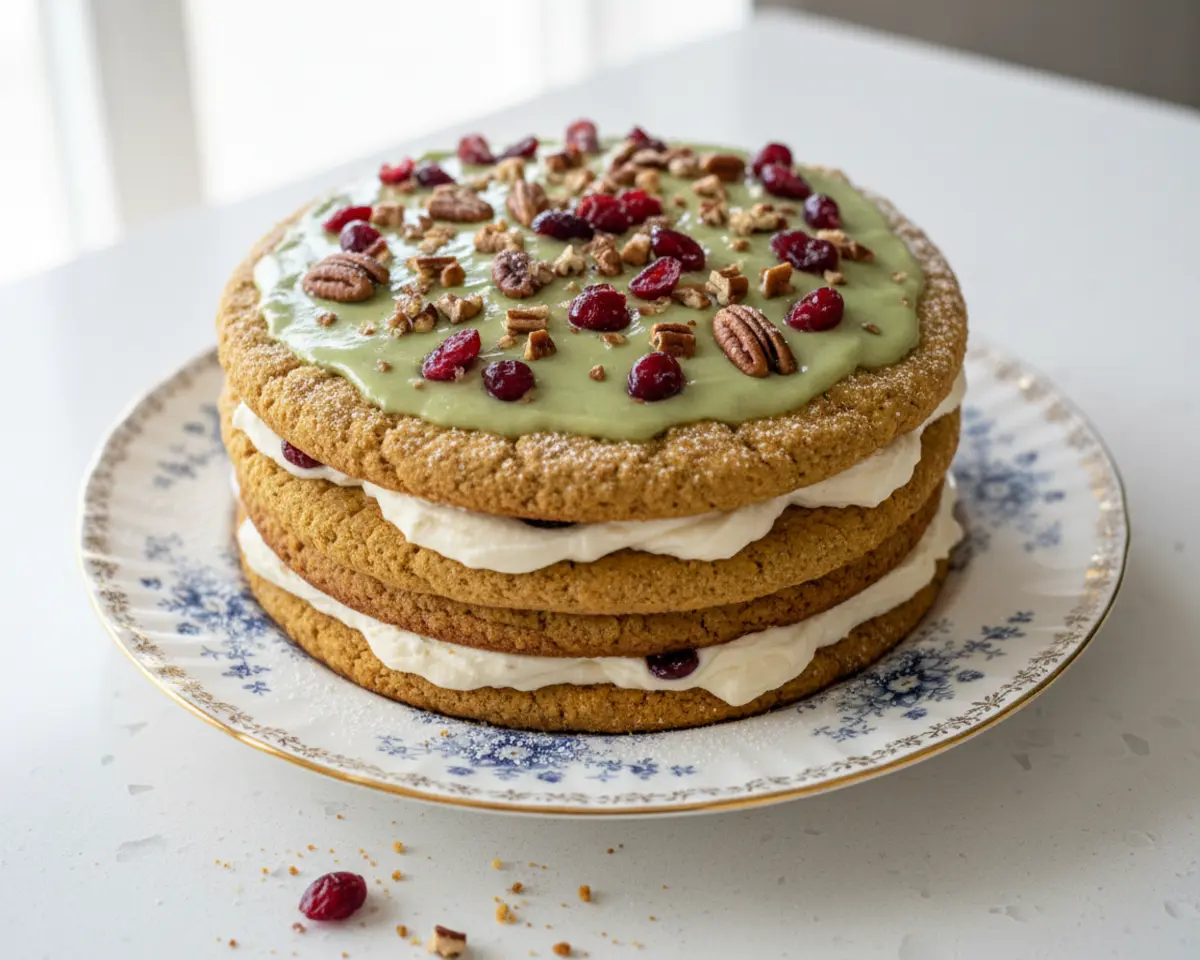
Oatmeal Creme Pie Cake
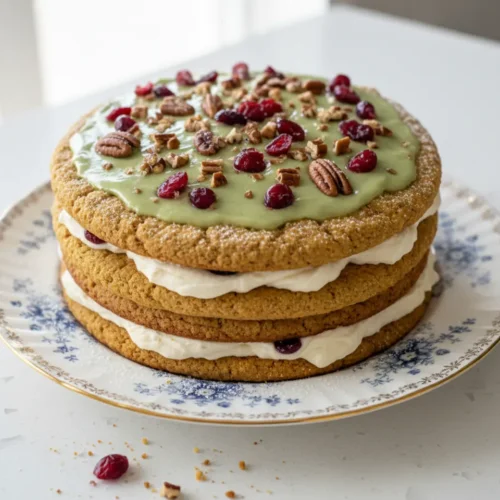
Oatmeal Creme Pie Cake takes everything you loved about those iconic lunch box snacks and turns them into a dreamy layer cake that’s basically a hug in dessert form. If you grew up sneaking those soft, cream-filled treats, you’re going to flip for this homemade oatmeal cream pie version that’s way more impressive (and even tastier).
This copycat oatmeal cream pie cake brings all that nostalgic flavor with tender, spiced oatmeal layers and a luscious buttercream filling that’ll have everyone asking for seconds.
I developed this dessert cake recipe one cozy fall afternoon in my Asheville kitchen when I couldn’t stop thinking about those classic treats. The result? A showstopper cake that’s easier than you think and perfect for birthdays, potlucks, or just because you deserve something sweet. Let’s bake up some serious nostalgia together.
Table of Contents
Quick Overview
Craving more sweet treats that bring back those nostalgic bakery vibes? Dive into our full collection of irresistible cake and cupcake recipes for more delightful desserts just like this one!
Little Snapshot: What This Recipe Delivers
This Oatmeal Creme Pie Cake transforms the classic snack cake into a two-layer masterpiece with spiced oatmeal cake and fluffy vanilla buttercream filling. It’s nostalgic, crowd-pleasing, and surprisingly simple to pull off in your own kitchen.
Why You’ll Love This Recipe 🌸
- This Oatmeal Creme Pie Cake takes less time than driving to the store for the packaged version.
- You get all that nostalgic flavor with ingredients you probably already have, perfect for busy moms looking for a showstopping dessert without the stress.
- The fluffy cream filling tastes way better than anything store-bought, and everyone will think you spent hours on it.
- According to Smithsonian Magazine, Little Debbie snack cakes have been bringing joy to American families since the 1960s — and this recipe proves exactly why that nostalgia never gets old.
Quick Facts ⚡
Here’s the quick scoop on this Oatmeal Creme Pie Cake.
- CourseDessert
- Prep Time20 minutes
- Cook Time30 minutes
- Total Time50 minutes (plus cooling)
- Servings12 servings
- DifficultyEasy
Nutritional Peek
| Nutrient | Amount per serving |
|---|---|
| Calories | 520 |
| Protein | 4g |
| Carbohydrates | 68g |
| Fat | 27g |
| Fiber | 1g |
| Sugar | 52g |
What You’ll Need
Before we dive into this cozy baking project, let’s make sure you’ve got the right tools on hand. Nothing fancy required—just your trusty baking basics that make cake days feel like a breeze.
- Two 9-inch round cake pans
- Electric mixer (stand or hand mixer works great)
- Medium and large mixing bowls
- Whisk and rubber spatula
- Measuring cups and spoons
- Wire cooling rack
- Cake stand or serving plate
- Offset spatula for spreading filling
Ingredients
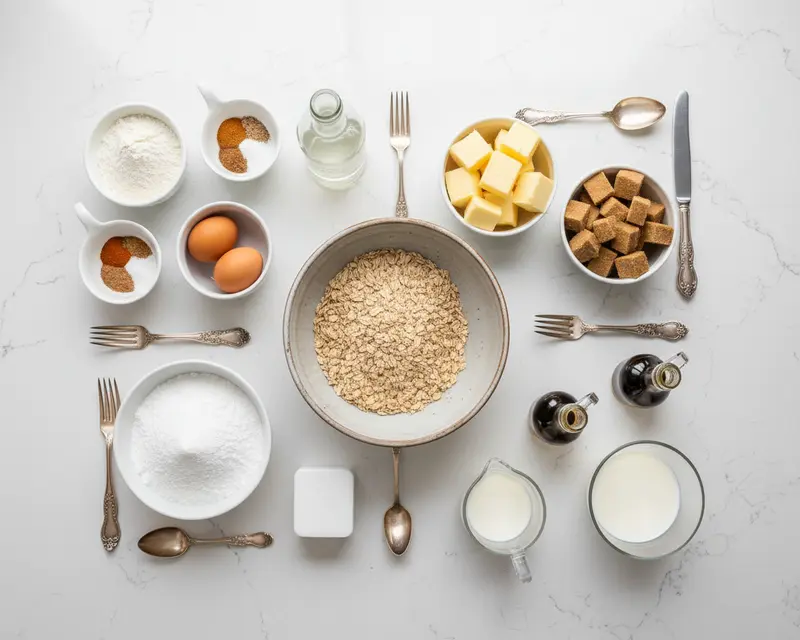
The beauty of this oatmeal cream pie recipe is how it combines pantry staples into something magical. We’ve got two simple categories here: the spiced oatmeal cake layers that give you all those warm, cozy vibes, and the dreamy buttercream filling that makes this cake totally irresistible. Let’s break it all down so you can gather everything before you start mixing.
| Group | Ingredient | Amount | Notes |
|---|---|---|---|
| Cake Base | All-purpose flour | 1 1/2 cups | Spoon and level for best results |
| Cake Base | Baking soda | 1 teaspoon | Fresh is key for proper rise |
| Cake Base | Salt | 1/2 teaspoon | Balances the sweetness beautifully |
| Cake Base | Ground cinnamon | 1 teaspoon | Brings that classic warm spice |
| Cake Base | Ground nutmeg | 1/2 teaspoon | Just a hint for depth |
| Cake Base | Unsalted butter, softened | 1 cup (2 sticks) | Room temp is essential |
| Cake Base | Packed light brown sugar | 1 1/2 cups | Adds moisture and caramel notes |
| Cake Base | Large eggs | 2 | Room temp helps everything blend |
| Cake Base | Vanilla extract | 1 teaspoon | Pure is worth it here |
| Cake Base | Buttermilk | 1/2 cup | Makes the cake super tender |
| Cake Base | Quick oats | 1 1/2 cups | The star ingredient for texture |
| Filling | Unsalted butter, softened | 1 cup (2 sticks) | Again, room temp matters |
| Filling | Shortening | 1 cup | Gives that classic fluffy texture |
| Filling | Powdered sugar, sifted | 4 cups | Sifting prevents lumps |
| Filling | Vanilla extract | 2 teaspoons | Double the vanilla love |
| Filling | Milk | 1/4 cup | Thins the filling to perfection |
Step-by-Step Instructions
Let’s make this happen. Oatmeal Creme Pie Cake might sound fancy, but it’s really just a series of simple steps that come together into something absolutely delicious.
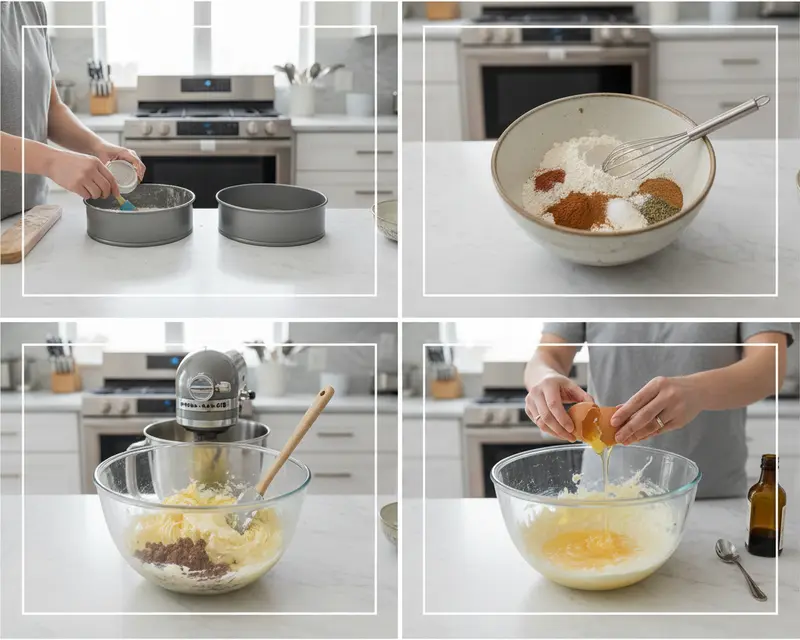
Start by preheating your oven to 350°F (175°C) and giving your two 9-inch round cake pans a generous coating of butter and flour. This little prep step saves you from heartbreak later when your gorgeous cakes refuse to release from the pans.
Grab a medium bowl and whisk together your all-purpose flour, baking soda, salt, ground cinnamon, and ground nutmeg until everything’s evenly distributed. Set this dry mixture aside while you work on the wet ingredients—it’ll be ready when you need it.
In your large mixing bowl, cream together the softened butter and packed brown sugar with your electric mixer until the mixture looks light, fluffy, and almost cloud-like. This usually takes about 3-4 minutes on medium speed, and it’s where all that tender cake texture starts.
Beat in your eggs one at a time, making sure each one is fully incorporated before adding the next. Then stir in your vanilla extract so every bite will have that sweet, warm flavor we’re chasing.
In a separate small bowl, combine the buttermilk and quick oats, then let this mixture sit for about 5 minutes. This little rest allows the oats to soften slightly and absorb some of that tangy buttermilk goodness.
Now comes the alternating dance: gradually add your dry ingredients to the butter mixture, alternating with the buttermilk-oat mixture. Start with the dry ingredients and end with them too—this method keeps your cake tender and prevents overmixing. Mix until just combined, with no streaks of flour remaining.
Divide your batter evenly between the two prepared cake pans, using a kitchen scale if you’re feeling precise (or just eyeball it like I usually do). Smooth the tops gently with your spatula so they bake evenly.
Slide those pans into your preheated oven and bake for 25-30 minutes, until a wooden skewer inserted into the center comes out clean or with just a few moist crumbs. Your kitchen will smell absolutely amazing right about now.
Let the cakes cool in their pans for 10 minutes—this helps them firm up just enough to handle. Then carefully invert them onto a wire rack to cool completely before you even think about filling them.
While your cakes cool, make the filling by creaming together the softened butter and shortening in a large bowl until light and fluffy. This combo gives you that signature texture that’s just like the original snack cakes.
Gradually beat in the powdered sugar one cup at a time, making sure each addition is fully incorporated before adding more. This prevents sugar clouds from taking over your kitchen and ensures a smooth, lump-free filling.
Beat in the vanilla extract and milk until your filling is light, fluffy, and spreadable—like the most glorious frosting you’ve ever seen. If it seems too thick, add a tiny splash more milk; if it’s too thin, beat in a bit more powdered sugar.
Once your cakes are completely cool (seriously, wait for it), place one cake layer on your serving plate or cake stand. Spread about half of that gorgeous filling evenly over the top, going all the way to the edges.
Carefully place the second cake layer on top of the filling, pressing down gently so it adheres without squishing out all that cream. Spread the remaining filling over the top of the second layer in generous swirls.
You can serve this beauty immediately for maximum ooh-and-ahh factor, or refrigerate it if you’re making it ahead. Either way, you’ve just created something absolutely magical.
Expert Tips
My best homemade oatmeal cream pies always come from a few key techniques I’ve learned through lots of delicious trial and error. Let me share the secrets that’ll make your cake turn out perfectly every single time, because you deserve all the baking wins.
Room temperature ingredients are non-negotiable for this recipe. When your butter, eggs, and buttermilk are all at room temp, they blend together smoothly and create a much more tender crumb than cold ingredients ever could.
Don’t skip the 5-minute rest for the oats and buttermilk. This brief pause lets the oats soften just enough to blend into the batter beautifully without turning your cake gummy or dense.
Use quick oats rather than old-fashioned rolled oats for the best texture. Quick oats are smaller and more finely cut, so they incorporate seamlessly into your cake batter without creating weird chewy pockets.
Measure your flour correctly by spooning it into your measuring cup and leveling it off with a knife. Scooping directly from the bag packs in way too much flour, which makes your cake dry and heavy instead of tender and dreamy.
The shortening in the filling isn’t just random—it’s what gives you that signature fluffy, stable texture that holds up beautifully at room temperature. According to King Arthur Baking, combining butter and shortening creates the perfect balance of flavor and stability for frosting.
Cool your cakes completely before assembling, even if it feels like torture waiting. Warm cake will melt your filling into a sad puddle, and you’ve worked too hard for that kind of disappointment.
For cleaner slices, chill your assembled cake for about 30 minutes before serving. This firms up the filling just enough to make neat cuts without squishing cream everywhere.
Variations
Once you’ve mastered the classic version, it’s time to play around with different flavor twists that’ll keep this cake exciting. I love experimenting with variations, especially when I’m making this for the third time in a month because my family can’t get enough.
Try a maple variation by swapping half the brown sugar for maple sugar and adding a tablespoon of pure maple syrup to your filling. It adds this gorgeous autumn vibe that’s perfect for fall gatherings or Thanksgiving dessert.
Make it chocolate-drizzled by melting some dark chocolate and drizzling it over the top layer in artistic swoops. It doesn’t change the flavor dramatically but makes your cake look ridiculously fancy with almost zero effort.
Add chopped pecans or walnuts to the batter for extra crunch and nuttiness. Fold in about 3/4 cup of toasted, chopped nuts right before dividing the batter between your pans.
Create mini versions by baking the batter in a muffin tin for about 15-18 minutes. Slice each cooled cupcake in half horizontally and sandwich them with filling for adorable individual servings that are perfect for lunchboxes.
Boost the spice factor by adding 1/4 teaspoon of ground ginger and a pinch of cardamom to your dry ingredients. These warm spices play beautifully with the cinnamon and nutmeg already in the recipe.
Make it extra nostalgic by pressing a few whole quick oats gently into the top filling layer before serving. It’s a cute visual nod to what’s inside and gives texture contrast with every bite.
Troubleshooting
Even with the best recipes, sometimes things go a little sideways in the kitchen. Don’t worry—I’ve been there, and I’ve got you covered with solutions for the most common issues you might run into.
Problem: Your cake layers turned out dense and heavy instead of light and tender.
Solution: You probably overmixed your batter or measured too much flour. Mix only until the ingredients are just combined, and make sure you’re spooning flour into your measuring cup rather than packing it in. Overmixing develops too much gluten, which makes cake tough.
Problem: The cakes stuck to the pans and broke apart when you tried to remove them.
Solution: Next time, grease and flour your pans really well, or use parchment paper circles on the bottom for insurance. Let the cakes cool for the full 10 minutes before inverting—trying to remove them too early causes breakage.
Problem: Your filling turned out too soft and runny to spread properly.
Solution: Beat in more powdered sugar a quarter cup at a time until it reaches spreadable consistency. If you added too much milk, this is an easy fix. You can also chill the filling for 15 minutes to firm it up.
Problem: The filling is grainy instead of smooth and creamy.
Solution: Make sure your butter and shortening were properly softened before mixing, and always sift your powdered sugar. Grainy filling usually means the sugar didn’t fully incorporate or there were lumps to begin with.
Problem: Your cake layers domed in the center and won’t sit flat when stacked.
Solution: You can level them with a serrated knife by carefully slicing off the dome, or use cake strips around your pans next time to promote even baking. The extra cake scraps make excellent “quality control” snacks.
Problem: The oats created weird clumps in your batter.
Solution: Make sure you’re using quick oats (not old-fashioned) and letting them soak in the buttermilk for the full 5 minutes. This softens them enough to distribute evenly throughout your batter.
Storage & Reheating
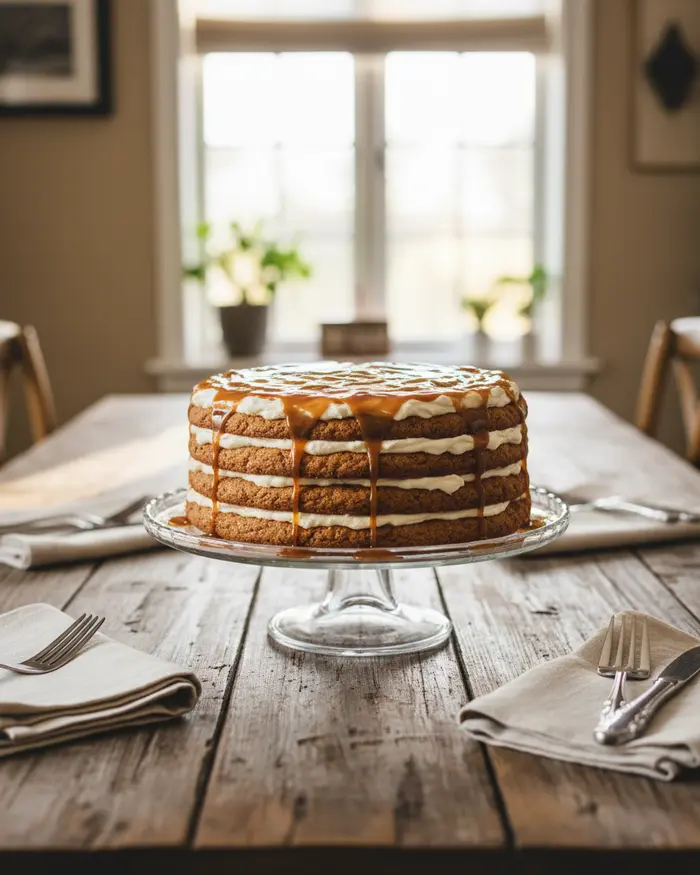
This copycat oatmeal cream pie cake keeps beautifully, which means you can make it ahead for parties or just enjoy it slowly over several days (no judgment here). The filling holds up really well, so you don’t have to worry about it getting weird or melty.
Store your assembled cake in the refrigerator, loosely covered with plastic wrap or in a cake keeper. It’ll stay fresh and delicious for up to 5 days, though in my house it rarely lasts that long. Let it sit at room temperature for about 20 minutes before serving for the best flavor and texture.
If you want to freeze this cake, wrap individual slices tightly in plastic wrap and then in aluminum foil. They’ll keep for up to 3 months in the freezer and thaw beautifully in about an hour at room temperature.
| Storage Method | Duration | Best Practice |
|---|---|---|
| Room Temperature | Up to 2 days | Cover loosely; keep in cool spot away from heat |
| Refrigerator | Up to 5 days | Store in airtight container or cake keeper |
| Freezer (whole cake) | Up to 2 months | Wrap tightly in plastic wrap, then foil |
| Freezer (slices) | Up to 3 months | Wrap each slice individually for easy serving |
No-Waste Kitchen Ideas
I’m all about using every last bit of what we make, because wasting good food just feels wrong. Here are some creative ways to use up any odds and ends from this baking project.
Save any cake scraps from leveling your layers and crumble them over ice cream for an instant dessert upgrade. You can also mix them into yogurt for breakfast or blend them into a milkshake for pure indulgence.
If you have leftover filling (which honestly rarely happens), use it to fill sandwich cookies, spread on graham crackers, or pipe onto cupcakes. It keeps in an airtight container in the fridge for up to a week.
Got extra buttermilk? Use it in pancakes, biscuits, or salad dressings throughout the week. You can also freeze it in ice cube trays for future baking projects.
Don’t toss that brown sugar bag when it’s almost empty—add the remnants to your morning oatmeal or coffee for a sweet treat. Every little bit counts when you’re trying to reduce kitchen waste.
Repurpose your cake pans by using them as molds for layered salads, cold desserts, or even savory dishes. They’re way more versatile than just cake, and it justifies keeping them in your already-crowded cabinet.
Frequently Asked Questions
You’ve got questions about making this nostalgic dessert, and I’ve got answers. Here’s what people ask me most often about this recipe.
What is an Oatmeal Creme Pie Cake?
An Oatmeal Creme Pie Cake is a dessert inspired by the classic Little Debbie snack cake. It typically consists of soft oatmeal cake layers filled and frosted with a sweet vanilla or marshmallow creme filling, recreating the nostalgic flavors of the original packaged treat in a homemade cake form.
How do you store Oatmeal Creme Pie Cake?
Store Oatmeal Creme Pie Cake in an airtight container at room temperature for up to 2 days, or refrigerate it for up to 5 days. The cake can also be frozen for up to 3 months if wrapped tightly in plastic wrap and foil. Bring to room temperature before serving for the best texture and flavor.
Can I make Oatmeal Creme Pie Cake ahead of time?
Yes, you can make Oatmeal Creme Pie Cake ahead of time. The cake layers can be baked 1-2 days in advance, wrapped well, and stored at room temperature. The frosting can also be made ahead and refrigerated. Assemble the cake up to 24 hours before serving and store it covered in the refrigerator.
What type of oats should I use for Oatmeal Creme Pie Cake?
Old-fashioned rolled oats work best for Oatmeal Creme Pie Cake as they provide the right texture and authentic oatmeal cookie flavor. Quick oats can be used as a substitute but may result in a slightly different texture. Avoid using steel-cut oats as they are too coarse and will not soften properly during baking.
What kind of frosting goes on Oatmeal Creme Pie Cake?
The traditional frosting for Oatmeal Creme Pie Cake is a marshmallow creme buttercream or a vanilla buttercream made with marshmallow fluff. This creates the signature sweet, fluffy white filling that mimics the original snack cake. Some recipes use a simple American buttercream with vanilla extract for a similar effect.
Final Dish
This Oatmeal Creme Pie Cake brings all that childhood nostalgia right into your kitchen with tender, spiced layers and that signature fluffy cream filling we all remember. It’s easier than you think, way more impressive than it looks, and absolutely delicious in that comforting, can’t-stop-eating-it kind of way.
Whether you’re making it for a special occasion or just because Tuesday needs some sweetness, this cake delivers every single time.
I’d absolutely love to see your version of this beauty—snap a photo and tag me so I can cheer you on! Drop a comment below and let me know what you thought, or if you tried any fun variations. Check out more cozy dessert inspiration on our recipe index or learn more about our kitchen philosophy.
I’m Claire Whitmore — a dessert daydreamer from Asheville, NC. For me, baking isn’t about perfect pastries — it’s about the joy of sharing something sweet (and maybe sneaking an extra scoop of icing).
Oatmeal Creme Pie Cake
Ingredients
- 1 ½ cups all-purpose flour
- 1 teaspoon baking soda
- ½ teaspoon salt
- 1 teaspoon ground cinnamon
- ½ teaspoon ground nutmeg
- 1 cup 2 sticks unsalted butter, softened
- 1 ½ cups packed light brown sugar
- 2 large eggs
- 1 teaspoon vanilla extract
- ½ cup buttermilk
- 1 ½ cups quick oats
For the Filling
- 1 cup 2 sticks unsalted butter, softened
- 1 cup shortening
- 4 cups powdered sugar sifted
- 2 teaspoons vanilla extract
- ¼ cup milk
Instructions
- Preheat oven to 350°F (175°C). Grease and flour two 9-inch round cake pans.
- In a medium bowl, whisk together the flour, baking soda, salt, cinnamon, and nutmeg. Set aside.
- In a large bowl, cream together the softened butter and brown sugar until light and fluffy.
- Beat in the eggs one at a time, then stir in the vanilla extract.
- In a separate small bowl, combine the buttermilk and quick oats. Let sit for 5 minutes.
- Gradually add the dry ingredients to the wet ingredients, alternating with the buttermilk and oat mixture, beginning and ending with the dry ingredients. Mix until just combined.
- Divide the batter evenly between the prepared cake pans.
- Bake for 25-30 minutes, or until a wooden skewer inserted into the center comes out clean.
- Let cakes cool in the pans for 10 minutes before inverting them onto a wire rack to cool completely.
- For the filling: In a large bowl, cream together the softened butter and shortening until light and fluffy.
- Gradually beat in the powdered sugar, one cup at a time, until smooth.
- Beat in the vanilla extract and milk until the filling is light and fluffy.
- Once the cakes are completely cool, place one cake layer on a serving plate or cake stand.
- Spread about half of the filling evenly over the top of the first cake layer.
- Carefully place the second cake layer on top of the filling.
- Spread the remaining filling over the top of the second cake layer. Serve immediately or refrigerate.