No-Bake Cherry Cheesecake Bars
No-Bake Cherry Cheesecake Bars are the kind of dessert that makes people think you spent hours in the kitchen — when really, your oven never even turned on.
Hey there, I’m Claire Whitmore — a pastry whisperer in Asheville, NC, where butter totally counts as self-care. These cherry cheesecake bars are a make-ahead dessert dream: a buttery graham cracker crust, a silky whipped cream cheese filling, and a glossy cherry pie filling topping that looks straight out of a retro dessert cookbook.
All six ingredients, no baking, and a beautiful square you can slice and serve with zero stress. That’s the EdenPlate way — desserts that feel special without stealing your whole afternoon.
Table of Contents
Little Snapshot: What This Recipe Delivers
These No-Bake Cherry Cheesecake Bars come together in about 20 minutes of hands-on prep, then chill for 4 hours (or overnight) to set into perfectly sliceable squares.
Made with cream cheese, heavy cream, graham crumbs, and cherry pie filling, they deliver that classic retro dessert flavor with a fluffy, mousse-like texture. Eight servings, beginner-friendly, and totally make-ahead — they’re the definition of an easy crowd-pleaser.
Why You’ll Love This Recipe
- These No-Bake Cherry Cheesecake Bars come together faster than it takes to preheat an oven — seriously, no baking required at any step.
- They’re the perfect make-ahead dessert bars for parties, potlucks, or just treating yourself on a Tuesday — pop them in the fridge the night before and you’re done.
- Six simple ingredients, one pan, and clean sliceable squares that look way more impressive than the effort involved. Busy moms, this one’s for you.
- According to The Kitchn in their deep dive into cream cheese and no-bake desserts, cream cheese gives no-bake fillings the structure and creaminess that makes them taste bakery-quality — and this cherry cheesecake recipe proves exactly why.
Quick Facts
Here’s the quick scoop on this No-Bake Cherry Cheesecake Bars recipe.
- Course: Dessert
- Prep Time: 20 minutes
- Cook Time: 0 minutes
- Total Time: 4 hours 20 minutes (including chill time)
- Servings: 8 servings
- Difficulty: Easy
Nutritional Peek
Here’s an approximate breakdown per serving, based on 8 servings.
| Nutrient | Amount Per Serving |
|---|---|
| Calories | ~390 kcal |
| Protein | 5g |
| Carbohydrates | 34g |
| Fat | 27g |
| Saturated Fat | 15g |
| Sugar | 22g |
| Fiber | 1g |
Nutritional values are estimates and may vary based on specific brands used.
Ingredients
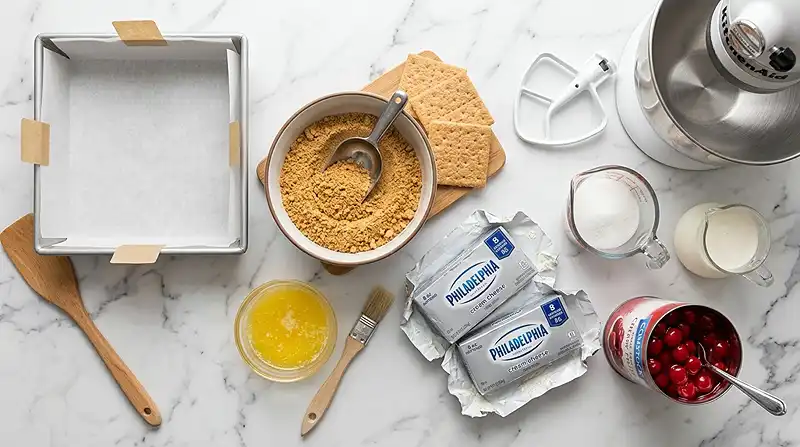
This cherry cheesecake bars recipe keeps things beautifully simple with just two ingredient groups.
For the crust, you’ll need graham crumbs and melted butter — that’s it. For the creamy filling and topping, you’ve got softened cream cheese, granulated sugar, heavy cream, and a can of cherry pie filling. Let your cream cheese and heavy cream sit out a bit before you start — room-temperature cream cheese blends smoothly, and cold heavy cream whips up into those gorgeous stiff peaks.
| Amount | Ingredient |
|---|---|
| 2 cups | Graham cracker crumbs |
| 6 tablespoons | Butter, melted (yes, real butter — don’t even think about substituting) |
| 16 ounces | Cream cheese, softened (full-fat for the creamiest result) |
| 1/2 cup | Granulated sugar |
| 1/2 cup | Heavy cream (cold from the fridge works best for whipping) |
| 1 can | Cherry pie filling (about 21 oz — don’t skimp on those cherries) |
Tools You’ll Actually Use
- 8×8 inch square baking dish
- Parchment paper
- Stand mixer or hand mixer with paddle and whisk attachments
- Two mixing bowls (one small, one medium)
- Rubber spatula or offset spatula
- Measuring cups and spoons
Step-by-Step Instructions
Ready to make the best No-Bake Cherry Cheesecake Bars of your life? Here we go.
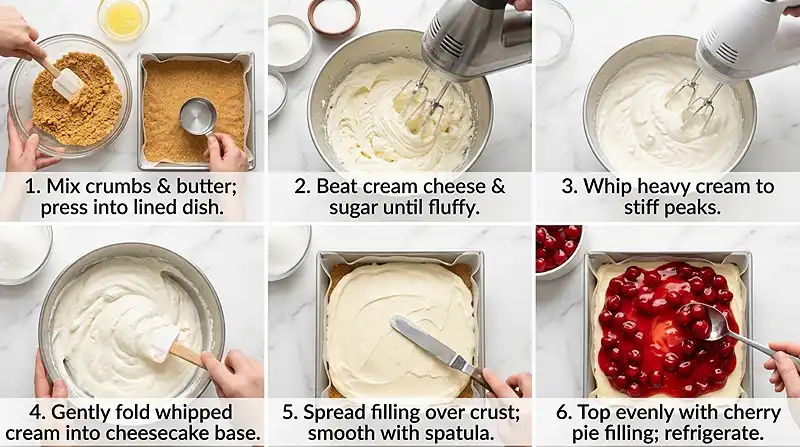
Step 1: Prep the pan. Line your 8×8 inch baking dish with parchment paper, letting the edges hang over the sides. This little trick means you can lift the whole slab out later for clean, easy slicing. Set the pan aside.
Step 2: Make the graham crust. In a small mixing bowl, combine 2 cups of graham cracker crumbs with 6 tablespoons of melted butter. Stir until the mixture looks like damp sand and every crumb is coated. Pour it into your parchment-lined dish and press it down firmly and evenly using the back of a spoon or the bottom of a measuring cup. The crust should feel compact — this is what keeps your bars from crumbling when you slice them.
Step 3: Beat the cream cheese filling. In your stand mixer using the paddle attachment, combine 16 ounces of softened cream cheese and 1/2 cup of granulated sugar. Mix on medium until the mixture turns light, pale, and fluffy — about 2 to 3 minutes. Scrape down the sides of the bowl halfway through. You want zero lumps here, so make sure that cream cheese is truly softened before you start.
Step 4: Whip the heavy cream. In a separate clean bowl, pour in 1/2 cup of cold heavy cream. Start the mixer on low speed to avoid splashing, then gradually increase to high. Whip until you have stiff peaks — the cream should hold its shape when you lift the beater. This usually takes about 2 to 3 minutes on high. Don’t over-whip or it’ll start to look grainy.
Step 5: Fold the whipped cream into the cream cheese. Gently pour the freshly whipped cream into the cream cheese and sugar mixture. Turn the mixer to high and beat until fully combined, smooth, and airy. The filling should look light and cloud-like — not dense, not runny.
Step 6: Assemble the layers. Scoop the cream cheese filling over the graham crust in the baking dish. Use the back of a spoon or offset spatula to smooth it out into an even layer. Then spoon your cherry pie filling evenly over the top, spreading it carefully so you get cherries in every bite. Try not to press too hard — you want those layers to stay distinct.
Step 7: Chill. Cover the dish with plastic wrap or foil and slide it into the fridge. Let it set for at least 4 hours — but overnight is truly better. The longer it chills, the cleaner your slices will be. Your kitchen will smell amazing even though you never turned on the oven.
Step 8: Slice and serve. Lift the bars out of the dish using the parchment overhang. Set on a cutting board and slice into 8 squares. Serve with a big old cherry cheesecake loving smile.
Claire’s Pro Tips and Gentle Guidance
These retro dessert bars are pretty forgiving, but a few little tricks take them from good to absolutely dreamy.
I’ve made every mistake in the book with no-bake cheesecake — lumpy filling, soggy crust, bars that fell apart the moment I tried to cut them. Here’s what I’ve learned so you don’t have to go through the same drama.
Soften that cream cheese all the way. I’m talking truly room temperature, not just “I took it out 10 minutes ago.” Give it at least 30 to 45 minutes on the counter. Cold cream cheese will leave lumps in your filling no matter how long you beat it, and no one wants a lumpy cheesecake bar.
Press that crust firmly. The number one reason bars fall apart is a crust that wasn’t pressed down hard enough. Use the flat bottom of a measuring cup and really lean into it. You want it dense and compact, almost like a cookie.
Chill overnight when you can. Four hours will work, but overnight is the sweet spot. The filling sets more firmly, the crust gets its act together, and your slices come out clean and gorgeous. Plan ahead and future-you will be very grateful.
Don’t skip the parchment paper. Honestly, this is the move that changes everything. Line your pan before anything else goes in. You’ll be able to lift the whole slab out cleanly and slice it on a flat surface like a pro.
Quick Fixes for No-Bake Cherry Cheesecake Bars
Problem: My filling is lumpy. This almost always means the cream cheese wasn’t soft enough before you started mixing. Next time, let it sit out longer. For now, keep beating — sometimes lumps work themselves out with extra mixing time.
Problem: My bars won’t set and are still too soft to slice. They likely need more time in the fridge. Pop them back in for another hour or two, or even overnight. If they’re still very soft after 8 hours, the whipped cream may not have reached stiff peaks — make sure you’re whipping to the right consistency next time.
Problem: The crust is crumbling when I slice. The crust wasn’t pressed firmly enough before chilling. It can also help to chill the crust alone for 15 minutes before adding the filling — it firms up a bit and holds together better.
Problem: The cherry topping is sliding off. If the filling layer was too thick or not fully set before you added the cherries, they’ll slide. Make sure the filling is chilled and set before adding the topping — or just add the cherry pie filling right before serving instead of chilling it on top.
Problem: My bars taste too sweet. Cherry pie filling can be quite sweet, and so can the cream cheese layer. Try squeezing a little fresh lemon juice into the cream cheese mixture next time — just a teaspoon or two brightens the whole filling and balances the sweetness beautifully.
Variations and Fun Twists
Once you’ve mastered this cherry cheesecake bars base, the world is your dessert topping.
Swap the fruit topping. Blueberry, strawberry, or peach pie filling all work beautifully here. In fall, try apple pie filling with a pinch of cinnamon in the crust. In summer, fresh macerated strawberries are stunning.
Make it gluten-free. Use gluten-free graham crackers or gluten-free digestive biscuits for the crust. Everything else in this recipe is already naturally gluten-free.
Add a little lemon zest. A teaspoon of fresh lemon zest stirred into the cream cheese filling adds a lovely brightness that plays really nicely with the cherries.
Make it fancier. Pipe little rosettes of whipped cream around the edges before serving, or dust lightly with powdered sugar. These bars clean up beautifully for a dinner party without any extra effort.
Mini bars for a crowd. Press the recipe into a 9×13 inch pan and cut into 16 smaller squares for a party tray. Perfect alongside something savory like this sausage hash brown breakfast bake if you’re doing a full brunch spread.
Serving, Storage, and Reheating
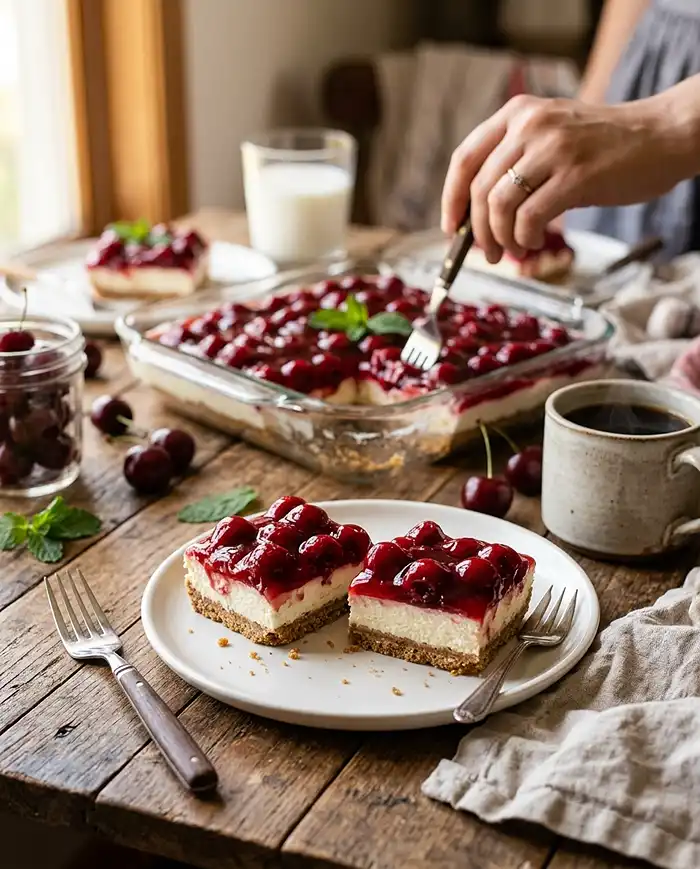
Serve these cherry cheesecake bars cold, straight from the fridge. They’re best within the first two days when the crust is still slightly crisp and the filling is at peak creaminess. Add a little whipped cream on top right before serving if you want to feel extra fancy.
Store leftover bars in an airtight container in the refrigerator for up to 4 days. Lay a piece of plastic wrap directly on the cut surfaces if you want to keep them from drying out. They honestly get even better on day two as the flavors meld together.
No reheating needed — these bars are meant to be enjoyed cold. If you want to freeze them, wrap individual squares tightly in plastic wrap and freeze for up to one month. Thaw overnight in the fridge before serving. The texture will be slightly softer than fresh, but still totally delicious.
No-Waste Kitchen Magic
Got a bit of leftover cream cheese filling? Spoon it into small glasses with some graham crumbs and extra cherries for adorable mini cheesecake parfaits — no pan required.
Leftover cherry pie filling is wonderful stirred into oatmeal, spooned over vanilla ice cream, or layered into a simple trifle with pound cake and whipped cream. Don’t let those cherries go to waste — they’re basically dessert sauce in a can.
If your bars are starting to soften after a few days in the fridge, crumble them up and layer them into a dessert parfait with extra whipped cream. Imperfect bars still taste incredible, I promise.
If you love easy baked treats too, these cherry chocolate chip blondies are the perfect companion recipe — cherry season deserves to be celebrated fully.
Frequently Asked Questions
Can I make these No-Bake Cherry Cheesecake Bars ahead of time?
Yes, absolutely — and honestly, I’d encourage it. These bars are better when made the night before, because the longer chill time lets the filling set more firmly and the flavors develop. Just cover the pan tightly and refrigerate overnight. Slice and serve straight from the fridge the next day.
How do I know when the No-Bake Cherry Cheesecake Bars are done setting?
Give the pan a gentle jiggle after 4 hours. The filling should feel firm rather than liquid and the cherry topping should hold its shape. If it still seems wobbly in the center, give it another hour or two. Overnight chilling is the most reliable way to get perfectly set bars.
Can I freeze No-Bake Cherry Cheesecake Bars?
You can! Wrap individual squares tightly in plastic wrap, then place them in a freezer bag. Freeze for up to one month and thaw overnight in the refrigerator before serving. The texture may be slightly softer than fresh, but the flavor is still wonderful.
Why should I use full-fat cream cheese in this recipe?
Full-fat cream cheese gives the filling its rich, creamy structure. Lower-fat versions have more water content and can make the filling too soft to hold its shape after chilling. For a no-bake dessert that relies entirely on the fridge to set, stick with full-fat for the best result.
What is the best way to store cherry cheesecake bars?
Store them in an airtight container in the refrigerator for up to 4 days. For already-cut bars, press plastic wrap directly against the cut edges to prevent them from drying out. They actually taste even better on day two as the flavors meld together.
Cozy Closing
There’s something so wonderfully nostalgic about a tray of No-Bake Cherry Cheesecake Bars sitting in the fridge, just waiting to be sliced.
They’re the kind of dessert that tastes like a hug — simple, classic, and genuinely crowd-pleasing every single time. I hope they find their way onto your table soon.
I’d love to see your spin on these No-Bake Cherry Cheesecake Bars! Drop a comment below with your photos — did you try a different fruit topping or add a little lemon zest? I’d absolutely love to hear how you made it your own.
I’m Claire Whitmore — a dessert daydreamer from Asheville, NC. For me, baking isn’t about perfect pastries — it’s about the joy of sharing something sweet (and maybe sneaking an extra cherry off the top before anyone notices).

No-Bake Cherry Cheesecake Bars
Equipment
- 8×8 inch square baking dish
- Parchment paper
- Stand mixer or hand mixer
- Mixing bowls
- Rubber spatula or offset spatula
- Measuring cups and spoons
Ingredients
Graham Crust
- 2 cups Graham cracker crumbs
- 6 tablespoons Butter melted
Cream Cheese Filling
- 16 ounces Cream cheese softened
- ½ cup Granulated sugar
- ½ cup Heavy cream cold
Cherry Topping
- 1 can (21 oz) Cherry pie filling
Instructions
- Line an 8×8 inch baking dish with parchment paper, leaving overhang for easy removal.
- Mix graham cracker crumbs and melted butter, then press firmly into the pan to form the crust.
- Beat cream cheese and sugar until smooth and fluffy.
- Whip cold heavy cream until stiff peaks form.
- Fold whipped cream into the cream cheese mixture until light and airy.
- Spread filling evenly over the crust.
- Top with cherry pie filling and smooth evenly.
- Chill for at least 4 hours or overnight, then slice and serve.