Ghost Cookies
Ghost Cookies are pure October magic — crisp-edged sugar cookies shaped like little friendly phantoms, draped in snowy icing, and dotted with wide eyes that seem to follow you around the kitchen. Okay, little confession: I’m Claire Whitmore, a home baker tucked away in Asheville, NC, who firmly believes frosting is a love language.
And these Ghost Cookies? They’re the sweetest way to kick off spooky season without any actual scaring.
This recipe starts with one cup softened unsalted butter creamed with granulated sugar, then enriched with egg and vanilla extract, bound by all-purpose flour, baking powder, and a pinch of salt, rolled to a quarter-inch thickness, cut into ghost shapes, baked at 375°F for eight to ten minutes until lightly golden, cooled completely, then outlined and flooded with white royal icing or melted white chocolate and finished with black gel eyes and mouths — a festive Halloween cookie that takes about ninety minutes start to finish and suits beginner bakers beautifully.
I still remember the October afternoon my neighbor’s twins camped out at my kitchen island, giggling as they drew wobbly mouths on a tray of these ghosts. One ended up with three eyes, another looked more surprised than spooky, and honestly? Those were the ones that disappeared first.
Table of Contents
In a Nutshell
Ghost Cookies are buttery sugar cookies cut into ghost shapes, coated in white icing or chocolate, and decorated with simple black faces — ready in about ninety minutes with basic pantry staples. They’re beginner-friendly, endlessly customizable, and guaranteed to make your Halloween spread feel homemade and heartfelt without requiring any fancy piping skills.
Why This Deserves a Spot in Your Rotation ✨
- These easy ghost cookies require zero special skills — if you can trace a face with a marker, you can nail the decoration.
- The dough comes together in one bowl, chills while you answer emails, and bakes faster than most sitcom episodes.
- They look absolutely adorable on a platter, and kids (plus every adult with a sweet tooth) will fight over the last one.
- The team at Simply Recipes’ royal icing guide explains how a simple flood technique creates that smooth, bakery-level finish — and honestly, this recipe nails it every time.
The Need-to-Know Details 📋
Before we dive in, here’s the lowdown on this Ghost Cookies recipe.
- CourseDessert
- Total Time90 minutes
- Prep Time45 minutes (includes chilling)
- Bake Time8–10 minutes
- Yield24 cookies
- DifficultyEasy
What You’ll Need (Ingredients)
Every batch of Halloween cookies starts with a handful of pantry staples and one or two little splurges that make all the difference.
You’ll need softened unsalted butter and granulated sugar for structure and sweetness, one large egg and pure vanilla extract to bind everything together, all-purpose flour whisked with baking powder and salt for the perfect tender crumb, plus white royal icing or melted white chocolate and black gel food coloring or an edible marker to bring your friendly ghosts to life.
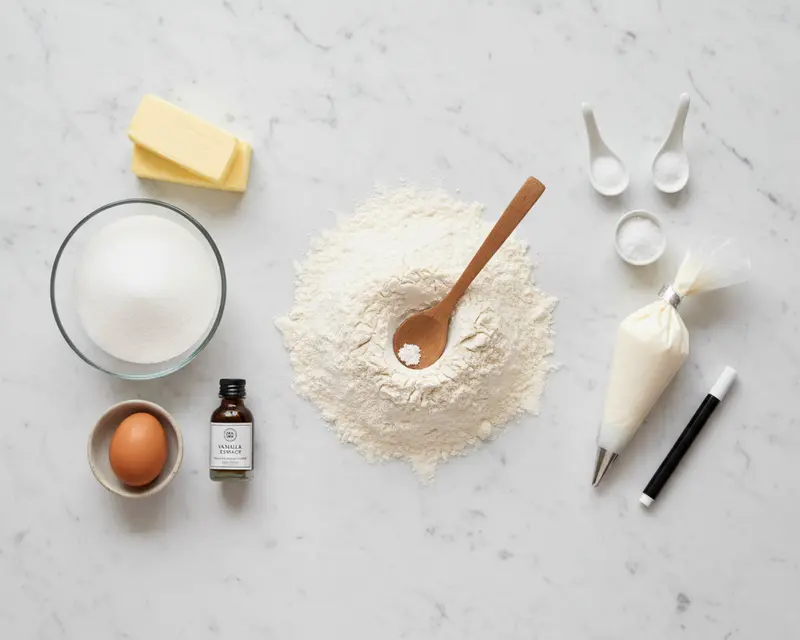
| Ingredient | Amount | Claire’s Note |
|---|---|---|
| Unsalted butter, softened | 1 cup (2 sticks) | Leave it on the counter for an hour — microwave softening never feels quite right. |
| Granulated sugar | 1 cup | The foundation of that crisp edge we’re after. |
| Large egg | 1 | Room temp blends smoother — set it out with the butter. |
| Vanilla extract | 1 teaspoon | Pure only, please — imitation tastes flat in sugar cookies. |
| All-purpose flour | 2 ¾ cups | Spoon and level; packing it leads to dry, crumbly dough. |
| Baking powder | 1 teaspoon | Just enough lift without puffing them into blobs. |
| Salt | ¼ teaspoon | Balances the sweetness beautifully. |
| White royal icing or melted white chocolate | As needed | Royal icing dries harder; chocolate stays a little softer — your call. |
| Black gel food coloring or edible marker | As needed | I love an edible marker for fuss-free faces, but gel in a toothpick works too. |
Gear Check
- Stand mixer or large mixing bowl and hand mixer
- Measuring cups and spoons
- Medium mixing bowl and whisk
- Plastic wrap
- Rolling pin
- Ghost-shaped cookie cutter (about 3–4 inches tall)
- Baking sheets and parchment paper
- Wire cooling rack
- Piping bag or zip-top bag (for icing), or spoon
- Edible marker or toothpick (for faces)
Optional but lovely: a silicone baking mat for perfectly even browning, and a small offset spatula for smoothing icing.
Nutrition at a Glance
Numbers aren’t everything, but here they are for the curious — always good to know what you’re biting into.
| Nutrient | Per Cookie |
|---|---|
| Calories | ~145 |
| Protein | 2 g |
| Carbohydrates | 18 g |
| Fat | 7 g |
| Fiber | <1 g |
| Sugar | 9 g |
Values are approximate and vary based on icing quantity and decoration choices.
How to Make Ghost Cookies (Step-by-Step Instructions)
Making Ghost Cookies is a cozy, two-part process: mix and chill the dough, then roll, cut, bake, and decorate. Every step is straightforward, and the results look like you spent way more effort than you actually did.
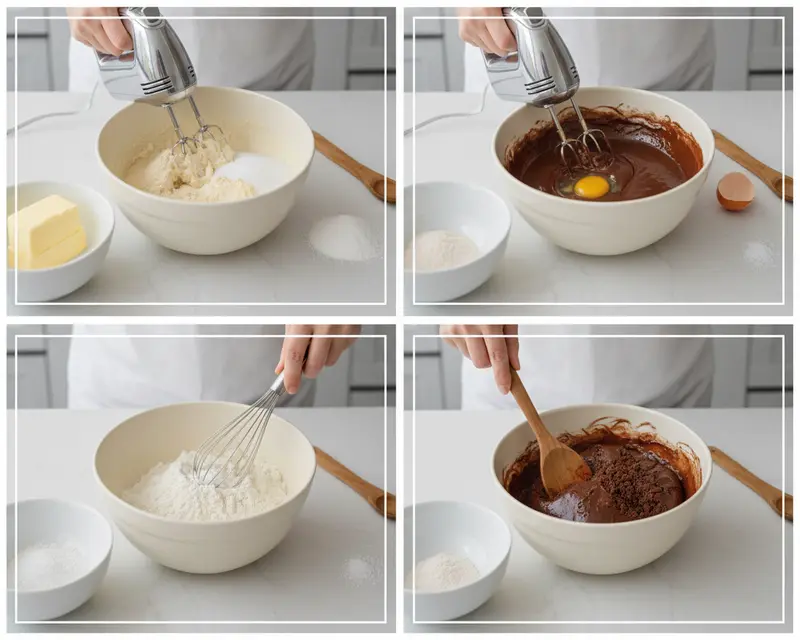
Mix the dough
- Cream the butter and sugar: In a large bowl, beat one cup softened unsalted butter and one cup granulated sugar with a hand or stand mixer on medium speed for two to three minutes, until the mixture is pale, fluffy, and smells faintly like a bakery opened in your kitchen.
- Add the egg and vanilla: Crack in one large room-temperature egg and pour in one teaspoon pure vanilla extract, then beat on medium until everything is smooth and no yellow streaks remain — about thirty seconds.
- Whisk the dry ingredients: In a separate medium bowl, whisk together two and three-quarter cups all-purpose flour, one teaspoon baking powder, and one-quarter teaspoon salt until evenly blended and lump-free.
- Combine wet and dry: Add the flour mixture to the butter mixture in two or three additions, mixing on low speed after each just until the dough comes together and no dry pockets remain — it should feel soft but not sticky, and pulling away from the sides of the bowl.
- Chill the dough: Divide the dough in half, pat each portion into a flat disc about one inch thick, wrap tightly in plastic wrap, and refrigerate for at least thirty minutes (or up to two days) so it firms up and becomes easy to roll without sticking or tearing.
Roll and cut
- Preheat and prep: Set your oven to 375°F (190°C) and line two baking sheets with parchment paper — the parchment keeps bottoms from browning too fast and makes cleanup a breeze.
- Roll out the first disc: On a lightly floured countertop or pastry mat, roll one chilled dough disc to an even quarter-inch thickness, dusting the rolling pin with a tiny bit of flour if the dough tries to cling — too thick and the cookies stay soft, too thin and they’ll crisp into crackers.
- Cut your ghosts: Press a ghost-shaped cookie cutter straight down (no twisting) into the dough, lifting each shape gently with a small offset spatula or butter knife and placing it on the prepared baking sheet, spacing them about one inch apart; gather scraps, re-roll once, and cut more until the first disc is used up.
- Bake: Slide the baking sheet into the preheated oven and bake for eight to ten minutes, until the edges turn the palest shade of golden and the centers still look matte — they’ll firm as they cool, so don’t wait for deep color or you’ll end up with crunchy ghosts instead of tender ones.
- Cool on the pan: Let the cookies rest on the baking sheet for two to three minutes to set their structure, then use a thin spatula to transfer them to a wire rack to cool completely — decorating warm cookies will melt your icing into a puddle.
Decorate
- Outline and flood: Once every ghost is room temperature, spoon white royal icing or melted white chocolate into a piping bag (or a zip-top bag with one tiny corner snipped off), pipe a thin outline around each ghost, then fill the center with more icing, using a toothpick to nudge it into corners and smooth the surface — let this base coat set for at least thirty minutes until it’s dry to the touch.
- Add the faces: Use a black edible marker to draw two oval eyes and one wavy or round mouth on each ghost, or dip a toothpick into black gel food coloring and dot on features freehand — wobbly lines and surprised expressions are part of the charm, so embrace every imperfect face.
Claire’s Kitchen Secrets (Pro Tips)
Every batch of Halloween baking gets a little smoother when you know a few gentle tricks. These easy ghost cookies are forgiving, but a handful of small tweaks can take them from “cute” to “how did you even do that?”
Chill the dough long enough. Thirty minutes is the minimum, but an hour (or overnight) makes rolling and cutting almost effortless — cold butter holds its shape better in the oven, so your ghosts keep their crisp edges instead of spreading into blobs.
Roll between parchment. If counter flouring stresses you out, sandwich your dough disc between two sheets of parchment paper and roll right through them — no sticking, no mess, and you can peel the top sheet off and cut directly on the bottom one.
Don’t over-mix after adding flour. The second you see the last streak of flour disappear, stop the mixer — overworking activates gluten and turns tender cookies tough and dense.
Make ahead and freeze. Cut shapes can go straight from baking sheet to freezer on a tray, then into a zip-top bag once solid; bake from frozen, adding one or two extra minutes to the timer, and you’ll have fresh spooky treats on actual Halloween without the last-minute panic.
Here’s what I’d do differently next time: I used to try decorating the same day I baked, but now I bake one evening, leave the naked cookies in an airtight container overnight, and decorate the next morning when I’m fresh and my hand is steadier — the faces turn out way less lopsided.
For more guidance on working with royal icing consistency, the experts at King Arthur Baking’s royal icing tutorial walk you through every texture from stiff peaks to flood consistency, which makes decorating any cut-out cookie so much less stressful.
Help! My Ghost Cookies… (Troubleshooting)
Why did my Ghost Cookies spread and lose their shape in the oven?
Your butter was probably too warm or your dough didn’t chill long enough — soft fat melts fast and lets the dough relax before it sets. Next time, chill the cut shapes on the baking sheet for ten minutes before they go into the oven, and make sure your butter was truly just softened (not melty) when you creamed it.
My cookies came out hard and crunchy instead of tender — what happened?
You likely rolled the dough too thin, baked them a minute or two too long, or measured flour by scooping (which packs in extra). Aim for a true quarter-inch thickness, pull them when the edges are barely golden, and always spoon flour into your measuring cup and level it off.
The icing won’t stay inside the lines — it keeps running off the edges!
Your icing is too thin for flooding without an outline, or you skipped the outline step altogether. Pipe a thicker border first, let it set for five minutes to create a little dam, then flood the center — the barrier will hold everything in place beautifully.
My ghost faces smudged when I tried to draw them — how do I fix that?
The base icing wasn’t fully dry yet, so the marker or gel dragged through the wet surface. Let your white layer sit for at least thirty minutes (or until it feels completely dry and matte to a light fingertip touch) before adding any black details.
Can I skip the chilling step if I’m in a hurry?
You can try, but your dough will be sticky, hard to roll, and prone to tearing — plus the baked cookies will spread more and lose definition. If you’re truly rushed, pop the dough in the freezer for fifteen minutes instead of the fridge for thirty, and work quickly on a cold surface.
Mix It Up (Variations)
For a cozy fall twist: Add half a teaspoon of cinnamon and a quarter teaspoon of nutmeg to the dry ingredients, and decorate with orange-tinted icing instead of white for little pumpkin ghosts.
Spring or summer version: Use pastel icing (pale pink, lavender, mint) and draw smiling faces for cheerful “friendly spirit” cookies that work at a spring birthday or baby shower.
Gluten-free route: Swap the all-purpose flour one-to-one with a gluten-free baking blend that includes xanthan gum (I like King Arthur Measure for Measure), and chill the dough an extra fifteen minutes since GF dough can be softer.
Vegan or dairy-free route: Replace the butter with vegan baking sticks (not tub spread), use a flax egg (one tablespoon ground flaxseed plus two and a half tablespoons water, stirred and rested five minutes), and decorate with aquafaba royal icing or dairy-free white chocolate.
Cozy & casual presentation: Pile them on a big wooden board with a few candy corn scattered around, stack them in a mason jar tied with orange ribbon, or tuck one into a lunch box with a little note.
Party-ready presentation: Arrange them on a white platter in overlapping rows, dust the edges with edible silver glitter, or stand a few upright in shot glasses filled with black sanding sugar for a mini “graveyard” centerpiece.
Serving Ideas, Storage & Reheating
How to serve: These Halloween cookies shine on their own, but they’re even more fun alongside a mug of spiced apple cider, a scoop of vanilla ice cream, or tucked into a collection of other Halloween spooky treats like mummy brownies and Oreo-stuffed chocolate chip cookies for a full dessert spread that’ll make your table the talk of the party.
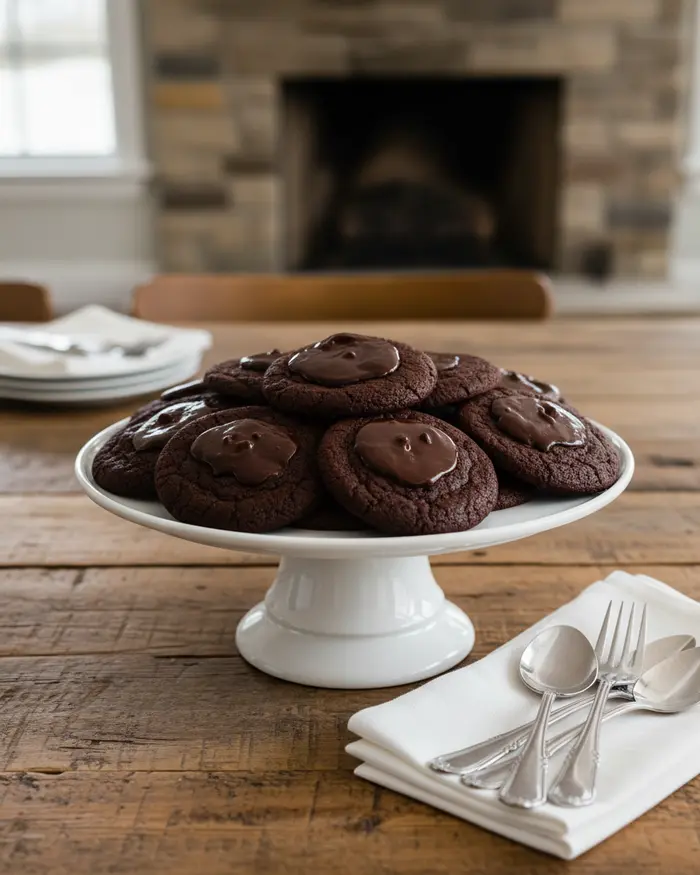
Storage: Once the icing is completely dry, layer your ghost cookies between sheets of parchment or wax paper in an airtight container and store at room temperature for up to one week — they stay crisp and the faces won’t smudge as long as you don’t stack them directly on top of each other.
For longer keeping, freeze decorated cookies in a single layer on a baking sheet until solid, then transfer to a freezer-safe container for up to three months.
Reheating: These are meant to be enjoyed at room temp, but if you want to warm a plain (un-iced) cookie for a few seconds, pop it in a 300°F oven for two to three minutes — just know that reheating decorated cookies will melt the icing, so save that trick for naked leftovers only. Honestly, though, leftovers are pretty rare around here.
Zero-Waste Wins
Dough scraps: After your second re-roll, press leftover bits into a small disc, chill again, and bake as rustic “witch finger” cookies — no cutter needed.
Leftover royal icing: Thin it with a teaspoon of water, drizzle it over graham crackers or pretzels, and let it harden for instant snackable treats.
Broken cookies: Crumble them into a bowl, layer with whipped cream and pudding, and call it a “ghost graveyard parfait” — kids will lose their minds.
Day-old cookies: Chop them coarsely and fold into vanilla ice cream during the last minute of churning for a homemade Halloween dessert mashup that tastes like October in a bowl.
Frequently Asked Questions (FAQs)
Here are the questions that pop up most often when readers dive into this recipe — and the answers that’ll help you bake your best batch yet.
What are Ghost Cookies?
Ghost Cookies are festive Halloween-themed sugar cookies decorated to look like ghosts, typically featuring a white icing or frosting base with simple facial features like eyes and a mouth added in chocolate or black icing.
How do I store Ghost Cookies to keep them fresh?
Store Ghost Cookies in an airtight container at room temperature for up to 5 days. If decorated with royal icing, allow the icing to dry completely before stacking. For longer storage, undecorated cookies can be frozen for up to 3 months.
What ingredients do I need to make Ghost Cookies?
Basic Ghost Cookies require flour, butter, sugar, eggs, vanilla extract, baking powder, and salt for the cookie dough. For decoration, you will need white frosting or royal icing and black or chocolate icing for the facial features.
Can I make Ghost Cookies ahead of time?
Yes, you can make Ghost Cookies ahead of time. Bake the cookies up to 2 days in advance and store them undecorated in an airtight container. Decorate them on the day you plan to serve them, or decorate fully and store for up to 5 days.
Are Ghost Cookies suitable for people with dietary restrictions?
Traditional Ghost Cookies contain gluten, dairy, and eggs. However, they can be adapted for dietary restrictions by using gluten-free flour blends, dairy-free butter and frosting alternatives, and egg substitutes like flax eggs or commercial egg replacers.
One Last Crumb
Ghost Cookies are the kind of recipe that fills your kitchen with the scent of vanilla and butter, covers your countertop in flour dust, and ends with a platter of wobbly-eyed little ghosts that somehow manage to be both spooky and sweet at the same time.
They’re simple enough for a weeknight, impressive enough for a party, and every single one tells its own tiny story through those hand-drawn faces.
Whip up a batch of these Ghost Cookies this October, let the kids (or your own inner kid) take over the decorating, and watch how fast they disappear. Snap a pic of your favorite face, tag me, and tell me in the comments what personality your ghost cookies ended up with — half my favorite Halloween baking ideas came from readers like you, and I can’t wait to see what you create.
Whether you’re baking for a classroom party, a porch drop-off for neighbors, or just because it’s October and you deserve something sweet, these Ghost Cookies deliver every time. The dough is forgiving, the decorating is low-pressure, and the results always feel like a little celebration — no matter how wonky the eyes turn out.
So grab your ghost cutter, crank up your favorite playlist, and let’s get baking. These little phantoms are waiting to haunt your cookie jar, and trust me — they won’t last long enough to get lonely.
I’m Claire Whitmore — a dessert daydreamer from Asheville, NC. For me, baking isn’t about perfect pastries — it’s about the joy of sharing something sweet (and maybe sneaking an extra scoop of icing).
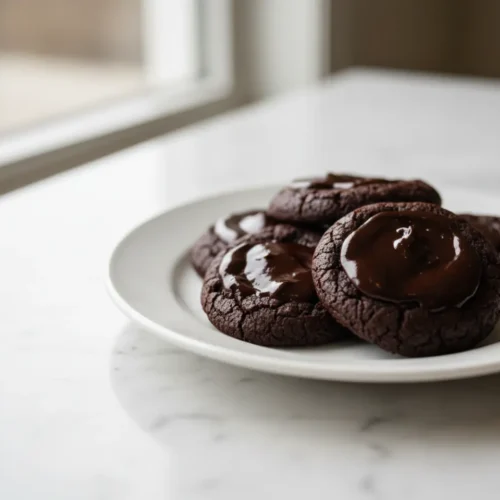
Ghost Cookies
Ingredients
- 1 cup 2 sticks unsalted butter, softened
- 1 cup granulated sugar
- 1 large egg
- 1 teaspoon vanilla extract
- 2 ¾ cups all-purpose flour
- 1 teaspoon baking powder
- ¼ teaspoon salt
- White royal icing or melted white chocolate
- Black gel food coloring or edible marker
Instructions
- In a large bowl, cream together the softened butter and granulated sugar until light and fluffy.
- Beat in the egg and vanilla extract until well combined.
- In a separate bowl, whisk together the flour, baking powder, and salt.
- Gradually add the dry ingredients to the wet ingredients, mixing until just combined and a soft dough forms.
- Divide the dough in half, flatten into discs, wrap in plastic wrap, and refrigerate for at least 30 minutes.
- Preheat your oven to 375°F (190°C) and line baking sheets with parchment paper.
- On a lightly floured surface, roll out one disc of dough to about ¼-inch thickness. Use a ghost-shaped cookie cutter to cut out shapes. Reroll scraps as needed.
- Place the ghost cookies on the prepared baking sheets and bake for 8-10 minutes, or until the edges are lightly golden.
- Let the cookies cool on the baking sheets for a few minutes before transferring them to a wire rack to cool completely.
- Once completely cool, decorate the ghost cookies. Use white royal icing or melted white chocolate to outline and fill the ghost shapes. Allow to set.
- Once the white icing or chocolate has set, use black gel food coloring or an edible marker to draw eyes and mouths on your ghost cookies.