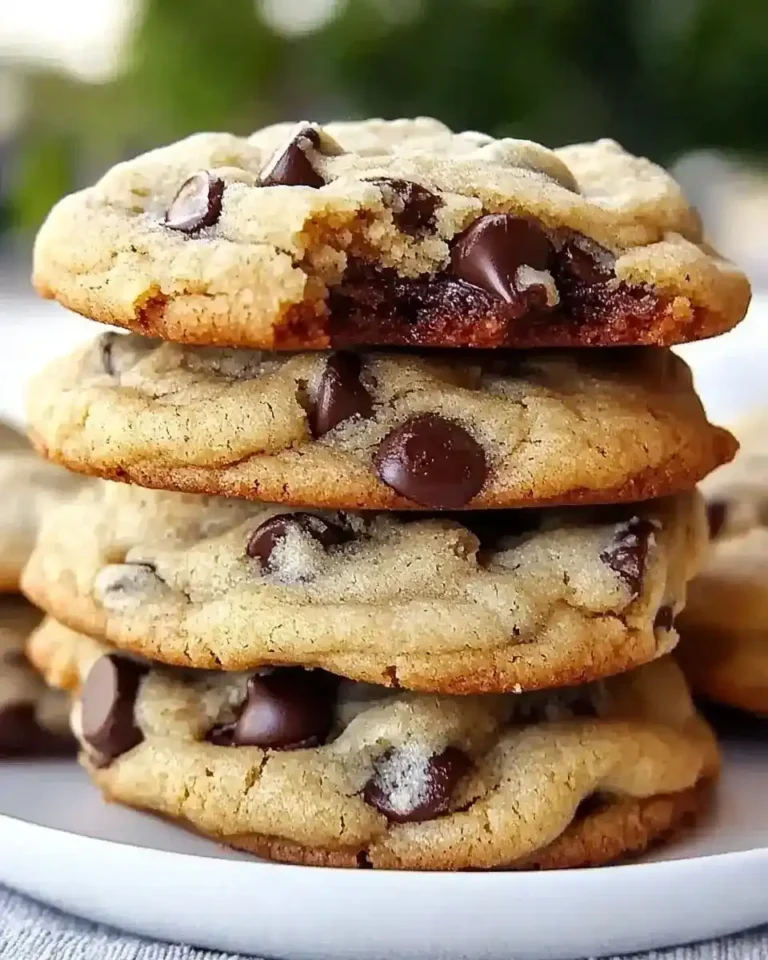
Monster Cookie Protein Balls
Monster Cookie Protein Balls are easy, no-bake, protein-packed treats loaded with peanut butter, oats, chocolate chips, and M&M’s — ready in 15 minutes with just a bowl and spoon.
Hey there, I’m Claire Whitmore — a dessert daydreamer from Asheville, NC, where chocolate chips are a food group and sneaking protein into treats is my love language.
This Monster Cookie Protein Balls recipe is a no-bake wonder that combines creamy peanut butter, wholesome rolled oats, vanilla protein powder, mini chocolate chips, and colorful M&M’s into bite-sized energy boosters that taste like dessert but fuel you like breakfast.
They’re naturally gluten-free (if you use certified GF oats), require zero baking skills, and come together in about 15 minutes with ingredients you probably already have in your pantry.
I originally whipped up these protein balls on a frantic Tuesday morning when my kids needed a snack that wasn’t, you know, another granola bar wrapper. I wanted something that felt like a treat but wouldn’t send them (or me) into a sugar spiral an hour later.
Table of Contents
Little Snapshot: What This Recipe Delivers
Monster Cookie Protein Balls are no-bake, high-protein snacks made with peanut butter, oats, protein powder, chia seeds, honey, mini chocolate chips, and M&M’s.
They take just 15 minutes to prep, require no special equipment, and deliver a chewy, cookie-dough-like texture that satisfies sweet cravings while keeping you fueled throughout the day.
Why You’ll Love This Recipe 🌸
- This monster cookie protein balls recipe takes less time than scrolling through your recipe feed — seriously, 15 minutes and you’re done.
- They taste like cookie dough you’re totally allowed to eat, but they’re actually good for you (protein! fiber! no guilt!).
- You can make them with whatever you’ve got — swap the chocolate chips, use almond butter, toss in some shredded coconut — they’re basically impossible to mess up.
- According to EatingWell’s comprehensive guide to protein and satiety, protein-rich snacks help you stay fuller longer and stabilize blood sugar — and this recipe proves exactly why.
Quick Facts ⚡
Here’s the quick scoop on this Monster Cookie Protein Balls recipe.
- CourseSnack / Dessert
- Prep Time15 minutes
- Cook Time0 minutes (no-bake!)
- Total Time15 minutes
- Servings14-16 protein balls
- DifficultyEasy
Nutritional Peek
Here’s what you’re getting in each protein-packed little ball (based on 16 servings):
| Nutrient | Amount per Serving |
|---|---|
| Calories | ~110 kcal |
| Protein | 5g |
| Carbohydrates | 11g |
| Total Fat | 6g |
| Fiber | 2g |
| Sugar | 5g |
These numbers will vary slightly depending on your protein powder and peanut butter brand, but you’re looking at a balanced, satisfying snack either way.
Ingredients
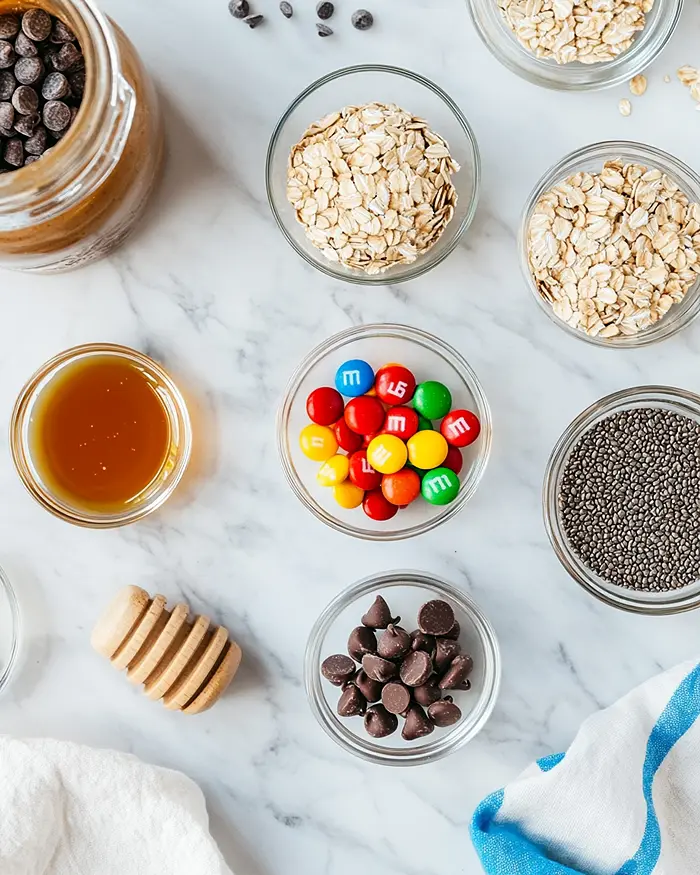
Let’s talk about what goes into these healthy monster cookie protein balls — and trust me, it’s a lineup you’ll want to keep stocked. For the base, you’ll need creamy peanut butter (the all-natural, no-sugar-added kind works beautifully here), vanilla protein powder for that muscle-loving boost, and rolled oats to give them structure and fiber.
Then come the fun parts: mini chocolate chips and mini M&M’s for that classic monster cookie nostalgia, plus chia seeds for a little omega-3 magic.
To bind everything together, you’ll use honey (or maple syrup if you’re going vegan), vanilla extract for warmth, and a pinch of fine sea salt to make all those flavors pop. A splash of water helps adjust the texture so your dough isn’t too dry or chalky — just perfectly scoopable.
| Amount | Ingredient |
|---|---|
| 1 cup | creamy peanut butter (all-natural, no added sugar preferred — yes, the kind that needs stirring!) |
| 1/3 cup | vanilla protein powder (I swear by Optimum Nutrition Gold Standard, but use what you love) |
| 1/2 cup | rolled oats (old-fashioned oats work best; instant gets too mushy) |
| 1 tbsp | chia seeds (these little guys add fiber and help the balls hold together) |
| 2 tbsp | honey (or maple syrup for a vegan swap) |
| 1 tsp | vanilla extract (pure, not imitation — you’ll taste the difference) |
| 1/4 tsp | salt (fine sea salt works best) |
| 1/4 cup | mini chocolate chips (because life’s too short for no chocolate) |
| 1/4 cup | mini candies like M&M’s Minis (this is what makes them “monster” cookies!) |
| 1 to 3 tsp | water (add gradually — this is your texture adjuster) |
Tools You’ll Actually Use
- Medium mixing bowl
- Wooden spoon or your clean hands (honestly, hands work best here)
- 1-tablespoon cookie scoop (or just a regular tablespoon)
- Airtight storage container
- Optional: small bowl of water nearby to keep your hands from getting too sticky
Step-by-Step Instructions
Ready to make the easiest no bake monster cookie protein balls of your life? Let’s do this.
Step 1: Combine Ingredients
In a medium bowl, add 1 cup creamy peanut butter, 1/3 cup vanilla protein powder, 1/2 cup rolled oats, 1 tablespoon chia seeds, 2 tablespoons honey, 1 teaspoon vanilla extract, and 1/4 teaspoon fine sea salt. Toss in 1/4 cup mini chocolate chips and 1/4 cup mini M&M’s.
Make sure everything’s within arm’s reach before you start — once you get going, you won’t want to stop mid-mix to hunt down the vanilla extract.
Step 2: Mix and Adjust Consistency
Use a wooden spoon or your hands (I’m team hands all the way) to mix everything together until you’ve got a cohesive, cookie-dough-like mixture. As you mix, start adding water one teaspoon at a time.
Here’s the thing: the amount of water you need totally depends on your peanut butter. If it’s drippy and natural, you might only need 1 teaspoon. If it’s thicker and more solid, you could need up to 3 teaspoons.
The water helps moisten the dough, cuts any chalky texture from the protein powder, and makes sure your balls hold together without crumbling. You’re aiming for a consistency that’s slightly sticky but not wet — think play dough that doesn’t stick to your hands.
Step 3: Shape the Dough into Balls
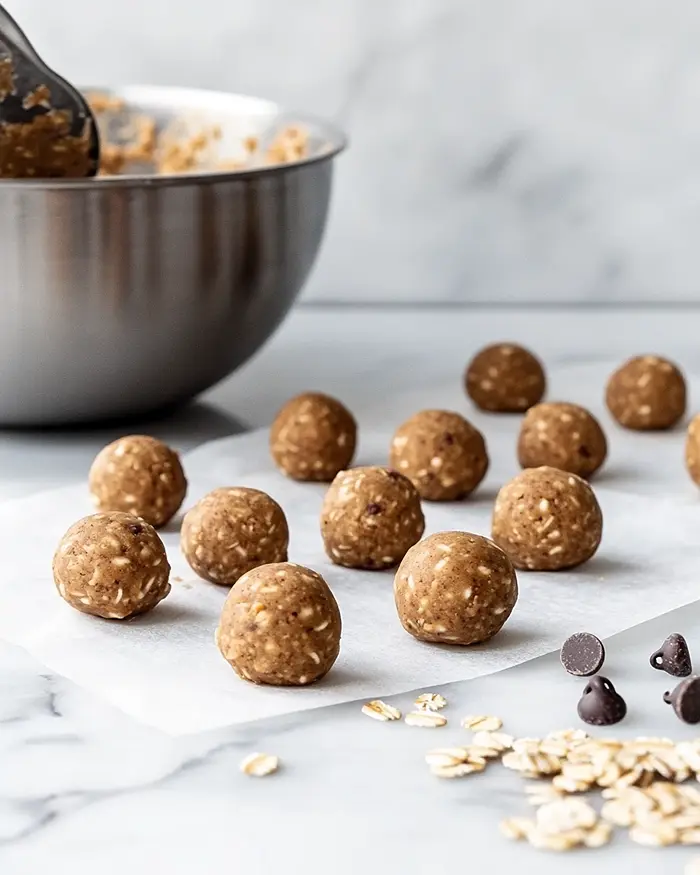
Once your dough feels just right, grab a 1-tablespoon cookie scoop (or just eyeball it with a regular spoon). Scoop out portions and roll them between your palms to form smooth, round balls about 1 inch in diameter.
If the dough’s sticking to your hands, dampen your palms with a tiny bit of water — game changer. Keep rolling until you’ve used up all the dough, which should give you about 14 to 16 protein balls depending on how generous your scoops are.
Step 4: Store and Enjoy
Place your finished monster cookie protein balls in an airtight container and pop them in the fridge for at least 30 minutes to firm up (though they’re honestly pretty great right away if you can’t wait). Store them in the refrigerator for up to a week for quick grab-and-go snacking.
For longer storage, toss them in the freezer where they’ll keep for up to 3 months. You can eat them straight from the freezer for a firmer, almost fudgy texture, or let them sit at room temperature for 5 minutes to soften slightly.
Claire’s Pro Tips & Gentle Guidance
Let me share a few little secrets I’ve learned while making approximately a million batches of this monster cookie protein balls recipe. These tips will save you from the mistakes I’ve already made (you’re welcome).
Go natural with your peanut butter. All-natural peanut butter (the kind with just peanuts and salt) gives you better texture and flavor than the overly sweetened, stabilized stuff. Just make sure to stir it really well before measuring so the oils are evenly distributed.
Don’t skip the water. I know it seems weird to add water to a peanut butter mixture, but trust me — it makes all the difference. It keeps the dough from being too dense or chalky and helps everything bind together beautifully.
Chill before you devour. Yes, they’re edible right away, but giving them 30 minutes in the fridge firms them up and makes the flavors meld. Plus, cold protein balls just hit different on a warm afternoon.
Customize your mix-ins like crazy. The chocolate chips and M&M’s are classic, but you can swap in dried cranberries, shredded coconut, chopped nuts, or even white chocolate chips.
According to King Arthur Baking‘s collection of expert baking guidance , the best recipes are the ones you make your own — and these protein balls are basically a blank canvas for whatever you’re craving.
Quick Fixes for Monster Cookie Protein Balls
Problem: Dough is too dry and won’t hold together
Add water! Seriously, just another teaspoon or two. Mix it in thoroughly and see if the dough becomes more pliable and sticky enough to roll into balls.
Problem: Dough is too wet or sticky
Add a tablespoon more oats or protein powder to absorb some of that moisture. You can also pop the mixture in the fridge for 10 minutes to firm up before rolling.
Problem: Protein balls are crumbly or falling apart
This usually means not enough moisture or not enough mixing. Make sure you’ve really worked the dough together until it’s cohesive, and add a tiny bit more peanut butter or water if needed.
Problem: They taste chalky or too “protein powder-y”
First, make sure you’re using a protein powder you actually like the taste of. Second, that water is crucial — it smooths out the chalky texture. You can also add an extra half tablespoon of honey for sweetness.
Variations & Fun Twists
This no bake monster cookie protein balls recipe is basically your playground. Here are some fun ways to switch it up.
Go nut-free: Swap the peanut butter for sunflower seed butter or Wow Butter. Same creamy texture, totally allergy-friendly for school lunches.
Make them vegan: Use maple syrup instead of honey and choose a plant-based protein powder. Done and done.
Try different flavor combos: Make them chocolate lovers’ dream balls by using chocolate protein powder and adding extra mini chocolate chips. Or go tropical with coconut flakes and dried pineapple bits.
Seasonal swaps: In fall, add a teaspoon of pumpkin pie spice and use pumpkin seeds instead of M&M’s. For summer, toss in dried blueberries and lemon zest for a bright, fresh twist.
Fancy presentation: Roll finished balls in shredded coconut, crushed graham crackers, or even more mini chocolate chips for a prettier look when you’re bringing them to a potluck (and yes, people will ask for the recipe).
Serving, Storage & Reheating
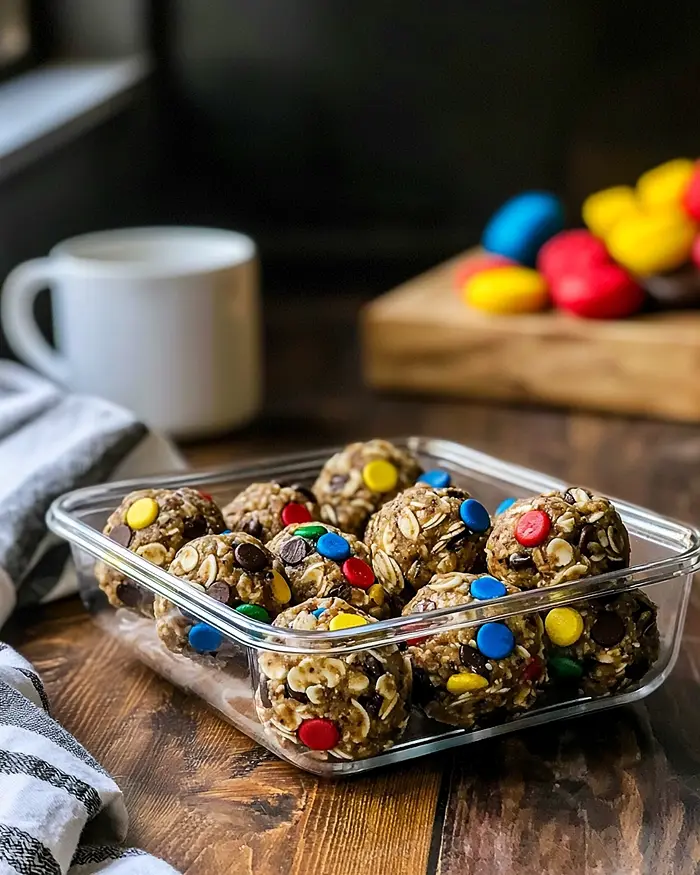
These healthy monster cookie protein balls are perfect for just about any snacking situation. Pack them in lunchboxes, toss a few in your gym bag for post-workout fuel, or keep a container on your counter for when the 3 PM slump hits and you need something that’s not another coffee.
Store your protein balls in an airtight container in the refrigerator for up to one week. They actually taste better after a day or two when the flavors have had time to marry and the oats soften slightly.
For longer storage, place them in a freezer-safe container or bag and freeze for up to 3 months. I like to freeze them on a baking sheet first so they don’t stick together, then transfer to a container. Eat them frozen for a firmer, almost truffle-like texture, or let them thaw at room temperature for about 10 minutes.
One recipe down, and so many more to explore! Head over to our complete Cookies & Brownies lineup for more delicious ideas that’ll keep your kitchen buzzing. Bookmark this one — you’ll thank yourself later.
No-Waste Kitchen Magic
Got leftover protein balls that are starting to get a little past their prime? Crumble them over yogurt or oatmeal for added texture and protein — it’s like a homemade granola situation.
If you’ve got extra chia seeds or oats hanging around, use them to make another batch and freeze half for future you. Your future self will thank you when you need a quick snack and don’t have time to make a fresh batch.
Leftover M&M’s or chocolate chips? Toss them in a trail mix with some nuts and dried fruit, or sprinkle them over ice cream because why not.
Monster Cookie Protein Balls FAQs
Can I freeze monster cookie protein balls?
Absolutely! These freeze beautifully for up to 3 months. Just pop them in an airtight container or freezer bag, and grab one (or three) whenever you need a quick snack.
What’s the best way to store monster cookie protein balls?
Keep them in an airtight container in the fridge for up to a week. They need to stay cold to maintain their shape and texture, plus they taste amazing chilled.
How do I know when the dough consistency is right?
The dough should feel slightly sticky but not wet, kind of like play dough that holds its shape when you roll it. If it’s crumbly, add water; if it’s too sticky, add more oats or protein powder.
Why should I use natural peanut butter in monster cookie protein balls?
Natural peanut butter (just peanuts and salt) gives you cleaner flavor and better texture without all the added sugar and oils. It also makes the protein balls taste more wholesome and less processed.
Can I make these without protein powder?
You can, but you’ll lose that protein boost that makes them so satisfying. If you skip it, add an extra 1/4 cup of oats and maybe a tablespoon of ground flaxseed to maintain the structure.
Cozy Closing
There you have it — the easiest, most craveable Monster Cookie Protein Balls you’ll ever make. They’re proof that healthy snacking doesn’t have to taste like cardboard or require a culinary degree.
I’d love to see your spin on this monster cookie protein balls recipe! Drop a comment below with your photos or tell me what mix-ins you used — I’m always looking for new flavor combos to try. Whether you go classic or get creative with dried fruit and coconut, I bet you’ve already got amazing variations brewing in your mind.
Now if you’ll excuse me, I’ve got a batch in the fridge calling my name, and I’m pretty sure they won’t eat themselves.
For more easy, family-friendly recipes that actually taste good, check out my 5-ingredient creamy taco soup, this easy Salisbury steak, or my famous 10-minute taco soup — because dinner shouldn’t be complicated.
I’m Claire Whitmore — a dessert daydreamer from Asheville, NC. For me, baking isn’t about perfect pastries — it’s about the joy of sharing something sweet (and maybe sneaking an extra protein ball when no one’s looking).

Monster Cookie Protein Balls
Equipment
- Medium mixing bowl
- Wooden spoon
- 1-tablespoon cookie scoop
- Airtight storage container
Ingredients
- 1 cup creamy peanut butter all-natural, no added sugar preferred
- ⅓ cup vanilla protein powder Optimum Nutrition Gold Standard recommended
- ½ cup rolled oats old-fashioned oats work best
- 1 tbsp chia seeds
- 2 tbsp honey or maple syrup for vegan option
- 1 tsp vanilla extract pure, not imitation
- ¼ tsp salt fine sea salt works best
- ¼ cup mini chocolate chips
- ¼ cup mini candies like M&M’s Minis
- 1-3 tsp water add gradually until desired consistency is reached
Instructions
- In a medium bowl, add 1 cup creamy peanut butter, 1/3 cup vanilla protein powder, 1/2 cup rolled oats, 1 tablespoon chia seeds, 2 tablespoons honey, 1 teaspoon vanilla extract, and 1/4 teaspoon fine sea salt. Toss in 1/4 cup mini chocolate chips and 1/4 cup mini M&M’s. Make sure everything’s within arm’s reach before you start — once you get going, you won’t want to stop mid-mix to hunt down the vanilla extract.
- Use a wooden spoon or your hands to mix everything together until you’ve got a cohesive, cookie-dough-like mixture. As you mix, start adding water one teaspoon at a time. The amount of water you need totally depends on your peanut butter. If it’s drippy and natural, you might only need 1 teaspoon. If it’s thicker and more solid, you could need up to 3 teaspoons. The water helps moisten the dough, cuts any chalky texture from the protein powder, and makes sure your balls hold together without crumbling. You’re aiming for a consistency that’s slightly sticky but not wet — think play dough that doesn’t stick to your hands.
- Once your dough feels just right, grab a 1-tablespoon cookie scoop (or just eyeball it with a regular spoon). Scoop out portions and roll them between your palms to form smooth, round balls about 1 inch in diameter. If the dough’s sticking to your hands, dampen your palms with a tiny bit of water — game changer. Keep rolling until you’ve used up all the dough, which should give you about 14 to 16 protein balls depending on how generous your scoops are.
- Place your finished monster cookie protein balls in an airtight container and pop them in the fridge for at least 30 minutes to firm up (though they’re honestly pretty great right away if you can’t wait). Store them in the refrigerator for up to a week for quick grab-and-go snacking. For longer storage, toss them in the freezer where they’ll keep for up to 3 months. You can eat them straight from the freezer for a firmer, almost fudgy texture, or let them sit at room temperature for 5 minutes to soften slightly. Enjoy!