Lemon Raspberry Cheesecake Bars
Lemon Raspberry Cheesecake Bars are the kind of dessert that makes people think you secretly attended pastry school. We’re talking a buttery graham cracker crust with lemon zest, a silky lemon cream cheese filling, and gorgeous raspberry swirls — all baked into easy, sliceable bars.
This recipe comes together with simple pantry staples — cream cheese, fresh lemon juice, eggs, raspberries, and graham crackers — in just about an hour of hands-on time. It’s beginner-friendly, crowd-pleasing, and completely make-ahead friendly. Basically everything a dessert bar should be.
Hey there, I’m Claire Whitmore — a pastry whisperer in Asheville, NC, where butter totally counts as self-care. I first made these on a whim one July afternoon when I had a pint of raspberries threatening to go bad and a block of cream cheese I kept eyeing in the fridge. One test batch later, and these bars became a permanent fixture in my recipe box. I haven’t looked back since.
Table of Contents
Little Snapshot: What This Recipe Delivers
These lemon raspberry cheesecake bars deliver a creamy, tangy lemon cream cheese filling layered over a lemon-kissed graham cracker crust, topped with a vibrant raspberry swirl — all in one easy 8×8-inch pan.
With just 20 minutes of prep, a short bake, and a chill time you can do overnight, these dessert bars are as low-stress as they are stunning. Serves 16 and stores beautifully all week.
Why You’ll Love This Recipe
- These lemon raspberry cheesecake bars look like you spent all afternoon in the kitchen — but really they take less time than reorganizing your junk drawer.
- One bowl, one pan, and a blender for the raspberry swirl — cleanup is genuinely minimal, which means more time for the important stuff (like eating a second bar).
- They’re completely make-ahead friendly, meaning you can prep them the night before a party or brunch and wake up to a ready-to-go dessert. Future you will be very grateful.
- According to King Arthur Baking’s guide to lemon cheesecake, getting the right balance of bright citrus and creamy filling is what elevates a simple baked dessert into something unforgettable — and this recipe nails exactly that.
Quick Facts
Here’s the quick scoop on this lemon raspberry cheesecake bar recipe.
- CourseDessert
- Prep Time20 minutes
- Cook Time44–48 minutes (including crust bake)
- Total TimeAbout 3 hours (including 2-hour chill)
- Servings16 bars
- DifficultyEasy–Medium
Nutritional Peek
Here’s a general breakdown per bar (1 of 16 servings). These are estimates and can vary slightly based on exact ingredient brands used.
| Nutrient | Amount Per Serving |
|---|---|
| Calories | ~210 kcal |
| Protein | 3.5g |
| Total Carbohydrates | 20g |
| Total Fat | 13g |
| Saturated Fat | 7g |
| Fiber | 0.5g |
| Sugar | 14g |
| Sodium | 135mg |
Ingredients
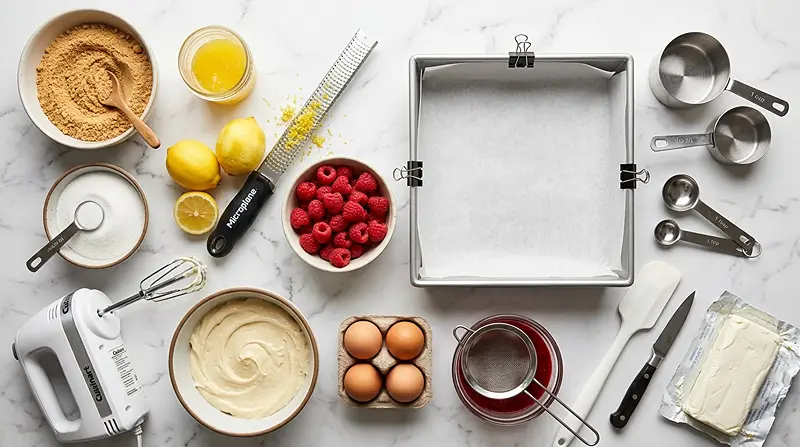
These cheesecake bars come together with three simple layers, each with its own short ingredient list.
For the crust — graham cracker crumbs, melted salted butter, sugar, and fresh lemon zest — you’ll want the butter fully melted so the crumbs hold together perfectly. For the filling — cream cheese, sugar, lemon zest, lemon juice, and eggs — everything should be at room temperature before you start mixing. And for the raspberry swirl, all you need is fresh or frozen raspberries and a touch of sugar.
Graham Cracker Crust
| Amount | Ingredient |
|---|---|
| 1 cup (100g) | Graham cracker crumbs |
| 1/4 cup (56g) | Salted butter, melted (yes, real butter — margarine just won’t do it here) |
| 2 Tbsp (25g) | Granulated sugar |
| 1 Tbsp (3g) | Fresh lemon zest |
Lemon Cream Cheese Filling
| Amount | Ingredient |
|---|---|
| 2 cups / 16 oz (454g) | Cream cheese, softened to room temperature |
| 2/3 cup (133g) | Granulated sugar |
| 1 Tbsp (3g) | Fresh lemon zest |
| 1/4 cup (60g) | Fresh lemon juice (bottled juice won’t give you that same bright zing) |
| 2 large (112g) | Eggs, room temperature |
Raspberry Swirl
| Amount | Ingredient |
|---|---|
| 3/4 cup (95g) | Raspberries, fresh or frozen and thawed |
| 2 Tbsp (24g) | Granulated sugar |
Tools You’ll Actually Use
- 8×8-inch metal baking pan (unpainted)
- Parchment paper + binder clips (optional but helpful)
- Hand mixer or stand mixer with whisk attachment
- Food processor or blender (for the raspberry puree)
- Fine mesh strainer
- Rubber spatula
- Wire cooling rack
- Sharp knife (for slicing bars)
- Small bowl and medium bowl
Step-by-Step Instructions for Lemon Raspberry Cheesecake Bars
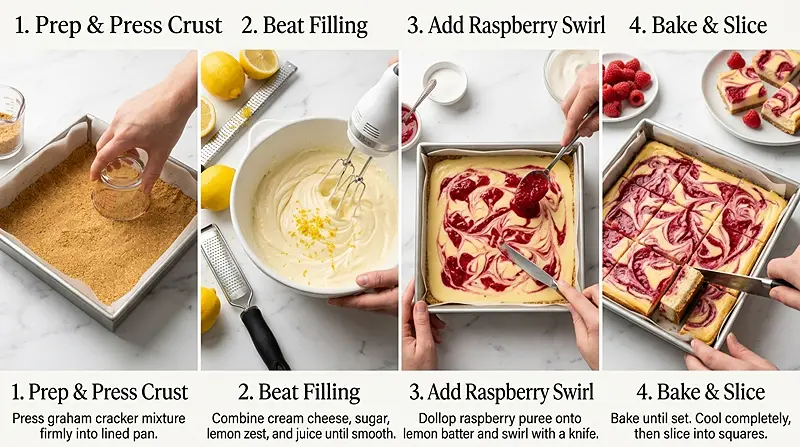
Step 1: Prep Your Pan and Preheat
Preheat your oven to 325°F (165°C). Line an 8×8-inch metal baking pan with parchment paper, letting the edges overhang so you can lift the bars out easily later. Binder clips work great to keep the parchment in place while you work.
Step 2: Make the Graham Cracker Crust
In a small bowl, combine 1 cup graham cracker crumbs, 1/4 cup melted salted butter, 2 Tbsp granulated sugar, and 1 Tbsp fresh lemon zest. Stir everything together until the crumbs look uniformly wet and clump together when pressed.
Pour the crust mixture into your prepared pan. Use the back of a spoon or the flat bottom of a measuring cup to press it down firmly and evenly across the entire base. You want a compact, solid layer — no gaps.
Step 3: Bake the Crust
Bake the crust for 8 minutes, then remove it from the oven and place the pan on a wire rack to cool. Keep your oven on — we’ll need it again shortly! Don’t skip the cooling step; pouring warm filling over a hot crust can affect the final texture.
Step 4: Make the Lemon Cheesecake Filling
While the crust bakes and cools, place 2 cups of room-temperature cream cheese in a medium bowl. Beat with a hand mixer or stand mixer fitted with a whisk attachment on medium to medium-high speed until completely smooth and creamy, with no lumps remaining.
Add 2/3 cup sugar, 1 Tbsp lemon zest, and 1/4 cup fresh lemon juice. Mix on medium-low speed until everything is just combined, scraping down the sides with a rubber spatula as needed.
Add 2 room-temperature eggs one at a time, mixing on medium speed after each addition until fully incorporated. The batter should look silky, pale, and pourable. Pour the filling evenly over the cooled graham cracker crust.
Step 5: Make the Raspberry Swirl
In a food processor or blender, blend 3/4 cup of fresh or thawed frozen raspberries until smooth. Pour the puree into a fine mesh strainer set over a bowl and press it through with the back of a spoon or rubber spatula. Don’t forget to scrape the underside of the strainer — the puree likes to cling there!
Stir 2 Tbsp of sugar into the strained raspberry puree. The mixture will be thin and sauce-like — that’s exactly what you want for beautiful swirls.
Step 6: Swirl and Bake
Drop spoonfuls of the raspberry mixture across the top of the lemon cheesecake batter. Use a knife or offset spatula to drag through the raspberry dots in long, swooping motions, creating a gorgeous swirled pattern. Don’t overdo it — a few confident strokes look more elegant than over-mixing.
Bake the bars for 36–40 minutes. To check for doneness, do the wiggle test: gently nudge the pan and look for a slight jiggle only in the very center. Skip the toothpick — it doesn’t work well for cheesecake bars!
Step 7: Cool and Chill
Remove the bars from the oven and let them cool completely on a wire rack at room temperature. Do not put them straight into the fridge — the sudden temperature change can cause cracks on top. Once they reach room temperature, refrigerate for at least 2 hours, or overnight for best results.
Step 8: Slice and Serve
Sprinkle a little extra lemon zest on top for a fresh, beautiful finish. Slice with a sharp, warm knife, wiping the blade clean between each cut to get those perfect, bakery-worthy squares. Pair these alongside our irresistible mini cheesecakes for a dreamy dessert spread!
Claire’s Pro Tips for Perfect Cheesecake Bars
A few little things make a big difference with these lemon raspberry cheesecake bars. The biggest one? Room temperature ingredients — always.
Cold cream cheese is your enemy here. It won’t beat smooth no matter how long you mix it, leaving you with lumps in the batter. Pull your cream cheese and eggs out of the fridge at least 30–60 minutes before you start.
Don’t overbeat the filling once the eggs go in. Mix just until each egg is incorporated and stop there. Over-beating after this point adds air to the batter, which can lead to cracks and a puffed, uneven surface.
Fresh lemon juice is non-negotiable. Bottled lemon juice has a flat, muted flavor that just won’t give you that bright citrus punch. Squeeze it fresh — your taste buds will thank you.
For the cleanest cuts, run your knife under hot water and dry it before each slice. It sounds fussy, but it’s the secret to those gorgeous, clean-edged bars.
Quick Fixes for Lemon Raspberry Cheesecake Bars
The top cracked
This usually happens when the bars go straight from the oven into the fridge. Always let them cool completely at room temperature first before refrigerating. A crack won’t affect the flavor at all — just dust with a little lemon zest to cover it up!
The filling is too dense or rubbery
Overmixing after adding the eggs is usually the culprit. Mix on medium speed only until each egg is incorporated, then stop. Less mixing means a lighter, creamier texture.
The swirl disappeared into the batter
The raspberry puree needs to be thin (like a sauce) to swirl properly — too thick and it sinks. Make sure you’re using the strained puree with the sugar stirred in, not a thick jam. A few light, confident strokes with your knife are all it takes.
The crust is crumbling when I cut the bars
The crust may not have been pressed firmly enough before baking. Next time, really pack it down with the bottom of a measuring cup. Also make sure the bars are fully chilled before slicing — a cold, set bar holds together much better than a barely-chilled one.
The bars aren’t setting up properly
Give them more chill time! Two hours is the minimum, but overnight is truly ideal. If they still seem soft after chilling, they may have been slightly underbaked — err on the side of a little more bake time next time.
This is just one of the many gems in our Cookies & Brownies series. Every recipe there has been tested and loved in real kitchens, and I promise there’s something for every craving. Go see for yourself.
Variations and Fun Twists
These dessert bars are wonderfully versatile once you know the base recipe.
Swap the berries. Blueberries, blackberries, or strawberries all work beautifully in place of raspberries. The method stays exactly the same — blend, strain, sweeten, swirl.
Make it gluten-free. Swap the graham crackers for gluten-free graham-style crackers or crushed gluten-free cookies. Everything else in the recipe is naturally gluten-free.
Try a citrus twist. Swap the lemon for lime or blood orange for a completely different flavor profile. Blood orange with raspberry swirl is an absolutely stunning combination, especially in winter.
Add a white chocolate drizzle. Once the bars are fully chilled and sliced, drizzle with a little melted white chocolate for a fancy finish that requires almost zero extra effort.
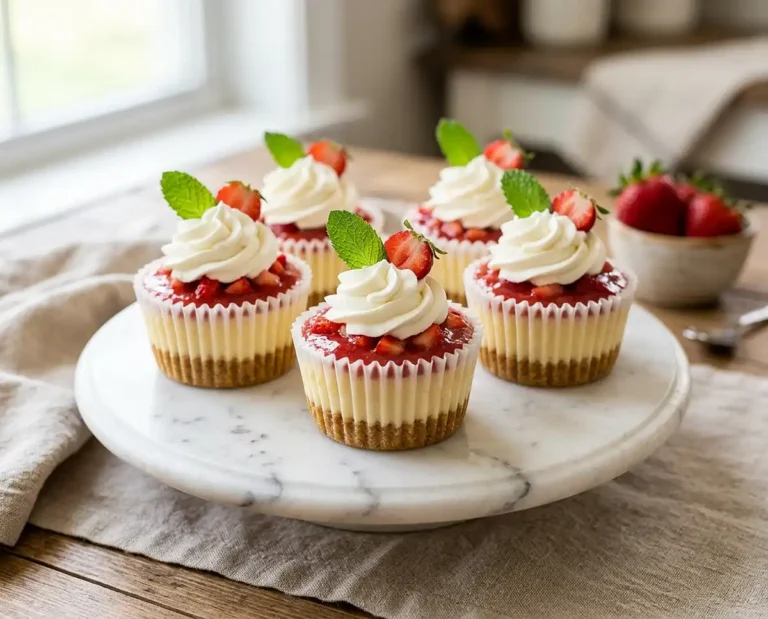
Make mini cheesecake cups. Love individual portions? Use this same lemon filling concept in our easy mini cheesecakes recipe for adorable single-serve portions — perfect for parties.
Serving, Storage & Reheating
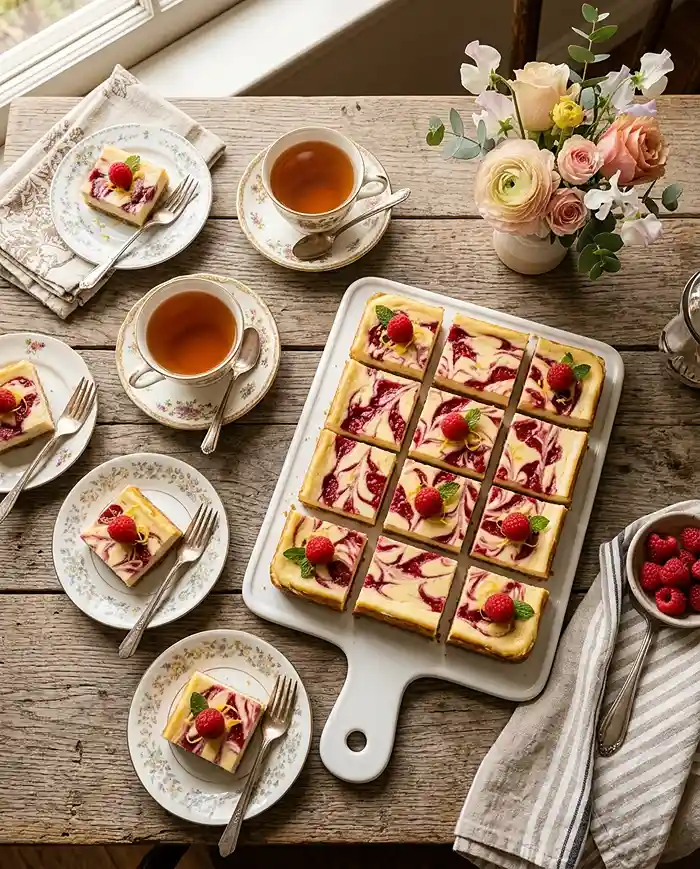
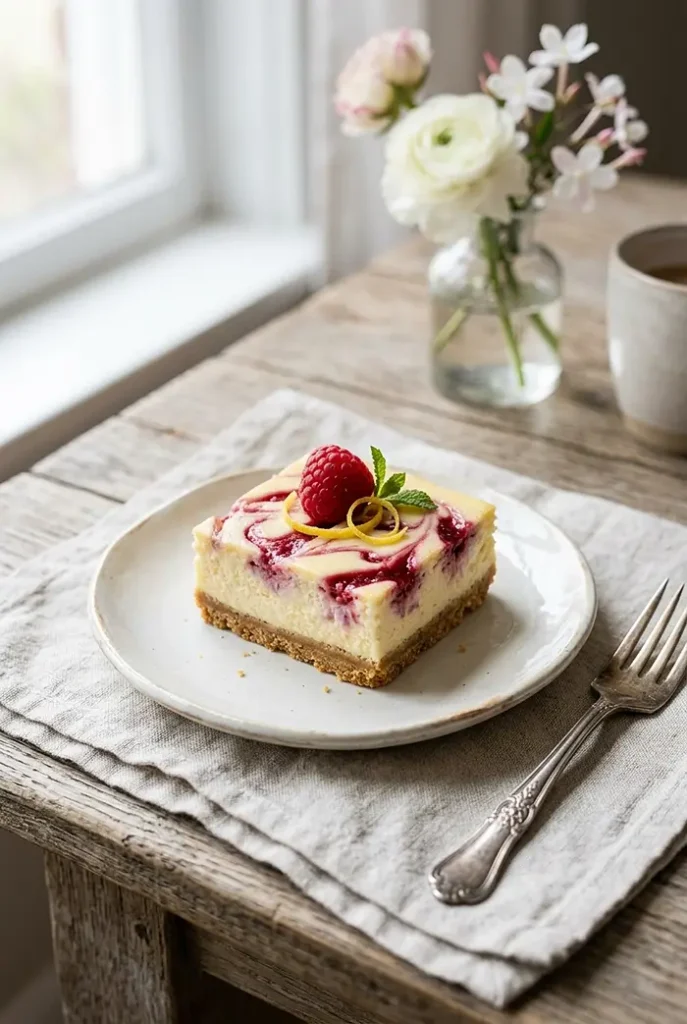
These cheesecake bars are best served straight from the fridge, cold and firm. Top them with fresh raspberries and a dusting of extra lemon zest for a presentation that looks like it came from a bakery display case.
Store leftover bars in an airtight container in the refrigerator for up to 5 days. They actually get better on day two when the flavors have had time to settle and meld together. (If you actually have leftovers on day five, I’m impressed.)
These bars don’t need to be reheated — they’re meant to be enjoyed cold. If you’d like to serve them at a slightly softer texture, just let them sit at room temperature for 10 minutes before serving. That’s all they need.
No-Waste Kitchen Magic
Don’t toss the seeds strained from your raspberry puree! They can be stirred into plain yogurt, oatmeal, or smoothies for a natural raspberry flavor boost.
Have extra lemon zest? Spread it on a small plate and let it dry at room temperature, then store it in a small jar for future baking projects. Dried lemon zest keeps for weeks and adds a bright punch to everything from muffins to salad dressings.
If your bars do crack on top, don’t waste a crumb. Crumble them up and layer them parfait-style with whipped cream and fresh berries for an effortlessly beautiful no-fuss dessert.
Leftover graham cracker crumbs? Sprinkle them over yogurt or ice cream as a quick crunchy topping. If you have a lot left, they freeze well in a zip-lock bag for your next crust project. And if you love cozy, simple cinnamon-spiced cakes, you’ll want to save those crumbs for topping our cinnamon roll cake too — it’s another reader favorite!
FAQs About Lemon Raspberry Cheesecake Bars
Can I use frozen raspberries for the swirl?
Yes! Frozen raspberries work just as well as fresh here. Make sure to thaw them completely and drain off any excess liquid before blending. The puree will still be beautifully bright and flavorful.
Can I freeze lemon raspberry cheesecake bars?
You can! Wrap individual bars tightly in plastic wrap, then place them in an airtight freezer bag. They freeze well for up to 2 months. Thaw overnight in the refrigerator before serving — don’t thaw at room temperature, as this can make the texture a bit watery.
How do I know when the cheesecake bars are done baking?
Use the wiggle test! Gently nudge the pan — the edges should be fully set, with only a small jiggle in the very center. Skip the toothpick test for these bars; it’s not reliable for cheesecake-style fillings. The center will finish setting as the bars cool.
Why should I use fresh lemon juice in lemon raspberry cheesecake bars?
Fresh lemon juice has a bright, vibrant flavor that bottled juice simply can’t match. Bottled juice tends to taste flat or slightly bitter, especially in a delicate filling like this one. Since lemon is the star flavor here, fresh really does make a noticeable difference.
What’s the best way to store lemon raspberry cheesecake bars?
Keep them in an airtight container in the refrigerator for up to 5 days. Place a sheet of parchment between layers if stacking to prevent the tops from sticking. They stay creamy and delicious all week long — if they last that long!
A Sweet Little Ending
I hope these lemon raspberry cheesecake bars become a regular in your kitchen the way they’ve become one in mine. They’re the kind of recipe that feels special every single time, whether you’re making them for a summer gathering, a holiday dessert table, or just a Tuesday that deserves something a little extra.
I’d love to see your spin on this lemon raspberry cheesecake bar recipe! Drop a comment below with your photos — I’d love to see how you made it your own. Did you swap the berries? Add a white chocolate drizzle? Try a different crust? These bars are so versatile — I bet you’ve got amazing variations already in mind!
I’m Claire Whitmore — a dessert daydreamer from Asheville, NC. For me, baking isn’t about perfect pastries — it’s about the joy of sharing something sweet (and maybe sneaking an extra bar before the pan makes it to the table).
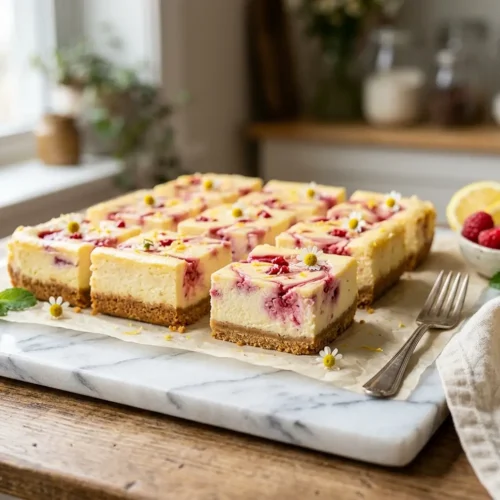
Lemon Raspberry Cheesecake Bars
Equipment
- 8×8-inch metal baking pan
- Parchment paper
- Hand mixer or stand mixer
- Food processor or blender
- Fine-mesh strainer
- Rubber spatula
- Wire cooling rack
- Sharp knife
- Mixing bowls
Ingredients
Graham Cracker Crust
- 1 cup graham cracker crumbs
- ¼ cup salted butter melted
- 2 tbsp granulated sugar
- 1 tbsp lemon zest fresh
Lemon Cream Cheese Filling
- 2 cups cream cheese softened
- ⅔ cup granulated sugar
- 1 tbsp lemon zest
- ¼ cup lemon juice fresh
- 2 large eggs room temperature
Raspberry Swirl
- ¾ cup raspberries fresh or thawed
- 2 tbsp granulated sugar
Instructions
- Preheat oven to 325°F (165°C) and line an 8×8-inch pan with parchment paper.
- Mix graham cracker crumbs, melted butter, sugar, and lemon zest. Press firmly into the pan.
- Bake the crust for 8 minutes, then cool slightly.
- Beat cream cheese until smooth. Add sugar, lemon zest, and lemon juice. Mix until combined, then add eggs one at a time.
- Pour filling over cooled crust.
- Blend raspberries, strain, and mix with sugar to create a smooth puree.
- Drop raspberry puree over filling and swirl with a knife. Bake for 36–40 minutes until center slightly jiggles.
- Cool completely, then refrigerate for at least 2 hours before slicing and serving.