Fudgy Red Velvet Brownies Recipe
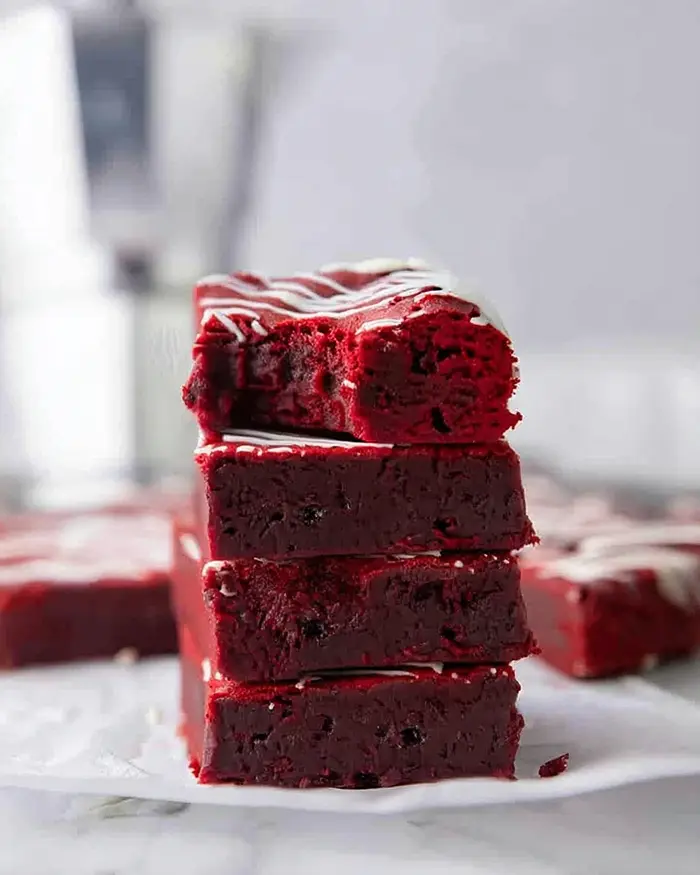
This Fudgy Red Velvet Brownies Recipe combines rich chocolate flavor with a stunning red hue for an irresistible treat. Easy, bakery-worthy, and ready in under an hour—perfect for celebrations or weeknight cravings.
Hey there, I’m Claire Whitmore—a pastry whisperer in Asheville, NC, where butter totally counts as self-care. This Fudgy Red Velvet Brownies Recipe is my answer to when you want something showstopping but don’t have all day to fuss in the kitchen.
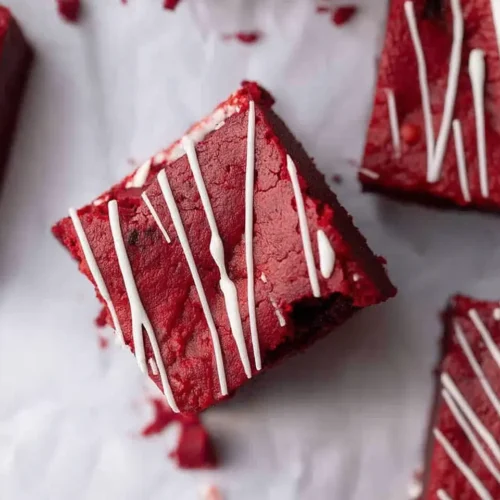
We’re talking dense, chocolatey brownies with that signature red velvet tang from a hint of vinegar, plus an optional white chocolate drizzle that makes them look like they came from a fancy bakery.
These easy red velvet brownies use simple pantry staples—melted butter, cocoa powder, and just the right amount of red food coloring—and come together in one bowl with minimal cleanup. They’re fudgy, decadent, and utterly crowd-pleasing.
Table of Contents
Little Snapshot: What This Recipe Delivers
This Fudgy Red Velvet Brownies Recipe delivers dense, chocolate-rich brownies with a vibrant red color and tangy undertone in just 45 minutes total.
With one-bowl simplicity, beginner-friendly steps, and optional white chocolate drizzle, these homemade red velvet brownies are perfect for celebrations, potlucks, or satisfying weeknight chocolate cravings.
Why You’ll Love This Recipe 🌸
- This Fudgy Red Velvet Brownies Recipe looks fancy but takes less time than watching an episode of your favorite show.
- One-bowl wonder means minimal cleanup—because who actually enjoys doing dishes after baking?
- They’re soft, dense, and have that perfect fudgy texture without being underbaked or cakey.
- According to King Arthur Baking in their deep dive on red velvet’s unique characteristics, the combination of cocoa and vinegar creates a distinct tangy chocolate flavor—and these easy red velvet brownies capture that magic in every bite.
Quick Facts ⚡
Here’s the quick scoop on this Fudgy Red Velvet Brownies Recipe.
- CourseDessert
- Prep Time10 minutes
- Cook Time30-35 minutes
- Total Time45 minutes
- Servings16 brownies
- DifficultyEasy
Fudgy Red Velvet Brownies Recipe
Equipment
- 8×8-inch baking pan
- Parchment paper
- Large microwave-safe mixing bowl
- Whisk or wooden spoon
- Medium bowl
- Sifter or fine-mesh strainer
- Toothpick
- cooling rack
Ingredients
- ¾ cup unsalted butter melted
- 2 oz semi-sweet chocolate bar chopped
- 1 ¼ cup granulated sugar
- 2 large eggs room temperature
- 2 teaspoon vanilla extract
- 1 teaspoon white vinegar
- ½ tablespoon red gel food coloring
- 2 tablespoon unsweetened cocoa powder
- 1 ¼ cup all-purpose flour
- ¼ teaspoon salt
- ½ cup white chocolate chips optional, for mixing in or drizzling
Instructions
- Preheat your oven to 350°F and line an 8×8 inch baking pan with parchment paper, leaving some overhang on the sides so you can lift the brownies out easily later.
- In a large microwave-safe mixing bowl, combine the melted unsalted butter and chopped semi-sweet chocolate. Microwave in 30-second increments, stirring between each burst, until the chocolate is fully melted and smooth.
- Add the granulated sugar to the melted butter-chocolate mixture and stir until well combined. Then add the eggs one at a time, beating well after each addition until the mixture looks thick and slightly paler. Stir in the vanilla extract, white vinegar, and red gel food coloring until the batter turns a gorgeous, vibrant red.
- In a separate medium bowl, sift together the unsweetened cocoa powder, all-purpose flour, and salt.
- Gradually add the sifted dry ingredients to the wet chocolate mixture, gently folding with a spatula or wooden spoon until just combined. Be careful not to overmix. If using white chocolate chips, fold them in now.
- Pour the brownie batter into your prepared 8×8 inch pan and spread it evenly with a spatula, making sure it reaches all the corners.
- Bake in your preheated 350°F oven for approximately 30-35 minutes, or until a toothpick inserted into the center comes out with a few moist crumbs clinging to it.
- Allow the brownies to cool completely in the pan on a cooling rack. Once cooled, use the parchment paper overhang to lift the whole brownie slab out of the pan.
- If desired, melt the remaining white chocolate chips and drizzle over the top, then let it set for about 10 minutes before slicing into 16 squares.
Notes
Nutritional Peek
Here’s a quick look at what you’re getting per brownie—because knowing the numbers helps you decide if you want one square or three (no judgment here).
| Nutrient | Amount per Serving |
|---|---|
| Calories | 185 kcal |
| Protein | 2g |
| Carbohydrates | 24g |
| Fat | 9g |
| Fiber | 0.5g |
| Sugar | 17g |
This is just one of the many gems in our Cookies & Brownies series. Every recipe there has been tested and loved in real kitchens, and I promise there’s something for every craving. Go see for yourself.
Fudgy Red Velvet Brownies Recipe Ingredients
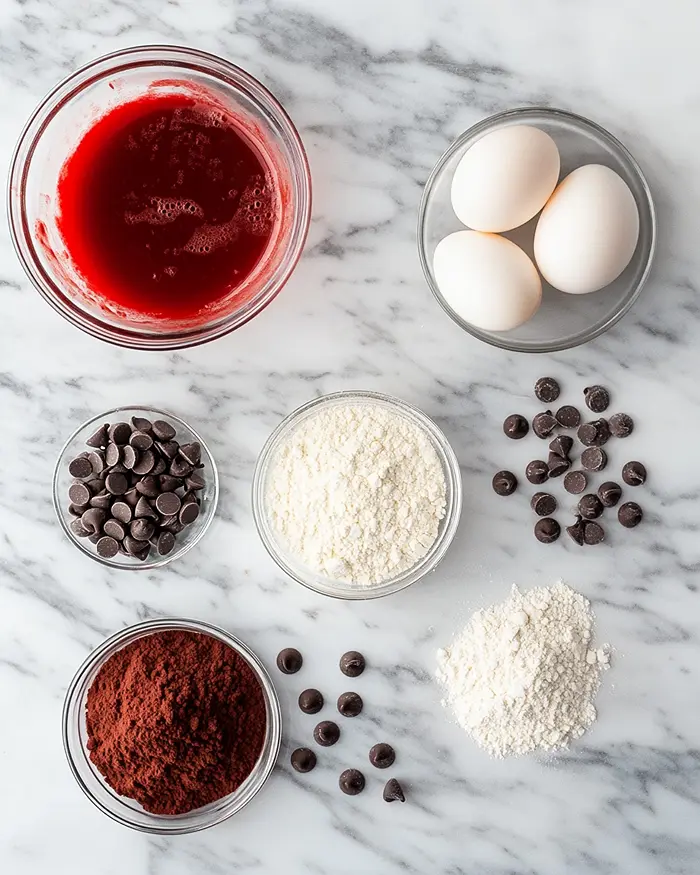
These homemade red velvet brownies rely on everyday baking staples you probably already have on hand. For the wet ingredients—melted butter, eggs, vanilla extract, vinegar, and red food coloring—make sure everything’s at room temperature so they blend smoothly without streaks.
For the dry mix—cocoa powder, flour, salt, and sugar—sifting helps avoid lumps and creates that ultra-fudgy texture we’re after.
| Amount | Ingredient |
|---|---|
| 3/4 cup | Unsalted butter, melted (yes, real butter—margarine just doesn’t deliver the same richness here) |
| 2 oz | Semi-sweet chocolate bar, chopped (this adds deeper chocolate flavor beyond just cocoa powder) |
| 1 & 1/4 cup | Granulated sugar |
| 2 large | Eggs (room temperature blends better) |
| 2 tsp | Vanilla extract (the good stuff makes a difference) |
| 1 tsp | White vinegar (this is the secret to that classic red velvet tang) |
| 1/2 tbsp | Red gel food coloring (gel works better than liquid for vibrant color) |
| 2 tbsp | Unsweetened cocoa powder |
| 1 & 1/4 cup | All-purpose flour |
| 1/4 tsp | Salt |
| 1/2 cup | White chocolate chips, optional (fold into batter or melt for drizzling) |
Tools You’ll Actually Use
- 8×8 inch baking pan
- Parchment paper
- Large microwave-safe mixing bowl
- Whisk or wooden spoon
- Medium bowl for dry ingredients
- Sifter or fine-mesh strainer
- Toothpick (for testing doneness)
- Cooling rack
Step-by-Step Instructions
Let’s make this Fudgy Red Velvet Brownies Recipe happen with easy, foolproof steps.
Step 1: Prep Your Pan and Oven
Preheat your oven to 350°F and line an 8×8 inch baking pan with parchment paper, leaving some overhang on the sides so you can lift the brownies out easily later. This little trick makes cutting clean squares so much simpler.
Step 2: Melt the Chocolate and Butter
In a large microwave-safe mixing bowl, combine the 3/4 cup melted unsalted butter and 2 oz chopped semi-sweet chocolate.
Microwave in 30-second increments, stirring between each burst, until the chocolate is fully melted and smooth. This creates a rich, glossy base for your red velvet brownies.
Step 3: Mix in the Sugar and Wet Ingredients
Add the 1 & 1/4 cup granulated sugar to the melted butter-chocolate mixture and stir until well combined. Then add the 2 large eggs one at a time, beating well after each addition until the mixture looks thick and slightly paler.
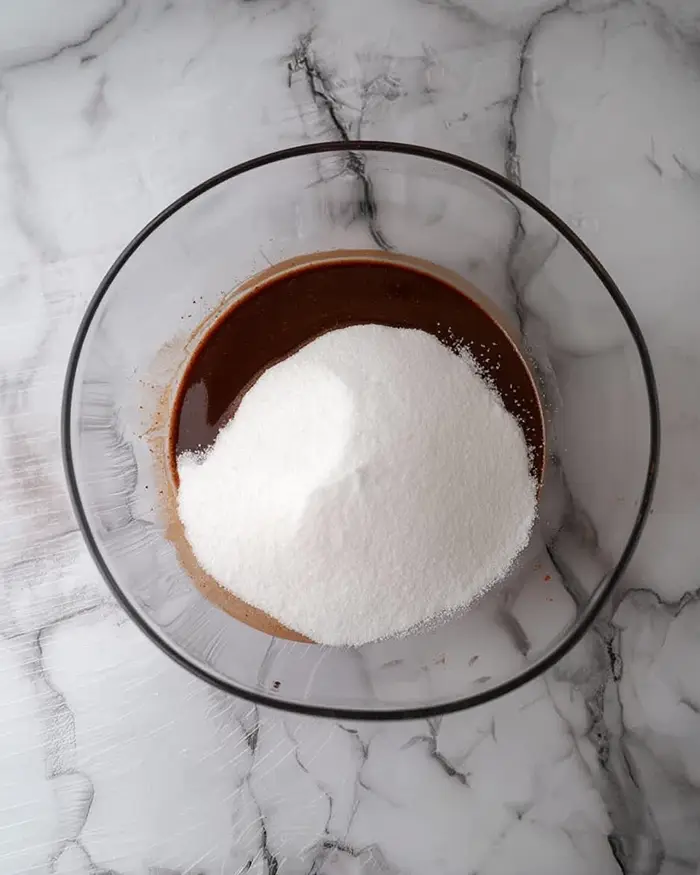
Stir in the 2 tsp vanilla extract, 1 tsp white vinegar (this gives that signature tangy red velvet flavor), and 1/2 tbsp red gel food coloring until the batter turns a gorgeous, vibrant red.
Step 4: Sift and Combine Dry Ingredients
In a separate medium bowl, sift together the 2 tbsp unsweetened cocoa powder, 1 & 1/4 cup all-purpose flour, and 1/4 tsp salt. Sifting prevents lumps and helps create that ultra-smooth, fudgy texture we’re after in these easy red velvet brownies.
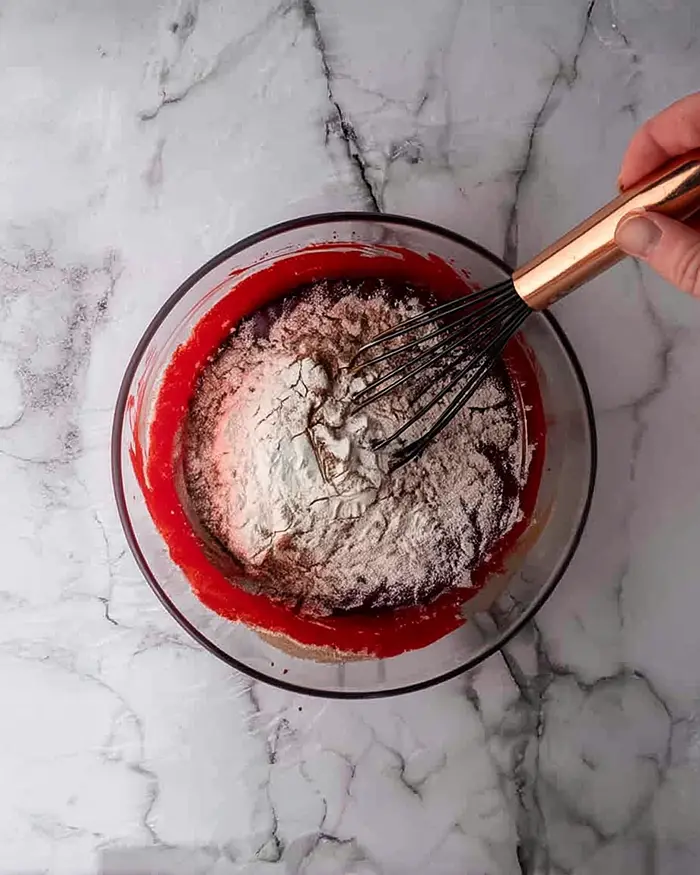
Step 5: Fold Dry into Wet
Gradually add the sifted dry ingredients to the wet chocolate mixture, gently folding with a spatula or wooden spoon until just combined—you should still see a few streaks of flour.
Be careful not to overmix or your brownies will turn out tough instead of fudgy. If you’re using white chocolate chips, fold in 1/2 cup now for pockets of sweetness throughout.
Step 6: Pour and Spread
Pour the brownie batter into your prepared 8×8 inch pan and spread it evenly with a spatula, making sure it reaches all the corners. Smooth the top so it bakes uniformly.
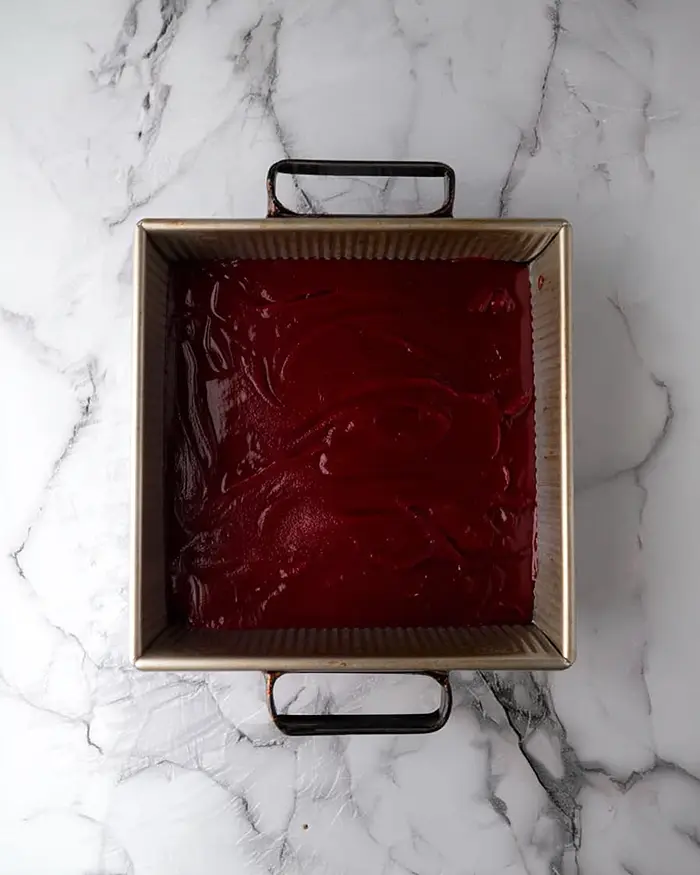
Step 7: Bake to Fudgy Perfection
Bake in your preheated 350°F oven for approximately 30-35 minutes, or until a toothpick inserted into the center comes out with a few moist crumbs clinging to it—not wet batter, but definitely not completely clean either.
This is the sweet spot for fudgy homemade red velvet brownies. Your kitchen should smell like a chocolate dream by now.
Step 8: Cool and Finish
Allow the brownies to cool completely in the pan on a cooling rack—I know waiting is hard, but cutting them warm will give you a crumbly mess instead of clean squares. Once cooled, use the parchment paper overhang to lift the whole brownie slab out of the pan.
If you want that bakery look, melt the remaining white chocolate chips and drizzle over the top, then let it set for about 10 minutes before slicing into 16 squares.
Claire’s Pro Tips & Gentle Guidance
Want your easy red velvet brownies to turn out perfectly every time? Here are my hard-won secrets from many batches (and a few learning moments).
Don’t skip the vinegar—it might seem weird, but that tiny splash creates the tangy flavor that separates red velvet from regular chocolate brownies. Without it, you’re just making chocolate brownies with red food coloring.
Use gel food coloring instead of liquid. Liquid food coloring makes the batter too thin and you’ll need way more to get that vibrant red, which can affect the flavor. Gel gives you bold color with just a tiny amount.
The toothpick test is your best friend here. For fudgy brownies, you want moist crumbs on the toothpick—not wet batter, but definitely not clean. If the toothpick comes out completely clean, you’ve overbaked them and they’ll be cakey instead of fudgy.
Let them cool completely before cutting, or use the refrigerator trick: pop the whole pan in the fridge for 30 minutes after they’ve cooled to room temperature. Cold brownies slice into perfect, Instagram-worthy squares without crumbling.
For more detailed techniques on achieving the perfect brownie texture, check out this comprehensive brownie guide from Serious Eats that dives deep into the science of fudgy vs. cakey.
Quick Fixes for Fudgy Red Velvet Brownies Recipe
Problem: Brownies Are Too Dry or Cakey
You likely overbaked them. Remember, the toothpick should come out with moist crumbs, not clean. Next time, check them at the 28-minute mark and pull them as soon as you see those crumbs—they’ll continue cooking slightly as they cool in the pan.
Problem: Batter Looks Brown Instead of Red
This happens when you add the red food coloring to the cocoa mixture before combining wet and dry ingredients.
Make sure you’re adding the red coloring to the wet ingredients (after the eggs and vinegar) so the color shows through beautifully. Also, using gel food coloring instead of liquid makes a huge difference in vibrancy.
Problem: Brownies Stick to the Pan
Always line your pan with parchment paper with overhang on two sides—this creates little “handles” to lift the whole brownie slab out cleanly. Greasing alone isn’t enough for these fudgy brownies; they’re so moist they’ll stick without that parchment barrier.
Problem: White Chocolate Drizzle Won’t Set
If your white chocolate is too runny or won’t harden, it might have been overheated. Melt it gently in 15-second microwave bursts, stirring between each, and let the brownies cool completely before drizzling. Pop them in the fridge for 10 minutes after drizzling to help the chocolate set faster.
Variations & Fun Twists
This homemade red velvet brownies recipe is incredibly versatile—here are some of my favorite ways to switch it up.
Cream Cheese Swirl: Drop spoonfuls of sweetened cream cheese (4 oz softened cream cheese mixed with 2 tbsp sugar and 1 egg yolk) on top of the batter, then swirl with a knife for that classic red velvet cheesecake vibe.
Gluten-Free Version: Swap the all-purpose flour 1:1 with a gluten-free baking blend that contains xanthan gum. I’ve tested this with Bob’s Red Mill 1-to-1 and it works beautifully—same fudgy texture, no compromise.
Peppermint Red Velvet: Add 1/2 tsp peppermint extract along with the vanilla and fold in crushed candy canes or peppermint chips instead of white chocolate. These are perfect for holiday baking.
Triple Chocolate: Use dark chocolate instead of semi-sweet, add mini chocolate chips to the batter, and drizzle with dark chocolate instead of white. It’s basically a chocolate lover’s dream disguised as red velvet.
Elegant Plating: Cut brownies into small rectangles, dust with powdered sugar, and serve with fresh raspberries and a dollop of whipped cream. Suddenly your weeknight brownies look like a French bistro dessert.
Serving, Storage & Reheating
These easy red velvet brownies are best served at room temperature where their fudgy texture really shines. I love pairing them with a glass of cold milk, a scoop of vanilla ice cream, or even a cup of strong coffee for an indulgent afternoon treat.
They’re also stunning on a dessert platter alongside my simple churro cheesecake or ultimate banana oatmeal bars.
Store your brownies in an airtight container at room temperature for up to 4 days, or in the refrigerator for up to a week. I actually prefer them cold from the fridge—they get even fudgier and the white chocolate drizzle stays nice and firm.
For longer storage, wrap individual brownies in plastic wrap, then place them in a freezer-safe container or bag and freeze for up to 3 months. Thaw at room temperature for about an hour, or pop a frozen brownie in the microwave for 15-20 seconds for a warm, gooey treat that tastes freshly baked.
No-Waste Kitchen Magic
Got leftover brownies (if that ever happens)? Here’s how to give them new life.
Crumble day-old brownies over vanilla ice cream for an instant sundae, or layer them with whipped cream and fresh berries in a glass for easy brownie trifles. You can also chop them into chunks and fold into vanilla or chocolate ice cream for a homemade red velvet brownie ice cream.
If your brownies got a little too dry, turn them into brownie truffles: crumble them into fine crumbs, mix with 2-3 tablespoons of softened cream cheese until you can form balls, then roll in cocoa powder or melted white chocolate. Nobody will ever know they started as overbaked brownies.
Save any white chocolate you don’t use for drizzling—it keeps in an airtight container for months and is perfect for topping my French toast casserole or melting into hot cocoa.
Fudgy Red Velvet Brownies Recipe FAQs
Can I freeze this Fudgy Red Velvet Brownies Recipe?
Absolutely! These brownies freeze beautifully for up to 3 months. Wrap individual squares in plastic wrap, then place them in a freezer-safe bag with as much air pressed out as possible. Thaw at room temperature or warm briefly in the microwave—they taste just as fudgy as the day you baked them.
What’s the best way to store homemade red velvet brownies?
Keep them in an airtight container at room temperature for 3-4 days, or refrigerate them for up to a week if your kitchen is warm. I actually love them cold from the fridge—they get even denser and fudgier, almost truffle-like.
Will this recipe work in a 9×13 pan?
Yes, but your brownies will be thinner and will bake faster—check them at 20-22 minutes instead of 30. For thicker, fudgier brownies like the ones pictured, stick with the 8×8 inch pan.
Is there a way to make these red velvet brownies less sweet?
Try reducing the granulated sugar to 1 cup and use dark chocolate instead of semi-sweet for the melted chocolate portion. You’ll still get plenty of sweetness from the white chocolate drizzle if you choose to add it, but the brownie base will be less sugary.
Cozy Closing
I hope this Fudgy Red Velvet Brownies Recipe becomes your new go-to for when you want something impressive without the stress. They’re rich, they’re gorgeous, and honestly, they disappear faster than I can make them around here.
I’d love to see your spin on this Fudgy Red Velvet Brownies Recipe! Drop a comment below with your photos or tell me if you tried any of the variations—I’d love to see how you made it your own. This Fudgy Red Velvet Brownies Recipe is so versatile; I bet you’ve got amazing ideas already in mind!
And if you’re looking for more easy desserts that feel special, try my standing rib roast for a savory showstopper, or keep things sweet with another batch-worthy treat from the EdenPlate archives.
I’m Claire Whitmore—a dessert daydreamer from Asheville, NC. For me, baking isn’t about perfect pastries—it’s about the joy of sharing something sweet (and maybe sneaking an extra brownie when no one’s looking).