Chocolate-Covered Peanut Butter Eggs
Chocolate-covered peanut butter eggs are the kind of homemade Easter candy that makes people think you secretly went to pastry school. Hey there, I’m Claire Whitmore — a pastry whisperer in Asheville, NC, where butter totally counts as self-care.
This chocolate-covered peanut butter eggs recipe is everything: easy ingredients, a quick prep time, and that crowd-pleasing peanut butter-meets-chocolate flavor we all live for. We’re talking creamy peanut butter filling, confectioners’ sugar, real butter, and a silky semi-sweet chocolate shell — all coming together in one gorgeous little Easter treat.
I made these for the first time on a rainy April afternoon with my daughter, and we ended up eating half the filling before it ever hit the baking sheet. No regrets. These are dangerously good, and I genuinely look forward to making them every single spring.
Table of Contents
Little Snapshot: What This Recipe Delivers
These homemade chocolate-covered peanut butter eggs are a no-bake Easter candy made from a creamy peanut butter and butter filling, sweetened with confectioners’ sugar, shaped into egg forms, then dipped in smooth semi-sweet chocolate.
They take about 20 minutes of hands-on prep, chill for an hour, and yield 18 perfect peanut butter eggs — an easy, make-ahead homemade Easter candy that tastes way better than anything in a foil wrapper.
Why You’ll Love This Recipe
- This chocolate-covered peanut butter eggs recipe takes less time than a full Easter basket run to the store — and tastes infinitely better.
- No oven needed, no candy thermometer, and no fancy skills required — just a mixer, your hands, and a little patience while they chill.
- They’re totally make-ahead friendly, store beautifully for up to two weeks, and even freeze like a dream for those “I need chocolate now” moments.
- According to King Arthur Baking’s complete chocolate-dipping guide, the secret to beautiful dipped candies is letting your chocolate cool slightly before dipping — and this recipe walks you through exactly that.
Quick Facts
Here’s the quick scoop on this chocolate-covered peanut butter eggs recipe.
- CourseDessert / Candy
- Prep Time20 minutes
- Chill Time1 hour 30 minutes
- Total TimeAbout 2 hours
- Servings18 eggs
- DifficultyEasy
Nutritional Peek
Here’s an approximate nutritional breakdown per peanut butter egg (based on 18 servings). Keep in mind these are estimates and can vary slightly by brand.
| Nutrient | Amount Per Serving |
|---|---|
| Calories | ~230 kcal |
| Total Fat | ~13g |
| Saturated Fat | ~6g |
| Carbohydrates | ~26g |
| Sugar | ~22g |
| Protein | ~4g |
| Fiber | ~1g |
| Sodium | ~80mg |
Ingredients
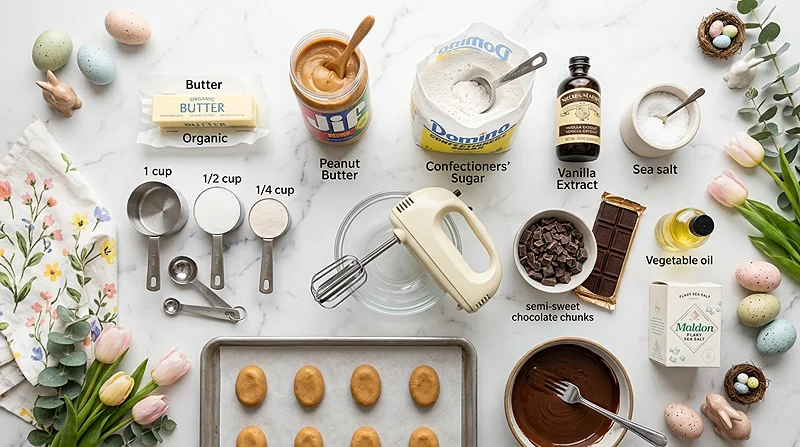
Good peanut butter eggs start with the right peanut butter candy filling — and this one is simple, delicious, and totally forgiving.
For the filling — softened unsalted butter, creamy peanut butter (the regular Jif or Skippy kind, not natural), confectioners’ sugar, vanilla extract, and a tiny pinch of salt — you’ll want everything at room temperature so it blends into a smooth, scoopable dough. For the chocolate coating — semi-sweet chocolate bars (not chips!) and just a touch of vegetable oil — you want the good stuff here for the silkiest shell possible.
| Amount | Ingredient |
|---|---|
| 6 tablespoons (85g) | Unsalted butter, softened to room temperature |
| 1 cup (250g) | Creamy peanut butter (not natural style — yes, this matters!) |
| 2½ cups (300g) | Confectioners’ sugar |
| ½ teaspoon | Pure vanilla extract |
| ⅛ teaspoon | Salt |
| 12 ounces (339g) | Semi-sweet chocolate bars, coarsely chopped (three 4-oz bars) |
| 1 teaspoon | Vegetable oil |
| Optional | Coarse or flaky sea salt, for topping |
Tools You’ll Actually Use
- Stand mixer or handheld electric mixer with paddle attachment
- Large baking sheet lined with parchment paper or silicone mat
- Medium heat-proof bowl or liquid measuring cup (for melting chocolate)
- Fork (for dipping)
- Toothpick or second fork (for sliding eggs off the fork)
- Microwave or small saucepan for double boiler setup
- Measuring cups and spoons
- Kitchen scale (optional but recommended for accuracy)
Step-by-Step Instructions for Chocolate-Covered Peanut Butter Eggs
Let’s make these chocolate-covered peanut butter eggs from scratch — it’s easier than you think, I promise.
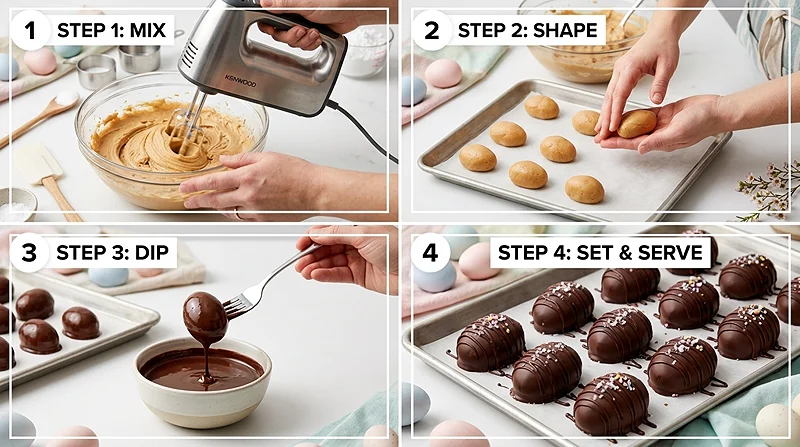
Step 1: Prep your baking sheet. Line a large baking sheet with parchment paper or a silicone baking mat and set it aside. You’ll use this for both shaping and setting the dipped eggs.
Step 2: Make the peanut butter filling. Using a stand mixer or handheld mixer fitted with the paddle attachment, beat the 6 tablespoons softened unsalted butter on medium-high speed until creamy and smooth, about 2 minutes. Add 1 cup creamy peanut butter and beat for about 1 minute until combined. Don’t stress if you spot tiny butter chunks — they’ll smooth out.
Step 3: Add the sugar and flavorings. Add 2½ cups confectioners’ sugar, ½ teaspoon vanilla extract, and ⅛ teaspoon salt. Beat on low speed for 2 minutes until fully combined. The mixture will feel a little soft and slightly crumbly — that’s totally normal and exactly what you want.
Step 4: Shape the eggs. Scoop about 1.5 tablespoons (roughly 1 ounce / 29g) of peanut butter mixture per egg. Roll each portion into a ball between your palms, then flatten it slightly and use your fingers to narrow one end into an egg shape about ¾ inch thick. Place shaped eggs on your prepared baking sheet. If the mixture gets too soft and sticky from the warmth of your hands, pop the tray in the fridge for 15 minutes to firm up. Dusting your hands with a little confectioners’ sugar also helps!
Step 5: Chill the shaped eggs. Refrigerate the shaped peanut butter eggs for at least 1 hour, and up to 1 full day. This step is not optional — chilled eggs hold their shape when you dip them in warm chocolate.
Step 6: Melt the chocolate. During the last few minutes of chilling, melt the 12 ounces coarsely chopped semi-sweet chocolate bars with 1 teaspoon vegetable oil. Microwave method: Combine the chocolate and oil in a medium heat-proof bowl or a deep liquid measuring cup (the depth makes dipping easier!). Microwave in 20-second increments, stirring after each, until fully melted and smooth. Let the chocolate cool for 6–8 minutes before dipping — if it’s too hot, it will melt and flatten your eggs.
Step 7: Dip the eggs. Remove the peanut butter eggs from the fridge. Working one at a time, submerge each egg fully into the melted chocolate, then lift it out carefully with a fork. Tap the fork gently on the side of the bowl to shake off any excess chocolate. Use a toothpick or second fork to slide the coated egg off the fork and onto the parchment-lined baking sheet. If your eggs start softening and losing their shape, return the tray to the fridge for 5–10 minutes, then continue.
Step 8: Add toppings and set. If you have leftover melted chocolate, drizzle it over the finished eggs using a spoon or squeeze bottle. While the chocolate is still wet, sprinkle each egg with coarse or flaky sea salt (or festive sprinkles if you’re feeling fun). Refrigerate the coated eggs for about 30 minutes, or until the chocolate is completely set before serving.
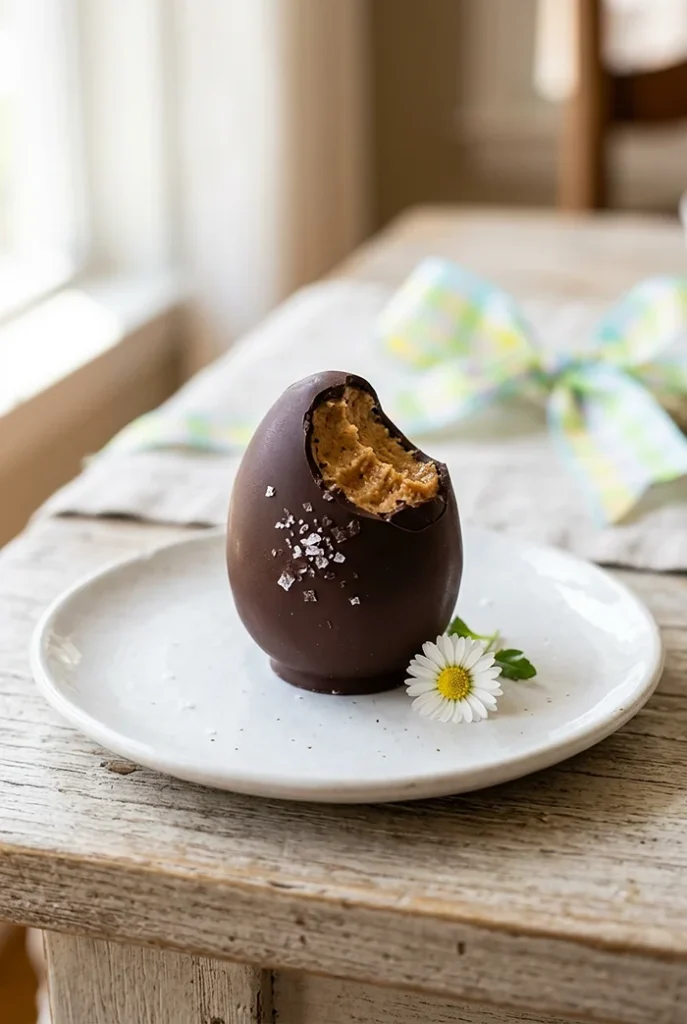
Claire’s Pro Tips for Perfect Peanut Butter Eggs
Making homemade Easter candy sounds intimidating, but these peanut butter eggs are genuinely forgiving. A few little tricks will take yours from “pretty good” to absolutely stunning.
The biggest thing I’ve learned? Don’t skip the chill time — both before AND after dipping. Warm filling melts warm chocolate and you’ll end up with a puddle instead of a pretty egg. I learned this the hard way on my first batch. Now I always give them a full hour, minimum.
Use a liquid measuring cup for dipping. Pour your melted chocolate into a deep liquid measuring cup instead of a shallow bowl. The depth makes it so much easier to fully submerge each egg without fighting the sides of the bowl. Game changer.
Bar chocolate over chips. Chocolate chips contain stabilizers that make them resist melting smoothly. Semi-sweet chocolate bars (like Baker’s or Ghirardelli) melt into a silkier, thinner coating that sets beautifully. The vegetable oil also helps thin it out to a perfect dipping consistency.
Work in batches. Pull only a few eggs from the fridge at a time to dip. The warmth of a whole tray sitting out will soften them too quickly. Keep the rest chilling until you’re ready for them.
Powder your palms. If the peanut butter mixture keeps sticking to your hands while shaping, dust them lightly with confectioners’ sugar. It prevents sticking without affecting the flavor.
Quick Fixes for Chocolate-Covered Peanut Butter Eggs
Problem: My peanut butter filling is too soft to shape.
This usually means the butter was too warm or the room is hot. Pop the bowl in the fridge for 15–20 minutes until it firms up. You can also dust your hands with confectioners’ sugar to help manage the texture while shaping.
Problem: The chocolate is too thick for dipping.
Add a tiny bit more vegetable oil — about ¼ teaspoon at a time — and stir well. This thins the chocolate to a more fluid, dippable consistency without affecting the flavor or set.
Problem: The chocolate is seizing up and turning grainy.
This usually means water got into the chocolate. Even a drop of steam can cause seizing. Make sure your bowls and tools are completely dry before you start. Unfortunately, seized chocolate is hard to rescue — it’s best to start fresh with a new batch of chocolate.
Problem: My eggs are losing their shape during dipping.
They weren’t cold enough going in! Return the shaped eggs to the fridge for another 10–15 minutes and try again. Also double-check that your chocolate has cooled to a warm (not hot) temperature before dipping.
Problem: There’s a big chocolate “puddle” forming under each egg.
This means too much excess chocolate wasn’t shaken off. After lifting the egg from the chocolate, tap the fork more firmly against the side of the bowl — 3 to 4 good taps — before sliding the egg onto the parchment.
Variations and Fun Twists
Once you’ve nailed the base recipe for these peanut butter eggs, there are so many fun directions you can take them.
Dark chocolate version: Swap the semi-sweet bars for bittersweet or dark chocolate (70% cocoa) for a more intense, grown-up flavor that plays beautifully against the sweet filling.
White chocolate coating: Melt white chocolate with a touch of coconut oil instead of vegetable oil, and coat your eggs for a pastel-friendly Easter look. Add a drizzle of pink or lavender-colored white chocolate on top for extra flair.
Gluten-free: Great news — this recipe is naturally gluten-free as written! Just double-check your chocolate bars to confirm no cross-contamination if that’s a concern.
Almond butter version: Swap the peanut butter for almond butter (not natural style — same rule applies) for a slightly different but equally delicious filling.
Festive toppings: While the chocolate is still wet, press on mini Easter sprinkles, crushed freeze-dried strawberries, or shredded coconut. They make gorgeous gifts.
Mini versions: Use a teaspoon of filling instead of 1.5 tablespoons to make bite-sized peanut butter eggs — perfect for Easter baskets and little hands.
Serving, Storage, and Reheating

These peanut butter eggs are best served straight from the refrigerator. The filling stays firm and the chocolate shell has a satisfying snap when cold. Arrange them on a pretty platter lined with Easter grass or parchment for a beautiful candy-box presentation.
Store leftover eggs (if you have any — which, honestly, I doubt) layered between sheets of parchment or wax paper in an airtight container in the refrigerator for up to 2 weeks. The filling can soften slightly at room temperature, so the fridge is their happy place.
They also freeze wonderfully. Layer them in a freezer-safe container between parchment sheets and freeze for up to 2 months. We genuinely love eating them straight from the freezer — the texture is almost fudge-like and incredibly satisfying. No reheating needed here!
No-Waste Kitchen Magic
Got leftover melted chocolate after dipping? Don’t let it go to waste! Pour it into a parchment-lined dish and sprinkle with flaky sea salt, crushed pretzels, or festive sprinkles to make a quick chocolate bark. Refrigerate until set, then break into pieces.
Extra peanut butter filling that didn’t get shaped? Roll it into simple truffles, chill them, and dip in the leftover chocolate. Bonus candy with zero extra effort.
If you end up with leftover confectioners’ sugar, store it in an airtight jar. It’s perfect for dusting your hands during future candy-making sessions or sweetening homemade whipped cream.
FAQs About Chocolate-Covered Peanut Butter Eggs
Can I freeze chocolate-covered peanut butter eggs?
Yes, absolutely! These freeze beautifully for up to 2 months. Layer them between sheets of parchment in a freezer-safe airtight container to prevent sticking. Thaw in the refrigerator overnight, or enjoy them straight from the freezer — they’re incredible that way too.
What’s the best way to store homemade peanut butter eggs?
Keep them in an airtight container in the refrigerator, layered with parchment paper. They stay fresh and firm for up to 2 weeks. Avoid storing at room temperature for long periods, since the peanut butter filling can soften and get a little sticky.
How do I know when the chocolate is the right temperature for dipping?
After melting, let the chocolate sit for 6–8 minutes. It should feel warm (not hot) when you dip a fingertip in — similar to a comfortable bath temperature. If it’s too hot, it will melt your filling. If it’s cooled too much and starts to thicken, microwave it in a 10-second burst and stir.
Why should I use regular creamy peanut butter instead of natural style?
Natural peanut butter contains oils that separate and create a greasy, unstable filling that doesn’t hold its egg shape well. Regular-style peanut butter (like Jif or Skippy) has a stabilized, consistent texture that blends smoothly with the butter and sugar to create a perfectly moldable, firm peanut butter candy filling.
Can I make peanut butter eggs ahead of time?
These are actually ideal for making ahead! You can shape and refrigerate the unfilled eggs up to 1 day before dipping. Once coated and set, they keep in the fridge for 2 full weeks. They’re one of the best make-ahead homemade Easter candies out there.
Can’t get enough of these flavors? You’re going to love what’s waiting in the Eggs & Omelettes lineup. Every single recipe is made to impress without the stress. Happy cooking, friend!
A Cozy Closing Note
I really hope you fall as hard for these chocolate-covered peanut butter eggs as my family has. They’ve become our most-requested Easter tradition — and honestly, I’ve started making them year-round just because life is too short to save good candy for one holiday.
If you’re looking for another crowd-pleasing recipe to round out your spring table, my grilled cheese burrito copycat is always a hit alongside something sweet!
I’d love to see your spin on these chocolate-covered peanut butter eggs! Drop a comment below with your photos — did you go dark chocolate? Add sprinkles? Try the almond butter version? I’d love to see how you made them your own. These peanut butter eggs are so versatile; I bet you’ve already got some fun ideas brewing.
About Claire
I’m Claire Whitmore — a dessert daydreamer from Asheville, NC. For me, baking isn’t about perfect pastries — it’s about the joy of sharing something sweet (and maybe sneaking an extra scoop of icing). Welcome to EdenPlate, where cozy recipes and good vibes always have a seat at the table.

Chocolate-Covered Peanut Butter Eggs
Equipment
- Stand mixer or handheld mixer
- Large baking sheet
- Parchment paper or silicone mat
- Heat-proof bowl
- Fork
- Toothpick
- Microwave or double boiler
- Measuring cups and spoons
- Kitchen scale
Ingredients
Filling
- 6 tablespoons unsalted butter softened
- 1 cup creamy peanut butter not natural style
- 2.5 cups confectioners’ sugar
- 0.5 teaspoon vanilla extract
- 0.125 teaspoon salt
Chocolate Coating
- 12 ounces semi-sweet chocolate bars coarsely chopped
- 1 teaspoon vegetable oil
- flaky sea salt optional
Instructions
- Line a large baking sheet with parchment paper or a silicone mat and set aside.
- Beat softened butter until creamy, then add peanut butter and mix until combined.
- Add confectioners’ sugar, vanilla extract, and salt. Mix until a soft dough forms.
- Scoop portions, roll into balls, and shape into eggs. Place on prepared baking sheet.
- Refrigerate shaped eggs for at least 1 hour until firm.
- Melt chocolate with vegetable oil in the microwave in 20-second intervals, stirring until smooth. Let cool slightly.
- Dip each egg into melted chocolate, lift with a fork, tap off excess, and place back on the baking sheet.
- Optional: drizzle extra chocolate and sprinkle with sea salt. Refrigerate until chocolate is set, about 30 minutes.