Fruity Pebbles Cheesecake Tacos
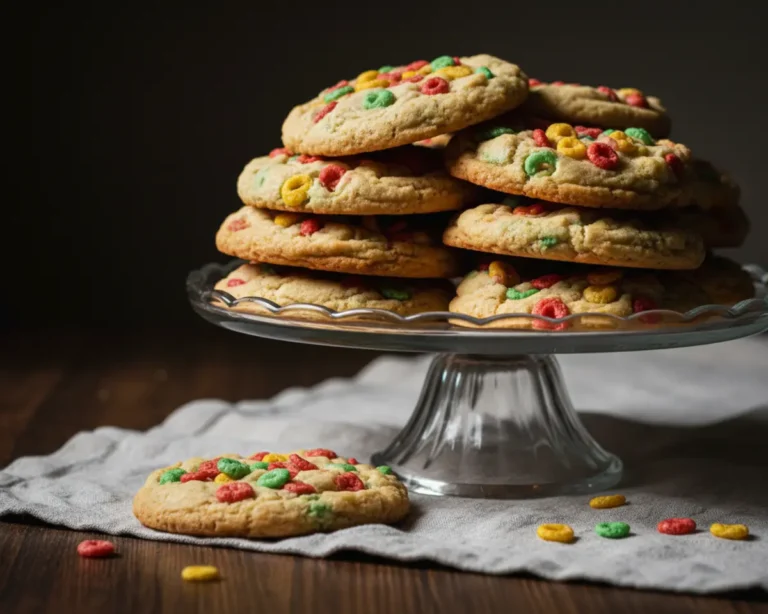
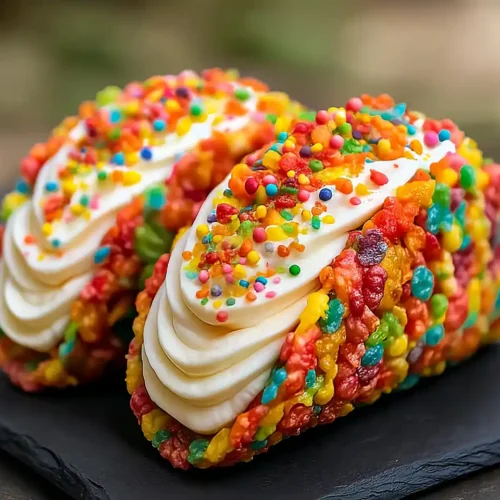
Fruity Pebbles Cheesecake Tacos are a no-bake dessert with crunchy cereal shells, creamy vanilla cheesecake filling, and colorful cereal topping. Ready in 40 minutes — kids love them!
Fruity Pebbles Cheesecake Tacos are the dessert mashup you didn’t know you needed until right this second. They’re crunchy, creamy, colorful, and ridiculously fun to make with kids (or solo while listening to your favorite guilty-pleasure playlist).
This no-bake dessert combines buttery cereal shells with a dreamy vanilla cheesecake filling that’s so light it practically floats off the spoon.
Hey there, I’m Claire Whitmore — a pastry whisperer in Asheville, NC, where butter totally counts as self-care. This Fruity Pebbles Cheesecake Tacos recipe takes childhood nostalgia and turns it into something you can actually serve at a party without anyone side-eyeing you.
Table of Contents
Little Snapshot: What This Recipe Delivers
Fruity Pebbles Cheesecake Tacos deliver crunchy, butter-coated cereal shells shaped like tacos and filled with a fluffy no-bake cheesecake mixture made from cream cheese, powdered sugar, vanilla, and whipped cream.
Ready in just 40 minutes with zero oven time, they’re perfect for birthday parties, playful dessert tables, or whenever you want something colorful and delicious without the fuss.
Why You’ll Love This Recipe 🌸
- This Fruity Pebbles dessert taco is completely no-bake, which means zero oven stress and more time for the fun stuff (like licking the bowl).
- The crunchy cereal shells stay crispy for hours, so you can prep them ahead without any sogginess drama.
- Kids can totally help assemble these — it’s basically edible arts and crafts, and everyone loves that.
- According to King Arthur Baking’s guide to no-bake desserts, the beauty of no-bake treats is their simplicity and versatility — and this fruity pebbles cheesecake taco recipe proves exactly why.
Quick Facts ⚡
Here’s the quick scoop on this Fruity Pebbles Cheesecake Tacos recipe.
- CourseDessert
- Prep Time10 minutes
- Chill Time30 minutes
- Total Time40 minutes
- Servings6 tacos
- DifficultyEasy
Fruity Pebbles Cheesecake Tacos
Equipment
- Mixing bowls (medium and large)
- Small taco-shaped molds or muffin tin
- Hand mixer or stand mixer
- Spatula
- Measuring cups and spoons
- Spoon or small scoop
Ingredients
For the Shells
- 3 cups Fruity Pebbles cereal
- ½ cup unsalted butter melted
For the Filling
- 8 oz cream cheese softened to room temperature
- ½ cup powdered sugar sifted
- 1 tsp pure vanilla extract
- 1 cup whipped cream
For the Garnish
- Additional Fruity Pebbles cereal as needed
Instructions
- Combine 3 cups of Fruity Pebbles cereal and 1/2 cup melted unsalted butter in a medium mixing bowl. Stir thoroughly with a spatula until every single cereal piece is evenly coated with that glossy butter — this is what holds everything together and gives you that irresistible crunch.
- Press the buttery cereal mixture firmly into small taco-shaped molds or the cups of a muffin tin, packing it down tightly so it holds its shape. You want to compact it really well here — no wimpy pressing allowed! Pop the molds into the refrigerator and chill for at least 30 minutes until the shells are completely firm and hold their shape when you gently touch them.
- Using a hand mixer on medium-high speed, beat 8 oz of room-temperature cream cheese in a large bowl until it’s light, fluffy, and completely smooth with no lumps remaining. Gradually add 1/2 cup sifted powdered sugar and 1 tsp pure vanilla extract, blending on medium speed until the mixture is silky and resembles frosting. This should take about 2-3 minutes of mixing.
- Gently fold 1 cup of whipped cream into the cream cheese mixture using a spatula and a light hand — you’re not stirring aggressively here, you’re folding in a swooping motion to maintain that airy, mousse-like texture. The filling should look like fluffy vanilla clouds by the time you’re done.
- Once your cereal shells are completely firm and chilled, carefully remove them from the molds (they should pop right out if you packed them well). Spoon the cheesecake filling generously into each crunchy shell, filling them from one end to the other like you’re filling actual tacos. Don’t be shy — pile that filling high!
- Sprinkle additional Fruity Pebbles cereal over the top of each filled shell for extra color, crunch, and that wow factor. Serve immediately for maximum crunch, or chill them in the fridge for 15-20 minutes if you prefer a firmer, almost ice-cream-like texture.
Notes
Nutritional Peek
Here’s a friendly breakdown of what you’re getting per taco — because knowledge is power, even when it comes to dessert.
| Nutrient | Amount per Serving |
|---|---|
| Calories | 320 kcal |
| Protein | 4g |
| Carbohydrates | 38g |
| Fat | 17g |
| Fiber | 1g |
| Sugar | 26g |
Note: Nutritional values are approximate and will vary based on specific brands used.
Ingredients
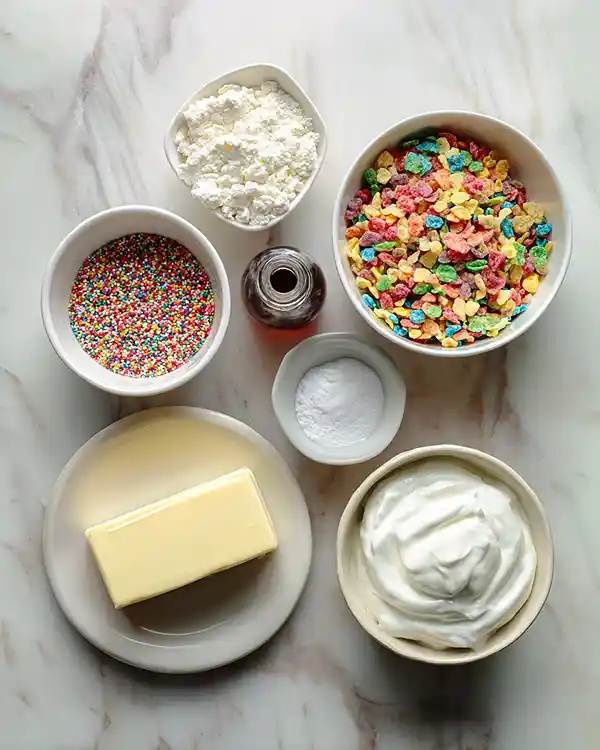
This cereal cheesecake taco recipe uses simple, everyday ingredients you probably already have on hand (or can grab in one quick grocery run). For the crunchy taco shells — fruity cereal and melted butter — you’ll want to use real unsalted butter here, not margarine, because it helps the shells hold their shape and adds that irresistible buttery flavor.
For the creamy filling — softened cream cheese, sifted powdered sugar, vanilla extract, and whipped cream — make sure your cream cheese is truly room temperature so it whips up fluffy instead of lumpy.
| Amount | Ingredient |
|---|---|
| For the Shells | |
| 3 cups | Fruity Pebbles cereal (yes, the colorful childhood classic) |
| 1/2 cup | Unsalted butter, melted (real butter — margarine just doesn’t cut it here) |
| For the Filling | |
| 8 oz | Cream cheese, softened to room temperature (this is key for smooth mixing) |
| 1/2 cup | Powdered sugar, sifted (no one wants sugar lumps) |
| 1 tsp | Pure vanilla extract (not imitation — you’ll taste the difference) |
| 1 cup | Whipped cream (store-bought or homemade, both work beautifully) |
| For the Garnish | |
| As needed | Additional Fruity Pebbles cereal (because more color = more joy) |
Tools You’ll Actually Use
Here’s what you’ll need to bring these little beauties to life:
- Mixing bowls (medium and large)
- Small taco-shaped molds or muffin tin (for shaping the shells)
- Hand mixer or stand mixer (for whipping that cream cheese)
- Spatula (for folding gently)
- Measuring cups and spoons
- Spoon or small scoop (for filling the shells)
Pro tip: If you don’t have taco molds, you can drape the cereal mixture over the back of a muffin tin to create that taco shape!
Step-by-Step Instructions
Let’s make some Fruity Pebbles Cheesecake Tacos that’ll have everyone asking for the recipe (and seconds).
Step 1: Make the Crunchy Cereal Shells
Combine 3 cups of Fruity Pebbles cereal and 1/2 cup melted unsalted butter in a medium mixing bowl.
Stir thoroughly with a spatula until every single cereal piece is evenly coated with that glossy butter — this is what holds everything together and gives you that irresistible crunch. Think of it like making Rice Krispie treats, but way more colorful and fun.
Step 2: Shape and Chill
Press the buttery cereal mixture firmly into small taco-shaped molds or the cups of a muffin tin, packing it down tightly so it holds its shape. You want to compact it really well here — no wimpy pressing allowed!
Pop the molds into the refrigerator and chill for at least 30 minutes until the shells are completely firm and hold their shape when you gently touch them.
Step 3: Whip Up the Dreamy Filling
Using a hand mixer on medium-high speed, beat 8 oz of room-temperature cream cheese in a large bowl until it’s light, fluffy, and completely smooth with no lumps remaining.
Gradually add 1/2 cup sifted powdered sugar and 1 tsp pure vanilla extract, blending on medium speed until the mixture is silky and resembles frosting. This should take about 2-3 minutes of mixing.
Step 4: Fold in the Clouds
Gently fold 1 cup of whipped cream into the cream cheese mixture using a spatula and a light hand — you’re not stirring aggressively here, you’re folding in a swooping motion to maintain that airy, mousse-like texture. The filling should look like fluffy vanilla clouds by the time you’re done.
Step 5: Fill Those Taco Shells
Once your cereal shells are completely firm and chilled, carefully remove them from the molds (they should pop right out if you packed them well). Spoon the cheesecake filling generously into each crunchy shell, filling them from one end to the other like you’re filling actual tacos. Don’t be shy — pile that filling high!
Step 6: Garnish and Serve
Sprinkle additional Fruity Pebbles cereal over the top of each filled shell for extra color, crunch, and that “wow” factor. Serve immediately for maximum crunch, or chill them in the fridge for 15-20 minutes if you prefer a firmer, almost ice-cream-like texture. Either way, they’re going to disappear fast!
Claire’s Pro Tips & Gentle Guidance
This fruity pebbles cheesecake taco recipe is pretty forgiving, but these little tricks will take your tacos from good to “please make these every weekend.”
Room temperature cream cheese is non-negotiable. Cold cream cheese will give you lumps no matter how long you beat it, and nobody wants chunky cheesecake filling. Leave it on the counter for at least an hour before you start, or microwave it in 10-second bursts if you’re impatient like me.
Pack those shells tight. The biggest mistake I see is people being too gentle when pressing the cereal mixture into the molds. You need to really compact it — press down firmly with the back of a spoon or your fingers until the mixture feels solid. Loose shells will crumble when you try to fill them, and that’s just sad.
Don’t skip sifting the powdered sugar. I know it feels like an extra step, but those little sugar clumps will ruin the silky texture of your filling. Just sift it quickly through a fine-mesh strainer and you’re golden.
Fold, don’t stir, when adding whipped cream. According to Serious Eats‘ expert guide to folding techniques , aggressive stirring deflates all those beautiful air bubbles you worked to create. Use a gentle swooping motion from the bottom of the bowl up and over — it takes an extra 30 seconds but makes all the difference in texture.
Quick Fixes for Fruity Pebbles Cheesecake Tacos
Problem: Shells are falling apart when I remove them from the molds. You didn’t pack them tightly enough or didn’t chill them long enough. Press more firmly next time and give them a full 30 minutes (or even 45) in the fridge. If they’re still crumbly, add an extra tablespoon of melted butter to the cereal mixture.
Problem: The filling is too runny and won’t hold its shape. Your cream cheese might not have been thick enough, or you over-mixed after adding the whipped cream. Pop the filling back in the fridge for 15-20 minutes to firm up. Next time, make sure you’re using full-fat cream cheese (not whipped or light versions) and fold gently.
Problem: The shells got soggy after sitting out. The filling’s moisture is seeping into the cereal. To prevent this, you can brush the inside of the shells with a thin layer of melted white chocolate before adding the filling — it creates a moisture barrier. Or just fill them right before serving instead of prepping hours ahead.
Problem: My shells cracked when I tried to shape them. The butter might have cooled too much before you pressed the mixture into the molds. Work quickly after mixing, and if the mixture starts to harden, pop it in the microwave for 5-10 seconds to soften it slightly.
There’s a whole world of cakes & cupcakes waiting for you over at the Cakes & Cupcakes collection. Each one is made with the same love and attention, and they’re all absolutely worth trying. Happy cooking!
Variations & Fun Twists
This cereal cheesecake taco recipe is basically a blank canvas for your creativity. Here are some fun ways to switch it up:
Chocolate lovers: Swap half the Fruity Pebbles for Cocoa Pebbles in the shells, and add 2 tablespoons of cocoa powder to the cheesecake filling. Top with mini chocolate chips instead of extra cereal.
Berry bliss: Fold 1/2 cup of diced fresh strawberries or blueberries into the cheesecake filling just before filling the shells. The fruity pop of real berries against that creamy filling is chef’s kiss.
Peanut butter twist: Add 1/4 cup of creamy peanut butter to the cream cheese mixture before whipping. Use Reese’s Puffs cereal instead of Fruity Pebbles for the shells. You’re welcome.
Tropical vacation: Use a mix of Fruity Pebbles and toasted coconut flakes for the shells, and fold some crushed pineapple (well-drained!) into the filling. Garnish with toasted coconut.
Fancy adult version: Add 1-2 tablespoons of your favorite liqueur (Grand Marnier, Baileys, or Amaretto work beautifully) to the cheesecake filling. This turns them into a grown-up party dessert instantly.
Serving, Storage & Reheating
These fruity pebbles dessert tacos are best served fresh and cold, straight from the fridge. The contrast between the crunchy shell and that cool, creamy filling is what makes them magical.
Serve them on a colorful platter for parties, or pack them in individual containers for a fun lunchbox surprise (though they might not make it to lunchtime if your family’s anything like mine).
Store any leftovers (if you actually have leftovers, which I doubt) in an airtight container in the refrigerator for up to 2 days. Place parchment paper between layers so they don’t stick together. The shells will soften slightly over time as moisture from the filling seeps in, but they’ll still taste delicious.
No reheating needed — these are meant to be enjoyed cold! In fact, popping them in the freezer for 10-15 minutes before serving gives them an almost ice-cream-taco vibe that’s pretty amazing on hot summer days.
No-Waste Kitchen Magic
Got leftover cereal shells that didn’t get filled? Crumble them up and use them as a crunchy topping for ice cream, yogurt parfaits, or even as a colorful crust for pan-fried peaches. They add the best texture!
Extra cheesecake filling can be piped into small dessert cups, topped with fresh berries, and served as individual no-bake cheesecake bites. Or spread it on graham crackers for a quick snack that feels way fancier than it actually is.
If your cereal shells break or crack during molding, don’t toss them! Crumble them into chunky pieces and layer them in a parfait glass with the cheesecake filling and whipped cream for a deconstructed version that tastes just as good.
Day-old filled tacos (if they somehow survive that long) can be crumbled and mixed into vanilla ice cream for a homemade cereal milk ice cream situation. Just saying — waste not, want not, and all that.
Fruity Pebbles Cheesecake Tacos FAQs
Can I freeze Fruity Pebbles Cheesecake Tacos?
Absolutely! Freeze the filled tacos on a baking sheet for about an hour until solid, then transfer them to a freezer-safe container with parchment paper between layers. They’ll keep for up to 2 months and taste like the most fun ice cream tacos you’ve ever had.
What’s the best way to store these if I’m making them ahead?
Make the shells up to 2 days ahead and store them unfilled in an airtight container at room temperature. Make the filling and keep it covered in the fridge. Fill the shells within an hour or two of serving for maximum crunch and minimal sogginess.
How do I know when the shells are firm enough to remove from the molds?
Gently touch the edge of a shell — if it feels solid and cool to the touch, and doesn’t squish when you press lightly, it’s ready. If it still feels soft or warm, give it another 10-15 minutes in the fridge.
Why should I use real butter instead of margarine in this recipe?
Real butter solidifies when chilled, which is what gives these shells their structure and helps them hold their taco shape beautifully. Margarine has a higher water content and different fat composition, so it won’t set up as firmly, and your shells might fall apart.
Could I use a different cereal for the shells?
Yes! Rice Krispies, Cocoa Pebbles, Lucky Charms (marshmallows removed), or even crushed cornflakes all work. Just stick with cereals that are small and compact — nothing too fluffy or it won’t hold together well.
Cozy Closing
These Fruity Pebbles Cheesecake Tacos are proof that dessert doesn’t have to be complicated to be completely crave-worthy. They’re playful, colorful, ridiculously fun to make, and honestly? They taste like pure childhood joy wrapped in a grown-up treat.
I’d love to see your spin on this Fruity Pebbles Cheesecake Tacos recipe! Drop a comment below with your photos or flavor variations — I’d love to see how you made them your own.
This cereal dessert taco is so versatile; I bet you’ve got amazing ideas already brewing. Maybe you’ll try them with horseradish sauce for prime rib… just kidding, please don’t do that.
Whether you’re making these for a kid’s birthday party, a casual weekend treat, or just because it’s Tuesday and you deserve something fun, I hope they bring as much joy to your kitchen as they do to mine. Happy taco-ing, my friend!
I’m Claire Whitmore — a dessert daydreamer from Asheville, NC. For me, baking isn’t about perfect pastries — it’s about the joy of sharing something sweet (and maybe sneaking an extra scoop of filling when no one’s looking).