No Bake Peanut Butter Oat Cups
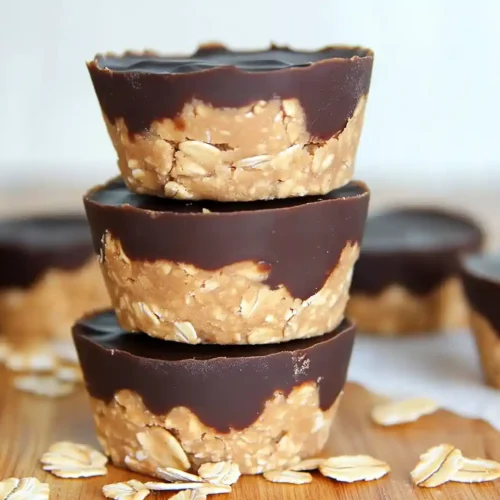
No Bake Peanut Butter Oat Cups made with just 4 simple ingredients! These healthy sweets are ready in minutes, perfect for busy moms who need quick desserts without turning on the oven.
Hey there, I’m Claire Whitmore — a dessert daydreamer from Asheville, NC, where chocolate chips are definitely a food group. This No Bake Peanut Butter Oat Cups recipe is about to become your new secret weapon when you need something sweet but don’t have the energy (or time) to actually bake.
We’re talking peanut butter, oats, maple syrup, and chocolate — four ingredients that come together into these ridiculously delicious little cups that taste like a Reese’s had a baby with a granola bar.
These healthy sweets use wholesome ingredients like rolled oats and natural peanut butter, giving you protein and fiber in every bite. The maple syrup adds just enough sweetness without refined sugar, and that chocolate topping? Pure magic.
Plus, they’re naturally gluten-free if you use certified GF oats, and they take less than 15 minutes of active prep time.
Table of Contents
Little Snapshot: What This Recipe Delivers
No Bake Peanut Butter Oat Cups are creamy peanut butter and oat bases topped with smooth melted chocolate, requiring zero oven time and just four simple ingredients. They’re ready in under 20 minutes of active work, naturally sweetened with maple syrup, and perfect for meal prep or satisfying sudden sweet cravings without the guilt.
Why You’ll Love This Recipe 🌸
- These No Bake Peanut Butter Oat Cups take less time than scrolling through your feed — seriously, 15 minutes and you’re done.
- Only four ingredients stand between you and chocolate-peanut butter bliss, and you probably have them all in your pantry right now.
- They’re naturally gluten-free, refined sugar-free, and packed with protein — so you can feel good about sneaking one (or three) as a midday snack.
- According to King Arthur Baking’s guide to simple no-bake treats, the best desserts often skip the oven entirely — and these peanut butter cups prove exactly why.
Quick Facts ⚡
Here’s the quick scoop on this No Bake Peanut Butter Oat Cups recipe.
- CourseDessert / Snack
- Prep Time15 minutes
- Chill Time2-3 hours
- Total Time2 hours 15 minutes
- Servings12 cups
- DifficultyEasy
No Bake Peanut Butter Oat Cups (4 Ingredients!)
Equipment
- High-speed blender or food processor
- Medium microwave-safe bowl
- Muffin pan with cupcake liners or silicone muffin pan
- Small microwave-safe bowl
- Spoon
Ingredients
Base Ingredients
- 1.5 cups rolled oats processed into oat flour
- 1.5 cups peanut butter creamy works best
- ¼ cup maple syrup real maple syrup, not pancake syrup
Chocolate Topping
- 1 cup chocolate chips semi-sweet, dark, or milk chocolate
- 1 tsp coconut oil optional, for shine
Instructions
- Toss 1.5 cups of rolled oats into your high-speed blender or food processor and blend for about 30-40 seconds until the oats transform into a fine, flour-like powder. You want it smooth but not so pulverized that it turns into oat dust — a little texture is totally fine and actually adds a nice bite to the cups.
- Add 1.5 cups of peanut butter and 1/4 cup of maple syrup to a medium microwave-safe bowl, then microwave for 40-60 seconds until the peanut butter is soft and slightly melty. Stir everything together thoroughly with a spoon until the peanut butter and maple syrup become one smooth, glossy mixture with no streaks.
- Slowly add your freshly blended oat flour to the peanut butter mixture and mix well — this will take some arm muscle, I’m not gonna lie. You can also throw everything into a food processor if hand-mixing feels like too much cardio. The mixture should be very thick but moldable, like play-dough that smells amazing. If it looks dry and crumbly, add an extra teaspoon of maple syrup or peanut butter at a time until it comes together.
- Line a standard muffin pan with cupcake liners, or use a silicone muffin pan for the easiest removal later (seriously, silicone is magic for this recipe). Without liners, these cups will stick like they’re auditioning for a permanent role in your pan, so don’t skip this step.
- Scoop the peanut butter oat mixture evenly into each muffin cup — I use about 2-3 tablespoons per cup. Press down firmly with your fingers to create a smooth, compact base that won’t crumble when you bite into it later.
- In a small microwave-safe bowl, combine 1 cup of chocolate chips and 1 teaspoon of coconut oil (if using). Microwave in 30-second bursts, stirring with a spoon between each session, until the chocolate is completely melted, smooth, and glossy — usually takes 2-3 rounds total.
- Pour a generous layer of melted chocolate over each peanut butter oat base, then use the back of a spoon to smooth it out evenly. If you’re feeling fancy, sprinkle some flaky sea salt, colorful sprinkles, or mini chocolate chips on top before the chocolate hardens — it’s the little touches that make these feel extra special.
- Pop the muffin pan into the refrigerator and let the cups chill for 2-3 hours until they’re completely firm and set. When they’re ready, carefully remove them from the liners or silicone molds — they should pop right out looking absolutely gorgeous.
Notes
Nutritional Peek
Here’s what you’re getting in each of these little beauties — because knowing what’s in your treats just feels good, right?
| Nutrient | Amount per serving |
|---|---|
| Calories | 215 kcal |
| Protein | 7g |
| Carbohydrates | 22g |
| Fat | 12g |
| Fiber | 3g |
| Sugar | 10g |
Ingredients
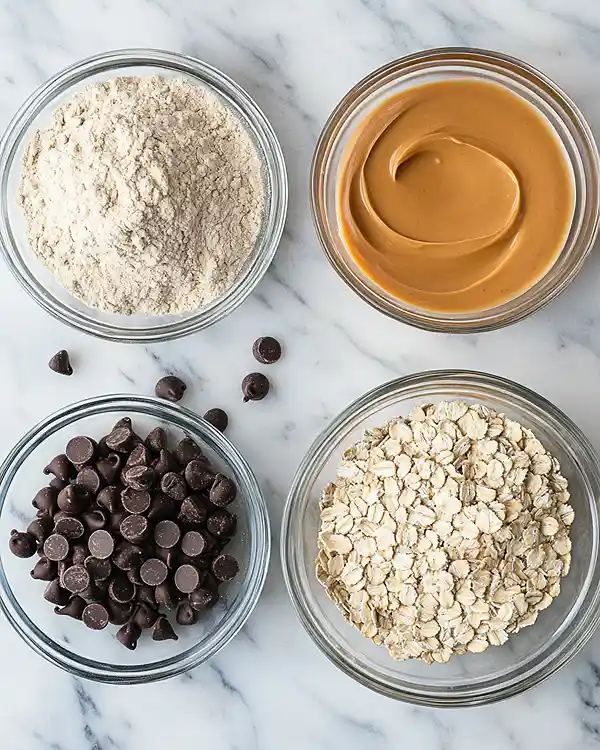
These desserts with few ingredients prove that you don’t need a mile-long shopping list to make something incredible. For the peanut butter oat base — peanut butter, oats, and maple syrup — you’ll want everything at room temperature so it blends smoothly without fighting you.
For the chocolate topping — chocolate chips and optional coconut oil — the coconut oil helps create that glossy, melt-in-your-mouth finish, but honestly? You can skip it if you don’t have any.
| Amount | Ingredient |
|---|---|
| 1.5 cups | Rolled oats (processed into oat flour) — yes, you’ll blend these yourself in about 30 seconds |
| 1.5 cups | Peanut butter — creamy works best, but if you’re team crunchy, I won’t judge |
| 1/4 cup | Maple syrup — the real stuff, not pancake syrup (trust me on this) |
| 1 cup | Chocolate chips — semi-sweet, dark, or milk chocolate all work beautifully |
| 1 tsp | Coconut oil (optional) — helps the chocolate get extra smooth and shiny |
Tools You’ll Actually Use
- High-speed blender or food processor (for turning oats into flour)
- Medium microwave-safe bowl
- Muffin pan with cupcake liners OR silicone muffin pan (seriously, silicone is a game-changer here)
- Small microwave-safe bowl (for melting chocolate)
- Spoon for stirring and smoothing
Step-by-Step Instructions
Making No Bake Peanut Butter Oat Cups is honestly easier than making your morning coffee, and way more rewarding.
Step 1: Make Your Oat Flour
Toss 1.5 cups of rolled oats into your high-speed blender or food processor and blend for about 30-40 seconds until the oats transform into a fine, flour-like powder. You want it smooth but not so pulverized that it turns into oat dust — a little texture is totally fine and actually adds a nice bite to the cups.
Step 2: Warm and Mix the Base
Add 1.5 cups of peanut butter and 1/4 cup of maple syrup to a medium microwave-safe bowl, then microwave for 40-60 seconds until the peanut butter is soft and slightly melty. Stir everything together thoroughly with a spoon until the peanut butter and maple syrup become one smooth, glossy mixture with no streaks.
Step 3: Combine with Oat Flour
Slowly add your freshly blended oat flour to the peanut butter mixture and mix well — this will take some arm muscle, I’m not gonna lie. You can also throw everything into a food processor if hand-mixing feels like too much cardio.
The mixture should be very thick but moldable, like play-dough that smells amazing. If it looks dry and crumbly, add an extra teaspoon of maple syrup or peanut butter at a time until it comes together.
Step 4: Prep Your Pan
Line a standard muffin pan with cupcake liners, or use a silicone muffin pan for the easiest removal later (seriously, silicone is magic for this recipe). Without liners, these cups will stick like they’re auditioning for a permanent role in your pan, so don’t skip this step.
Step 5: Press the Base
Scoop the peanut butter oat mixture evenly into each muffin cup — I use about 2-3 tablespoons per cup. Press down firmly with your fingers to create a smooth, compact base that won’t crumble when you bite into it later.
Step 6: Melt the Chocolate
In a small microwave-safe bowl, combine 1 cup of chocolate chips and 1 teaspoon of coconut oil (if using). Microwave in 30-second bursts, stirring with a spoon between each session, until the chocolate is completely melted, smooth, and glossy — usually takes 2-3 rounds total.
Step 7: Add the Chocolate Layer
Pour a generous layer of melted chocolate over each peanut butter oat base, then use the back of a spoon to smooth it out evenly. If you’re feeling fancy, sprinkle some flaky sea salt, colorful sprinkles, or mini chocolate chips on top before the chocolate hardens — it’s the little touches that make these feel extra special.
Step 8: Chill and Set
Pop the muffin pan into the refrigerator and let the cups chill for 2-3 hours until they’re completely firm and set. When they’re ready, carefully remove them from the liners or silicone molds — they should pop right out looking absolutely gorgeous.
Claire’s Pro Tips & Gentle Guidance
These healthy sweets recipes are so forgiving, but here are a few tricks I’ve learned from making batch after batch (sometimes multiple batches in one day, no shame).
Oat Flour Texture Matters: Don’t over-blend your oats into a superfine powder — you want oat flour, not oat dust. A little texture gives these cups a lovely, slightly chewy bite that makes them feel more substantial and satisfying.
Peanut Butter Consistency Check: If your peanut butter is the natural kind that separates, make sure to stir it really well before measuring. Too much oil and your cups might be greasy; not enough and they’ll be dry and crumbly.
The Mix Should Feel Thick: When you’re combining the oat flour with the peanut butter mixture, it should require some effort to stir — if it’s too loose and pourable, you need more oat flour.
According to Sally’s Baking Addiction’s comprehensive no-bake dessert guide , the right consistency is key for no-bake treats that actually hold together.
Silicone Pans Are Your Friend: I cannot stress this enough — silicone muffin pans make these cups pop out like a dream. If you use a regular metal pan, definitely use cupcake liners or you’ll be chiseling these out like an archaeologist.
Chocolate Layer Thickness: Don’t be stingy with the chocolate! A thin layer looks sad and cracks too easily. Pour it on generously — about 1-2 tablespoons per cup — for that satisfying chocolate shell.
Quick Fixes for No Bake Peanut Butter Oat Cups
Problem: Mixture is too dry and crumbly
Add more moisture, one teaspoon at a time — either maple syrup for sweetness or peanut butter for richness. You can also stir in 1/4 to 1/3 cup of pumpkin puree for a moister texture and a fun fall twist.
Problem: Cups won’t come out of the pan
You probably skipped the liners, didn’t you? Pop the pan back in the fridge for 30 minutes to firm them up even more, then use a butter knife to gently loosen the edges before lifting them out carefully.
Problem: Chocolate layer is cracking or looks dull
The coconut oil helps prevent cracking and adds shine, so if you skipped it, try adding a tiny bit next time. Also, make sure you’re not refrigerating them uncovered — condensation can make chocolate look cloudy and weird.
Problem: Cups are falling apart when you bite into them
Your base wasn’t pressed down firmly enough, or the mixture was too dry to begin with. Make sure you’re really packing that peanut butter oat layer down with some pressure — pretend you’re making the world’s tiniest pottery.
This recipe is just the start of something delicious. Browse the entire Classic Baked Dinners collection and discover all the ways you can bring more flavor to your table. Your family will thank you.
Variations & Fun Twists
These No Bake Peanut Butter Oat Cups are like a blank canvas just waiting for your creative genius.
Almond Butter Swap: Use almond butter instead of peanut butter for a slightly more sophisticated, less sweet flavor — my sister-in-law swears by this version and honestly, she might be onto something.
Dark Chocolate Lover’s Version: Use dark chocolate chips (70% cacao or higher) for a richer, less sweet topping that lets the peanut butter shine even more.
Add Some Crunch: Stir 1/4 cup of chopped peanuts or mini chocolate chips directly into the peanut butter oat mixture before pressing it into the pan for extra texture.
Seasonal Sprinkles: Top with festive sprinkles for holidays — red and green for Christmas, pastel for Easter, orange and black for Halloween. It’s an easy way to make them feel special for any occasion.
Vegan Version: These are already naturally vegan if you use dairy-free chocolate chips! Just double-check your chocolate chip label to be sure.
Mini Cups: Use a mini muffin pan to make bite-sized versions that are perfect for parties, lunchboxes, or portion control (though let’s be real, you’ll just eat more of them).
Serving, Storage & Reheating
These healthy sweets are best enjoyed straight from the fridge when they’re perfectly firm and the chocolate has that satisfying snap.
Serve them chilled as an afternoon pick-me-up, after-dinner treat, or pre-workout snack — yes, they have enough protein and carbs to fuel a workout, so that counts, right? They’re also fantastic for packing in lunchboxes or bringing to potlucks where you want to look like you totally have your life together.
Store your peanut butter oat cups in an airtight container in the refrigerator for up to 5 days for best freshness. Since they’re made with fresh ingredients like maple syrup and aren’t actually baked, room temperature storage will make them too soft and potentially a melty mess.
These are meant to be eaten cold, but if you prefer a softer, creamier texture, let them sit at room temperature for about 10-15 minutes before eating. The peanut butter layer will soften up just a bit while the chocolate stays intact — it’s honestly the best of both worlds.
No-Waste Kitchen Magic
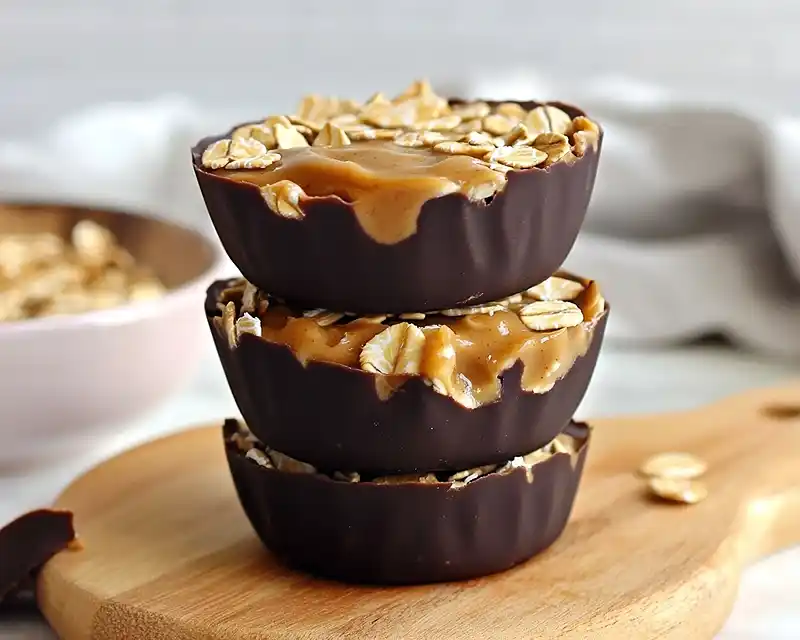
Got extra peanut butter oat cups (if that ever actually happens in your house)?
Crumble any broken or leftover cups over vanilla ice cream or yogurt for an instant sundae topping that tastes like you planned it all along. The combination of creamy, crunchy, and chocolatey is absolutely unreal.
If you made too many and they’re about to hit day 6 in the fridge, freeze them! Wrap each cup individually in parchment paper, then store them in a freezer bag for up to 3 months. They taste amazing straight from the freezer — like little frozen peanut butter chocolate bites.
Save your oat flour scraps if you over-blended and made extra. That leftover oat flour can go into smoothies, be mixed into pancake batter, or used as a base for overnight oats paired with a vanilla chai protein shake for an extra-filling breakfast.
If your chocolate layer cracked or didn’t set pretty, no worries — re-melt it gently, drizzle it over pan-fried peaches for an elevated dessert, or mix it into your morning coffee for a homemade mocha situation.
No Bake Peanut Butter Oat Cups (4 Ingredients!) FAQs
Can I freeze No Bake Peanut Butter Oat Cups?
Absolutely! These freeze beautifully for up to 3 months. Wrap each cup individually in parchment paper, then store them in an airtight freezer bag. They’re actually amazing eaten straight from the freezer — the texture becomes fudgy and firm, like a frozen peanut butter truffle.
What’s the best way to store these cups?
Always store them in the refrigerator in an airtight container for up to 5 days. Room temperature will make them too soft and the chocolate might melt, especially if your kitchen runs warm.
How do I know when the mixture is the right consistency?
It should feel thick and require effort to mix, but still be moldable like play-dough. If you can press it firmly into the muffin cups without it crumbling apart or sticking to your fingers excessively, you’ve nailed it.
Can I make these with quick oats instead of rolled oats?
You can, but rolled oats work better because they create a heartier, more substantial texture when blended into flour. Quick oats tend to make the mixture a bit mushier and less structured.
Will these work with crunchy peanut butter?
They will, but the texture will be different — you’ll have peanut chunks throughout which some people love. Just know that it might be slightly harder to press the mixture into the muffin cups smoothly.
Is there a nut-free version of this recipe?
Absolutely! Use sunflower seed butter or tahini instead of peanut butter for a nut-free alternative that’s still creamy and delicious. The flavor will be slightly different, but honestly? Still amazing.
Cozy Closing
I really hope these No Bake Peanut Butter Oat Cups become your new go-to when you need something sweet without the fuss — they’ve saved me on countless busy afternoons when baking felt like climbing a mountain. The best part? You can customize them however you want, and they always turn out delicious.
I’d love to see your spin on this No Bake Peanut Butter Oat Cups recipe! Drop a comment below with your photos or any fun variations you tried — did you add sprinkles? Use almond butter? Go wild with dark chocolate? I’d love to see how you made it your own.
And if you’re looking for more treats to pair with these, try them alongside a Georgia peach cocktail for your next summer gathering — the combo is chef’s kiss.
I’m Claire Whitmore — a dessert daydreamer from Asheville, NC. For me, baking isn’t about perfect pastries — it’s about the joy of sharing something sweet (and maybe sneaking an extra scoop of chocolate while no one’s looking).