Homemade Hot Cocoa Mix Recipe
This homemade hot cocoa mix recipe takes just 5 minutes to make with 4 simple pantry ingredients. Rich, chocolatey, and way better than store-bought — perfect for cozy winter evenings!
Hey there, I’m Claire Whitmore — a dessert daydreamer in Asheville, NC, where cozy mugs and chocolate therapy are totally a thing. This homemade hot cocoa mix is literally the easiest thing you’ll make all winter, and it tastes about a million times better than the packets at the store.
We’re talking rich chocolate flavor, creamy sweetness, and zero weird additives — just pure, simple ingredients like cocoa powder, powdered sugar, instant milk, and a touch of granulated sugar that blend into the dreamiest drink base ever.
I started making this years ago when I got tired of overly sweet store mixes that left that weird film on my tongue. Now I keep a giant jar of it on my counter all season long, ready for impromptu hot chocolate moments (which happen more often than you’d think when you work from home and it’s 20 degrees outside).
Table of Contents
Little Snapshot: What This Recipe Delivers
This homemade hot cocoa mix combines four pantry staples — instant milk, powdered sugar, cocoa powder, and granulated sugar — into a rich, chocolate-packed blend that stores for up to 3 months and makes about 16 servings in just 5 minutes of whisking.
Why You’ll Love This Recipe 🌸
- This homemade hot cocoa mix takes literally 5 minutes to make — less time than it takes to find matching socks.
- You control the sweetness and chocolate intensity, which means no more cloyingly sweet packets that taste like sadness.
- One batch makes 16 servings, so you’ve got cozy drinks covered for weeks (or days, no judgment here).
- According to King Arthur Baking in their guide to warming winter drinks, homemade mixes deliver fresher flavor and better texture than commercial versions — and this recipe proves exactly why.
Quick Facts ⚡
Here’s the quick scoop on this homemade hot cocoa mix.
- CourseBeverage/Dessert
- Prep Time5 minutes
- Cook Time0 minutes
- Total Time5 minutes
- Servings16 servings
- DifficultyEasy
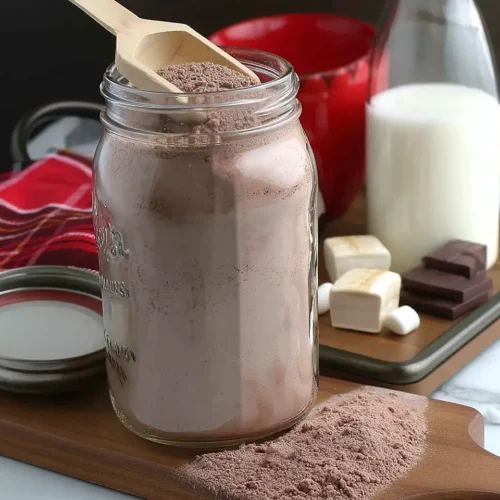
Homemade Hot Cocoa Mix
Equipment
- Large mixing bowl
- Fine-mesh sieve or sifter
- Whisk
- Airtight container or large jar with lid
- Measuring cups
- Large mug for serving
Ingredients
For the Hot Cocoa Mix
- 2 cups instant dry milk sifted
- 2 cups powdered sugar sifted
- 1 cup unsweetened cocoa powder sifted
- ⅓ cup granulated sugar
For Serving (per mug)
- ⅓ cup hot cocoa mix
- 1 cup warm milk 2% preferred, or any milk of choice
- toppings marshmallows, whipped cream, chocolate shavings, crushed peppermint, etc.
Instructions
- Grab your fine-mesh sieve and sift the 2 cups instant dry milk, 2 cups powdered sugar, 1 cup unsweetened cocoa powder, and 1/3 cup granulated sugar into a large mixing bowl. Sifting breaks up all those sneaky clumps and makes your hot cocoa silky smooth instead of chalky.
- Use a whisk to mix everything together until the cocoa powder, sugars, and milk powder are completely combined and you’ve got one uniform, chocolatey-looking blend. You want zero streaks of white or dark patches — just consistent color throughout. This takes maybe 30 seconds of whisking.
- Transfer your homemade hot cocoa mix into an airtight container or a big mason jar with a tight-fitting lid. Store it in your pantry away from heat and moisture for up to 3 months. Label it with the date and “ADD 1/3 CUP TO 1 CUP MILK” for easy reference.
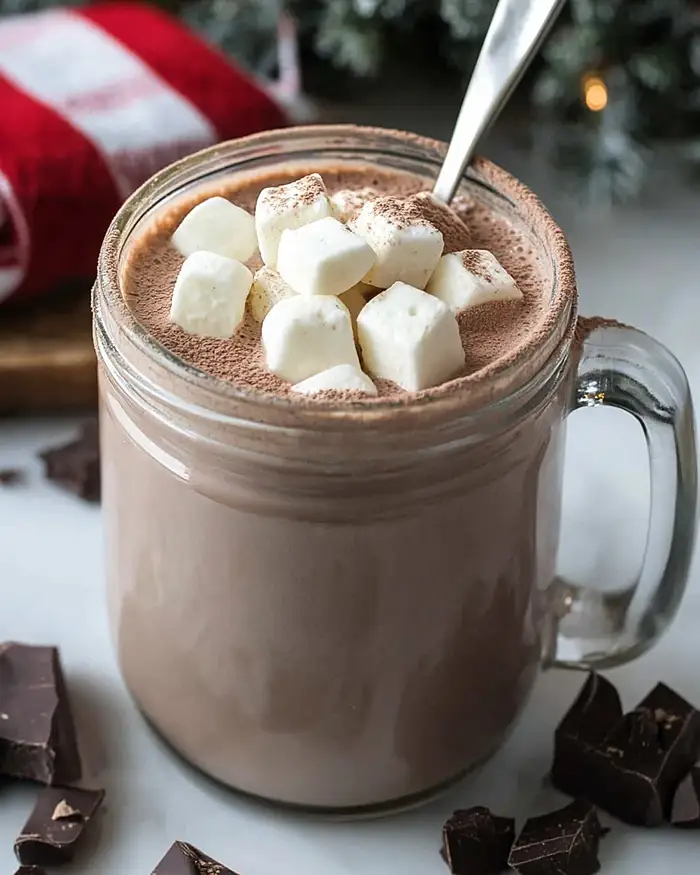
- When you’re ready for cocoa time, scoop 1/3 cup of mix into a large mug. Heat 1 cup of milk until it’s warm but not boiling — about 150°F, or just when it starts to steam. Pour the warm milk over the mix and stir until everything’s dissolved and smooth. Top with whatever makes your heart happy — mini marshmallows, whipped cream, chocolate shavings, crushed candy canes, or just drink it pure.
Notes
Nutritional Peek
Here’s what you’re working with per serving (about ⅓ cup mix prepared with 1 cup 2% milk):
| Nutrient | Amount per Serving |
|---|---|
| Calories | 180 |
| Protein | 9g |
| Carbohydrates | 32g |
| Total Fat | 3g |
| Saturated Fat | 2g |
| Fiber | 2g |
| Sugar | 28g |
| Sodium | 120mg |
Note: Nutritional values are approximate and will vary based on milk choice and toppings.
Ingredients
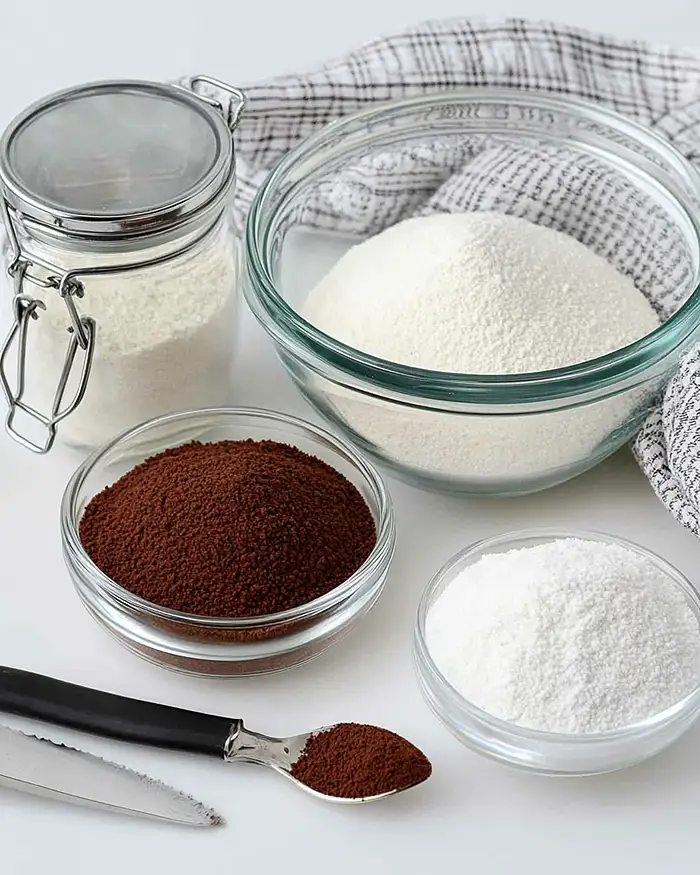
This hot chocolate mix recipe is ridiculously simple — you’re basically just mixing four pantry staples together until they’re besties. For the dry milk base — instant dry milk powder — you’ll want to sift it to avoid any lumps that’ll mess with your smooth drinking experience.
For the sweet stuff — powdered sugar and a bit of granulated sugar — sifting is your friend here too since powdered sugar loves to clump. And for that rich chocolate flavor — unsweetened cocoa powder — make sure it’s sifted or you’ll end up with cocoa chunks floating in your mug (not cute).
| Amount | Ingredient |
|---|---|
| 2 cups | Instant dry milk, sifted (Yes, sifting matters — clumpy milk powder is nobody’s friend) |
| 2 cups | Powdered sugar, sifted (This dissolves way better than granulated and gives you that creamy sweetness) |
| 1 cup | Unsweetened cocoa powder, sifted (The star of the show — go for quality cocoa if you can) |
| ⅓ cup | Granulated sugar (Just a touch to balance the cocoa’s natural bitterness) |
For serving (per mug):
- ⅓ cup hot cocoa mix
- 1 cup warm milk (2% is my go-to, but use whatever you love)
- Toppings: marshmallows, whipped cream, chocolate shavings, crushed peppermint, whatever makes you happy
Tools You’ll Actually Use
- Large mixing bowl
- Fine-mesh sieve or sifter
- Whisk
- Airtight container or large jar with lid (mason jars are perfect for this)
- Measuring cups
- Large mug for serving
Step-by-Step Instructions
Making this homemade hot chocolate mix is honestly almost too easy, but here’s how to do it right so you get the smoothest, most perfectly blended mix possible.
Step 1: Sift your dry ingredients
Grab your fine-mesh sieve and sift the 2 cups instant dry milk, 2 cups powdered sugar, 1 cup unsweetened cocoa powder, and ⅓ cup granulated sugar into a large mixing bowl.
I know sifting feels like an extra step, but trust me — it breaks up all those sneaky clumps and makes your hot cocoa silky smooth instead of chalky. If you skip this, you’ll be fishing cocoa lumps out of your mug later, and nobody wants that.
Step 2: Whisk it all together
Use a whisk to mix everything together until the cocoa powder, sugars, and milk powder are completely combined and you’ve got one uniform, chocolatey-looking blend. You want zero streaks of white or dark patches — just consistent color throughout. This takes maybe 30 seconds of whisking, so don’t rush it.
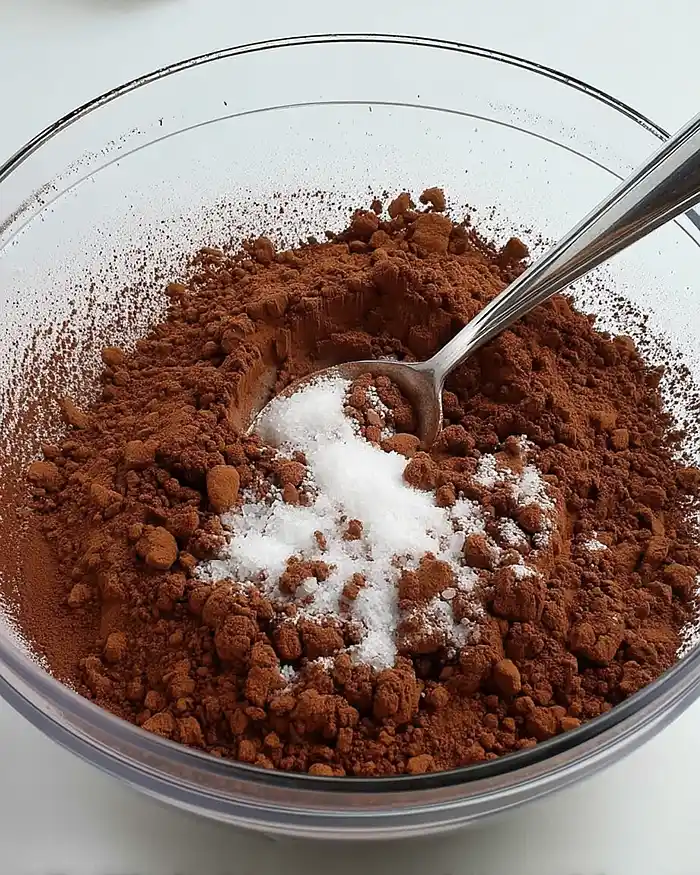
Step 3: Store in an airtight container
Transfer your gorgeous homemade hot cocoa mix into an airtight container or a big mason jar with a tight-fitting lid. Store it in your pantry away from heat and moisture for up to 3 months. I like to label mine with the date and “ADD ⅓ CUP TO 1 CUP MILK” so future-me doesn’t have to think too hard on cold mornings.
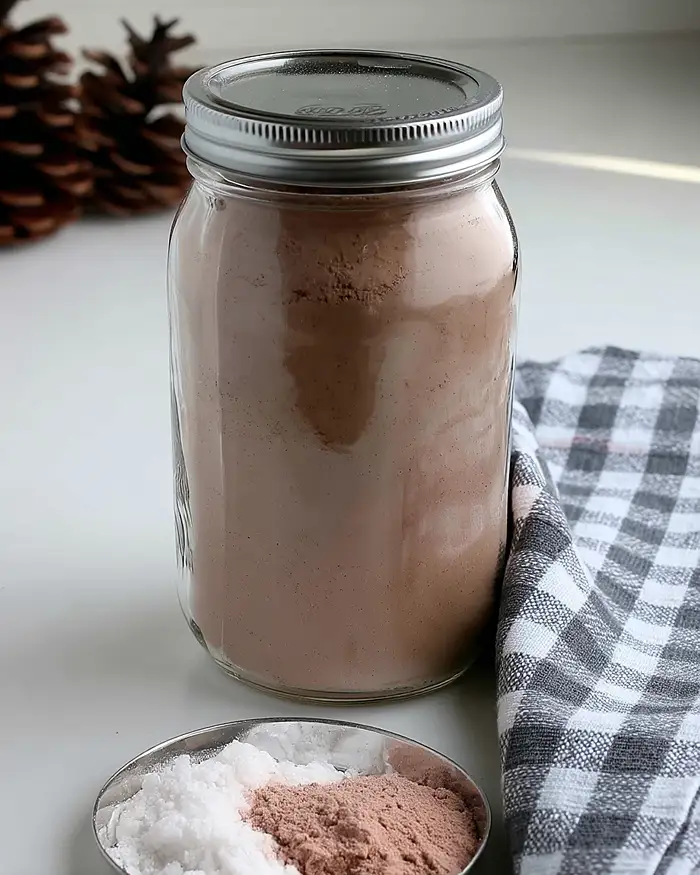
Step 4: Make your perfect cup
When you’re ready for cocoa time, scoop ⅓ cup of mix into a large mug. Heat 1 cup of milk (I prefer 2% for creaminess, but whole milk, oat milk, or almond milk all work) until it’s warm but not boiling — about 150°F if you’re fancy and have a thermometer, or just when it starts to steam.
Pour the warm milk over the mix and stir until everything’s dissolved and smooth. Top with whatever makes your heart happy — mini marshmallows, whipped cream, a drizzle of this decadent chocolate, crushed candy canes, chocolate shavings, or just drink it pure. Your mug, your rules.
Claire’s Pro Tips & Gentle Guidance
This hot cocoa mix recipe is pretty foolproof, but I’ve learned a few tricks over the years that’ll take your cocoa game from good to “why-did-I-ever-buy-packets” level.
Sift twice if you’re feeling fancy. I sometimes sift my ingredients together twice — once separately, then again after combining — if I really want that ultra-smooth professional texture. It’s not necessary, but it’s a nice touch if you’re making this as a gift or just want to feel extra accomplished.
Adjust the sweetness to match your vibe. If you like your hot chocolate less sweet (like me), dial back the powdered sugar to 1½ cups. If you’ve got a serious sweet tooth or you’re making this for kids, keep it as is or even add an extra ¼ cup of powdered sugar. Taste-test your first cup and tweak the next batch if needed.
Don’t skip the instant milk powder. I’ve had people ask if they can leave this out and just use all milk when making their cup — technically yes, but the mix won’t store as well and you lose that creamy, rich body that makes this hot cocoa so satisfying. The instant milk is what gives you that thick, luxurious texture.
Use quality cocoa powder for maximum chocolate bliss. According to Serious Eats in their comprehensive cocoa powder guide , Dutch-process cocoa gives you a smoother, less acidic flavor while natural cocoa is more intense and fruity.
I usually go with Dutch-process for this mix because it’s mellow and kid-friendly, but natural cocoa works beautifully too if you love bold chocolate flavor.
Make it a gift-giving superstar. This mix looks absolutely adorable layered in a clear jar with a ribbon and a little tag with mixing instructions. I make giant batches during the holidays and give them to teachers, neighbors, and anyone who needs more cozy in their life. Pair it with some vanilla overnight oats for a complete breakfast gift basket.
Quick Fixes for Homemade Hot Cocoa Mix
Problem: Your hot cocoa is clumpy or won’t dissolve smoothly.
This usually means you didn’t sift your ingredients well enough before mixing, or you’re adding the mix to cold milk.
Always sift your dry ingredients to break up clumps, and make sure your milk is nice and warm (not boiling, just steamy) before stirring in the mix. Whisk vigorously for about 30 seconds and those clumps should disappear.
Problem: Your hot chocolate tastes too sweet or too bitter.
If it’s too sweet, reduce the powdered sugar to 1½ cups next time or use less mix per cup (try ¼ cup instead of ⅓ cup). If it’s too bitter, you need more sugar — add another ¼ cup of powdered sugar to your mix, or just stir in a little honey or maple syrup directly into your mug.
Problem: Your mix separated or hardened in storage.
This happens when moisture sneaks into your container — make sure you’re using an airtight jar and storing it in a cool, dry spot away from the stove or dishwasher steam. If your mix has hardened, break it up with a fork, re-sift it if needed, and transfer to a fresh, completely dry container.
Problem: Your hot cocoa tastes chalky or powdery.
You’re probably not dissolving the mix completely. Make sure your milk is hot enough (at least 140°F), and whisk or stir really well for at least 30 seconds. Also double-check that you sifted everything — unsifted cocoa powder and milk powder can leave a gritty texture no matter how much you stir.
Variations & Fun Twists
This homemade hot cocoa mix is incredibly versatile, and once you’ve nailed the basic recipe, you can spin it about a hundred different delicious directions.
Mexican Hot Chocolate Mix: Add 2 teaspoons ground cinnamon and ¼ teaspoon cayenne pepper to the base mix for a warm, spicy twist. When you make your cup, top it with whipped cream and an extra pinch of cinnamon.
Mint Chocolate Cocoa: Crush 6–8 peppermint candies or candy canes into a fine powder and mix them into your batch. Or keep the base mix plain and just add a drop of peppermint extract to your mug when serving.
Vanilla Dream Hot Cocoa: Add 2 tablespoons vanilla powder (or 1 tablespoon vanilla bean powder if you’re feeling fancy) to the mix. This gives you a sweeter, creamier flavor that’s absolutely divine with marshmallows.
Dairy-Free Version: Swap the instant dry milk for instant coconut milk powder or powdered oat milk creamer. When serving, use your favorite non-dairy milk — oat milk and coconut milk both create gorgeously creamy hot chocolate.
Salted Caramel Hot Cocoa: Mix in ½ teaspoon fine sea salt and 2 tablespoons caramel powder (or finely crushed caramel candies) to the base. Serve with whipped cream, a drizzle of caramel sauce, and a tiny sprinkle of flaky sea salt.
Mocha Version: Add ¼ cup instant coffee or espresso powder to your mix for a grown-up mocha situation. This is my go-to on mornings when I need chocolate and caffeine in one mug.
Serving, Storage & Reheating
This homemade hot chocolate mix is all about making your life easier, so here’s how to keep it fresh and delicious for months.
Serving suggestions: I love serving this with a full marshmallow situation — mini marshmallows, homemade marshmallows, or even toasted marshmallows if you’ve got a kitchen torch handy.
Whipped cream, chocolate shavings, crushed peppermint, a drizzle of caramel or chocolate sauce, or a cinnamon stick for stirring all make it feel extra special. Pair it with classic potato latkes for a cozy winter brunch or some low-carb protein pudding for a lighter treat.
Storage: Keep your mix in an airtight container or mason jar in a cool, dry pantry away from heat and moisture. Stored properly, it’ll stay fresh and clump-free for up to 3 months — though mine never lasts that long because I go through it way too fast.
Make sure the container is completely dry before adding your mix, and keep it away from the stove or anywhere steamy.
Reheating: If you make a cup and it cools down before you finish it (happens to the best of us when we get distracted), just pop it in the microwave for 30–45 seconds or reheat it gently on the stove. Give it a quick stir before drinking since the cocoa might settle at the bottom.
No-Waste Kitchen Magic
Turn leftovers into chocolate milk: If you’ve somehow got prepared hot cocoa left over (rare in my house), chill it in the fridge and drink it cold as chocolate milk the next day. It’s surprisingly good iced, especially in the summer.
Use extra mix in baking: Stir a few tablespoons of your hot cocoa mix into brownie batter, chocolate cake batter, or even pancake batter for an extra chocolate boost. You can also dust it over the top of tiramisu or fold it into whipped cream for a chocolate mousse situation.
Make hot cocoa bombs: If you’re feeling crafty, you can pack your homemade mix into silicone molds with mini marshmallows, freeze them, and then coat them in melted chocolate to make those trendy hot cocoa bombs. Way cheaper than buying them, and you know exactly what’s inside.
Create a cocoa bar: Set out your big jar of mix alongside different milk options, toppings, and add-ins (cinnamon, vanilla extract, caramel sauce, marshmallows, whipped cream) and let everyone build their own perfect cup. It’s a hit at holiday gatherings or cozy movie nights.
Homemade Hot Cocoa Mix FAQs
Can I use regular milk powder instead of instant dry milk?
Yes, but instant dry milk dissolves better and faster, which is why I prefer it for this mix. Regular milk powder can work, but you might need to stir longer and more vigorously to get it fully dissolved. Just make sure you sift it really well to avoid clumps.
How do I know if I’ve added enough mix to my milk?
The standard ratio is ⅓ cup of mix to 1 cup of warm milk, which gives you a rich, creamy hot cocoa. If you like yours thicker and more chocolatey, use a little extra mix (up to ½ cup per cup of milk). If you prefer it lighter, use ¼ cup of mix instead. Taste and adjust to your preference!
Will this work with non-dairy milk like almond or oat milk?
Absolutely! This hot cocoa mix dissolves beautifully in any kind of milk — dairy, almond, oat, soy, coconut, cashew, you name it. Oat milk gives you the creamiest texture in my opinion, but almond milk works great if you want something lighter. Just make sure whatever milk you use is nice and warm before stirring in the mix.
Can I freeze this homemade hot chocolate mix?
You can, but there’s really no reason to since it stores perfectly at room temperature for up to 3 months. Freezing it could introduce moisture when you thaw it, which would cause clumping. Just keep it in your pantry in an airtight container and you’re all set.
This recipe is just the start of something delicious. Browse the entire Classic Comfort Foods collection and discover all the ways you can bring more flavor to your table. Your family will thank you.
Cozy Closing
So there you have it — the easiest, coziest, most delicious homemade hot cocoa mix you’ll ever make! I’d love to see your spin on this hot cocoa mix recipe! Drop a comment below with your favorite toppings or flavor twists — I’d love to see how you made it your own.
This homemade hot chocolate mix is so versatile; I bet you’ve got amazing variations already in mind!
Seriously, once you try this, you’ll never go back to store-bought packets. Keep a jar on your counter all winter long and thank yourself later.
I’m Claire Whitmore — a dessert daydreamer from Asheville, NC. For me, baking isn’t about perfect pastries — it’s about the joy of sharing something sweet (and maybe sneaking an extra marshmallow when no one’s looking).