Kool-Aid Grapes
Kool-Aid Grapes — the frozen, candy-coated snack that tastes like summer in a bite — are officially your new favorite no-bake treat.
Make Kool-Aid Grapes with just 2 ingredients — green grapes and Kool-Aid powder! This easy frozen candy recipe is kid-friendly, endlessly customizable, and ready in minutes. No baking, no fuss, just pure fruity fun.
Kool-Aid Grapes are the easiest, most satisfying homemade candy recipe you’ll make this season — and honestly, they might just ruin store-bought candy for you forever. Hey there, I’m Claire Whitmore — a dessert daydreamer from Asheville, NC, where a good snack totally counts as emotional support.
This Kool-Aid Grapes recipe uses just two simple ingredients (3 lbs of green grapes and 6 oz of Kool-Aid mix), takes about 10 minutes of active prep, and delivers an explosion of bold, tangy, candy-like flavor with every single bite.
Table of Contents
Little Snapshot: What This Recipe Delivers
Kool-Aid Grapes are frozen green grapes coated in bold, tangy Kool-Aid powder — a two-ingredient, no-bake frozen candy snack that takes just 10 minutes of prep and 24–25 hours of freezer time.
They’re kid-friendly, completely customizable with any Kool-Aid flavor, and serve 12 people easily. Think of them as nature’s candy with a sour, punchy upgrade — the ultimate homemade candy recipe for parties, snack time, or beating the heat.
Why You’ll Love This Recipe 🌸
- These Kool-Aid Grapes come together with just 2 ingredients and zero cooking — it’s basically the most low-effort snack win of the year.
- They’re totally kid-approved AND adult-approved (we see you sneaking a handful) — a perfect, fuss-free treat for busy moms who want something fun without a four-hour kitchen session.
- You can mix and match any Kool-Aid flavors to create a rainbow of frozen candy grapes — hello, party spread goals on an absolute budget.
- According to Healthline’s guide to the health benefits of grapes, grapes are packed with antioxidants, vitamins C and K, and potassium — and this recipe proves exactly why snacking on them is always a good idea.
Quick Facts ⚡
Here’s the quick scoop on this Kool-Aid Grapes recipe.
- CourseSnack / Dessert
- Prep Time10 minutes
- Freeze Time25 hours (1 hour initial + 24 hours final)
- Total Time~25 hours 10 minutes
- Servings12 servings
- DifficultyEasy
Nutritional Peek
Here’s a rough nutritional breakdown per serving (based on 12 servings from 3 lbs green grapes + Kool-Aid coating). Keep in mind values will shift slightly depending on the Kool-Aid flavor you choose!
| Nutrient | Amount Per Serving |
|---|---|
| Calories | ~75 kcal |
| Carbohydrates | ~19 g |
| Sugars | ~16 g |
| Protein | ~0.7 g |
| Fat | ~0.2 g |
| Fiber | ~0.9 g |
| Vitamin C | ~5% DV |
| Potassium | ~185 mg |
These are estimates and will vary based on exact grape weight and Kool-Aid flavor used.
Kool-Aid Grapes Ingredients
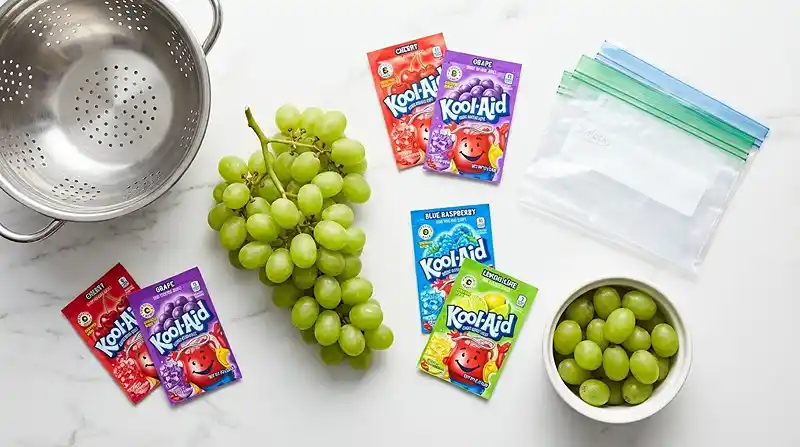
Ready to make this outrageously fun grape recipe? You’ll be thrilled to know the ingredient list is shockingly short.
For the base, you’ve got your fruit — 3 lbs of fresh, plump green grapes (seedless, please — nobody has time for seeds). For the coating, you’ll use 6 oz of Kool-Aid mix — and this is where the fun kicks in, because you can mix multiple flavors across different bags. The more flavors, the more colorful your frozen spread!
| Amount | Ingredient |
|---|---|
| 3 lbs | Green grapes, seedless and fresh (the plumper the better!) |
| 6 oz | Kool-Aid drink mix powder — any flavor(s) you love (cherry, tropical punch, and lemonade are chef’s kiss) |
Tip: If you’re doing multiple flavors, divide the 6 oz total across however many Kool-Aid packets you’re using. Each standard packet is 0.13–0.23 oz, so grab a few varieties!
Tools You’ll Actually Use
- Ziplock bags (one per Kool-Aid flavor)
- A colander for rinsing
- A baking sheet (at least one, but two is handy for multiple flavors)
- Parchment paper
- A freezer with some real estate to spare
- Optional: small bowls for portioning out the Kool-Aid
Step-by-Step Instructions
Making Kool-Aid Grapes is genuinely one of the most satisfying kitchen projects out there — it’s part snack, part science experiment, and 100% delicious. Here’s exactly how to do it:
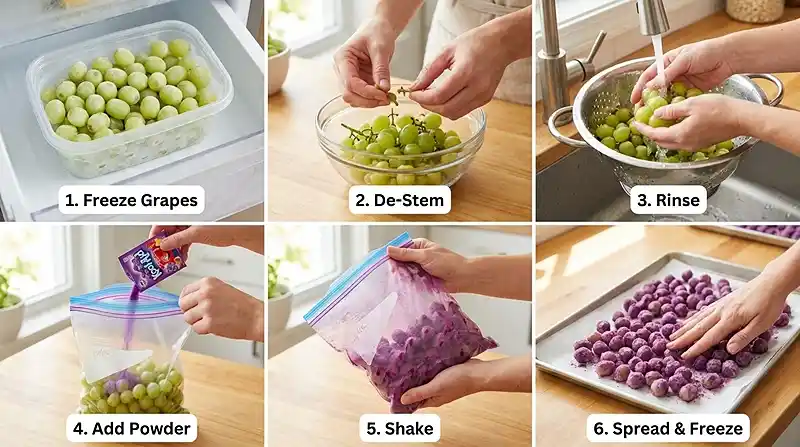
Step 1: Give your grapes a first freeze.
Place your 3 lbs of green seedless grapes in a single layer on a baking sheet or toss them loosely into a freezer-safe container. Pop them in the freezer for at least one hour. This first freeze is the secret move — it firms up the grapes and makes the next step so much easier. They should feel firm to the touch but not completely solid through.
Step 2: Twist off the stems while the grapes are still frozen.
Once your grapes have chilled for an hour, pull them out and quickly twist off the stems while they’re still cold and firm. Frozen stems snap right off cleanly — no wrestling, no mess. This saves you so much time compared to trying to de-stem at room temperature!
Step 3: Rinse the grapes in a colander.
Place your de-stemmed grapes in a colander and give them a good rinse under cool running water. This not only cleans the grapes but also adds just enough surface moisture to help the Kool-Aid powder stick beautifully. Shake off the excess water — you want them damp, not dripping.
Step 4: Divide the grapes into separate ziplock bags by flavor.
Split your damp grapes evenly into separate ziplock bags — one bag per Kool-Aid flavor you’re using. This is where the whole “build-your-own flavor bar” magic happens. Want all one flavor? One big bag works perfectly!
Step 5: Add Kool-Aid powder to each bag, seal, and shake to coat.
Pour your desired amount of Kool-Aid powder into each bag — roughly 1–2 tablespoons per bag, depending on how bold you want the flavor.
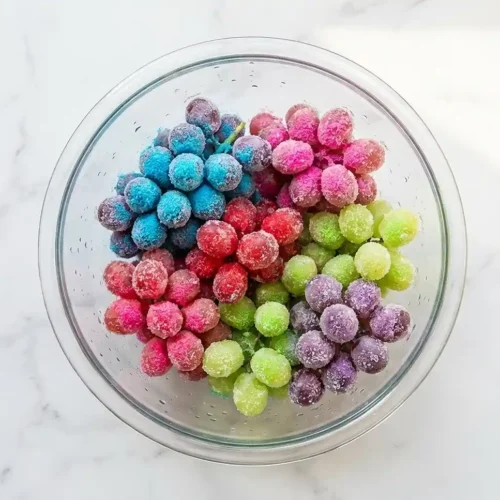
Seal the bags tightly, then shake vigorously until every single grape is coated in that gorgeous, jewel-bright powder. Open the bag and peek — they should look vibrantly colorful and fully covered.
Step 6: Spread the coated grapes on a parchment-lined baking sheet.
Line one or more baking sheets with parchment paper and spread your Kool-Aid-coated grapes out in a single layer with a little space between each one.
This ensures they freeze individually instead of clumping together into one big sugary mass. (Speaking from experience here — a frozen grape cluster is cute, but individual pops are way more snackable.)
Step 7: Freeze for 24 hours and enjoy!
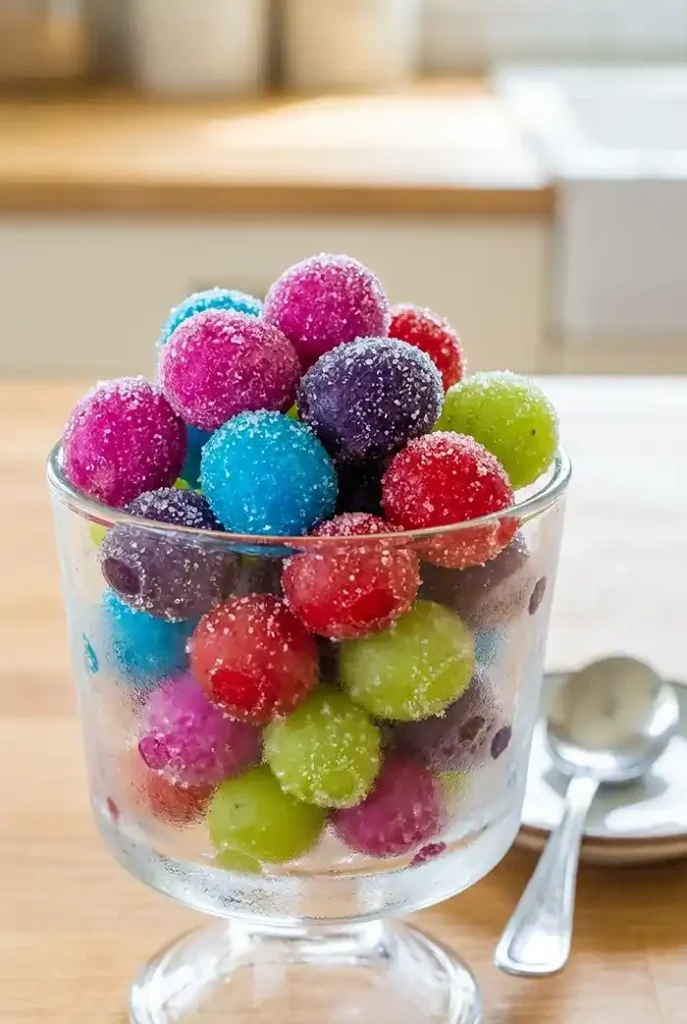
Slide your baking sheets into the freezer and let the grapes freeze for a full 24 hours. When you pull them out, they’ll be completely firm, intensely flavored, and coated in that gorgeous powdery candy shell. Pop one in your mouth and enjoy the satisfying crunch followed by a cold, juicy, tangy burst — honestly, it’s so good.
Claire’s Pro Tips & Gentle Guidance
When it comes to nailing your candy recipes homemade game, a few small details make a big difference — and I learned most of these the hard way so you don’t have to.
The biggest game-changer I’ve found is making sure the grapes are still slightly damp when they go into the Kool-Aid bag. Too dry, and the powder just falls off. Too wet, and you get a sticky, clumpy mess instead of that clean, powdery coating. Damp-not-dripping is your golden zone.
On grape size: Go for medium-to-large green grapes if you can find them. Smaller grapes mean more grapes per bite — which sounds great until you realize the coating-to-fruit ratio is off. Bigger grapes give you that satisfying chew with a bolder flavor punch on the outside.
On Kool-Aid flavor combos: Don’t sleep on mixing flavors! I love doing half cherry and half lemonade — the combo tastes like a cherry limeade popsicle and I’m absolutely obsessed. Blue raspberry with grape is another fan favorite in my house.
On Kool-Aid quantity: If you want a super intense candy coating, don’t be shy — add an extra tablespoon of Kool-Aid powder to your bag. The more powder, the more that tangy, sour, candy-like flavor comes through. If you want something milder (great for younger kiddos), use a lighter hand.
On unsweetened vs. sweetened Kool-Aid: You can use either! Unsweetened Kool-Aid keeps things more tart and vibrant. Pre-sweetened packets will give you a slightly sweeter, mellower coating. Both are delicious — it really just depends on your crew’s preferences.
According to Allrecipes’ roundup of easy 5-ingredient frozen treats, the best frozen snacks rely on simple techniques and bold flavors rather than complicated steps — and these Kool-Aid Grapes are basically a masterclass in exactly that philosophy.
Quick Fixes for Kool-Aid Grapes
Even the simplest recipes have their little quirks. Here are the most common hiccups and exactly how to fix them:
Problem: The Kool-Aid powder isn’t sticking to the grapes.
This usually means your grapes were too dry when they went into the bag. Simply give the grapes a quick rinse in the colander, shake off the excess water, and try again — the light moisture is what makes the powder cling.
Problem: The grapes are clumping together after freezing.
You probably had them too close together on the baking sheet, or some were touching when they went in. Next time, space them out a little more on the parchment paper. If they’re already frozen in a clump, just give the baking sheet a gentle tap on the counter to separate them.
Problem: The coating is uneven — some grapes have lots of powder, others have almost none.
This is a shaking issue! Make sure your ziplock bag is fully sealed and give it a much more vigorous shake — really go for it, like you’re trying to win something. You can also open the bag mid-shake and give the grapes a quick stir with your hand before sealing and shaking again.
Problem: The grapes taste more icy than candy-like after freezing.
If your grapes taste more “frozen water balloon” than “candy,” it likely means they weren’t coated thoroughly enough, or you used very watered-down grapes. Try adding an extra sprinkle of Kool-Aid powder right before the second freeze — just toss them lightly in a bowl with a bit more powder.
Problem: My Kool-Aid colors are fading after 24+ hours in the freezer.
This is totally normal with longer storage. The color concentrates right on the surface, and over time it can dull a little. They’ll still taste amazing! If presentation matters (hello, party platter), make them within 24–48 hours of serving for peak visual wow factor.
This is just one of the many gems in our Classic Comfort Foods series. Every recipe there has been tested and loved in real kitchens, and I promise there’s something for every craving. Go see for yourself.
Variations & Fun Twists
One of the best things about this Kool-Aid Grapes recipe is how wildly customizable it is — here are some of my favorite ways to mix things up:
Multi-flavor rainbow spread: Use 4–5 different Kool-Aid flavors and arrange the frozen grapes by color on a big platter. It’s stunning for parties and takes zero extra effort.
Spicy-sweet twist: Add a pinch of chili powder or Tajín alongside the Kool-Aid powder in the bag. The sweet-sour-spicy combo is addictive — very much a grown-up version of this snack.
Jell-O swap: You can swap Kool-Aid for Jell-O powder if that’s what you have on hand. It works beautifully and gives a slightly sweeter, creamier coating. Strawberry Jell-O on green grapes? Oh yes.
Sugar-free version: Use sugar-free Kool-Aid packets for a lower-sugar option that’s still absolutely delicious. Great for kiddos watching their sugar intake or anyone who wants all the fun with less sweetness.
Red grape version: While green grapes are the classic choice (their tartness plays so well with the Kool-Aid), red or black grapes work too — they just give a slightly sweeter base flavor. Try grape or cherry Kool-Aid on red grapes for an extra-fancy flavor match.
Pair it with other frozen treats: Serve your Kool-Aid Grapes alongside these blueberry swirl yogurt bites for a stunning frozen snack board that looks way more impressive than the effort involved.
Serving, Storage & Reheating
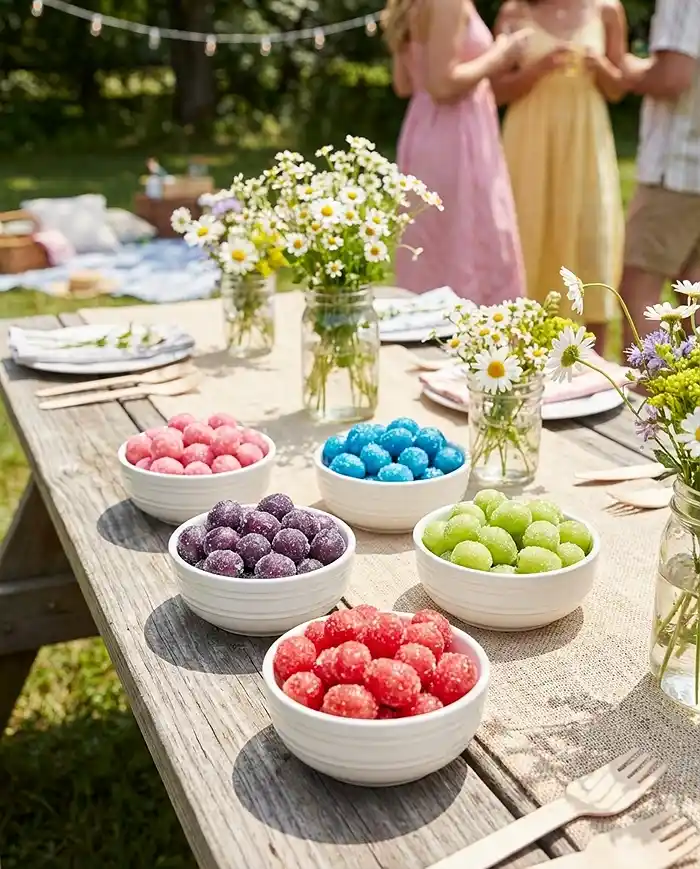
These grape recipes are all about that satisfying frozen crunch, so serving them straight from the freezer is the move. Pile them into small cups or bowls for individual servings, or spread them out on a platter for a share-worthy snack spread at parties.
They pair beautifully with other fun finger foods — like these easy baked churro bites for a snack table that genuinely disappears in minutes.
For storage, keep your Kool-Aid Grapes in an airtight freezer-safe container or a sealed ziplock bag in the freezer. They’ll stay fresh and delicious for up to 2 weeks, though the Kool-Aid coating is most vibrant and punchy within the first 48 hours. Label your container with the flavor(s) if you’re doing multiple — future-you will thank you.
No reheating needed here — this is a frozen treat all the way! If they’ve been in the freezer for more than a day and the coating has faded, you can give them a quick toss in a little more Kool-Aid powder before serving to refresh that bold color and flavor. Just 30 seconds of shaking and they’ll look party-ready again.
No-Waste Kitchen Magic
Even a recipe this simple can leave you with a little leftover goodness — here’s how to use every last bit:
Leftover Kool-Aid powder: Don’t toss that extra powder! Mix it into sparkling water for a homemade flavored drink, stir it into yogurt for a fruity swirl, or save it for the next batch of Kool-Aid Grapes. It keeps forever in a sealed container.
Grapes past their prime: If your grapes are getting a little soft and aren’t the best candidates for fresh-eating, they’re actually perfect for this recipe — the freezing process transforms their texture completely. No need to waste them.
Mixed flavor powder scraps: Got a tiny bit of cherry and a tiny bit of tropical punch left over? Mix them together for a mystery flavor batch — it’s honestly half the fun and usually tastes incredible.
Leftover frozen grapes (if that ever actually happens): Blend them straight from the freezer into a smoothie or grape sorbet-style slushie. Just toss them into the blender with a splash of juice — you’ll get something that tastes like a fancy frozen drink with zero extra effort.
Looking for more fun snack ideas to pair alongside these? These Louisiana voodoo fries are a wildly bold and fun contrast to bring to any gathering!
Kool-Aid Grapes FAQs
Can I use red grapes instead of green grapes for Kool-Aid Grapes?
Yes, you absolutely can! Red grapes work just as well — they’re just slightly sweeter and less tart than green grapes, which changes the overall flavor balance a little. Green grapes are the classic choice because their natural tartness pairs so perfectly with the bold, tangy Kool-Aid powder, but red grapes are delicious too, especially with sweeter flavor packets like grape or cherry.
What’s the best way to store Kool-Aid Grapes?
Store your Kool-Aid Grapes in an airtight, freezer-safe container or a sealed ziplock bag in the freezer. They stay fresh and tasty for up to two weeks, though the coating flavor and color is most vibrant within the first 48 hours of making them.
How do I know when Kool-Aid Grapes are ready to eat?
Your Kool-Aid Grapes are ready after a full 24 hours in the freezer following the Kool-Aid coating step. They should be completely solid all the way through — not just icy on the outside. Give one a press with your fingernail before pulling the whole batch; if it’s firm and doesn’t give, you’re good to go.
Why should I freeze the grapes before removing the stems?
Freezing the grapes for one hour first makes the stems incredibly easy to twist off cleanly — they basically just snap right off without any struggle. If you try to remove stems from room-temperature grapes, it’s messier and the grape flesh is more likely to tear, which affects both the appearance and the coating adhesion.
Will the Kool-Aid coating stay on after freezing?
Yes, as long as your grapes were damp (not dripping wet) when you shook them in the bag, the coating will stick beautifully through the freezing process. If some coating looks faded or sparse after 24 hours, just toss the grapes in a small bowl with a little extra Kool-Aid powder right before serving to refresh the coating instantly.
Cozy Closing
I’d love to see your spin on these Kool-Aid Grapes! Drop a comment below with your flavor combinations — I’d love to know if you discovered an unexpected winner. This Kool-Aid Grapes recipe is so endlessly customizable that I know you’ve already got some creative ideas brewing.
Whether you’re making them for a summer party, an after-school snack, or just because Tuesday called for something fun — these Kool-Aid Grapes deliver every single time. Share your photos, tag us, and let’s build the most colorful frozen snack gallery together.
I’m Claire Whitmore — a dessert daydreamer from Asheville, NC, where snack time is sacred and a two-ingredient recipe is cause for celebration. For me, food isn’t about perfection — it’s about the joy of making something fun, sharing it with people you love, and maybe licking the Kool-Aid powder off your fingers when no one’s looking.
Kool-Aid Grapes
Equipment
- Ziplock Bags
- Colander
- Baking sheet
- Parchment paper
- Freezer
- Small bowls (optional)
Ingredients
Main Ingredients
- 3 lbs Green grapes Seedless and fresh — the plumper the better!
- 6 oz Kool-Aid drink mix powder Any flavor(s) you love — cherry, tropical punch, and lemonade are a great choice. Divide across multiple flavors if desired.
Instructions
- Place your 3 lbs of green seedless grapes in a single layer on a baking sheet or loosely in a freezer-safe container. Pop them in the freezer for at least one hour. This first freeze firms up the grapes and makes stem removal much easier. They should feel firm to the touch but not completely solid all the way through.
- Once the grapes have chilled for one hour, pull them out and quickly twist off the stems while they’re still cold and firm. Frozen stems snap off cleanly with no mess or struggle — this step saves so much time compared to de-stemming at room temperature.
- Place your de-stemmed grapes in a colander and rinse them under cool running water. This cleans the grapes and adds just enough surface moisture to help the Kool-Aid powder stick beautifully. Shake off the excess water — you want them damp, not dripping.
- Split your damp grapes evenly into separate ziplock bags — one bag per Kool-Aid flavor you’re using. This is where the fun begins, because you can create multiple flavor varieties in one batch. Want all one flavor? One big bag works perfectly too!
- Pour your desired amount of Kool-Aid powder into each bag — roughly 1 to 2 tablespoons per bag depending on how bold you want the flavor. Seal the bags tightly, then shake vigorously until every grape is fully coated in that gorgeous, jewel-bright powder. Open the bag and check — they should look vibrantly colorful and evenly covered.
- Line one or more baking sheets with parchment paper and spread your Kool-Aid-coated grapes out in a single layer with a little space between each one. This ensures they freeze individually instead of clumping together into one big sugary mass.
- Slide your baking sheets into the freezer and let the grapes freeze for a full 24 hours. When you pull them out, they’ll be completely firm, intensely flavored, and coated in a gorgeous powdery candy shell. Pop one in your mouth and enjoy the satisfying crunch followed by a cold, juicy, tangy burst!