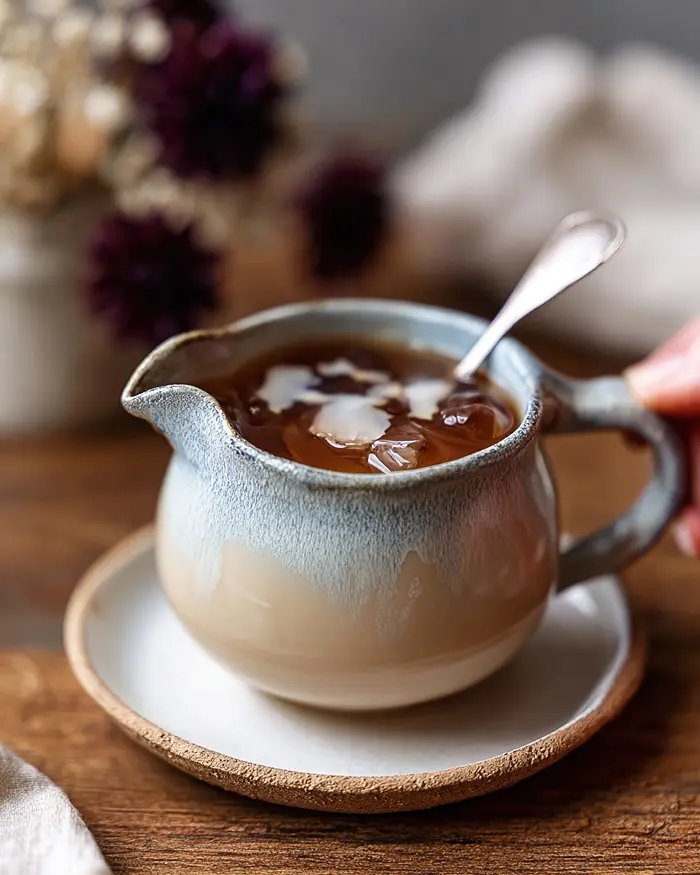
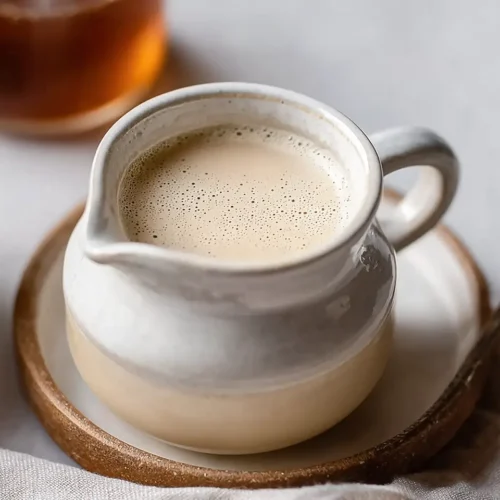
Easy Homemade Coffee Creamer
Learn how to make easy homemade coffee creamer with just 3 ingredients in 10 minutes. This natural coffee creamer recipe is customizable, fresher than store-bought, and perfect for busy mornings.
Hey there, I’m Claire Whitmore — a dessert daydreamer from Asheville, NC, where homemade coffee creamer is basically my love language. This Easy Homemade Coffee Creamer recipe is about to change your morning routine forever, and honestly, once you try it, those store-bought bottles won’t stand a chance.
We’re talking fresh half-and-half, real sugar, and vanilla bean paste that makes your kitchen smell like a cozy café — all coming together in under 10 minutes with just three simple ingredients that you probably already have tucked away in your fridge and pantry.
Making your own natural coffee creamer recipe means you know exactly what’s going into your cup — no mysterious stabilizers, no ingredients you can’t pronounce, just pure, creamy goodness that transforms regular coffee into something worth waking up for.
Plus, you can customize the sweetness level and flavor profile to match your exact preferences, whether you’re team “just a hint of sweet” or “basically dessert in a mug.”
Table of Contents
Little Snapshot: What This Recipe Delivers
This Easy Homemade Coffee Creamer comes together in about 10 minutes with half-and-half, sugar, and vanilla bean paste for a creamy, naturally sweet addition to your morning coffee.
It’s endlessly customizable, stores beautifully in the fridge, and tastes fresher and cleaner than anything you’ll find in the dairy aisle — plus you control exactly how sweet it is.
Why You’ll Love This Recipe 🌸
- This easy homemade coffee creamer takes less time than your coffee maker’s brew cycle — seriously, you’ll be done before your second cup is ready.
- You control the sweetness level, which means no more “is this creamer or liquid candy?” confusion — adjust it to match your exact taste preferences.
- It’s made with real ingredients you can actually pronounce, so you know exactly what’s going into your morning ritual (and your body will thank you for it).
- According to Serious Eats’ comprehensive coffee guide, the quality of what you add to your coffee matters just as much as the beans themselves — and this natural coffee creamer recipe proves exactly why.
Quick Facts ⚡
Here’s the quick scoop on this easy homemade coffee creamer.
- CourseBeverage / Condiment
- Prep Time2 minutes
- Cook Time5 minutes
- Total Time7 minutes
- Servings8 servings (2 tablespoons each)
- DifficultyEasy
Easy Homemade Coffee Creamer
Equipment
- Small saucepan
- Whisk
- Measuring cups and spoons
- Airtight container or glass jar
- Small funnel (optional)
Ingredients
- 1 cup half-and-half see notes for dairy-free swaps
- ¼ cup granulated sugar increase up to 1/2 cup for sweeter creamer
- 1/2-1 Tablespoon vanilla bean paste or flavoring of choice (vanilla extract, almond extract, or maple syrup)
Instructions
- In a small saucepan, whisk together 1 cup of half-and-half and 1/4 cup of granulated sugar (or up to 1/2 cup if you prefer a sweeter creamer), then warm the mixture over medium heat. Keep whisking occasionally to help the sugar dissolve evenly, and bring it to a slight simmer until you see just the first few bubbles forming at the edges and the sugar has completely dissolved into the cream—this usually takes about 3-5 minutes and you’ll know it’s ready when there’s no grittiness left when you run your whisk through it.
- Remove the saucepan from heat and whisk in 1/2 to 1 tablespoon of vanilla bean paste (or your flavoring of choice—vanilla extract, almond extract, or even a hint of maple syrup all work beautifully here). The warm cream will help the flavoring distribute evenly throughout, creating that perfectly balanced sweet-and-creamy situation your morning coffee has been missing.
- Let the homemade coffee flavoring cool slightly if you’re planning to add it to iced coffee, or use it immediately in your hot coffee if you can’t wait another second. Pour the cooled creamer into an airtight container or glass jar and store it in the fridge, making sure to note the best-by date on the half-and-half you used since that’s your storage timeline. Give it a good shake before adding it to your morning cup since natural ingredients can settle a bit.
Notes
Nutritional Peek
Here’s a quick look at what you’re getting per serving — because knowing what’s in your cup can feel pretty empowering, even if you’re just here for the delicious creamy goodness.
| Nutrient | Amount per Serving (2 Tbsp) |
|---|---|
| Calories | 45-55 |
| Protein | 1g |
| Carbohydrates | 6-8g |
| Total Fat | 2g |
| Saturated Fat | 1.5g |
| Fiber | 0g |
| Sugar | 6-8g |
Note: Nutritional values vary based on sugar amount used (¼ to ½ cup range).
Easy Homemade Coffee Creamer Ingredients
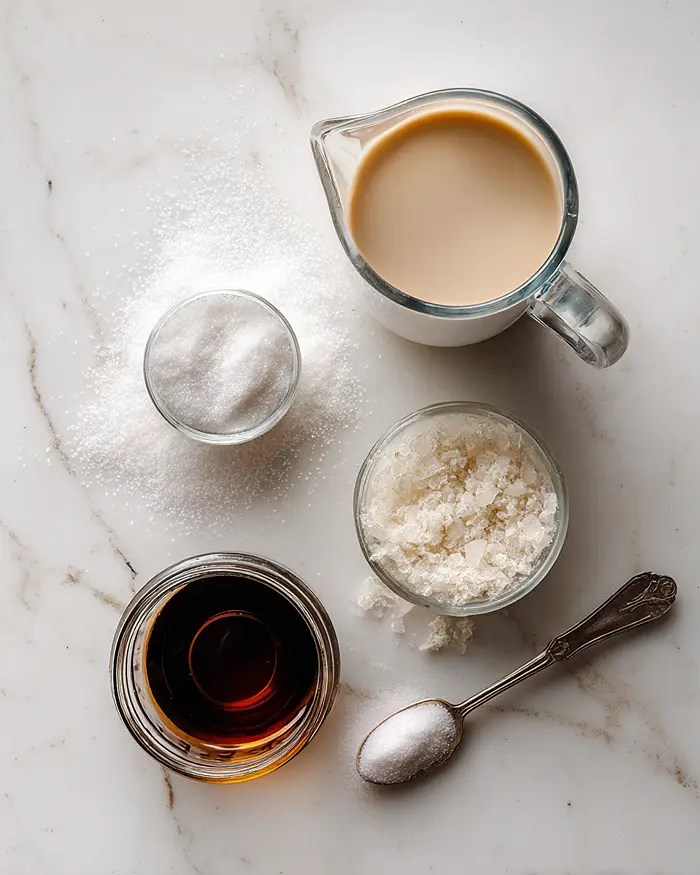
This natural coffee creamer recipe is ridiculously simple — we’re talking three ingredients that work together to create that perfect creamy, lightly sweet situation your morning coffee has been dreaming about.
For the dairy base, you’ll use half-and-half which gives you that luxurious creamy texture without being too heavy, while granulated sugar dissolves beautifully into the warm cream to create just the right amount of sweetness.
The vanilla bean paste (or your flavoring of choice) is where the magic happens — it adds depth and that cozy bakery vibe that makes this homemade version so much better than store-bought.
| Amount | Ingredient |
|---|---|
| 1 cup | Half-and-half (see notes for dairy-free swaps) |
| ¼ cup | Granulated sugar (increase up to ½ cup if you like it sweeter — no judgment here!) |
| ½-1 Tablespoon | Vanilla bean paste, or flavoring of choice (vanilla extract, almond extract, or even a splash of maple syrup work beautifully) |
Tools You’ll Actually Use
- Small saucepan
- Whisk
- Measuring cups and spoons
- Airtight container or glass jar for storage (I love using a mason jar with a pour spout)
- Optional: small funnel for easier pouring into your storage container
Step-by-Step Instructions
Making this easy homemade coffee creamer is honestly one of the most satisfying kitchen projects you’ll tackle all week — it’s quick, foolproof, and the results are so much better than anything you’ll find at the store.
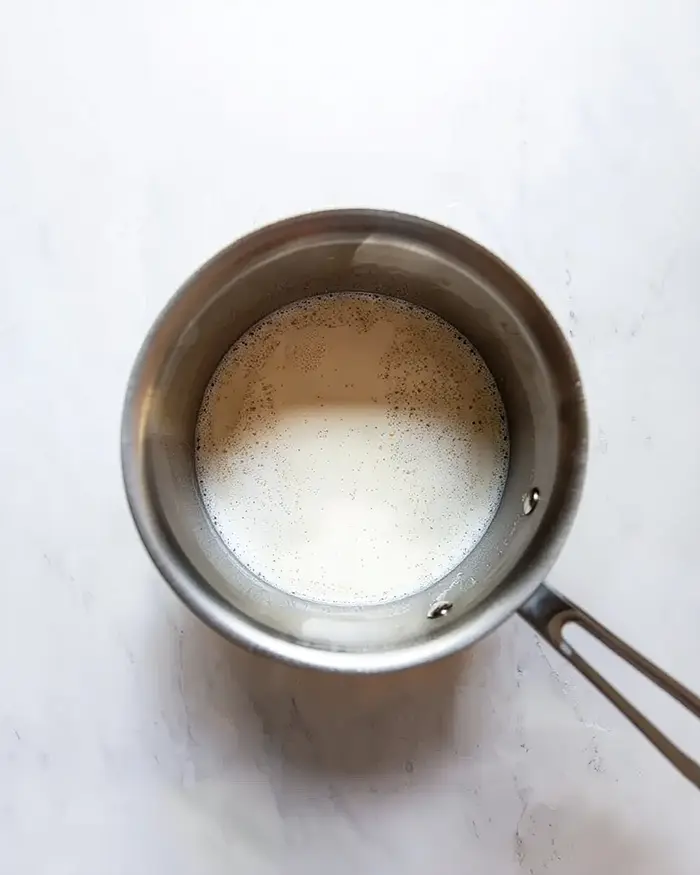
Step 1: Warm and dissolve. In a small saucepan, whisk together 1 cup of half-and-half and ¼ cup of granulated sugar (or up to ½ cup if you prefer a sweeter creamer), then warm the mixture over medium heat.
Keep whisking occasionally to help the sugar dissolve evenly, and bring it to a slight simmer until you see just the first few bubbles forming at the edges and the sugar has completely dissolved into the cream — this usually takes about 3-5 minutes and you’ll know it’s ready when there’s no grittiness left when you run your whisk through it.
Step 2: Add the flavor magic. Remove the saucepan from heat and whisk in ½ to 1 tablespoon of vanilla bean paste (or your flavoring of choice — vanilla extract, almond extract, or even a hint of maple syrup all work beautifully here).
The warm cream will help the flavoring distribute evenly throughout, creating that perfectly balanced sweet-and-creamy situation your morning coffee has been missing.
Step 3: Cool and store. Let the homemade coffee flavoring cool slightly if you’re planning to add it to iced coffee (nobody wants melted ice cubes, right?), or use it immediately in your hot coffee if you can’t wait another second.
Pour the cooled creamer into an airtight container or glass jar and store it in the fridge, making sure to note the best-by date on the half-and-half you used since that’s your storage timeline. Give it a good shake before adding it to your morning cup since natural ingredients can settle a bit — totally normal and actually a sign you made the real deal!
Claire’s Pro Tips & Gentle Guidance
These little tricks have saved me from coffee creamer mishaps more times than I can count, and they’ll help you nail this how to make sweet cream coffee creamer situation on your first try.
Start with less sugar and taste as you go. I always recommend beginning with ¼ cup of sugar, then tasting once it’s dissolved — you can always add more sweetness, but you can’t take it away.
Different coffee roasts and brewing methods have varying levels of bitterness, so what tastes perfect in a light roast might be too sweet in a dark French roast.
Don’t let it boil. You want a gentle simmer with just a few bubbles forming, not a full rolling boil that could cause the cream to separate or develop a slightly cooked flavor.
Keep your heat at medium and watch it closely — according to King Arthur Baking’s detailed tempering guide , gentle heat is always your friend when working with dairy products.
Experiment with flavor combinations. Once you’ve mastered the basic vanilla version, this becomes your playground — try adding a pinch of cinnamon and nutmeg for a cozy fall vibe, a splash of hazelnut extract for that coffeehouse feel, or even a tablespoon of cocoa powder for a mocha creamer that’ll make your morning feel like a special treat.
Use the freshest half-and-half you can find. Since this homemade coffee creamer has no preservatives or stabilizers, your storage time depends entirely on how fresh your dairy was to begin with. Check that expiration date before you start and plan to use your creamer within that timeframe — though honestly, it’s so good it rarely lasts that long in my house anyway.
Quick Fixes for Easy Homemade Coffee Creamer
Problem: Creamer tastes too sweet. Next time, start with just 2-3 tablespoons of sugar and work your way up, tasting as you go until you hit your perfect sweetness level — everyone’s taste buds are different, and that’s totally okay!
Problem: Sugar isn’t dissolving completely. Make sure you’re whisking regularly while the mixture heats up, and let it simmer for the full few minutes until you see those first bubbles — the warmth is what helps the sugar dissolve smoothly into the cream. If you’re still seeing grainy bits, your heat might be too low or you may need to whisk more vigorously.
Problem: Creamer separates in hot coffee. This usually happens if the creamer is too cold straight from the fridge and hits very hot coffee — let it sit at room temperature for a few minutes before adding, or add it slowly while stirring your coffee. Sometimes a quick shake of the container before pouring helps too since natural separation can occur during storage.
Problem: Flavor is too weak or too strong. Vanilla bean paste is more concentrated than extract, so if you’re using extract, you might need to increase the amount to 1-2 tablespoons for the same flavor impact. Start with the lower end of the range and add more to taste — you’re the boss of your creamer, after all!
Variations & Fun Twists
This easy homemade coffee creamer is your blank canvas for creating customized coffee shop vibes right in your own kitchen — and trust me, once you start experimenting, you’ll wonder why you ever bought the bottled stuff.
Seasonal spice creamer: Add ½ teaspoon of cinnamon, ¼ teaspoon of nutmeg, and a tiny pinch of ground cloves to create a cozy fall-inspired version that tastes like everything good about autumn mornings. This one’s perfect for pumpkin spice season without any of the artificial flavoring.
Chocolate hazelnut dream: Whisk in 2 tablespoons of cocoa powder along with ½ teaspoon of hazelnut extract for a homemade version of that expensive chocolate hazelnut creamer everyone loves. You might want to increase the sugar slightly since cocoa can add a bit of bitterness.
Dairy-free swap: Replace the half-and-half with full-fat coconut milk or oat milk for a dairy-free natural coffee creamer recipe that’s still incredibly creamy and delicious. Coconut milk adds a subtle tropical note, while oat milk keeps things neutral and mild.
Maple vanilla variation: Swap out half the granulated sugar for pure maple syrup and reduce the vanilla to ½ tablespoon — you’ll get this gorgeous maple-forward flavor that pairs beautifully with darker coffee roasts. Add it after you remove the pan from heat so the maple’s delicate flavor doesn’t cook off.
Serving, Storage & Reheating
Use about 2 tablespoons of this homemade coffee flavoring per cup of coffee, though you can absolutely adjust based on how creamy you like your morning brew. It’s delicious in both hot and iced coffee, and it even makes a fantastic addition to chai tea or hot chocolate when you’re feeling fancy.
Store your easy homemade coffee creamer in an airtight container or glass jar in the refrigerator, and make sure to use it within the timeframe of your half-and-half’s expiration date since there are no preservatives to extend its life.
I like to write the date on the jar with a piece of masking tape so I don’t have to remember — because let’s be real, mornings are hard enough without math.
Give the container a good shake before each use since natural separation can happen when there aren’t any stabilizers or emulsifiers — it’s totally normal and doesn’t mean anything’s wrong.
If your creamer has been sitting in the fridge and seems a bit thick, just let it come to room temperature for a few minutes or give it a vigorous shake to get it flowing smoothly again.
No-Waste Kitchen Magic
If you’ve got leftover creamer that’s approaching its expiration date (though honestly, that rarely happens in my house), freeze it in ice cube trays to add to iced coffee later — you get creamy coffee without any dilution, and nothing goes to waste. Each cube is roughly 2 tablespoons, so it’s perfectly portioned for your morning cup.
Use any extra creamer to make incredibly decadent hot chocolate by warming it with chocolate chips or cocoa powder, or drizzle it over fresh berries and granola for a quick breakfast that feels like dessert.
You can even whisk it into scrambled eggs for the fluffiest, creamiest eggs you’ve ever tasted — the dairy and sugar add this subtle richness that’s absolutely gorgeous.
If you made a flavored version like the cinnamon spice one, repurpose it as a sauce for these dipped heart brownies or drizzle it over fudgy red velvet brownies for an extra layer of flavor. It also makes an amazing base for bread pudding or French toast custard since it’s already sweetened and flavored.
Easy Homemade Coffee Creamer FAQs
Can I freeze this easy homemade coffee creamer for longer storage?
Yes, you can absolutely freeze it in ice cube trays or small containers for up to 3 months! Thaw overnight in the fridge before using, and give it a good shake since some separation might occur during freezing and thawing.
How do I know when my natural coffee creamer recipe has gone bad?
Trust your senses — if it smells off, looks curdled, or tastes sour, it’s time to toss it and make a fresh batch. Fresh creamer should smell sweet and vanilla-forward with no funky dairy smell, and it should pour smoothly without any chunky bits.
Is it cheaper to make homemade coffee creamer than buying it?
Yes, significantly cheaper — store-bought flavored creamers can cost $3-5 for a small bottle, while this recipe costs about $2 total and tastes fresher and cleaner. Plus, you’re not paying for water, thickeners, and preservatives that bulk up commercial versions.
What should I do if my coffee creamer is too thick?
Thin it out with a tablespoon or two of regular milk or additional half-and-half until it reaches your preferred consistency. If it thickened in the fridge (which can happen with natural ingredients), just let it sit at room temperature for a few minutes and give it a good shake.
Cozy Closing
I’d love to see your spin on this easy homemade coffee creamer! Drop a comment below with your favorite flavor combinations — I’m always looking for new variations to try, and I bet you’ve got some creative ideas brewing.
This natural coffee creamer recipe is so versatile that once you master the basic version, you’ll probably never go back to store-bought again.
Whether you’re making the classic vanilla version or experimenting with seasonal spices and different extracts, there’s something pretty magical about knowing exactly what’s going into your morning cup. It’s one of those small kitchen wins that makes your whole day feel a little more special, you know?
I’m Claire Whitmore — a dessert daydreamer from Asheville, NC. For me, baking isn’t about perfect pastries — it’s about the joy of sharing something sweet (and maybe sneaking an extra scoop of icing).
When I’m not in the kitchen, you’ll find me savoring a perfectly creamy cup of coffee made with homemade creamer, because life’s too short for anything less than delicious.