Heart Pink Cake with Pink Bow
This heart pink cake with pink bow is a stunning Valentine’s dessert featuring soft layers, vanilla buttercream, and vintage piping details. Perfect for romantic celebrations!
Hey there, I’m Claire Whitmore — a pastry whisperer in Asheville, NC, where butter totally counts as self-care. This heart pink cake with pink bow recipe is your ticket to creating a show-stopping Valentine’s centerpiece that looks bakery-perfect but is surprisingly manageable at home.
We’re talking soft cake layers carved into a romantic heart shape, draped in silky vanilla buttercream, and decorated with vintage shell borders, delicate ruffles, and the sweetest “I love you” message on top.
This pink heart cake brings together everything I love about romantic baking — it’s got that nostalgic, vintage vibe with the piped details, but the technique is totally doable even if you’ve never done fancy cake decorating before.
The secret is in the medium-consistency buttercream and taking your time with each piping step. Plus, you can customize the pink shades to match your vibe, whether you’re going soft blush or bold fuchsia.
Table of Contents
Little Snapshot: What This Recipe Delivers
This heart shaped pink cake with bow decoration features two 8-inch round layers expertly carved into a romantic heart shape, covered in dreamy vanilla buttercream with vintage shell borders, delicate ruffles, and optional hand-piped love messages.
Total time is about 2-3 hours including chilling, and while the piping looks intricate, the medium-difficulty techniques are beginner-friendly with a little patience and practice.
Why You’ll Love This Recipe 🌸
- This heart pink cake with pink bow looks like you hired a professional baker, but the heart-shaping trick takes literally two diagonal cuts per layer.
- The vintage piping style is super forgiving — if your ruffles aren’t perfect, they still look romantically rustic and charming.
- You can make this ahead and assemble the day before your Valentine’s celebration, which means less stress and more time for actual romance.
- According to King Arthur Baking’s beginner cake decorating guide, mastering just a few basic piping tips opens up endless design possibilities — and this recipe proves exactly why.
Quick Facts ⚡
Here’s the quick scoop on this heart pink cake with pink bow.
- CourseDessert
- Prep Time45 minutes
- Chill Time50 minutes
- Total Time2-3 hours
- Servings10-12 servings
- DifficultyMedium
Nutritional Peek
Here’s a friendly nutritional snapshot per generous slice (because we’re all about balance and enjoying life’s sweet moments):
| Nutrient | Amount per Serving |
|---|---|
| Calories | 520 kcal |
| Protein | 4g |
| Carbohydrates | 68g |
| Fat | 27g |
| Fiber | 1g |
| Sugar | 55g |
Note: Nutritional values are approximate and will vary based on your specific cake recipe and buttercream ratio.
Ingredients
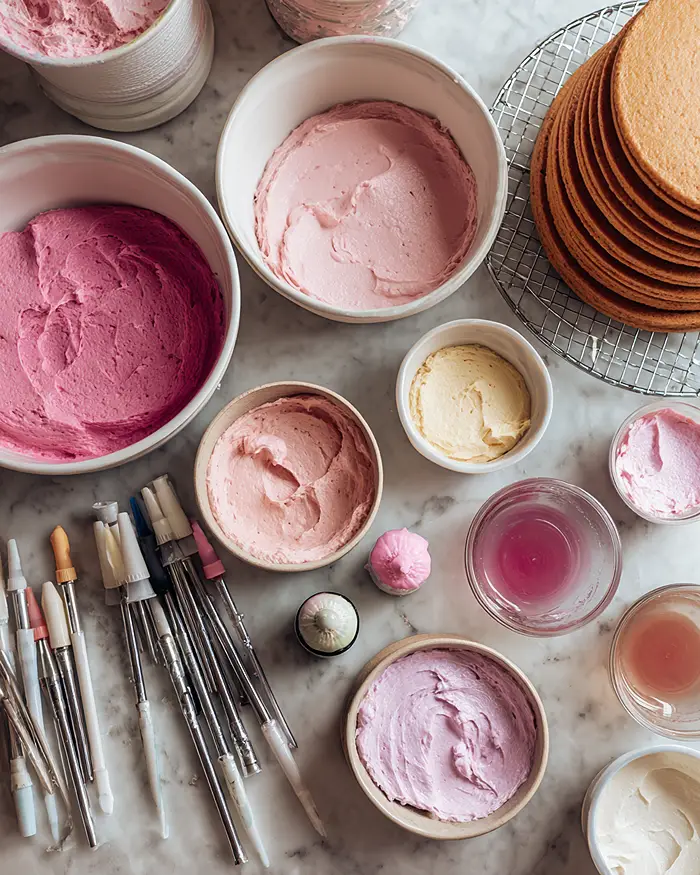
This pink cake with bow decoration starts with simple, quality ingredients that come together to create something truly special. For the cake base, you’ll use two 8-inch round layers — I’m a huge fan of a one-bowl chocolate cake for contrast, but vanilla or strawberry works beautifully too.
For the frosting and decoration, you’ll need a generous amount of vanilla buttercream (about 9 cups total, which equals 3 batches), food color gels in your favorite pink shades, and the right piping consistency to make those vintage details shine.
| Amount | Ingredient |
|---|---|
| 2 layers | 8-inch round cake layers (chocolate, vanilla, or strawberry — your choice!) |
| 9 cups | Vanilla buttercream (3 batches — yes, real butter, not margarine) |
| As needed | AmeriColor Deep Pink and Fuchsia food gel (or your preferred pink shades) |
| 1 | Cardboard cake base (for stability and easy serving) |
A little note on buttercream consistency: Medium consistency is absolutely essential here. Too stiff and your piping will look chunky; too soft and your details will melt away. You want buttercream that holds its shape when piped but still flows smoothly through your tips.
Tools You’ll Actually Use
Here’s what you’ll need to bring this beauty to life:
- Two 8-inch round cake pans
- Sharp serrated knife (for trimming)
- Offset spatula (angled makes frosting so much easier)
- Icing smoother or bench scraper
- Piping bags (disposable or reusable — your call)
- Piping tips: 4B (large shell), 102 (ruffle), 32 (small shell), and 3 (lettering)
- Cardboard cake base or cake board
- Turntable (not essential but makes your life way easier)
- Three small bowls (for dividing and coloring buttercream)
- Toothpicks (for gel color application)
Step-by-Step Instructions
Let’s make this stunning heart pink cake with pink bow together, one beautiful step at a time.
Step 1: Create Your Heart-Shaped Layers
Place your first 8-inch round cake layer on your work surface and make two diagonal cuts to remove the pointed top portions — you’re essentially cutting away two triangular sections from opposite sides to create that classic heart shape with the dip at the top.
Save those trimmed pieces as templates for your second layer so both hearts match perfectly. This little trick saves you from eyeballing it twice and ending up with mismatched layers that won’t stack properly.
Step 2: Assemble & Apply the Crumb Coat
Spread a small dollop of buttercream on your cardboard base to act as glue, then place your first heart-shaped cake layer down.
Position the curved trimmed pieces at the top of the heart to form that beautiful rounded top. Pipe buttercream “glue” along the edges where the pieces meet to secure everything together — this keeps your heart shape stable during decorating.
Add about ¼ inch of buttercream filling across the entire first layer, then place your second heart layer on top with its curved pieces already attached. Apply a thin crumb coat over the entire cake to lock in those crumbs and emphasize the heart shape, then chill for at least 30 minutes until the frosting feels firm to the touch.
Step 3: Frost Your Cake Smooth
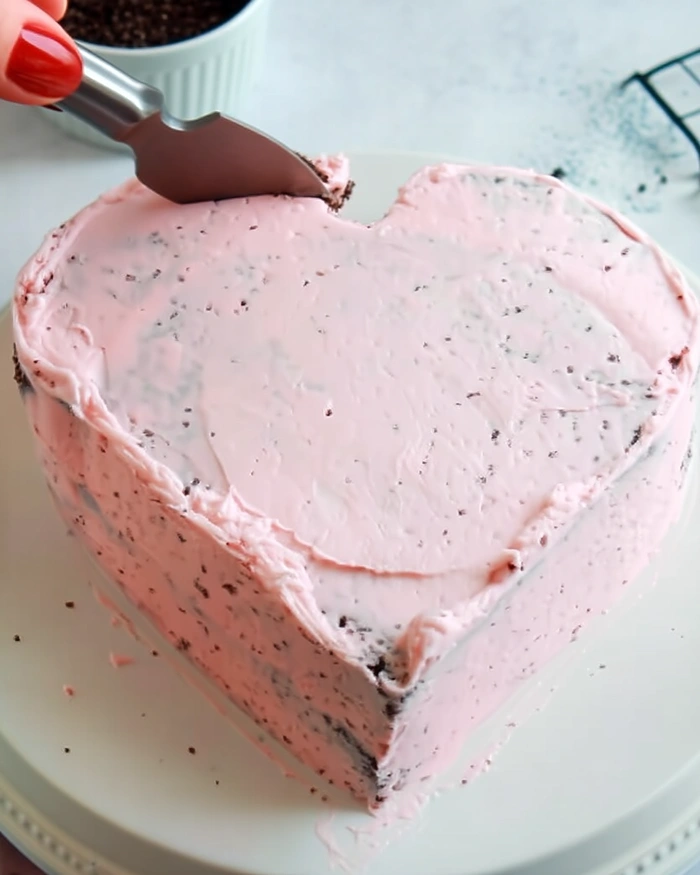
Once your crumb coat is chilled and set, frost the top and sides of your pink heart cake with a generous layer of buttercream using your angled spatula and icing smoother.
Create those gorgeous sharp edges by swiping your spatula inward along the top edge while holding the smoother against the side — this technique gives you that clean, professional finish. Chill for 20+ minutes to firm up your frosting before piping.
Step 4: Color Your Buttercream (Optional but Gorgeous)
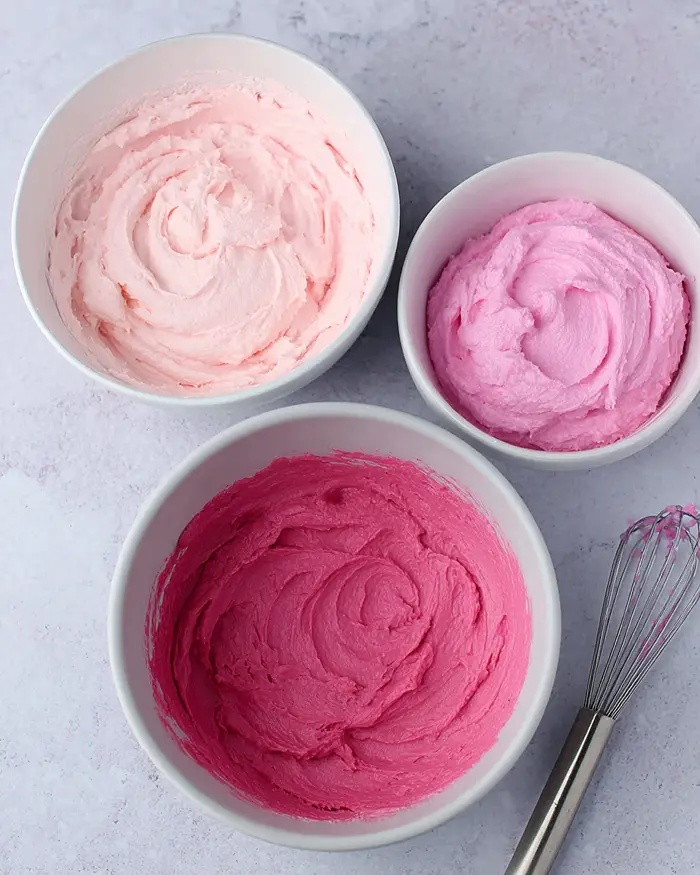
Divide your remaining buttercream into three bowls to create varying depths of pink — I love using AmeriColor Deep Pink and Fuchsia, starting with the smallest amount of gel and building up to your desired intensity.
Prepare your piping bags with the darkest pink in a bag fitted with Tip 4B, your mid-tone pink with Tip 102, and your lightest pink with Tip 32. If you’d rather keep it simple, one shade of pink throughout looks absolutely stunning too.
Step 5: Pipe Your Vintage Design
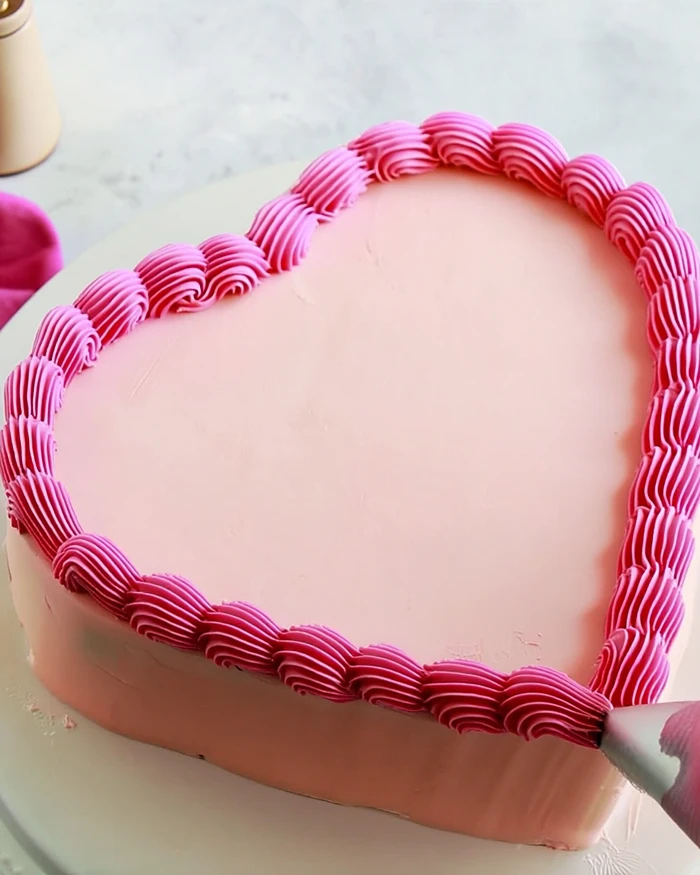
Start with large shell borders along the top and bottom edges of your heart using Tip 4B and your darkest pink — hold the bag at a 45-degree angle, squeeze to create a shell, then release pressure while pulling away to form that classic tail.
Pipe small shell borders just inside the large borders using Tip 32 and your lightest pink for a layered, dimensional look. Create double ruffle garlands on the sides using Tip 102 and your mid-tone pink, moving the tip in a back-and-forth motion while piping continuously.
Connect your ruffles with small piped hearts using Tip 32 — just pipe two small teardrops that meet at the bottom point.
Step 6: Write Your Sweet Message
Pipe “I love you” or your chosen message on top of your heart shaped pink cake using Tip 3 and your preferred pink shade. Here’s my pro tip: practice your lettering on a plate first, and keep your buttercream slightly thinner than your piping consistency for the most legible, flowing letters.
Claire’s Pro Tips & Gentle Guidance
Let me share some of my favorite tricks for nailing this pink cake with bow decoration every single time.
The biggest game-changer for creating a symmetrical heart is using your first trimmed pieces as actual physical templates for the second layer. Just lay them on top and cut around them — it’s basically tracing, and it works like magic.
Medium-consistency buttercream is your best friend here, and testing it is simple: pipe a small shell on a plate, and it should hold its ridges without slumping or looking too stiff. If it’s too thick, add a teaspoon of milk or cream at a time until you reach that sweet spot.
For the most vibrant, true pink colors, start with gel food coloring instead of liquid — you’ll need way less to achieve bold shades, and you won’t throw off your buttercream consistency. I swear by AmeriColor, but Wilton works great too.
If your vintage piping feels intimidating, remember that this style is supposed to look handmade and romantic, not robotic. Slight variations in your ruffles and shells actually add to the charm, so embrace the imperfections.
According to Wilton‘s detailed cake decorating techniques guide , even professional decorators appreciate the character that hand-piped details bring to vintage-style cakes.
Always chill between your crumb coat and final frosting layer — I know it’s tempting to rush, but those 30 minutes make the difference between a smooth, professional finish and a crumby mess that fights you the entire time.
Quick Fixes for Heart Pink Cake with Pink Bow
Problem: My heart shape looks lopsided after cutting. Use a cardboard heart template before you cut, or trace a heart shape onto parchment paper and lay it on top of your cake as a guide. You can always trim a little more to even things out — buttercream covers a multitude of minor imperfections.
Problem: My buttercream is too soft and my piped details are melting. Pop your cake in the fridge for 10 minutes to firm up the base frosting, and add 2-4 tablespoons of powdered sugar to your piping buttercream to thicken it up. The consistency should be like toothpaste, not pudding.
Problem: My shell borders look flat instead of dimensional. You’re probably not squeezing hard enough at the beginning of each shell to create that bulbous base. Start with firm, steady pressure, then release gradually as you pull away to form the tail.
Problem: My ruffles are breaking or looking choppy. Your buttercream might be too thick, or you’re moving too slowly. Keep a continuous, fluid back-and-forth motion with steady pressure — think of it like drawing waves on the side of your cake.
Variations & Fun Twists
This heart shaped pink cake is incredibly versatile and loves to be customized to your celebration style.
Seasonal Swaps: Use red and white buttercream for a classic Valentine’s look, or go pastel pink and lavender for a spring birthday. For a winter wonderland vibe, try white-on-white with silver dragees.
Flavor Fun: Swap vanilla buttercream for cream cheese frosting (just note it’s softer, so chill longer between steps), or add strawberry puree to your buttercream for a pink-all-the-way-through situation that tastes as good as it looks.
Dietary Adjustments: Use your favorite gluten-free cake layers (just make sure they’re sturdy enough to hold up to trimming), or try a vegan buttercream made with plant-based butter — the technique stays exactly the same.
Design Drama: Instead of vintage piping, go modern minimalist with smooth buttercream, fresh roses, and gold leaf. Or create an ombre effect by gradating your pink shades from dark at the bottom to light at the top.
Serving, Storage & Reheating
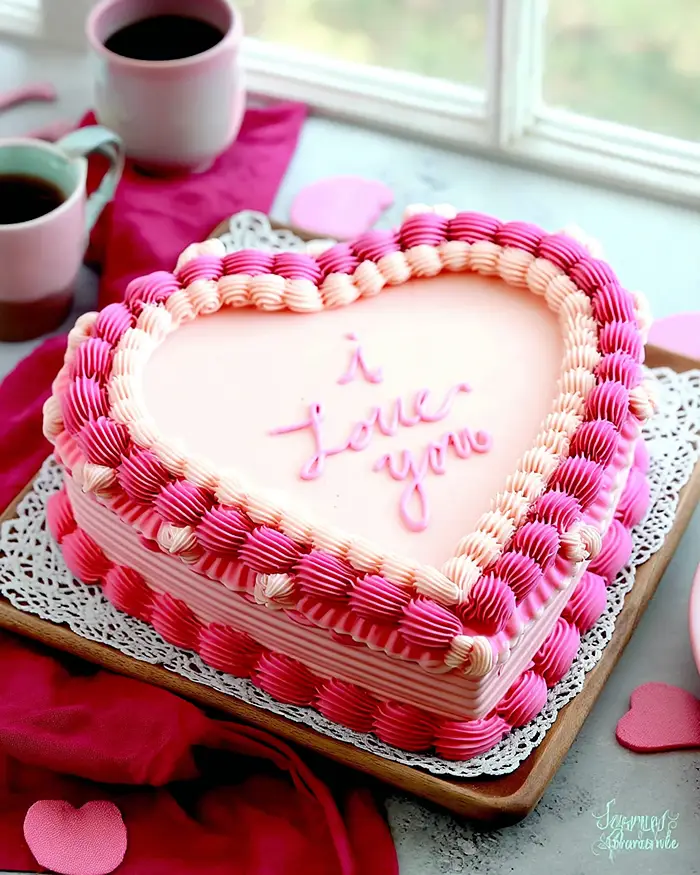
Serve this pink cake with bow decoration at room temperature for the best flavor and texture — take it out of the fridge about 30 minutes before slicing so your buttercream is soft and creamy rather than firm and cold. A serrated knife dipped in hot water (and wiped dry) gives you the cleanest slices.
Store your finished cake in the refrigerator, loosely covered with plastic wrap or in a cake carrier, for up to 5 days. The buttercream protects the cake layers beautifully and keeps everything moist. If you’re making this ahead, you can frost and decorate it completely up to 2 days before your event.
Leftover slices (if you actually have any — doubtful) can be brought to room temperature for serving, or honestly, some people love cold cake straight from the fridge. No judgment here. You can also freeze individual slices wrapped tightly in plastic wrap and foil for up to 3 months.
This is just one of the many gems in our Cakes & Cupcakes series. Every recipe there has been tested and loved in real kitchens, and I promise there’s something for every craving. Go see for yourself.
No-Waste Kitchen Magic
Don’t toss those trimmed cake pieces from creating your heart shape — they’re pure gold for other delicious creations.
Crumble them up and mix with a bit of buttercream to make cake pops or cake truffles. Roll into balls, dip in melted chocolate, and you’ve got an adorable bonus treat. You can even use the crumbs as a topping for ice cream sundaes or layered parfaits.
If you have extra buttercream (which rarely happens, but still), pipe it onto parchment paper in little rosettes or shells, freeze them on a baking sheet, then store in a freezer bag. These frozen buttercream decorations can be added to future cakes or cupcakes without any additional piping work.
Leftover cake that’s starting to dry out transforms beautifully into a trifle — just layer chunks with whipped cream and fresh berries for an entirely new dessert that looks intentional and impressive.
Heart Pink cake with pink bow FAQs
Can I freeze this heart pink cake with pink bow before decorating?
Absolutely! Wrap your heart-shaped layers (before frosting) tightly in plastic wrap and freeze for up to 3 months. Thaw completely in the fridge before frosting and decorating.
What’s the best way to transport this decorated cake?
Place your finished cake on a sturdy cake board, then carefully slide it into a large cake box or carrier. If you’re traveling more than 20 minutes, chill the cake thoroughly first so the buttercream is firm and less likely to shift or smudge.
Can I make this cake without all the fancy piping?
Of course! A smooth, simply frosted pink heart cake decorated with fresh flowers, berries, or even just a dusting of edible glitter looks absolutely stunning. The vintage piping is gorgeous, but totally optional.
Will this recipe work with box cake mix?
Yes! Use any two-layer 8-inch cake recipe or box mix you love. Just make sure your cakes are completely cooled before trimming and assembling, and you’re good to go.
Cozy Closing
There’s something so wonderfully romantic about presenting someone with a homemade heart pink cake with pink bow that you decorated with your own hands. This isn’t just dessert — it’s edible love language, and every piped ruffle and shell border carries your care and creativity.
I’d love to see your spin on this heart pink cake with pink bow! Drop a comment below with your photos or tag me on social — I’d love to see how you made it your own. Did you go classic pink, or did you experiment with bold fuchsia or soft blush? This heart shaped pink cake is so versatile; I bet you’ve got amazing variations already in mind!
And hey, if your first attempt isn’t Instagram-perfect, remember that it’ll still taste absolutely delicious, and the people you’re sharing it with will be blown away by your effort. Sometimes the slightly imperfect, made-with-love creations are the ones we remember most. Happy baking, friends! 💕
I’m Claire Whitmore — a dessert daydreamer from Asheville, NC. For me, baking isn’t about perfect pastries — it’s about the joy of sharing something sweet (and maybe sneaking an extra scoop of icing).
When I’m not covered in flour, you’ll find me experimenting with sticky garlic chicken noodles or perfecting my Valentine sugar cookies. Life’s too short for boring food!
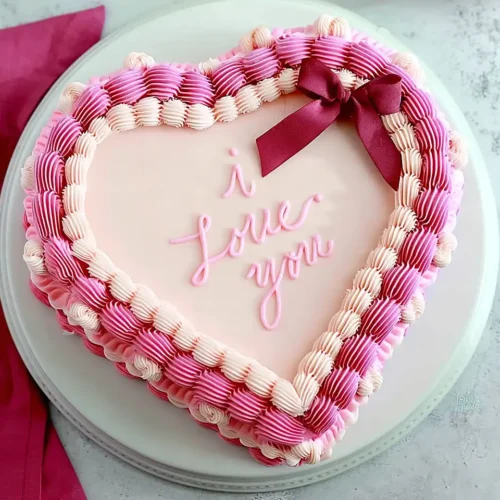
Heart Pink Cake with Pink Bow
Equipment
- 8-inch round cake pans
- Serrated knife
- offset spatula
- Icing smoother or bench scraper
- Piping bags
- Piping tips
- Cake board
- Turntable
Ingredients
Cake Layers
- 2 layers 8-inch round cake layers chocolate, vanilla, or strawberry
Buttercream & Decoration
- 9 cups Vanilla buttercream medium consistency
- Pink food gel coloring AmeriColor Deep Pink or Fuchsia
- 1 piece Cardboard cake base
Instructions
- Cut each 8-inch cake layer into a heart shape by making two diagonal cuts at the top, saving the trimmed pieces to form the rounded heart curves.
- Secure the first heart-shaped layer to a cake board with buttercream, attach the curved pieces, fill with buttercream, stack the second layer, and apply a thin crumb coat. Chill until firm.
- Frost the chilled cake smoothly with vanilla buttercream, creating clean edges. Chill again before decorating.
- Divide and tint the remaining buttercream into shades of pink. Fit piping bags with desired tips.
- Pipe vintage shell borders, ruffles, and decorative details around the cake, finishing with a piped message on top.